Hi dragan,
I’m still bunkering down on G-sender V1.2.2 so my screenshot may look a bit alien to newer versions, but Ibet this is still in there somewhere.
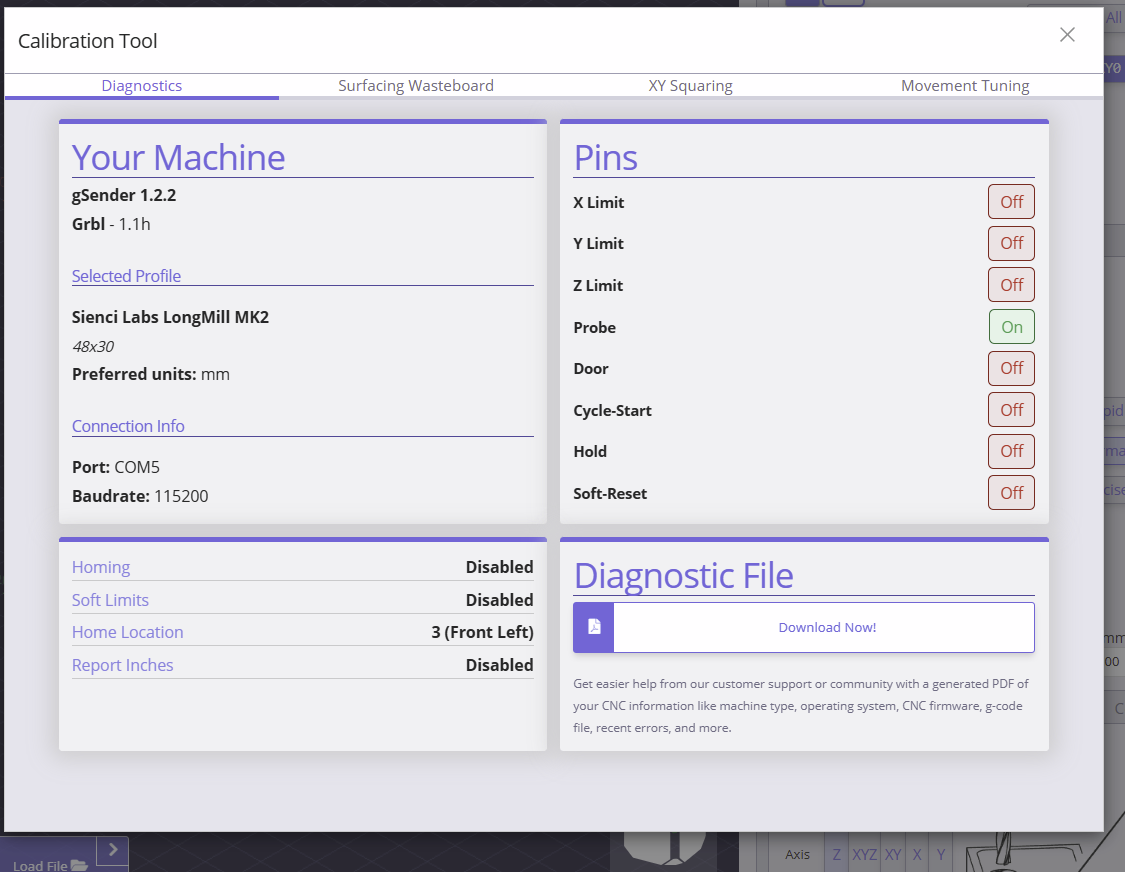
For me the pin list is directly in the diagnostics tab of the calibration tool.
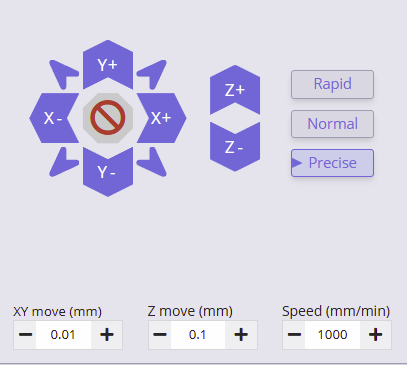
You can either jog via keyboard shortcuts set at the machine, use a joysticksomethinsomethin, or use a remote device, like a phone, tablet, or even a seperate pc in a remote location (like mine).
To start the tool measurement by hand, jog the tool towards one of the inner walls, have it lowered as deep as you can without it touching the slopes and jog untill you get a green light on the probe pin. retract one jog, reposition the block (it got moved oh so slightly) and decrease the xy jogging distance.
Creep up to the wall again untill you hit the green light again and zero your xy at that point.
Jog to the other side (prolly best to increase your step distance to speed up the process.) untill you are close. Decrease the xy step again and creep up untill you hit a green light again.
Subract the vallue you measure on the machine from 45mm (inner square) and you have a good indicator on how much your tool deviates from its specs.
I would have done a measurement myself and posted it here, but I have a project on and am not willing to rezero my xy for this post, so I cannot attest if it works accurate or not. Only that it might be worth trying, if you suspect a deviant tool, or simply want to know if you can expect deviations and how large they might be.
I did a crude simplification in this example. It’s best to take this as a howto and home in on how to do this more accurate by using smaller steps or implementing a few more retracts, and reductions to accurately determine the best possible zero position.
Now I know these steps can be automated with a macro, scienci does exactly that, and who knows your request might be granted (it seems easy ernough) but untill that glorious day, you could play around with the pin screen.