Hi, guys. I’m bound and determined to get some discussion going here, so here’s another topic that’s been weighing on my mind.
What do you intend to mount your new LongMill to?
Like most of us, I assume, I have a small two car garage that I like to park my car in, so space is at a premium.
Greg posted this video on facebook the other day, and I just about talked myself into building this myself.
The issue is, when I actually started looking into where I would put it in the garage, I realized that its huge. Even stowed with the table top vertical, it’s ~86" by ~30". And then you can’t get into any of the side drawers unless the thing has open space next to it also.
My other idea is to just make a 44"x50" table with a torsion box top, and then build my dust collection system into the back half of it, and put drawers in the front half.
I’m sure you guys have given this some thought too. So what ideas are out there?
As it stands, I’m planning to make a 48" x 48" table for my finishing room in the basement. I built a nice outfeed table for my tablesaw so I’ll likely duplicate that. One MDF shelf and the top will be 3/4" plywood with an MDF wasteboard. Not sure if im going the t-track route yet for holding pieces in place. Will buy a small vacuum cleaner to use as a dust collector.
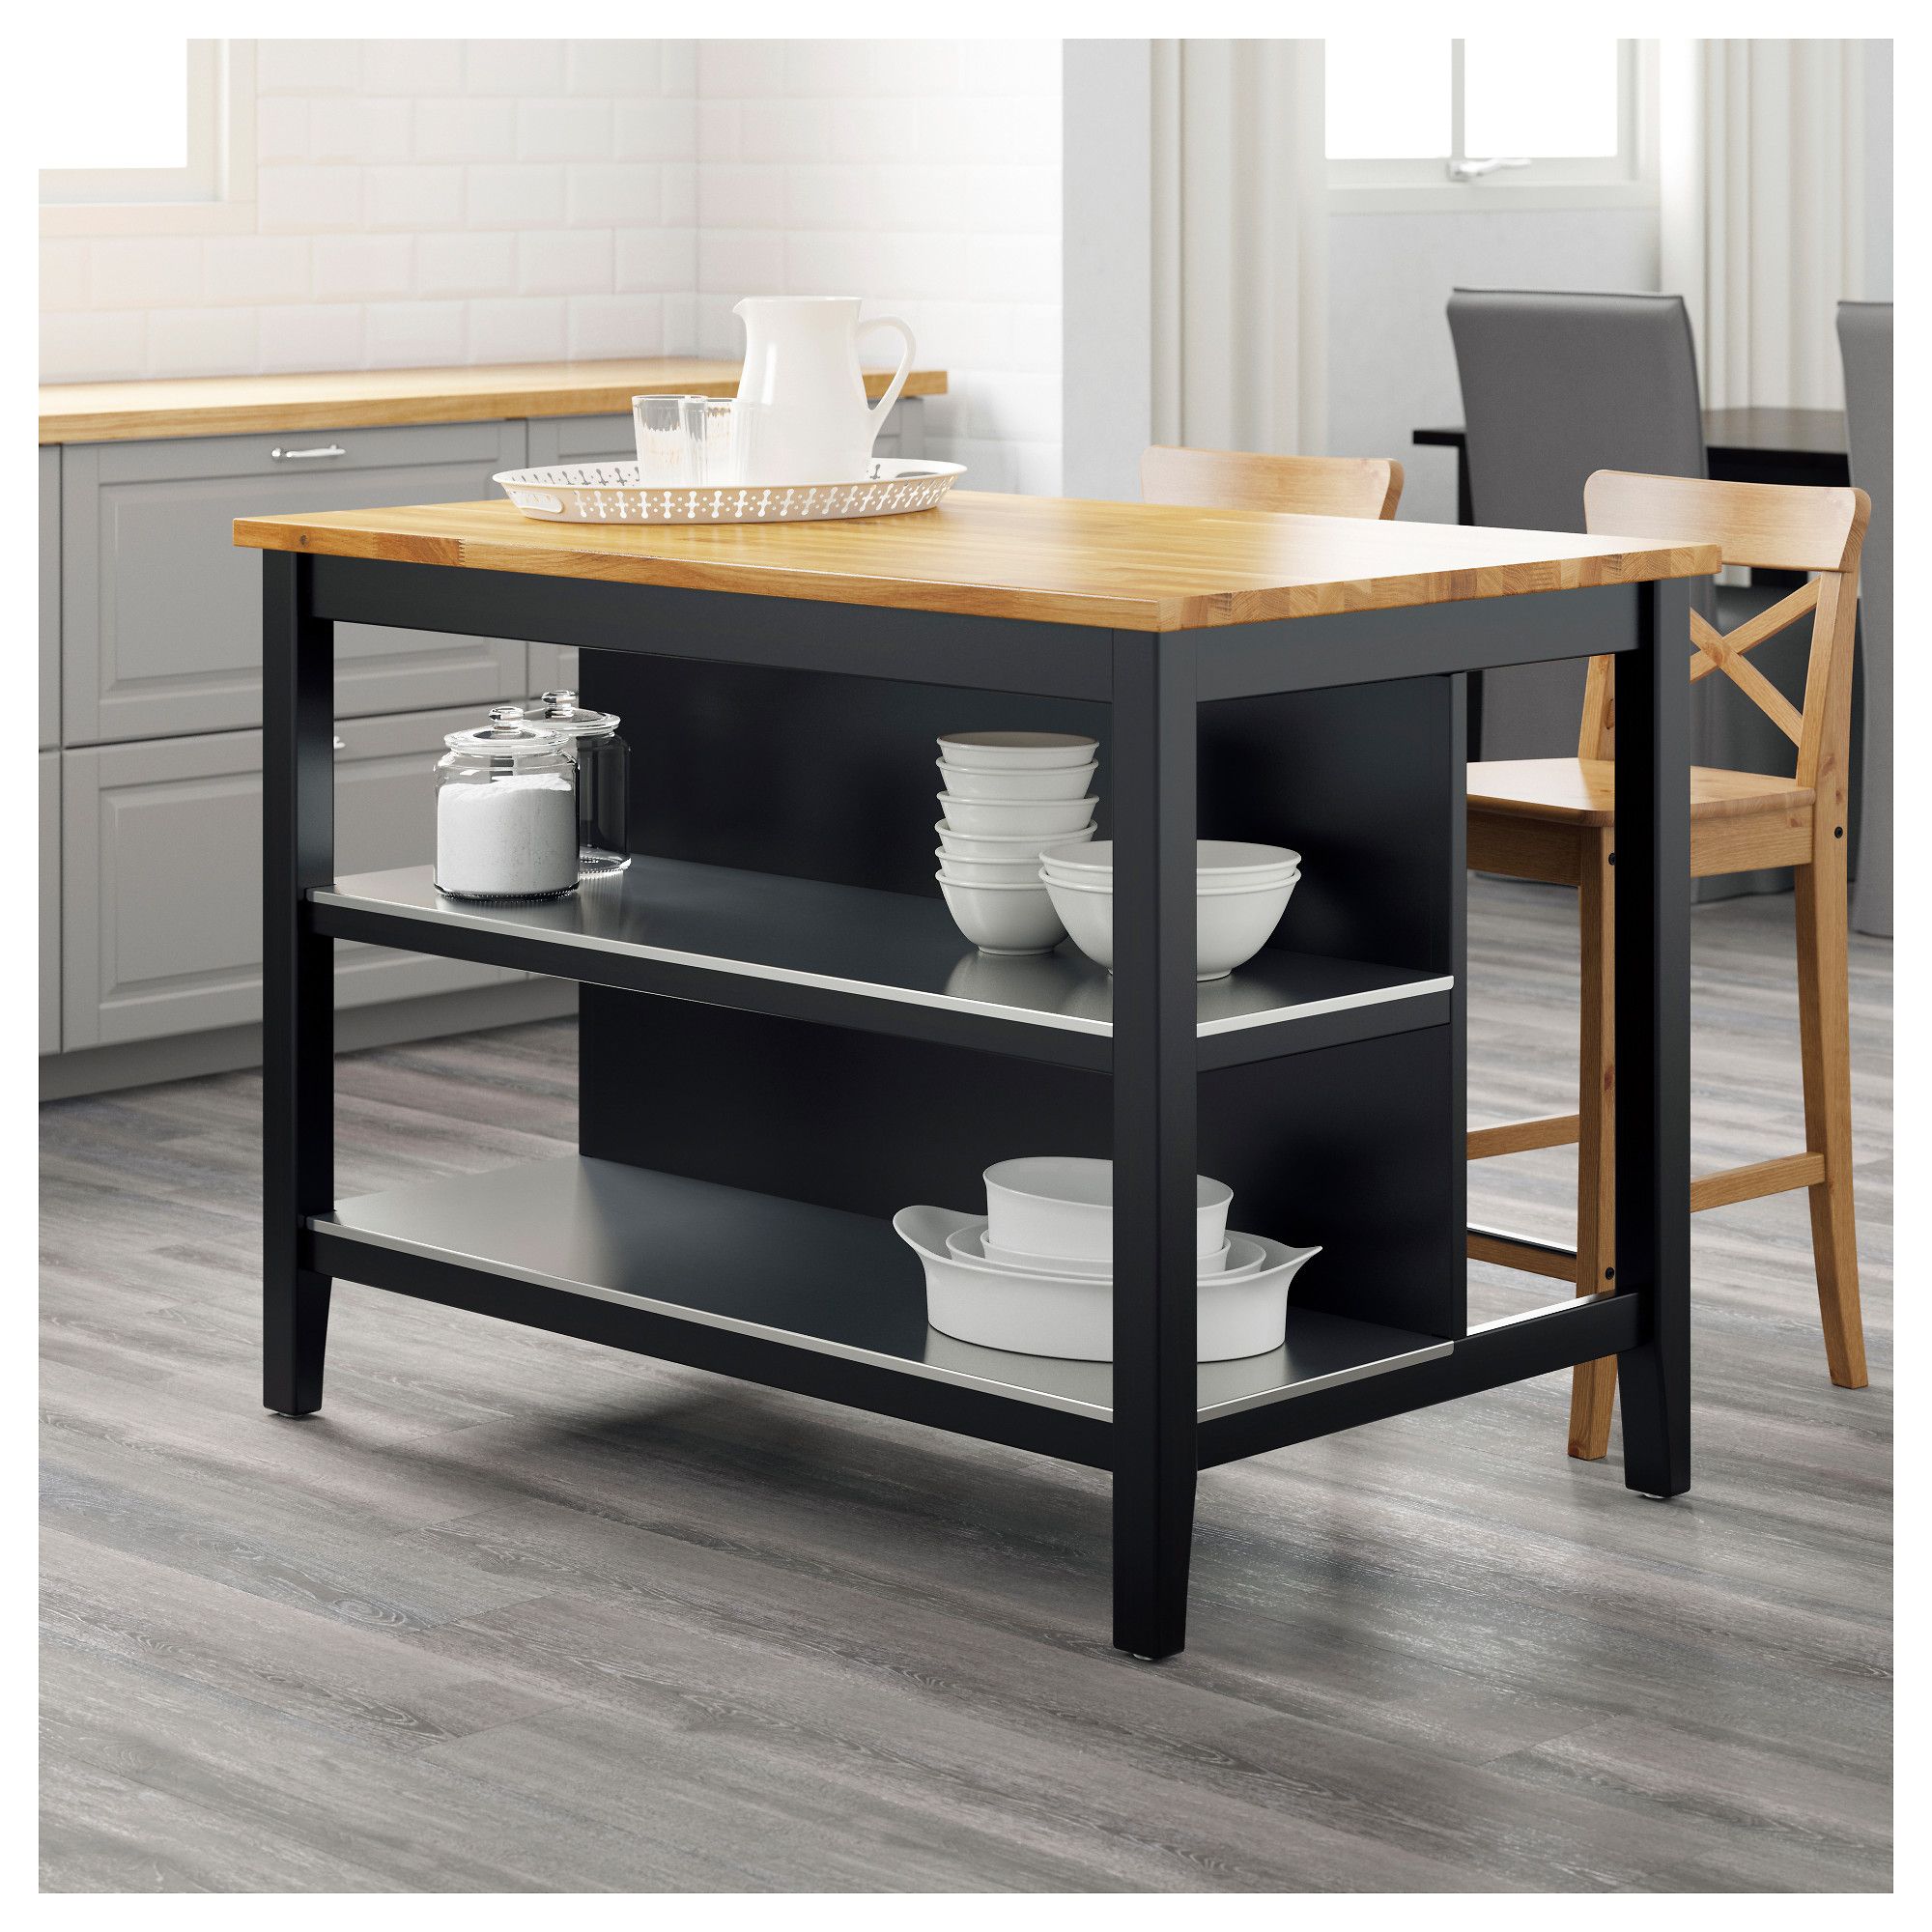
I was going to make a table or workstation for it but as I clean up the shop to make room for it, I realized… I’ve got a pair of Ikea islands I got on sale that I was using for mobile workbenches before I CNC cut my current hole-y bench. I think I might do an MDF overlay that indexes to the top and put the Longmill on that. You can’t beat paid for.
Looks like they discontinued these, but you still see them on Kijiji and Craigslist. It’s an Ikea Stenstorp kitchen island, makes a great workbench, especially if you throw a set of small tri-casters under the legs. They run about 49" x 28" or so I think.
Some good ideas in here so far. I still haven’t decided exactly what I’m going to do. I wish I knew the timeline for machine delivery a little better to help priorities this project in the huge list of projects I’ve got going right now.
What is everyone’s thoughts on waste boards? I’m leaning towards t-nuts in a 3" grid. However, over on the facebook group somebody posted this: T-Track | Orange Aluminum
Great ideas guys. Thanks for posting. Way easier to share ideas here than on facebook. If you can help us by encouraging others to come on here I think we could really make this forum into a powerful resource for everyone.
We had a large amount of slightly damaged pallet racking at work. I’ve completed the cut list and will weld it together to form a table top with detachable legs. Pics to follow at some point…
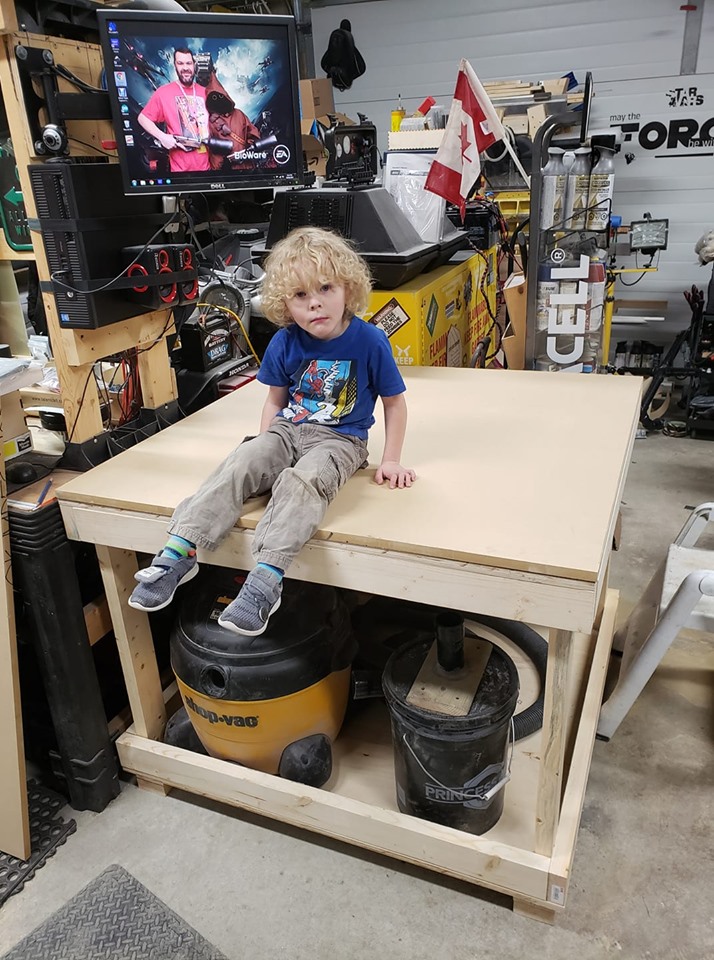
Built a quick table - will build an enclosure around it in the coming days / weeks (It is cold out after all)
I have a piece of 3/4 plywood I am going to put in the bottom for a shelf. I was also considering a clever idea my friend had, since I have a motorcycle tire machine bolted to the floor, I might cut out a slot in the bottom shelf and put the CNC machine over the tire machine - since I can’t use that space anyway, way not cover it up with the CNC table. Also has the side benefit of making sureI can’t whack my shins on the darned tire machine
So, I think I’m going to skip the fancy flip table. My current plans are to build a simple table, much like Mike’s. I’m hatching a plan, though, to build a sound-proof box for my vacuum underneath one corner. Another corner will have a cyclone separator and maybe a ~30 gallon dust collection bin. Then some drawers in the front.
Here is the table finished - I made a slot for it to sit over top my no-mar tire changer. It only gets used every so often, and takes up space, so I figured this was a simple way to optimize.
Down side is that part of the floor is not quite as level as the original spot. so now it is shimmed.
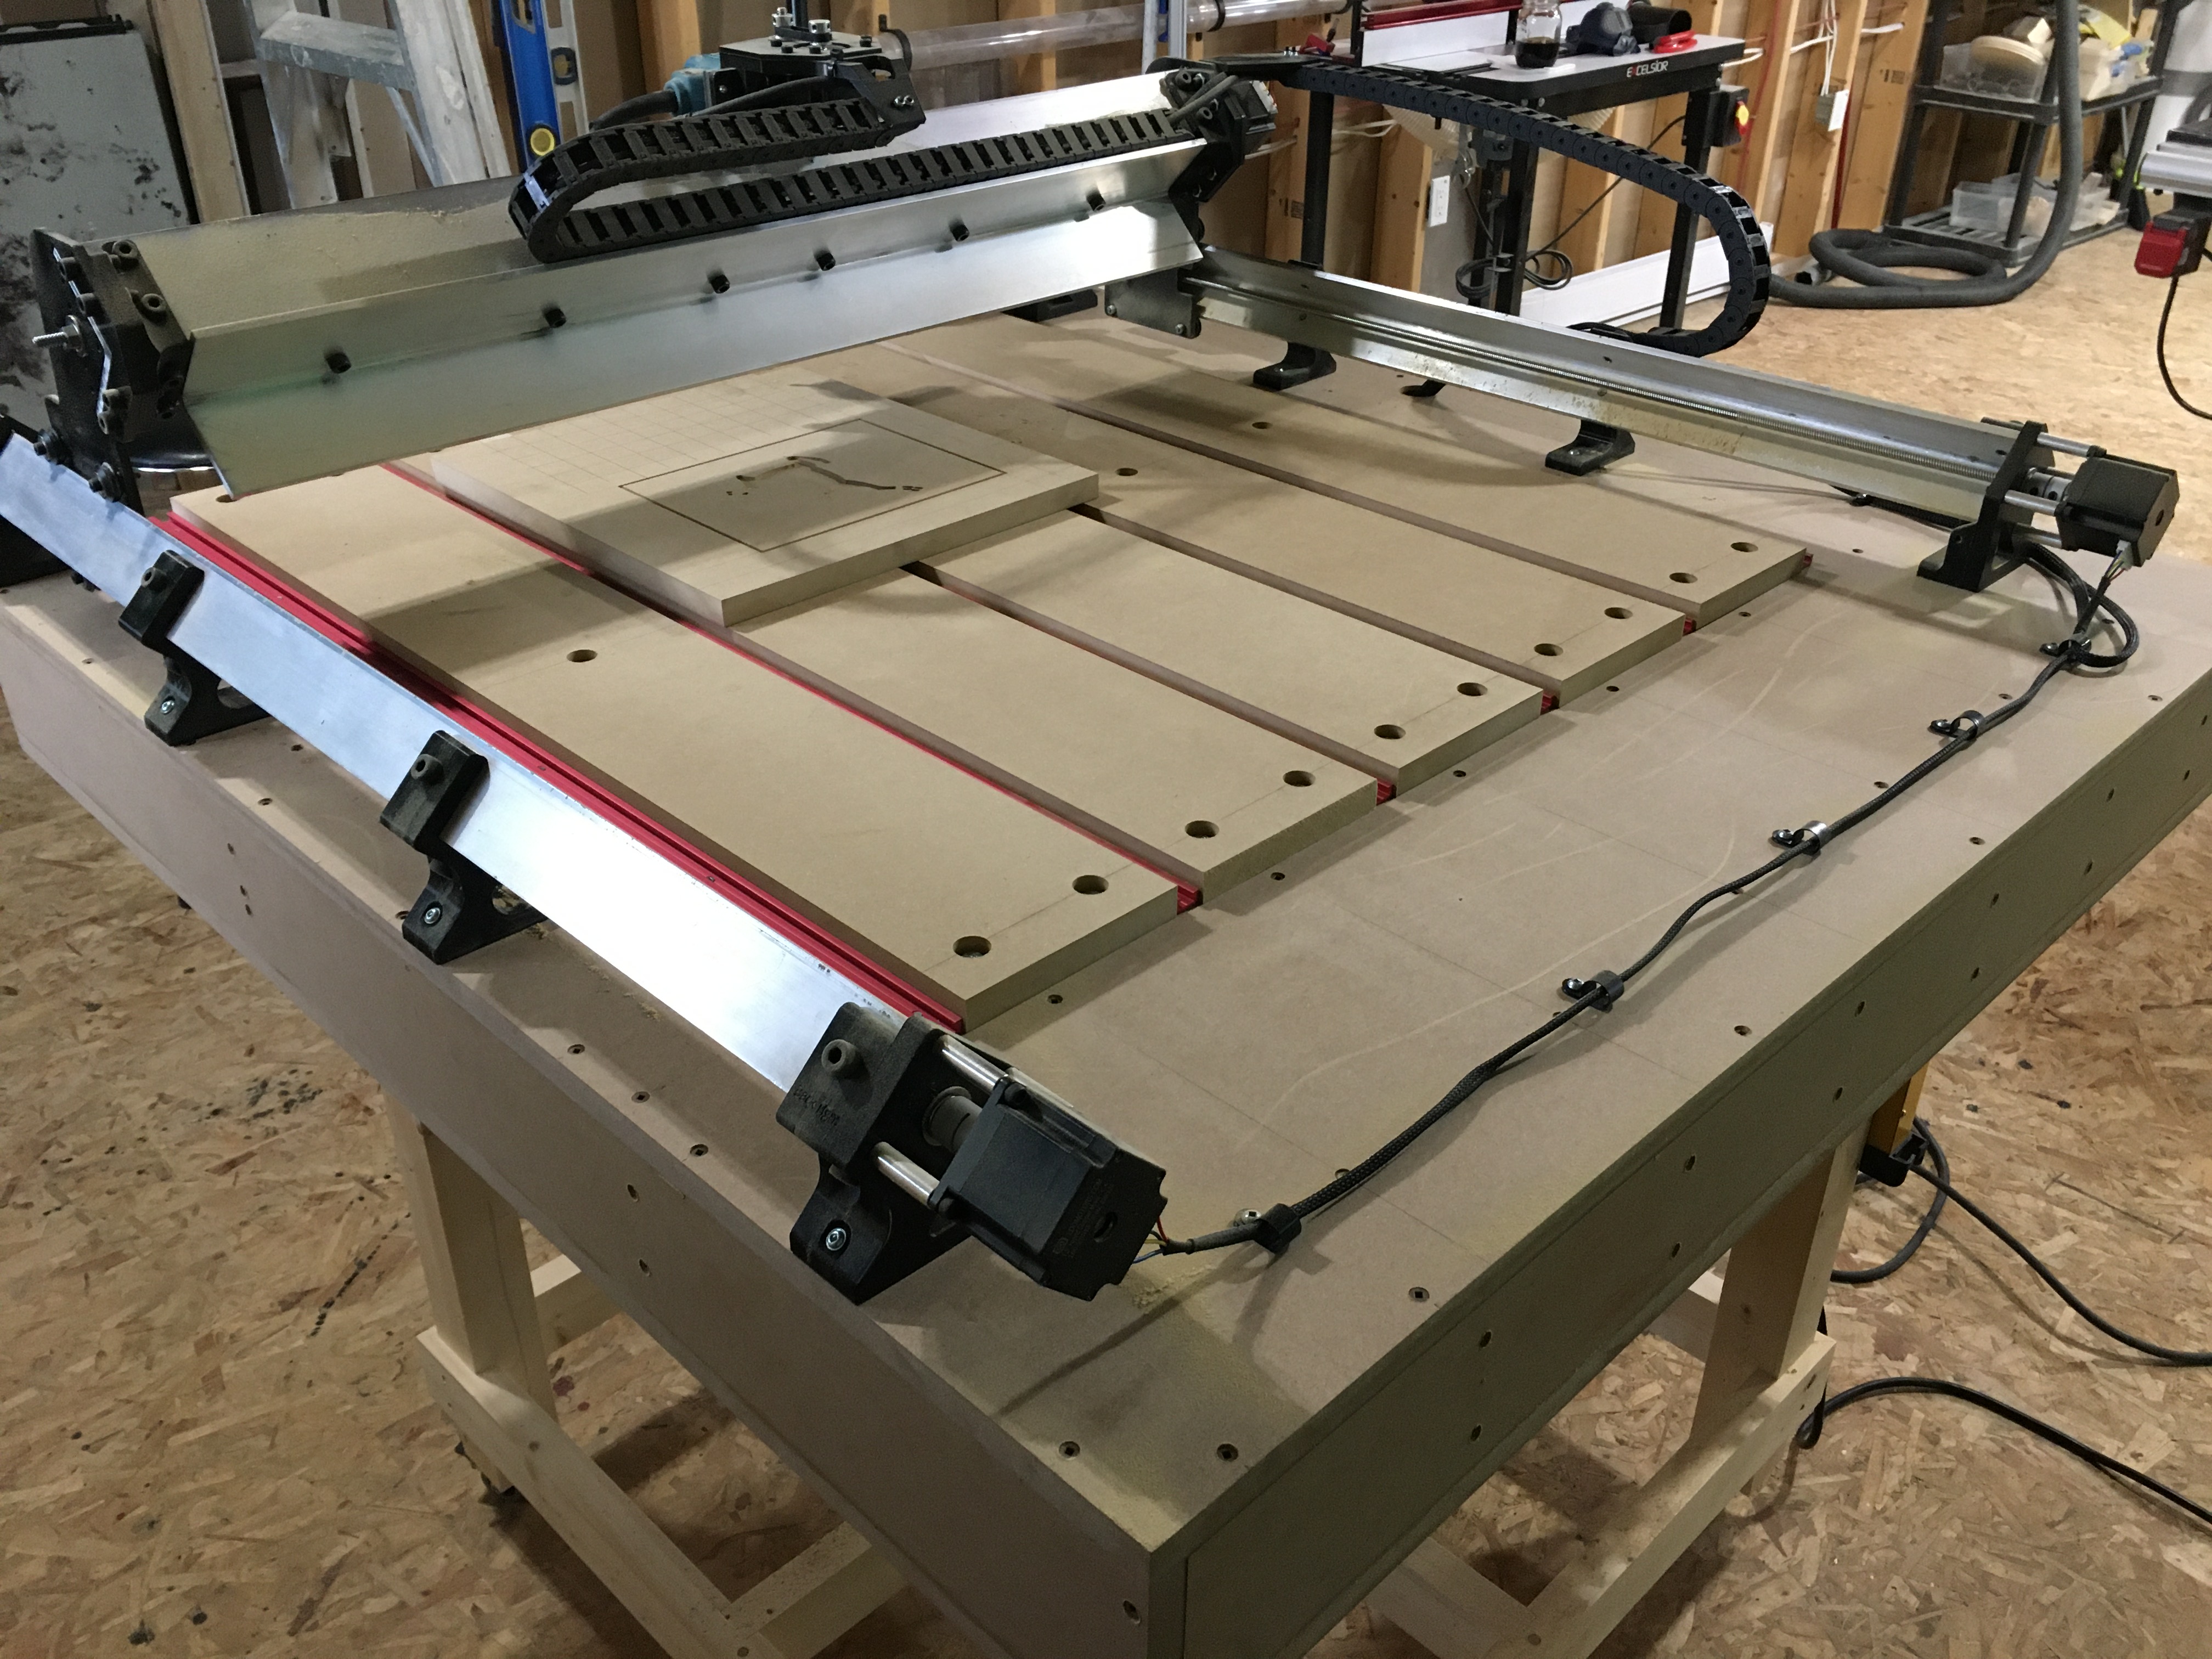
@David I am going to just cut out a hole in the front of my table so I can drop in vertical stock. Since I have multiple layers of wood, I figure I can just out something then have a removable insert for the spoil board. Not sure how I will do that yet, or even if I will, if I do I will post how I did it.
Cut a few simple sample projects out, and got the machine dialed in - so far it has been working great!
Looks great! Can you share bit size/type, workpiece material and your feeds and speeds with us? Those of us in the cheap seats still waiting for our machines would love to understand how the performance is in different materials.
Unfortunately I was using the defaults in carbide create - so very slow. Have been using pine, and some purpleheart, both cut pretty well. Cut out simple boxes in both.
Was using the included 1/4 downcut endmill, quality on the endmills seems good to me.
I would have gotten some more cutting in but had to deal with some car troubles and things like that. Want to get out and get some more wood and try some other projects.
I am also not sure if i need to calibrate the machine or not. will have to measure my next project and see if it if the right size!
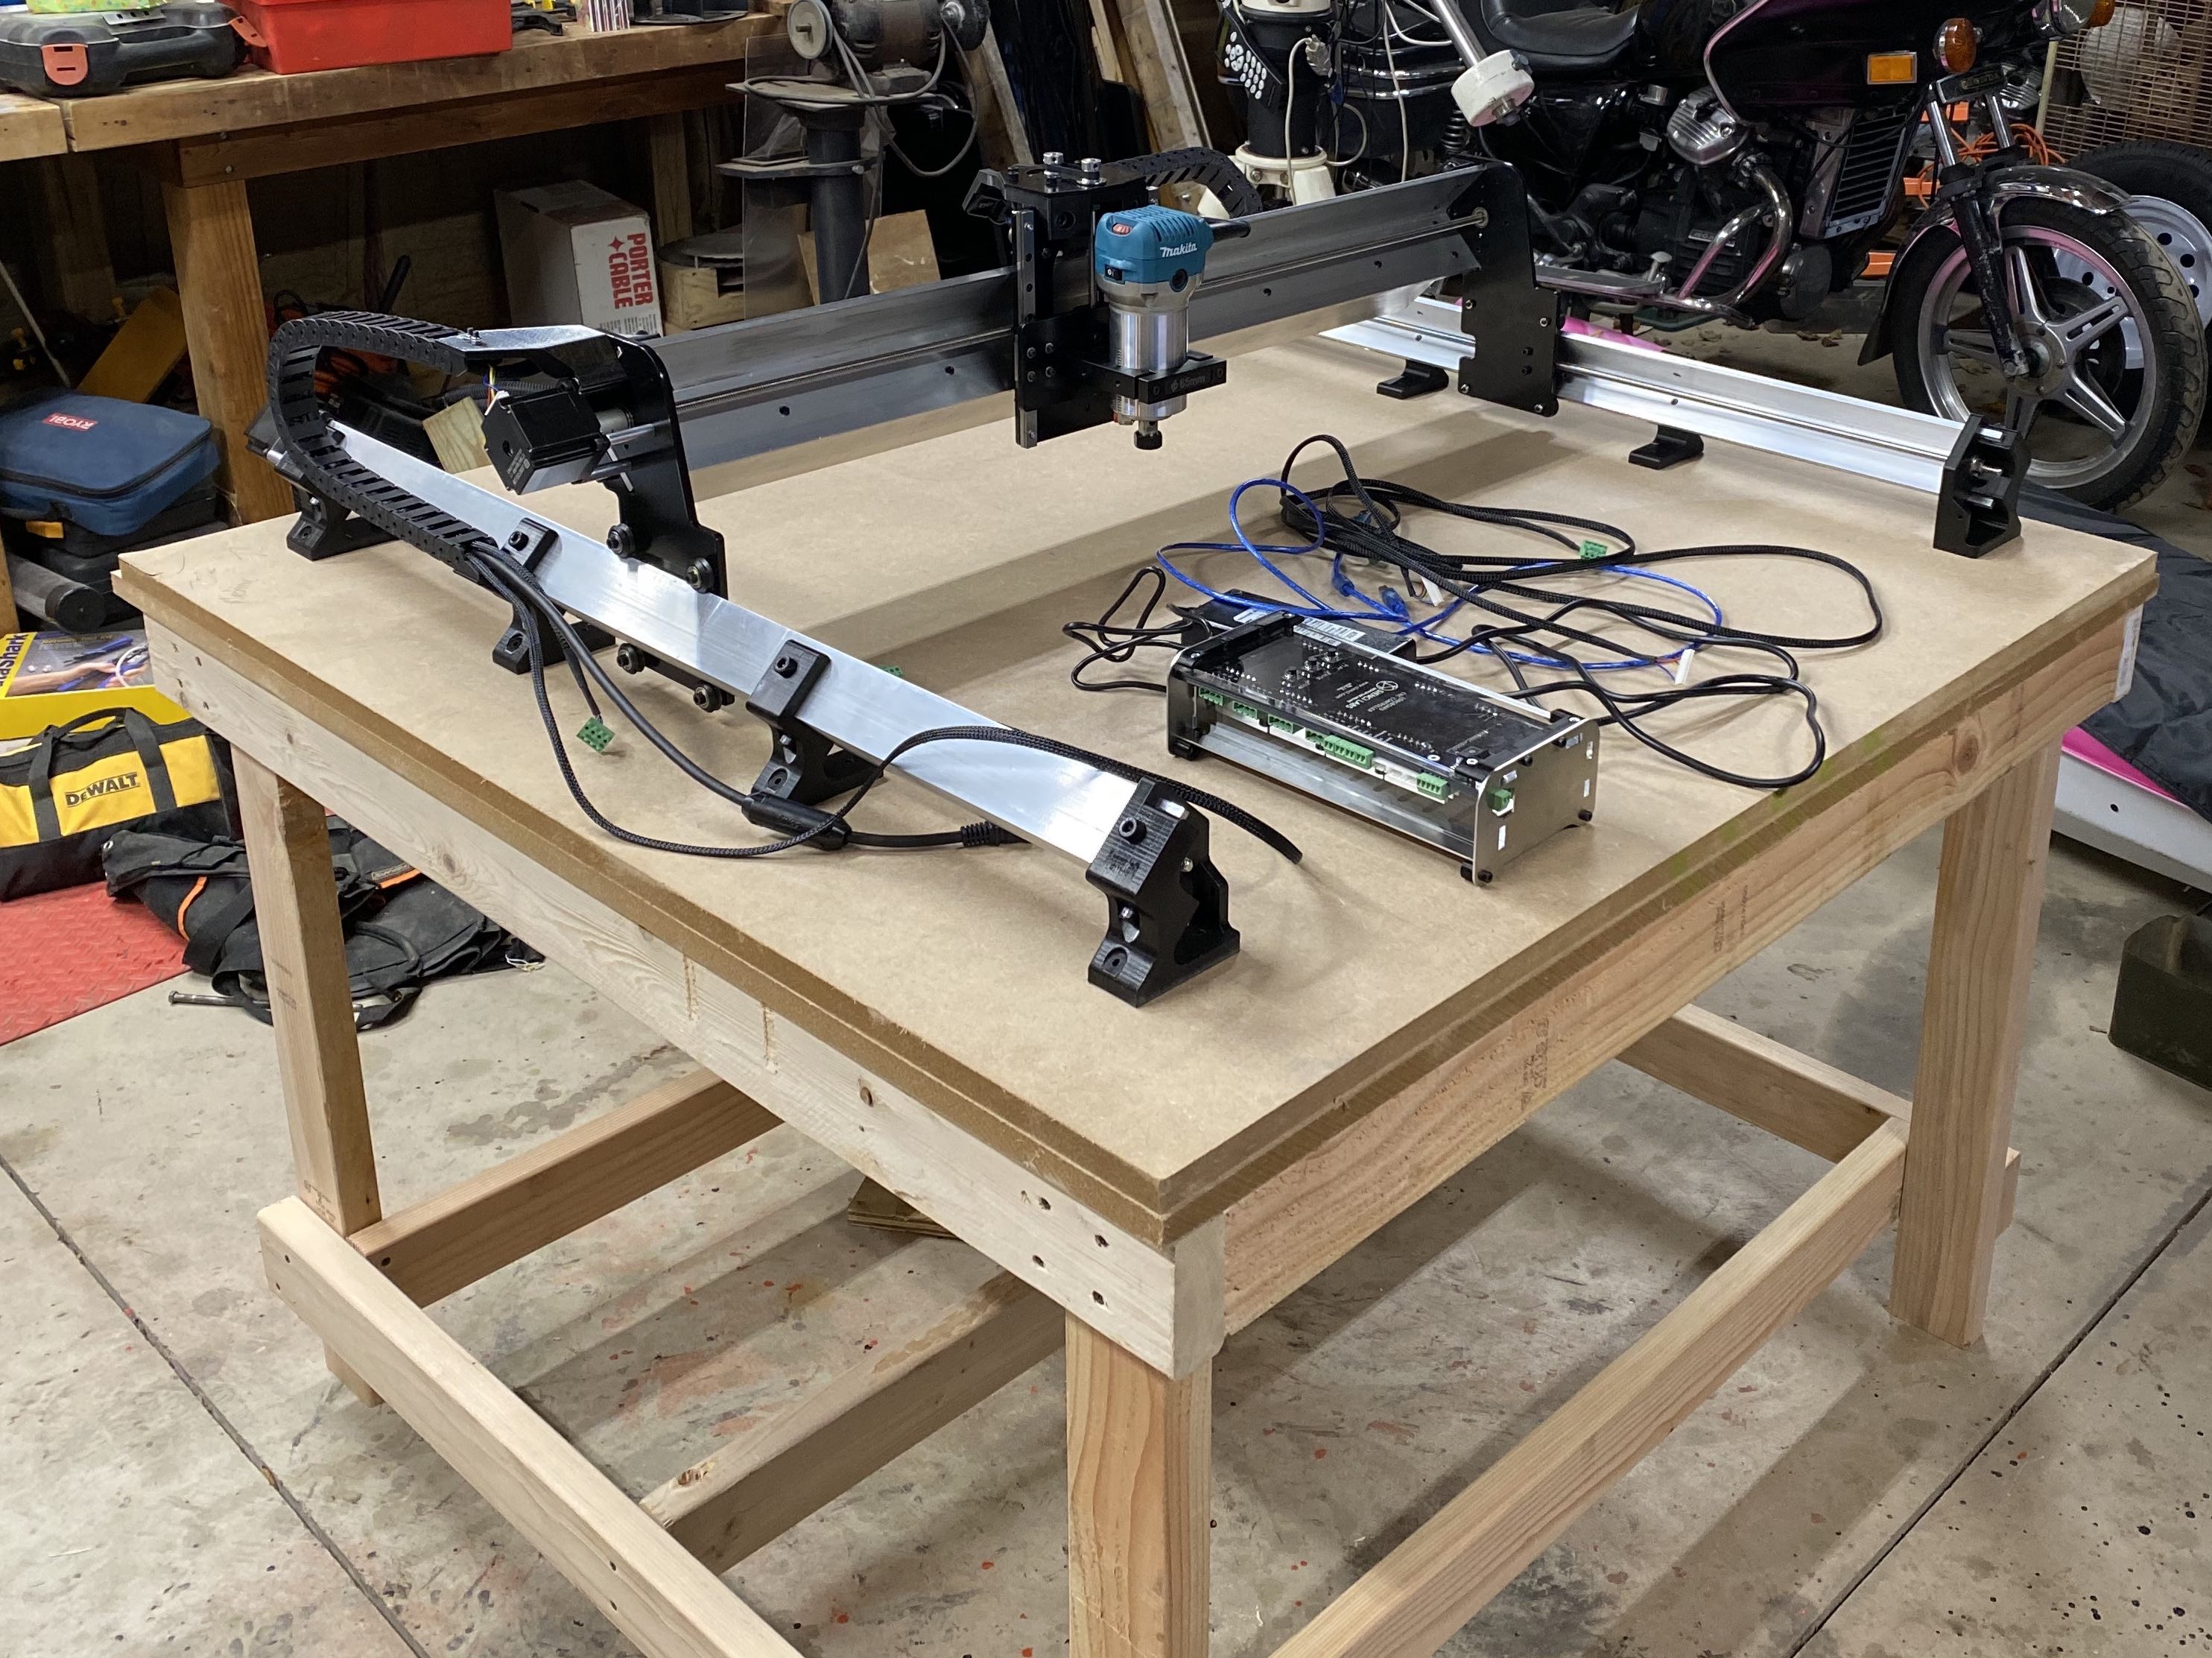
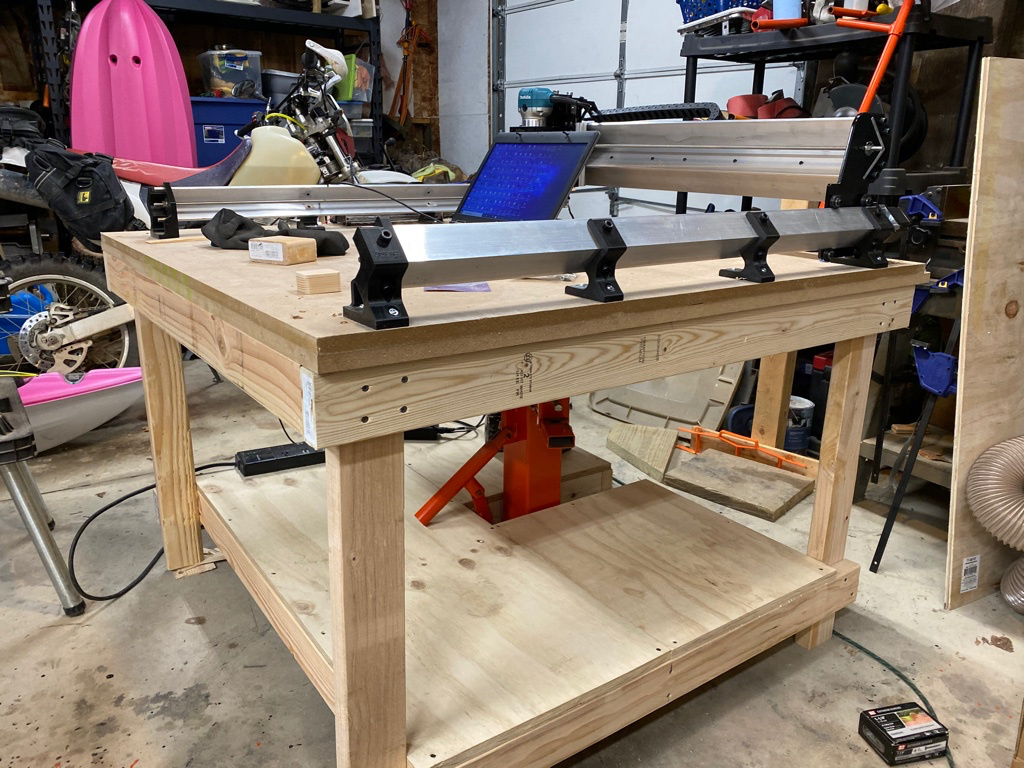
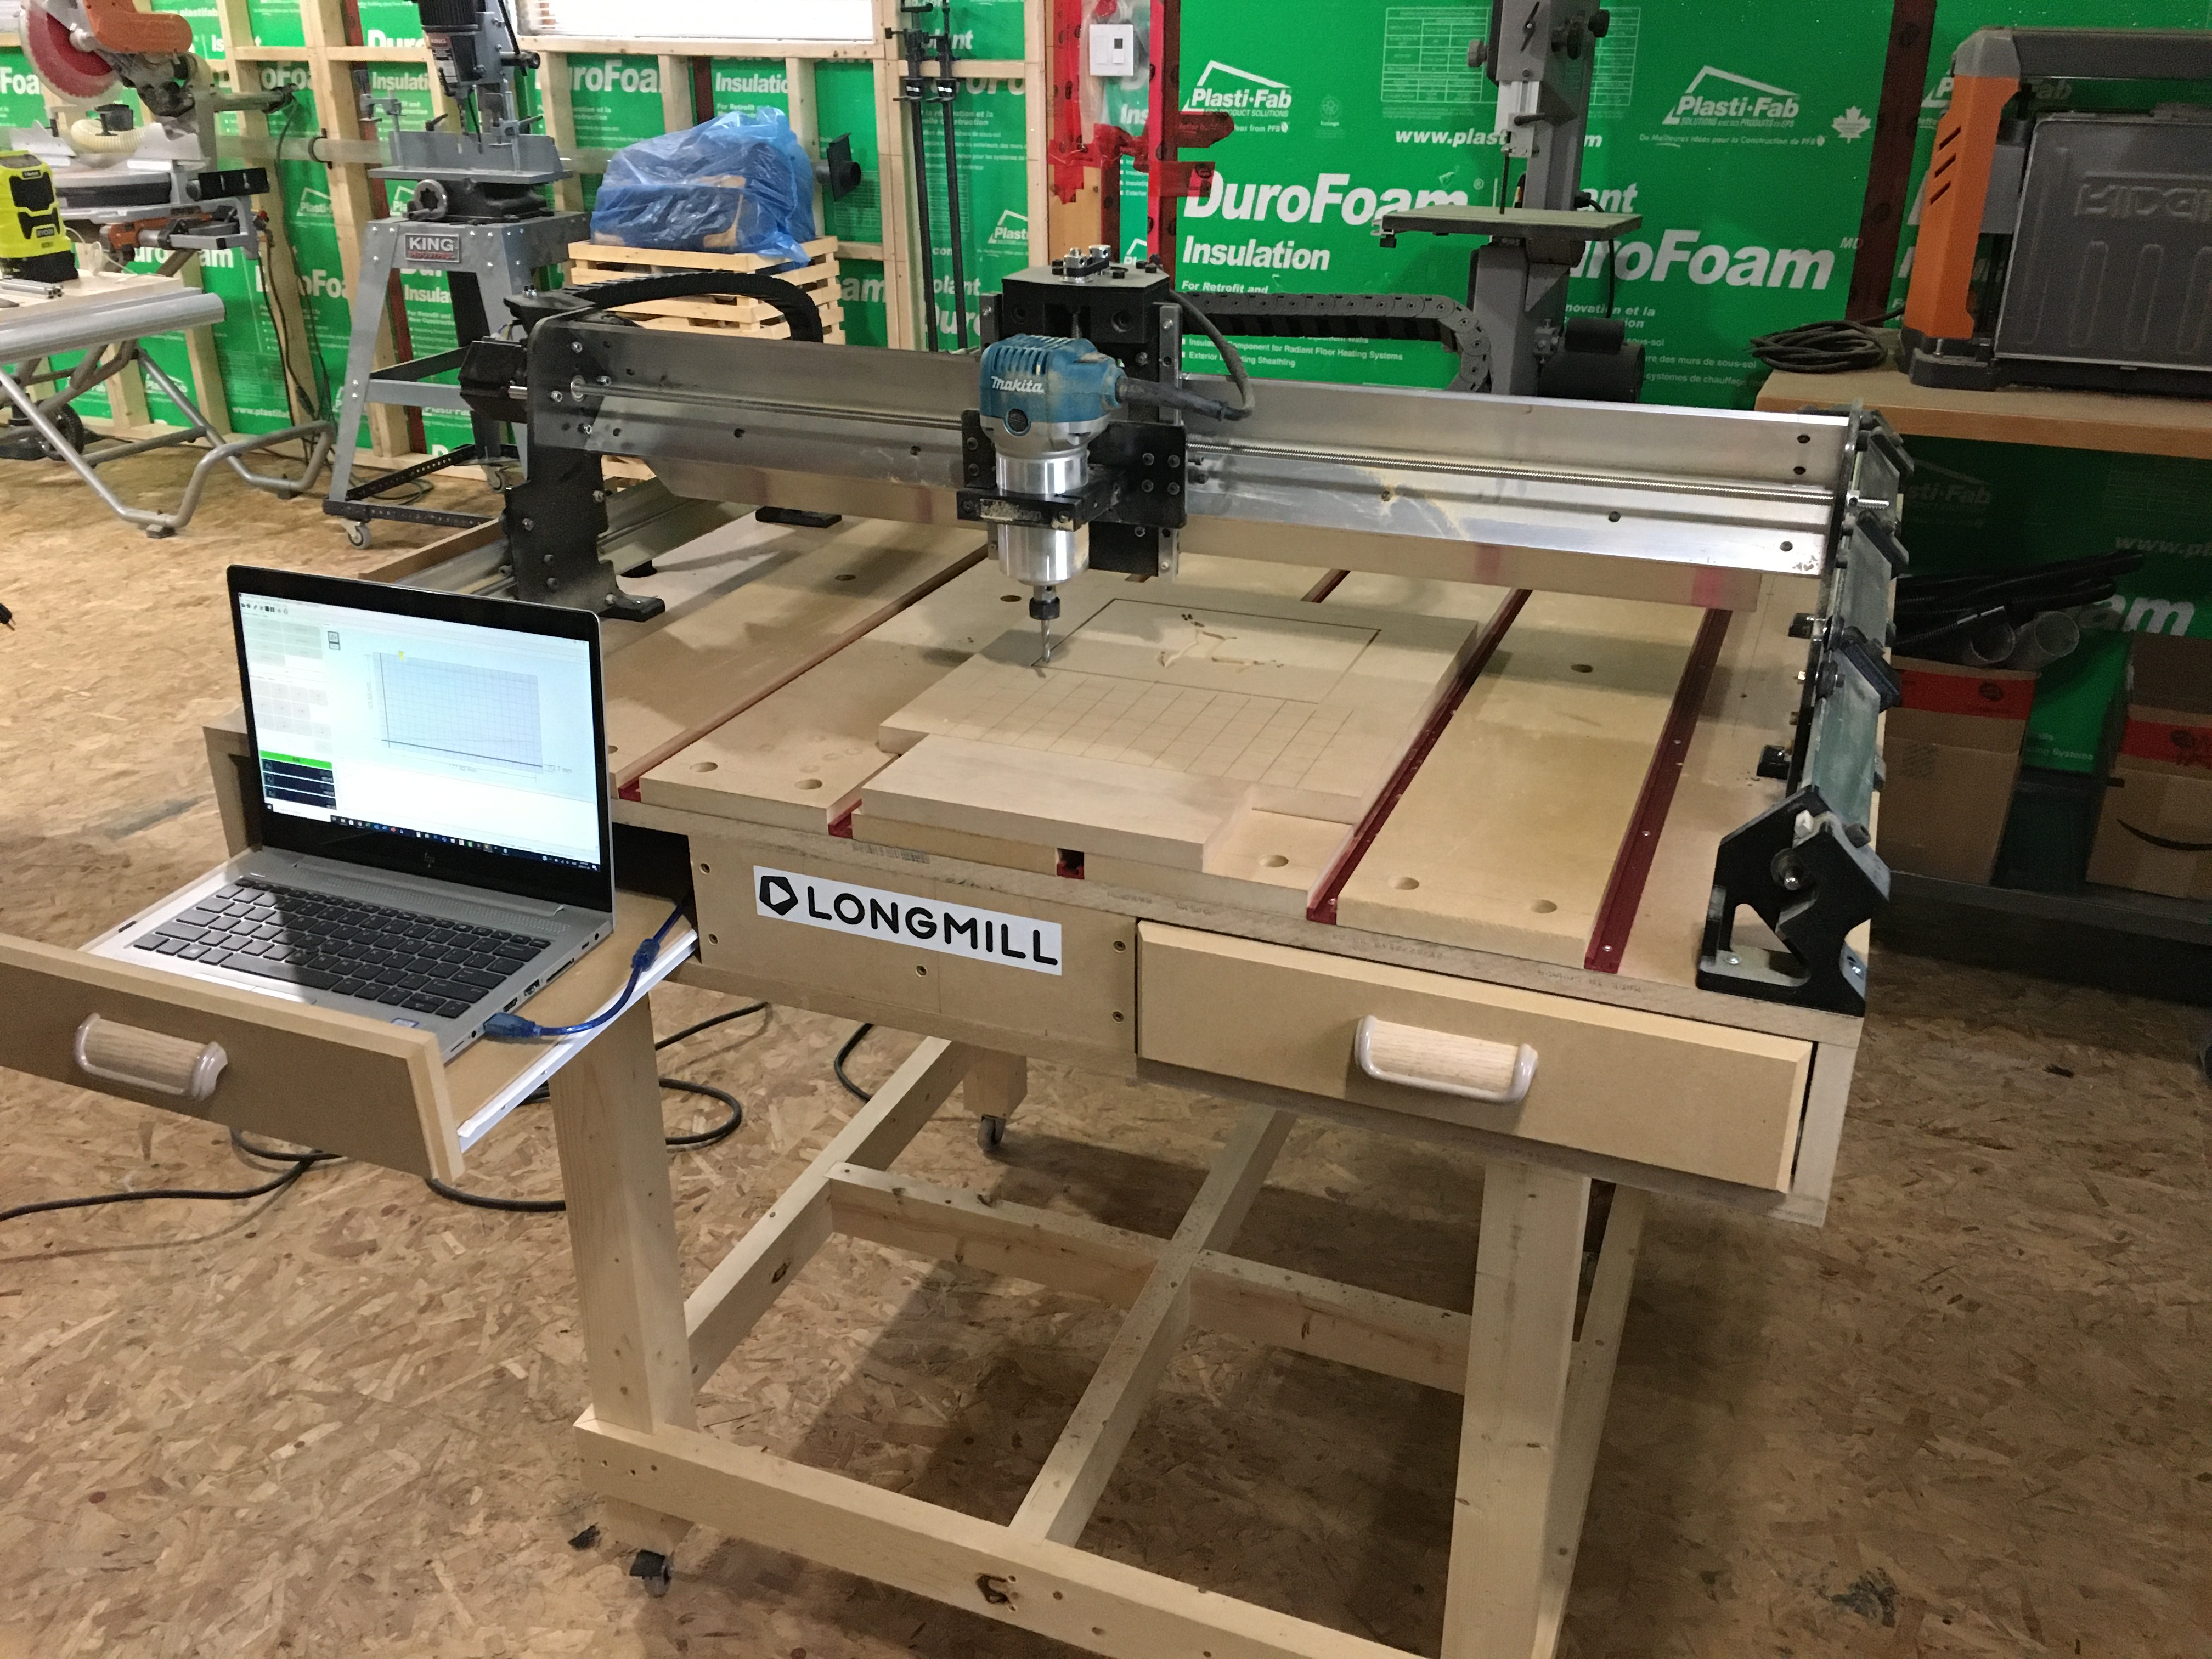
Here are some pictures of the table I just finished for a 30x30 Longmill. Most of the ideas came from posts here and on the FB page. Any questions/suggestions, don’t hesitate to engage.!
This arrived in my inbox this morning (the plans, not the actual workbench - that would be ridiculous). Looks like a good solution for anyone who is spacialy challenged and very ambitious. If I hadn’t already built a work station for my Longmill I would have considered it.