I got a no-brand-name touch probe and I want to know what is XY of the gsender probe configuration. Also, is any guide or video that shows the use of this probe?
First off welcome to the forum!
The settings for a touch plate are:
-
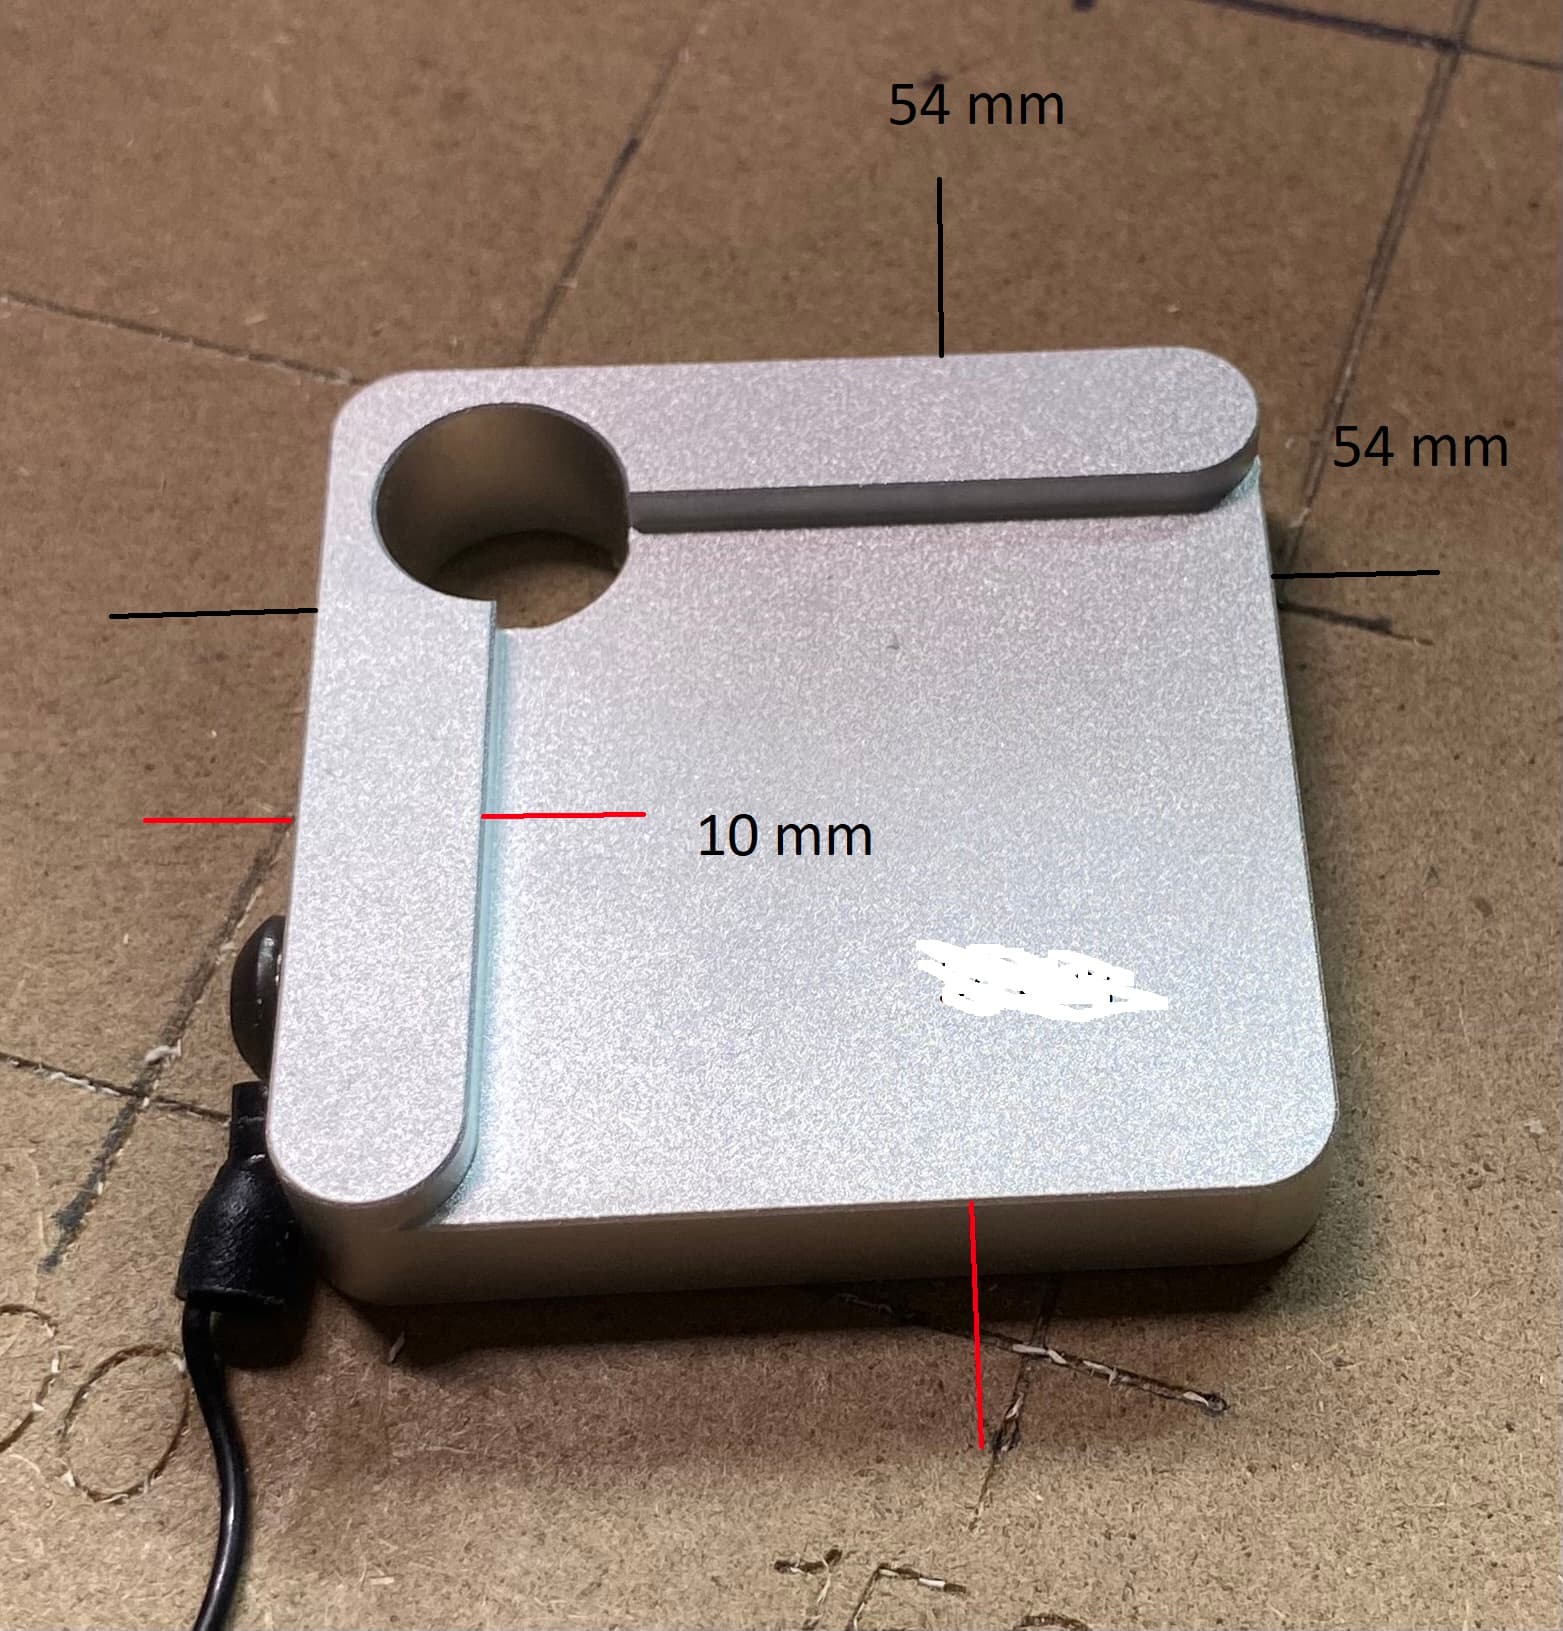
Z Thickness = The vertical thickness of the touch plate in the recessed area i.e. the distance from the spoil board to the top of the plate in the lower right corner in your picture.
-
XY Thickness = The horizontal thickness of the non-recessed part, looks like 10mm from the pic.
-
Length and width = The overall length and width of the plate, looks like 54mm for your block.
Usage:
If you look at the probe section in the bottom right of gSender you have options to probe Z, XYZ, XY, X, or Y. The picture shows where the bit should be in relation to the block at the start of the probe sequence for each of those options. The Tool option is important for any probe except Z only, you need to select the right diameter for the bit you are using to probe.
Typical usage would be to place the block on the lower left corner of the stock using that recess to place it in the right spot. The block would be rotated 180 degrees around the Y axis from the picture to be in the right orientation for probing the lower left corner. On that same corner you could probe any of the options depending on what you need.
For probing the Z only you can also place the block the way it is orientated in the pic, on top of the stock, and put the bit above the recessed area to start the probe.
My thoughts:
I would recommend to keep the probe connectivity test enabled in the settings. That will make sure that you don’t forget to put the other wire on the bit. The other wire should have a magnet or alligator clip for attaching to the bit.
I have also never seen a block with a hole there and it might give you trouble with the XYZ probe. When you do an XYZ probe the bit will probe the axis in the X, Y, Z order and my concern is that it might end up over the hole for the Z probe part. I would pay close attention and be ready to hit the emergency stop button when trying an XYZ probe for the first time with that block. That said if it’s a problem you can just probe XY and then do Z separately.
Hopefully some of this wall of text is useful to you! If something is still unclear let me know.
Cheers,
Michael
Thank you Michael for your clear and precise response to my first forum question. Your expertise and concise explanation were greatly appreciated. Your contribution has been invaluable to me and others in the forum.
You were right to tell me of some problems to function because of the hole. I’ll use it only for probing Z for now, maybe some macro will work later, thanks again
1 Like
That you for your very kind post @fede.
I just wanted to reiterate that you should be fine to use that block for an XY probe and then a separate Z probe. When you do a probe it only sets zero for the axis that you probe meaning that the XY probe will only set zero for X and Y. Probing for Z separately after will not mess with the X and Y zero that got set prior to probing Z.
1 Like
That’s even better to know, thanks, I’ll use it that way.
1 Like