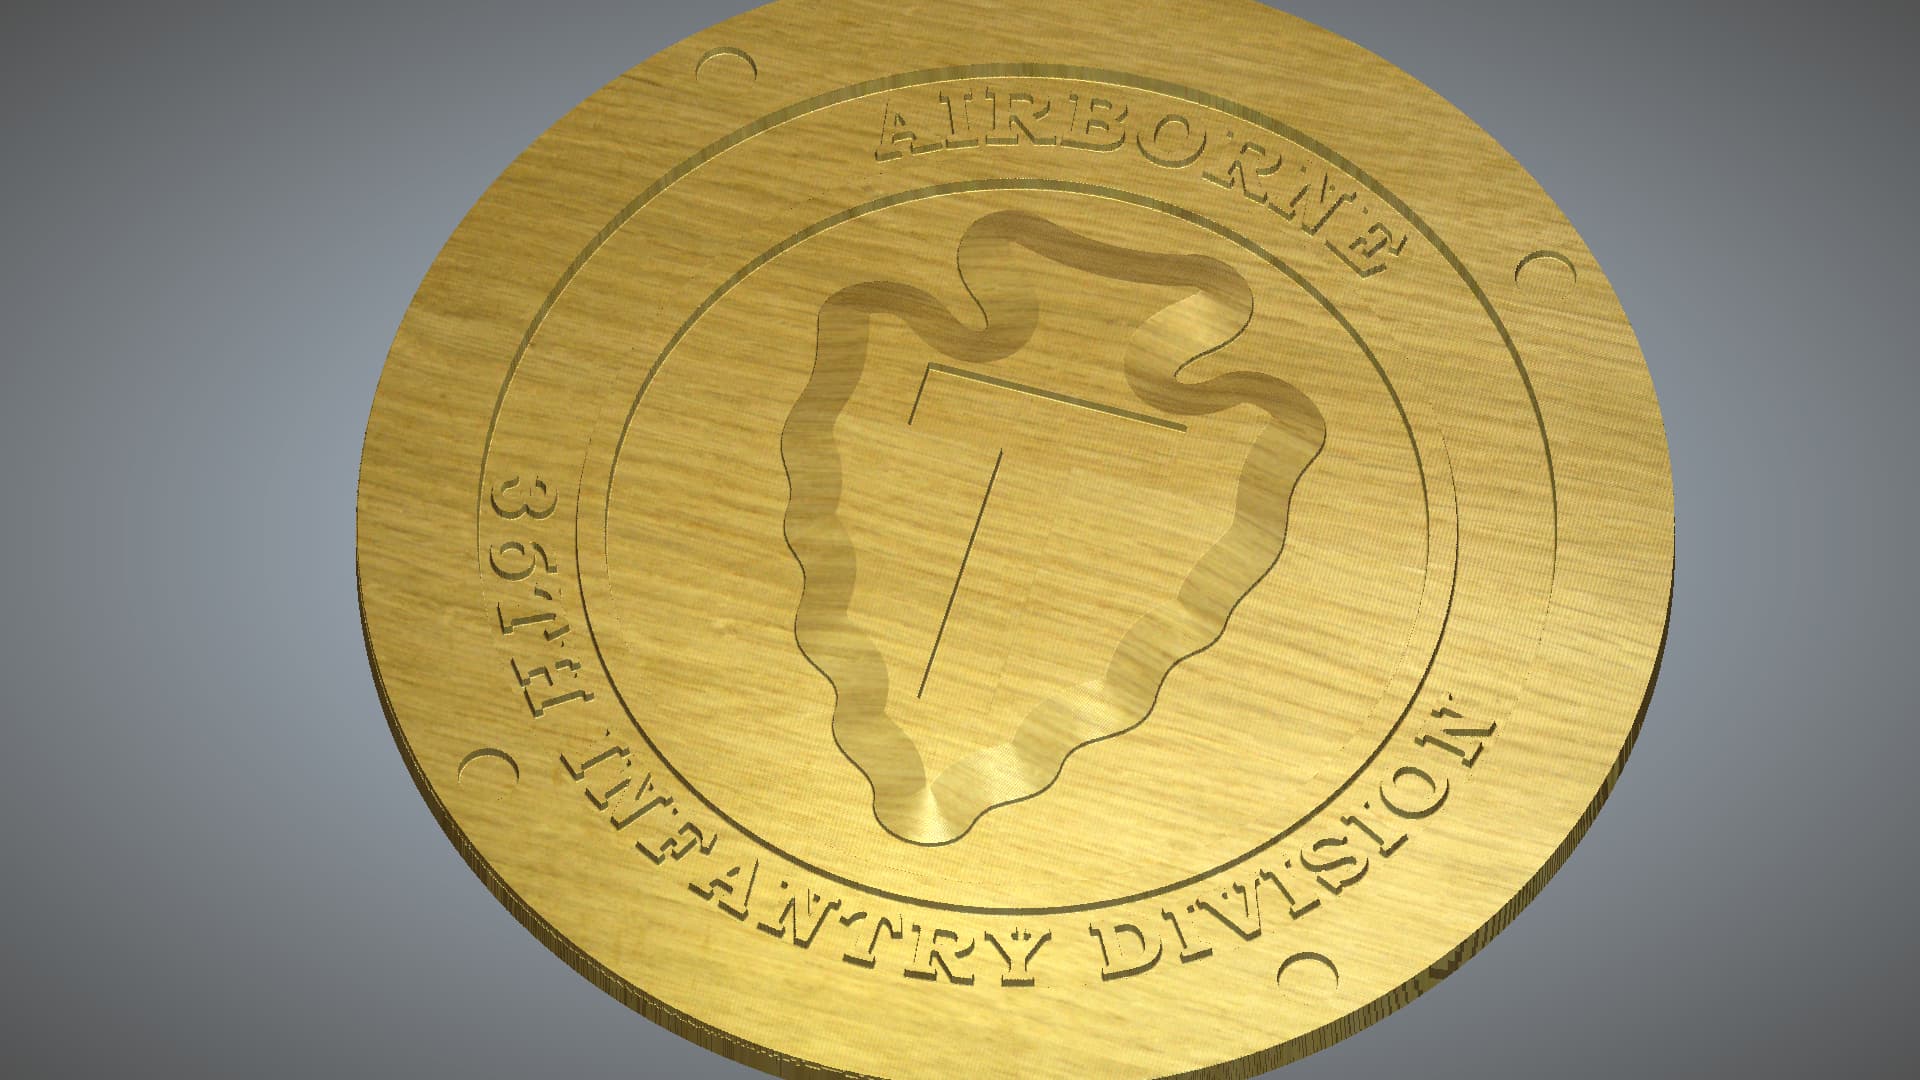
A friend of mine really wants me to make him a table and I don’t know how. He’s a US Army vet and was severely injured when his humvee hit an IED in Iraq. Below are two designs I have so far. Can I get some thoughts on them or ideas to improve them? Any and all help is appreciated.
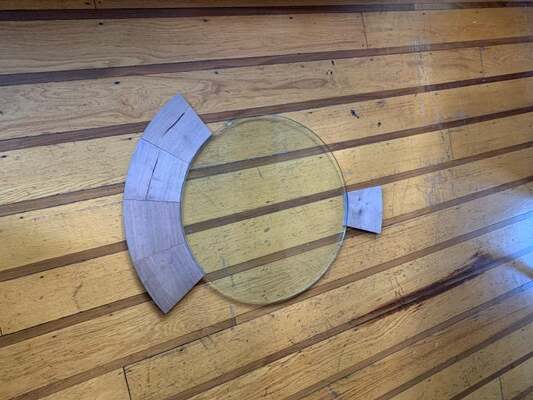
The first one has 4 circle pockets around the main piece. I thinking about using them for some stainless steel spacers to hold up a second layer consisting of a sectional wooden ring and a glass top. Example of the second layer pictured below the first design. That glass top will be centered over the bottom layer which will have the carving.
When he first asked me I consider it but he ended it giving me a piece of glass one day to use. I think he really wants that glass part of it. He suffers from severe PTSD and the glass is kind of his contribution to it.
I really like the fact that you’re helping out this wouonded vet. However,I’m sorry, but I don’t understand what your problem is here.
If I understand you correctly, you’re planning to carve the sketch you’re showing here on a piece of wood (most likely gluen up boards to give you the approximate 24" square) using your Longmill. Then you’ll place the circular glass top (which I am assuming is also 24" across) on top of your circular tabletop.
In most cases, glass table tops are set atop flat (ish) surfaces using small clear plastic discs (usually about 3/8" diameter) that have self-sticking faces.
Are my assumptions correct, or am I missing something here?
@Swinly In your first design, I don’t see what you gain by the stainless spacers. If understand the second pic, you would create a circular ring from segments. It’s not clear from the pic how the glass would be supported by that ring. Would you dado out the back of the ring to receive the glass? If I were going with option 1, I would simply cut a ring/donut with the Mill rather than go with a segmented ring. You could do the ring as a double-sided job, dadoing out the bottom to receive the glass and holding the glass in place with glazier’s points - sort of like one would do when framing a watercolour. That ring can simply sit on the carved ring. To ensure that it doesn’t slide around, you could cut dowel holes in both the ring and the table top/carved ring. Drill the holes half the thickness of the two pieces and the dowels would be invisible.
The second option is simpler. If I am understanding that pic, the outer ring is proud of everything else in the carve. The glass would simply sit on that outer ring. I guess the only thing to think about with that option is how to hold the glass in place.
I usually let my imagination run wild before actually thinking about it, so forgive me if none of this made sense. I’m not sure if I have a full picture in my head yet. That’s why I started this thread, to slow myself down and figure out what I’m doing before I end up with a pile of fail.
Your thought on option one sounds much better and not like the over-complicated mess I was conjuring up. Your understanding of option two is spot on. If I go that route with the wood I have then I’m thinking it may end up looking too thin.
Design is a personal thing, I would go with glass, everything I have done with epoxy scratches, from coasters to tables, it is subject to scratches. Something that large will show imperfections and scratches. Just my 2 cents.
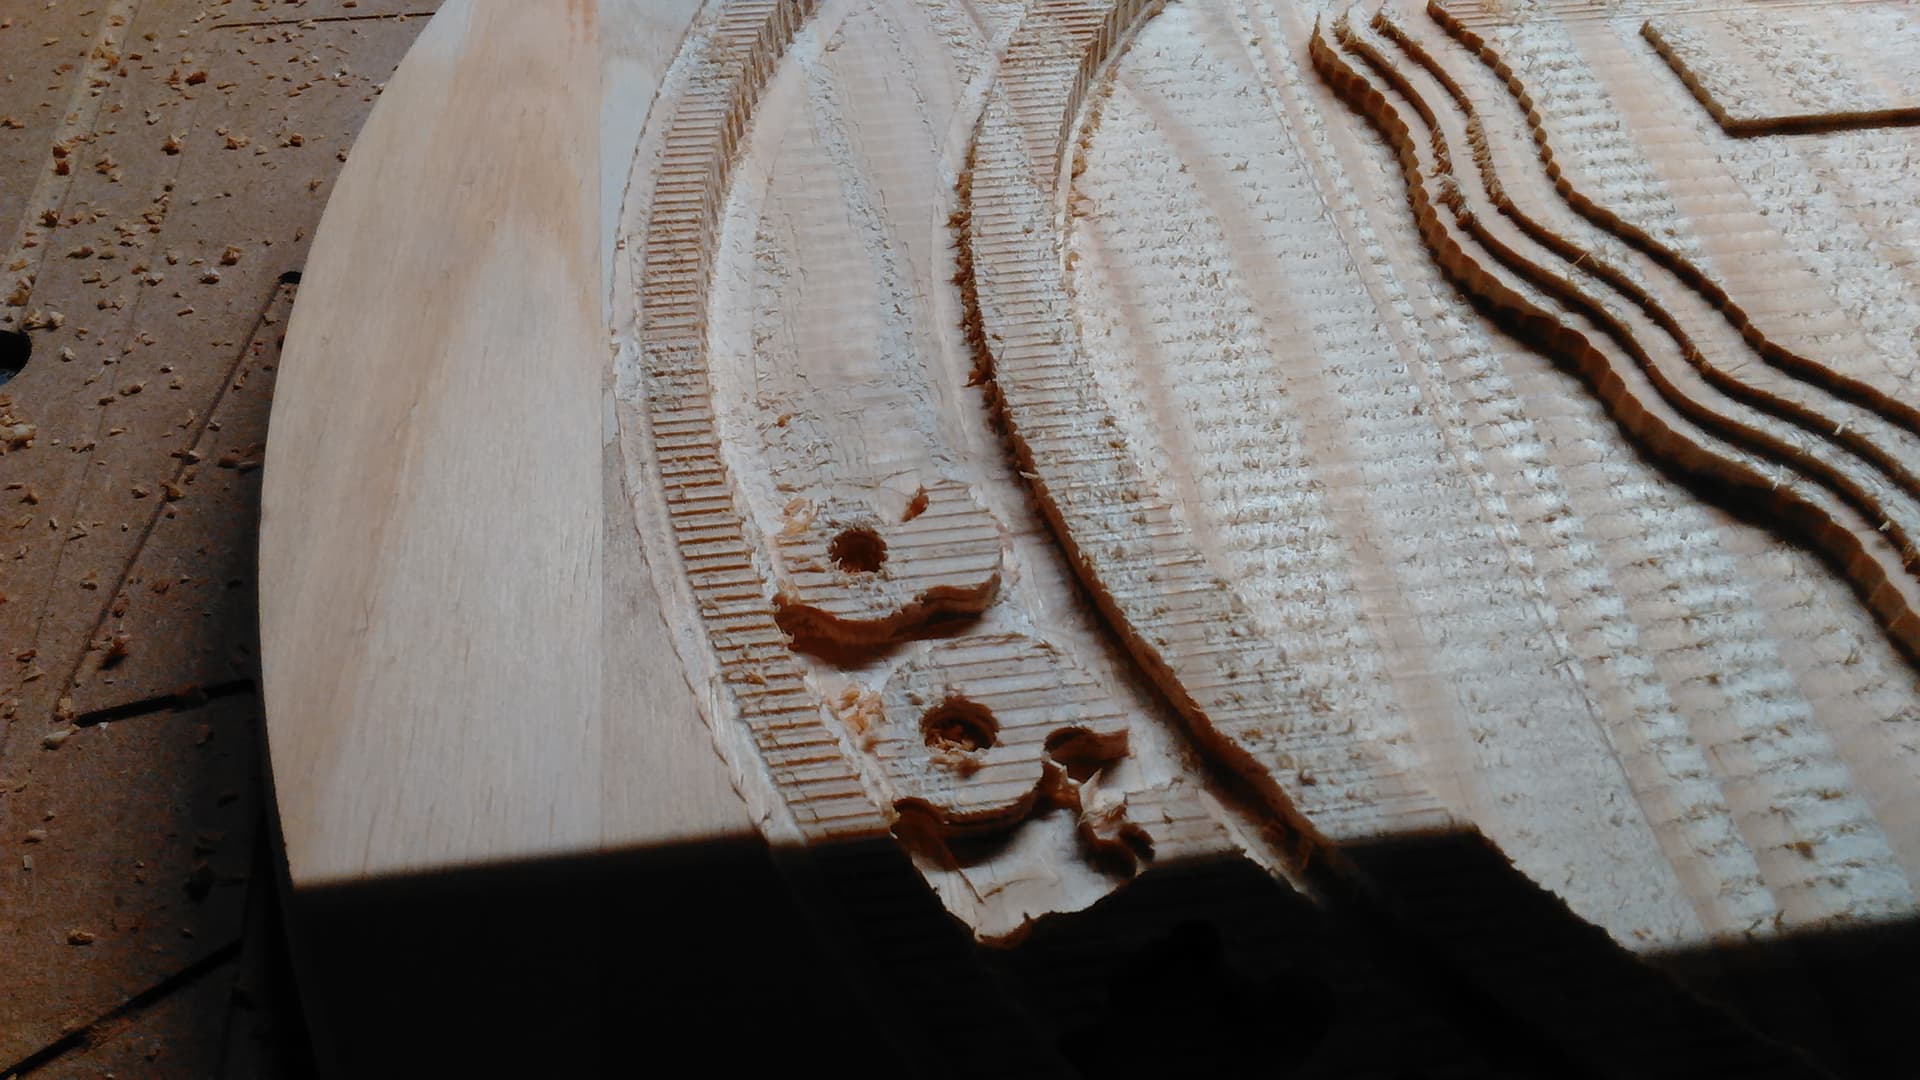
Well, I started the carve today. The roughing path went great and was looking good but now I’m on the finishing path and am completely confused by what is happening. It is still early in the tool path but…WTH.
It has made multiple passes back and forth. It seems to be scoring the surface. I’ve never noticed it doing this before but this is my first big carve. Maybe this is normal. IDK
It just doesn’t seem to be running as it has on other carves.
I used carveco maker +. It is a raster tool path. Tapered ball nose 0.62". Step over of 0.0075". Step down of 0.05". I did not change the XY zero. I did re-zero the Z for the finishing bit. Videos below
I checked my Z again and it seems it may be a tad too high. I did not surface my work piece before I started. Could having the Z too high produce results like that?
Dang it Dang it dang it I figured it out. I saved the roughing tool path twice. So when I did the finishing path it was really the roughing pass again.
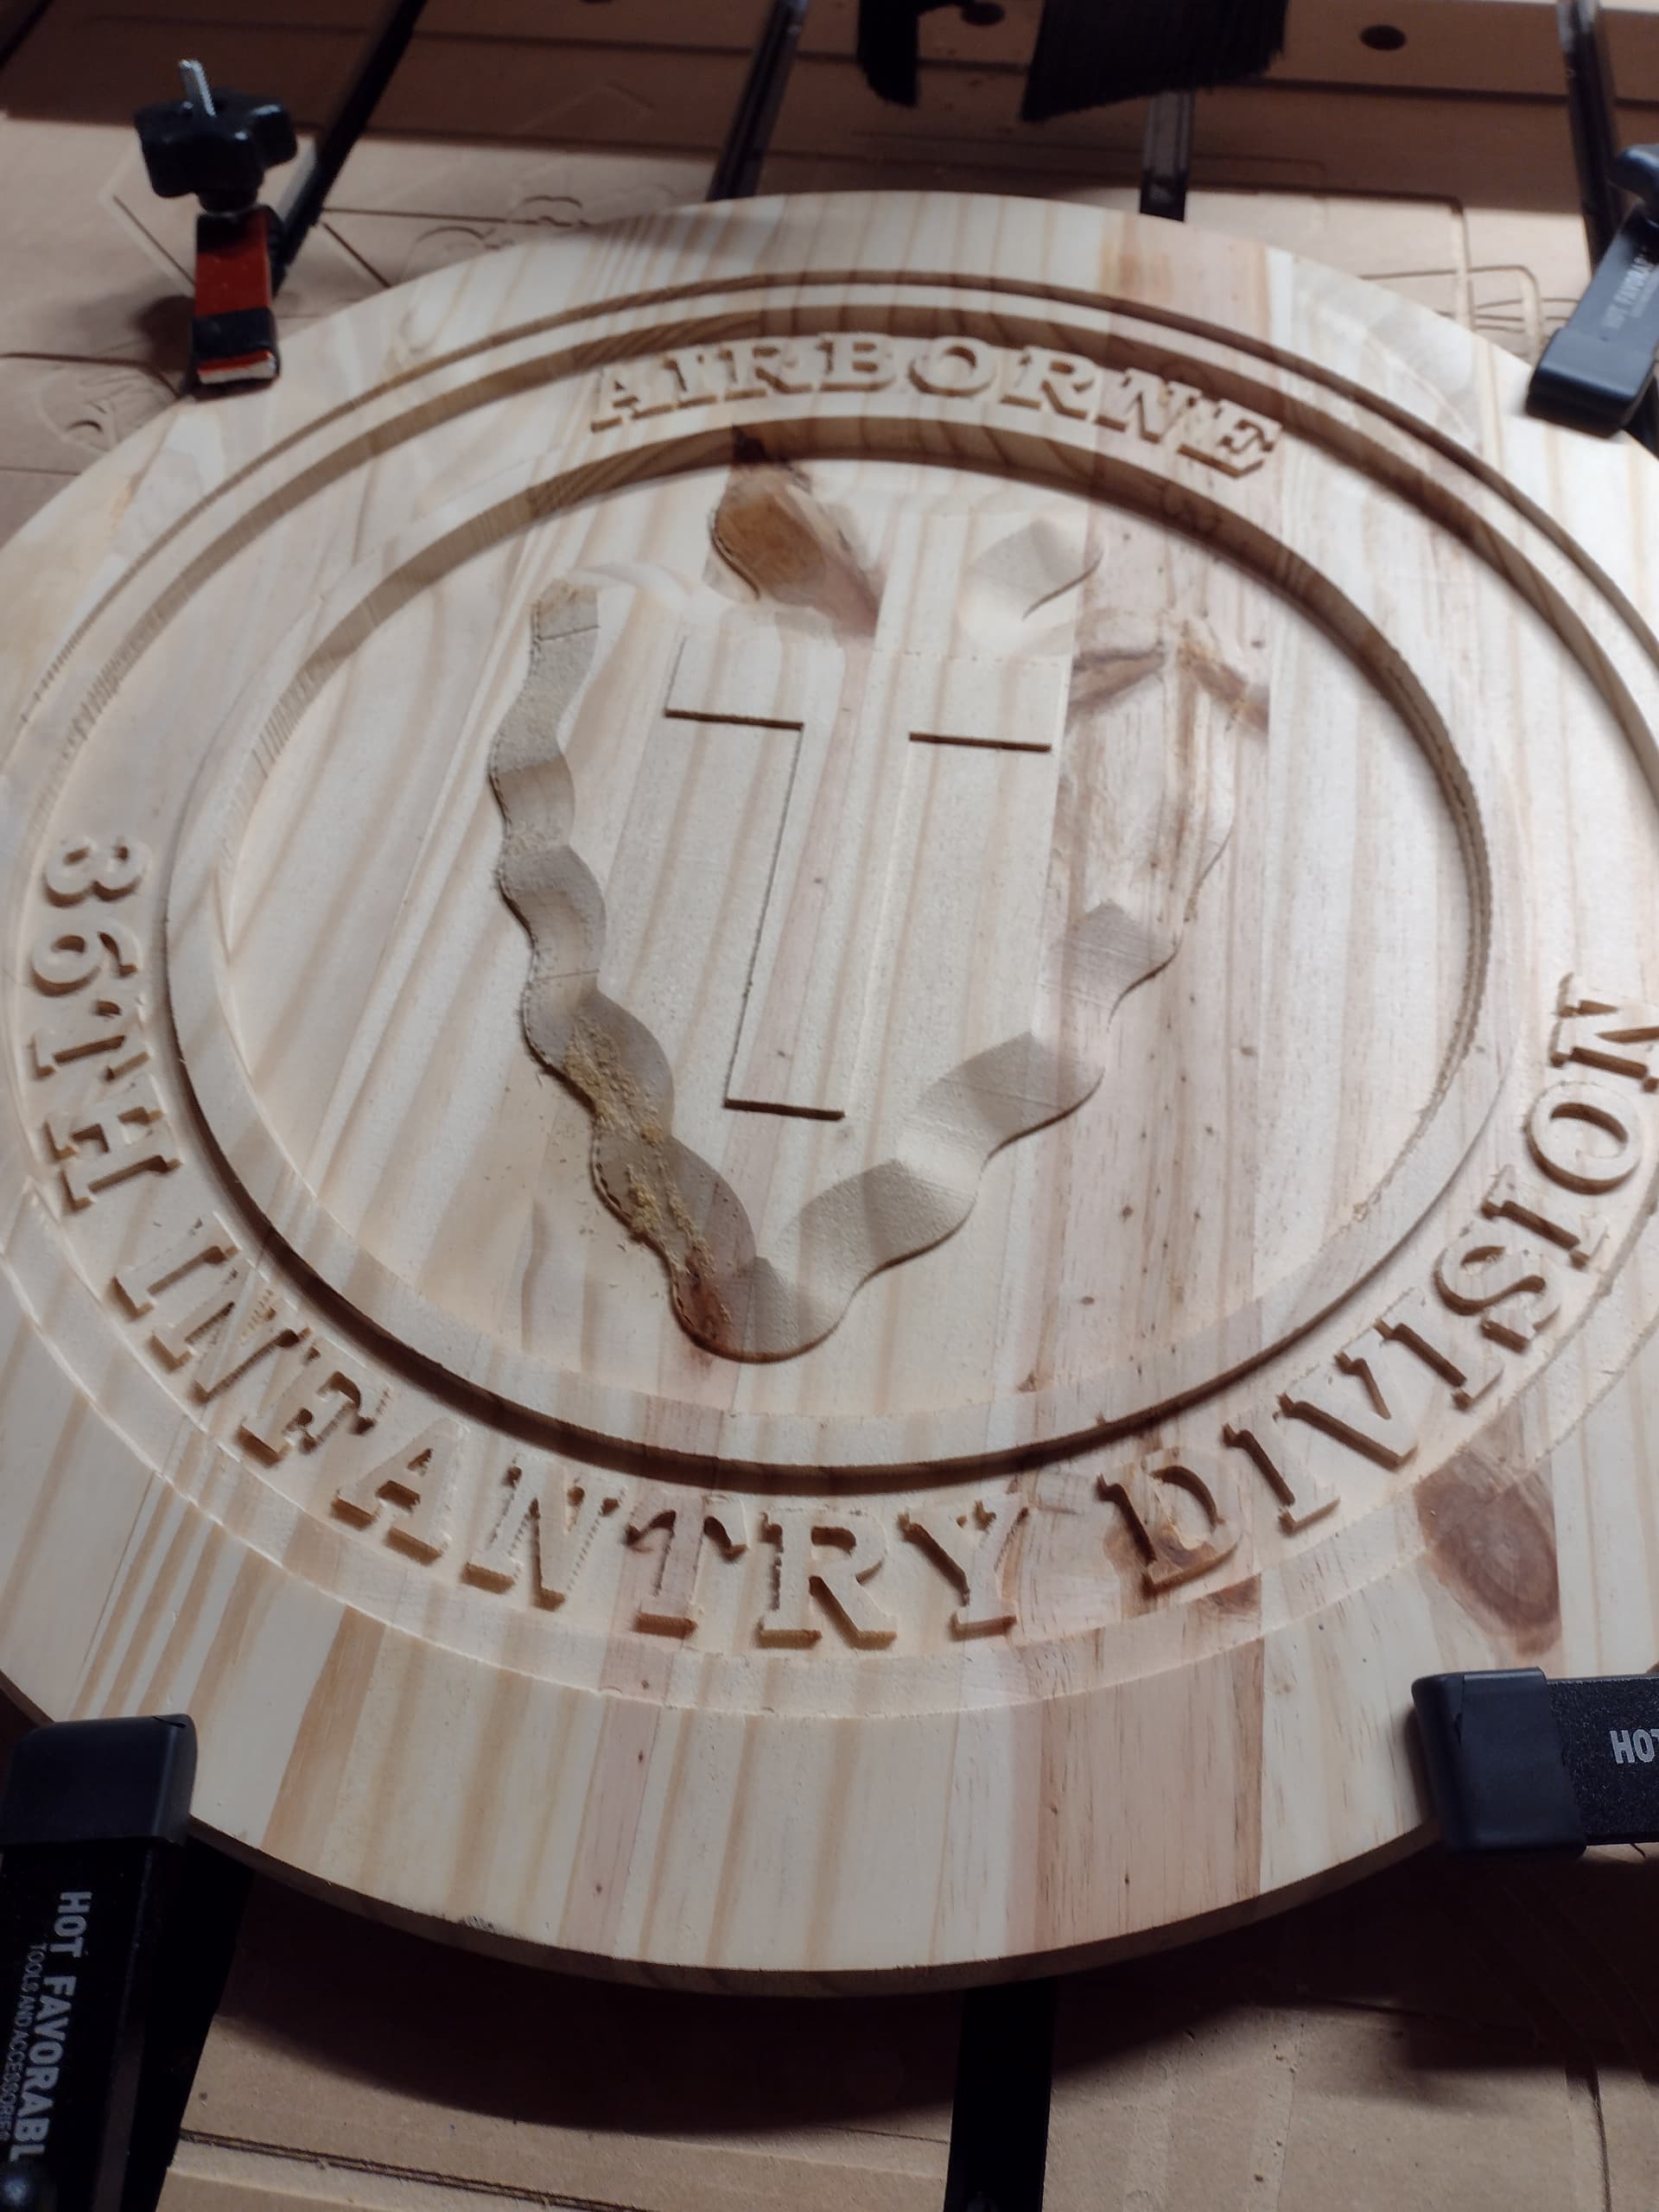
Okay, my friend Chuck, who the table is for, stopped by today for a visit. I took him out to the shop to see how it is going and he got pretty emotional seeing it and was very happy about it. That made me happy but there is one problem. He wants me to add some color to the arrowhead and T.
Color is my kryptonite. I suck at adding color. I really suck at adding color to one area and keeping it in that area.
How do I go about adding a hint of color to the arrowhead (a light blue) and T (black) without it bleeding into other areas?
Looks nice,
There are lots of ways to add colors, it depends somewhat on whether you want to see the woodgrain through the color or not. You can tape it off and brush or spray likely covering the grain, or you could wipe it on lightly with a cloth and get a see through color. And im sure many other ways. It’s really more about what the recipient would like to see.
I’d suggest talking to him about it some more, and the more involved he is with the decision the better he will feel about the outcome.
It could be a good project to involve him in if you both are OK with that. It could therapeutic for him to feel like he had a hand in the finished project.
Just a thought.
Chuck has already said he’ll be here to help sand it.
He’s wanting it to stay somewhat natural with exception of the arrowhead and “T” but I do think he is wanting the wood grain to still show through.
I have some Varathane Vintage Aqua that is close if not the color he’s looking for. I also have some Minwax black for the “T”.
I was thinking maybe thinning the Vintage Aqua with mineral spirits and carefully brushing/wiping it on. Then wipe the whole thing down with boiled linseed oil or Watco danish oil natural.
@Swinly If you are going to paint or stain any of it, seal all of it first. Otherwise the paint/stain will bleed into the surrounding area and it will not look good at all. This is especially true if you are going to thin the paint/stain.
Use either a de-waxed shellac or a lacquer-based sealer, let it thoroughly dry, then go your painting/staining.
I do have a spray can of Deft Lacquer Sanding Sealer. So when we start finishing this off I should seal it with the Deft LSS, then stain it, linseed oil and then some sort of topcoat?
@Swinly Yes. Be sure to allow the sealer to thoroughly dry before staining. Since it is a spray can, a couple of coats wouldn’t hurt. There are not many solids in spray cans.
Very nice work sir! I have been using wipe on poly for a couple of projects I have done recently. I opt for satin finish…… want to see the grain. Also very good job recognizing what you did wrong and fixing it.

 Your understanding of option two is spot on. If I go that route with the wood I have then I’m thinking it may end up looking too thin.