Hahaha, Oh, there is a really good song to be made from this. LOL
At this point man, I have more issues than I care to type and customer support has been either too busy handling other issues or this is the way they operate, not sure, but so far they have been slow to respond and whatever they have responded with wasn’t helpful.
SMH, because I though I made a good choice in my purchase and I still do on the machine, you guys have tried to be more helpful that the company and that makes me reconsider the investment I made with Scienci Labs.
100% not a happy customer! That might be the title of the next song. LOL
I’m done digging myself into a reckless tangent trying to figure out the problem, I’ll wait for customer support to help me. Like I mentioned, there are too may things wrong at this point, I fold. . .
Might be, but this morning I got a comprehensive support response from Kelly at Sienci with some solutions and items to check. I’ll report back on what happens, just in case anyone has similar issues.
Yes, the jerking got resolved, wrong bolts installed in ball screw bearings on both sides. Nice and solid now.
Still not XY zeroing properly using the AZTP no matter what. When it completes an XY probe with the correct corner selected in gsender, it still does not find material zero corectly, it’s like 10mm +Y
So when I run a job, the Y axis cuts tend to be -Y below where they should be. Makes no sense. When I run a job and let the spindle go back to material zero, it actually does. Again, makes no sense, especially after it goes back to XY zero after a job, I can run the same job from that position and it still cuts 10mm -Y. It’s pretty insane.
Then I installed UGS and had the same exact issues.
I think the SLB is somehow the issue since no matter what CAM I use, the results are the same.
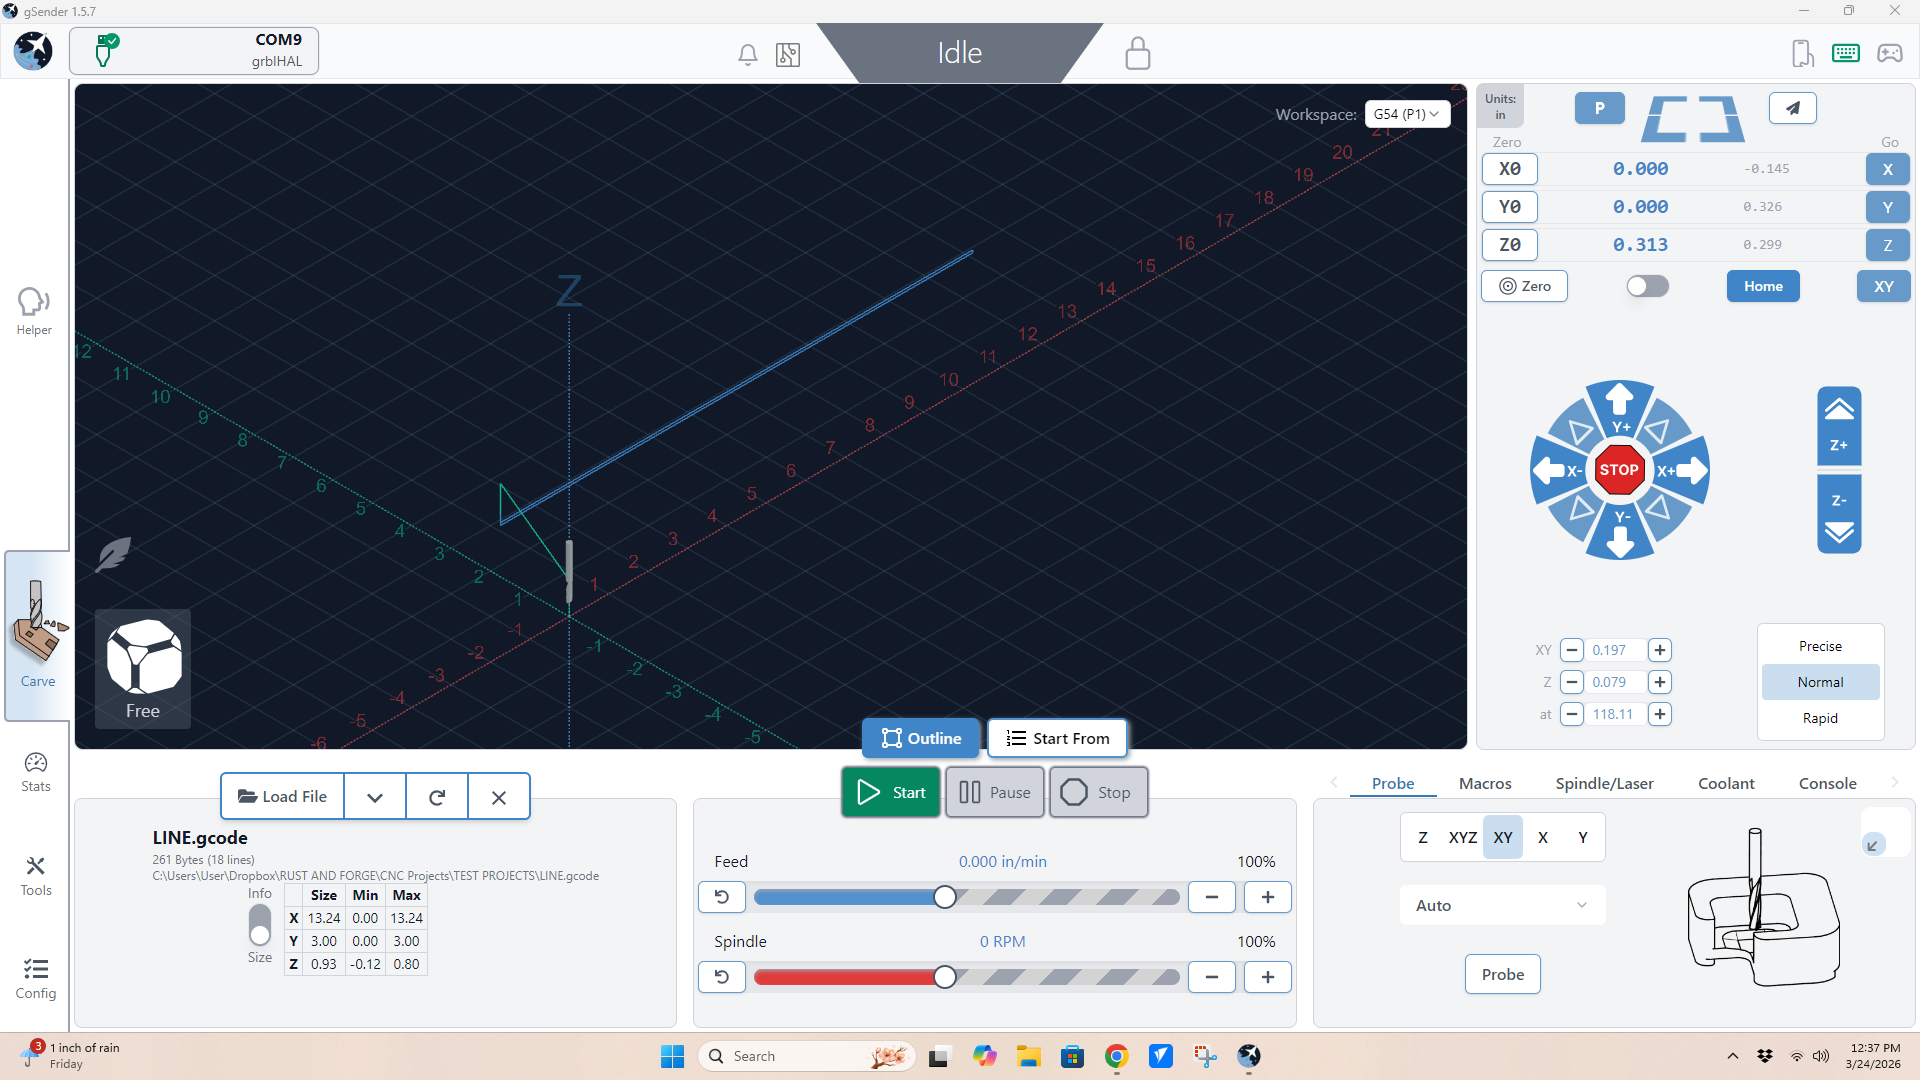
I just did an XY zero probe and here is a photo of the actual position it finished in. I measured it at 10MM on the dot. Gsender says it’s XY zero as shown on the screenshot.
@grainandgain Not that this has anything to do with your issue but how come the grey coordinates are so small? After homing, the rear left should be x0,y0. Anything close to the front should have a much larger y value.
The grey coordinates are the machine coordinates and should always be relative to your rear-left homing location.
For example, if you jog to the rear left, the grey x and y should be 0
If you jog to the front-left, the grey x=0, and the y=-48 (if in inches and for the 48x48 Altmill).
Front right, grey x=48, grey Y=-48
These values are independent of what you set as your zeros.
@grainandgain As for your zeroing problem, if you go to Config and enable “view Modified”, you will see the settings you changed from the defaults. That might help you see if anything looks off. There should not be that many settings that have been changed.
For me, I have “Probe” set to “AutoZero” and “Spindle” set to “H-100”. And a few others I recently changed.
I still find the grey coordinate values weird. Unless you haven’t homed your machine, or you’re homing to a different corner, or you set the machine size to something else, or…
I’ve always run any CNC i have owned by manually setting work zero and have never homed a machine. This machine ran decent up until recently, it steadily became more and more unpredictable and after the probing started failing, this is where I knew there was a deeper problem. I usually can set my material XY from anywhere and not have this issue. However, even when it would cut, once in a while it would drift off with no explination.
Not sure it you tried this, but homing the machine before using the auto touch plate seems to solve issues like the one you describe. I have had inconsistent Z settings being maintained at times. I myself think either Z-sender or the long board gets off at times. When I experience oddities like this I start my routine as if I were to start a new project, First home the system, set the zero at the home position, and then go to the approximate start point and then use the Auto touch plate to set the zero.
This might not fix your issue, but starting with the zero at the homing position seems to clear issues that I don’t understand when they happen.
WOW, this whole probing issue has been a nightmare.
So, I finally stopped being stubborn and homed my machine out as some of you suggested (Thanks) and homing was a great start.
Even after homing, my Y axis was off, varying amounts. So I started digging in deep figuring I had nothing to lose and jumped into setting after setting, testing and failing and then I noticed under the Motor Settings, there is a Y axis calibration tool. I ended up running that and it got me within ten MM of where I needed to be and then I manually entered in a compensation adding ten MM to the suggested measurement. I then homed the machine and gave it a shot and all of a sudden the probe was working perfectly. I then ran a job to test the accuracy of everything and it was spot on.
Thank you for all that gave me suggestions, I hope this fix helps someone else down the line.