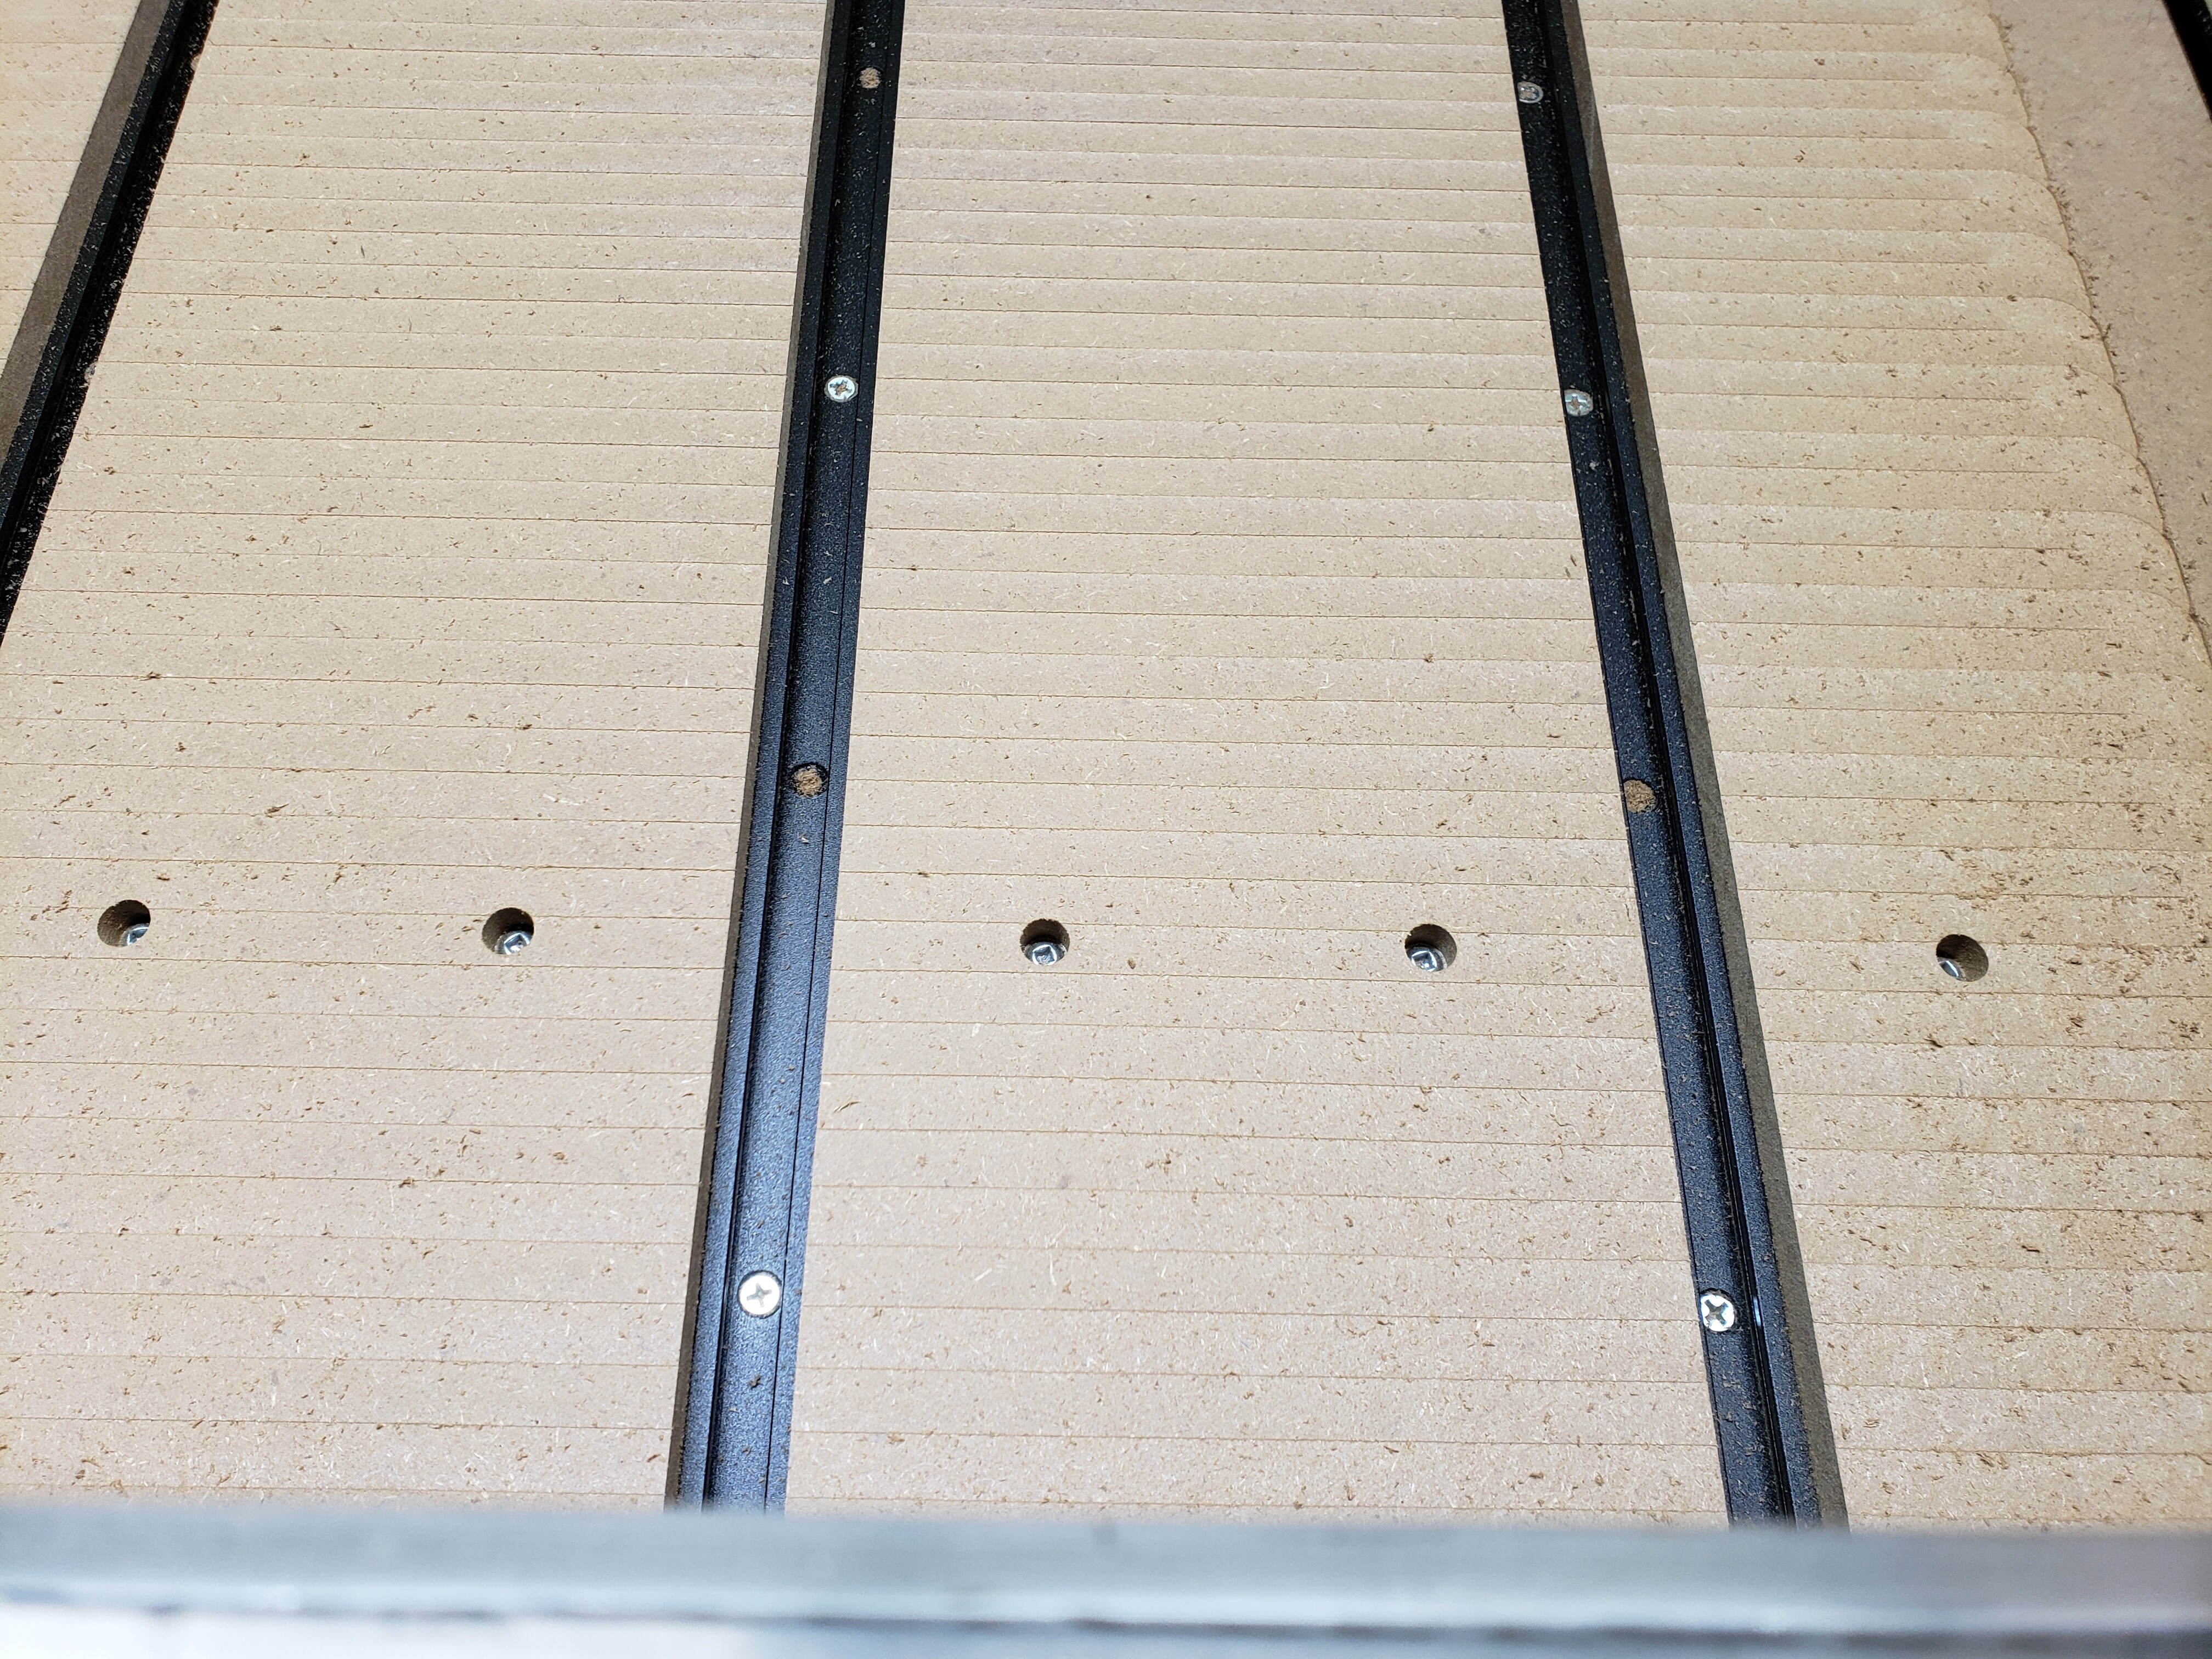
Hello all. Not sure what I got myself into here but I bought this machine used. I know NOTHING about any of this. I’m a retired and took up basement woodworking. These machines have always intrigued me but I hope I’m not in over my head. It took almost two weeks to build a table & rearrange one whole end of my shop area to make a suitable work space for this unit. It’s been a struggle and I was thrilled when I could just jog it around. I figured surfacing was next so I followed the Youtube video Eddie made. I got the Intuwiz file and to my surprise I was able to load it and start the surface job. First pass was beautiful. Every pass after that left a ridge in the center of the pass and a lip in every pass next to it. I ordered the bit from Sienci and if I hold the cutting edge on a straight edge it only touches on the outer edges of the cutter and I can see space in the middle. I’m not sure how this could be the problem since the first cut was perfect. I’m attaching a picture and hope it helps. The bottom line is the surface is anything but flat.
@oxbowbob Welcome to the gang, Bob. It looks like your Mill may need tramming. Look on Youtube in Mark Linday’s channel. He does an excellent video on tramming your CNC mill. Peter Passuelo does another good one on his CNCNutz channel. The idea is to get your router perpendicular to the table in both X and Y .
That said, I’m with you being confused by the fact that your first cut was perfect. If your Mill was out of tram, that should not be the case. I’m assuming that your wheels are properly tightened, as are your anti-backlash nuts. You may want to check them. If there is movement in the wheels on the X gantry, you will get ridges like you are seeing. How deep are you making the passes?
Thank you so much for the reply. My first and only pass was 1mm. I stopped after seeing the results. Didn’t want to wear my brand new spoil board to a nub before I ever cut anything. That first pass in reality was not perfect. It only looked that way because it was a full cut. When the overlapping started is where you could see it.
I woke up this morning with fresh eyes. I have a good set of squares so I set out to see what I could learn. The rail was square to the board and the router mount was square to the plate it was bolted to. However … there was a noticeable difference in how far the gantry was from the top & bottom part of the rail. Like I said … I bought this used and didn’t assemble it (I think that was a disadvantage now). I took the top wheels off and there were no washers behind them. Of course the bottoms had washers and that gave a tilt to the gantry assembly. I’m hoping I can just use 4 small washers to fix it since I only have two of the originals.
I did watch both the videos. I’m hoping to avoid that. This machine doesn’t look easy to tram.
Again, thank you for the reply. I have a feeling I’m going to be here fairly often.
@oxbowbob I think that you have the right approach, Bob. It sounds like your Z gantry is likely “nodding” front and back, which would account for the lines you are seeing. If the upper and lower wheels are not equally spaced, owing to missing washers, that will happen. Thankfully, it’s an easy fix. Thinking about it, I doubt that it’s critical that the washers are exactly the same thickness as the supplied ones. They just need to be all the same thickness. Replace all 4 with like washers and you will likely be good to go.
Wellll … it’s not fun yet. Going to try and do this in the short version. I did put 4 like washers all the way around. Better for sure. It could be better and I just couldn’t let it go. Bought a tram gauge and used it to get it not perfect, but close enough for me. I found a post of Andy’s and used his suggestions. I can’t see where getting it better will ever be of benefit. SO! Ready to resurface again. First attempt stops 3 or 4 passes in. Since I have no clue I start over. Second try makes it 3 passes past the first try. I remember reading something about dust collection and static electricity??? Again … no clue. I turn off dust collection and remove hose. Try #3. Since dust collection is off I can now here my PC dinging over and over like a new device is being plugged in. About 1/4 of the way thru cnc stops again. All 3 times had the same software messages. Disconnected and No Serial Port Found when I tried to reconnect. The PC is 3/5 years old. Today … when I go out and buy a new PC (and not really knowing that’s the issue) … between the costs of the table, cables, new electrical and other odds and ends, I will have about twice what I paid for the LM invested and have yet to carve a square inch of anything right. Comments are truly welcomed! No snickering in the background please
@oxbowbob No snickering here, Bob. The PC that I have controlling my Mill is a lot older than 3/5 years. If your PC is beeping, it sounds like the USB port is connecting and disconnecting. First thing to do is make sure that all the power saving features of windows are shut off. Make sure to include the USB port ones. It can’t hurt to try a different USB cable either. Use one that has good ferrite chokes and keep it as short as possible, while still keeping it away from the other cables.
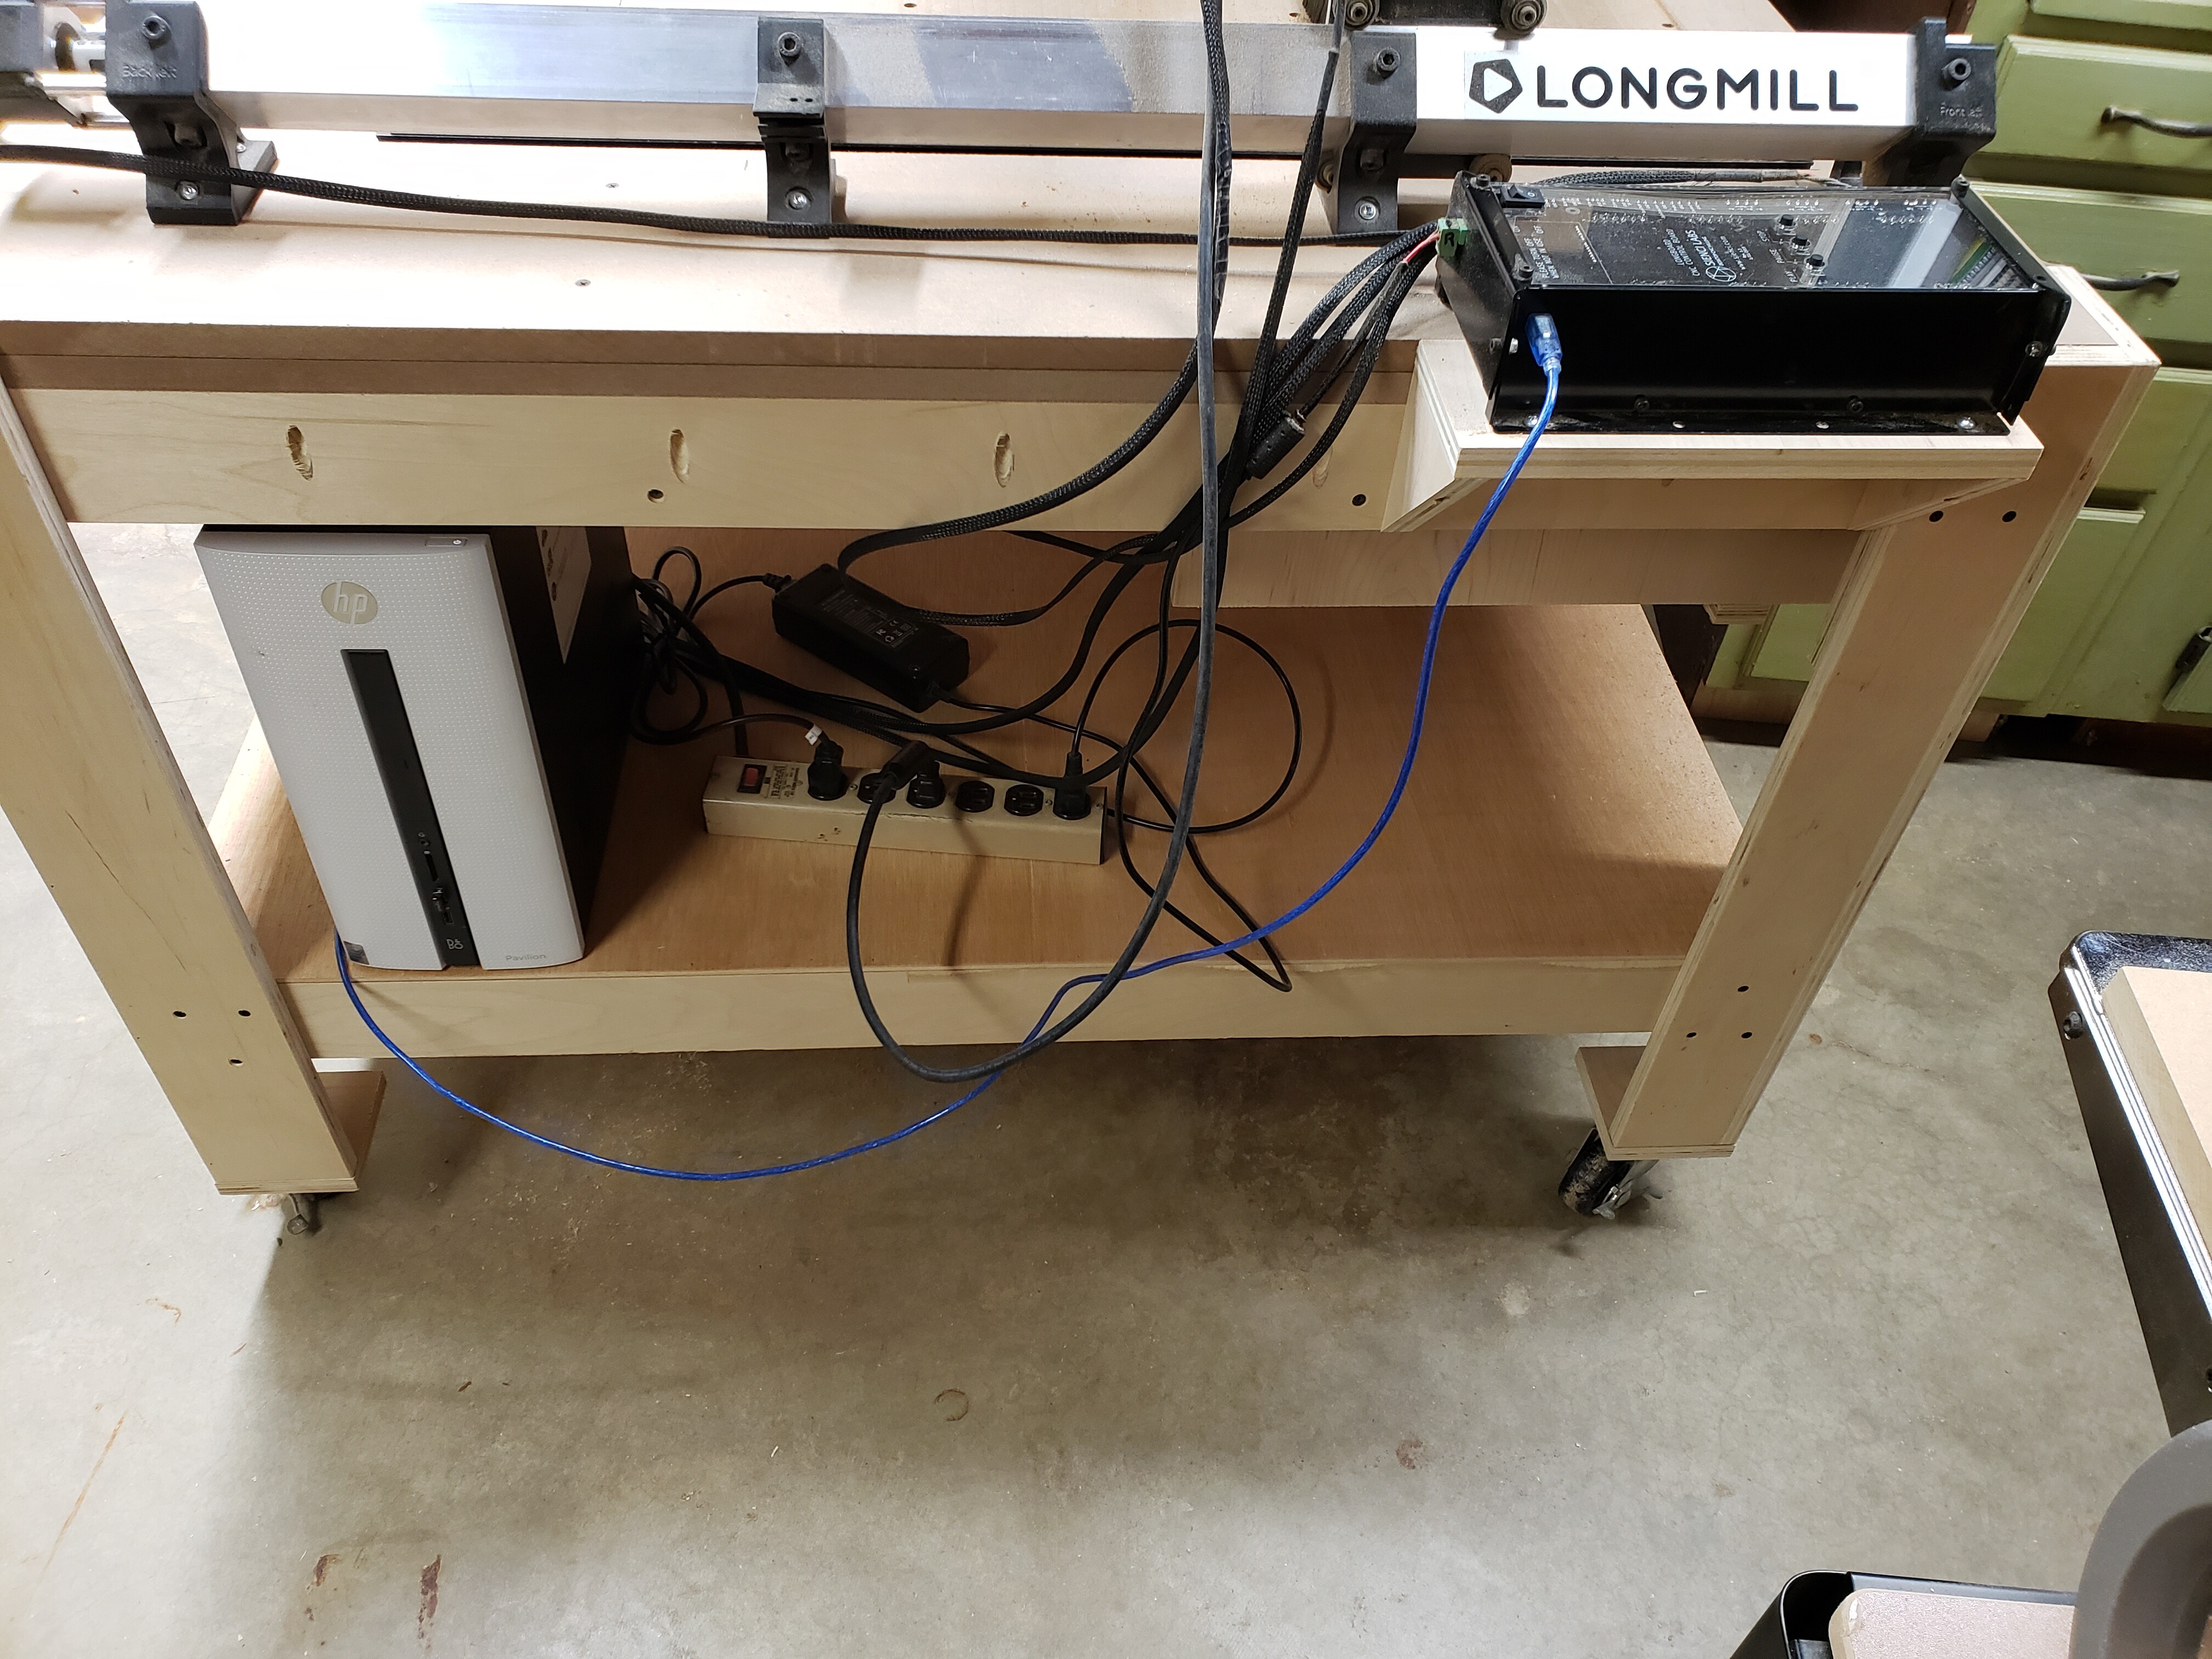
Sounds like there’s a multitude of things that can be wrong. Once I give you the rest of the details I’m thinking we can add to the list. I’m going to check the power settings, but I’m pretty sure they are all off. The screen is always active AND it has already made one complete surface job. Keep cable as short as possible … hmm … pretty sure you won’t think this is ok. My cable is 30’ long and I had no idea what ferrite chokes were until I looked them up. I had no idea you had to keep the cable away from the others. The cable is so long to keep the PC tower in another room & out of the wood shop dust. Last … I noticed right away the USB on the controller had a lot of play, but it did work for that first run. If I had to point a finger it would be at that first. I guess my questions now have to be is a 30 foot cable out of the question? and … Is the answer for the sloppy USB port to buy a new controller?
Can’t thank you enough!
Bob
@oxbowbob I would be willing to bet that your cable is the main, and maybe the only, source of your problems. Here is an extract from the usb org site
According to USB.org, USB operating specifications limit the maximum length of the cable to 5 meters for full speed devices and 3 meters for any low speed devices. 5 meters is around 16 feet 5 inches, and 3 meters is around 9 feet 10 inches.
As to the sloppy USB port on your controller, I guess it comes down to “how sloppy is it”? Also, what made it go sloppy? Are you straining the cable sideways? I would think not, given the length that you have to play with.
I can sympathize with wanting to keep the PC out of the wood dust. I didn’t even try. My PC sits on a bench right beside my Mill table. The monitor is mounted to an arm, again, right beside the Mill table. My dust collection is quite good, so things stay remarkably not too bad. I taped up all the ports on the PC that are not in use and I blow it out every so often. So far, though, when I open it up, it looks fine. If you are concerned about dust, you could build an enclose for the PC. As long as you have sufficient air flow, the PC will be fine. IMHO, I really don’t see using a 30’ USB cable as being a solution.
I can’t tell you what a pain it was to get everything else in another room and how much more convenient it would have been to have the tower in the same room. I have to start somewhere. May as well be moving the PC. I would like to say that the whole first surface job was done before I had the 30’ cable. I only had an extension cable and used a USB coupling between 2 cables to run that surface job.
Very sloppy … or at least much more so than I think it should be. Bad enough to think it’s a problem and it will probably bug me until it’s right. I don’t really know how it got that way. Bought it used. I haven’t used it enough to screw it up
I’ll start moving things tomorrow and see where that takes me. What time shall we talk about this again?
Yep, gonna wear out a wasteboard before I make anything
I agree that you need a flat wasteboard to get your projects right, but while working through your issues, you may want to work with smaller pieces. Think about using rigid foam, too. I played with foam for quite a while before daring to use good wood. Foam is cheap, easy on bits and forgiving when you forget to turn the router on before hitting “send”.
re: power settings. Don’t assume that your power settings are good based on your monitor being on all the time. As you may know, that just shows that one power setting is turned off. The one that is most likely to cause us grief is the one that allows windows to moderate the power to the USB ports.
I have been looking around for the hidden cameras. I haven’t found them yet! Spent a lot of the day moving and rearranging to get the PC in the same room as everything else. Had to run out for a longer eithernet cable. All hooked up and ready to go. Should be close enough.
I tried 3 different cables (not counting the 30 footer)
I tried 6 different USB ports
I checked the COM3 port in hardware. I could watch it show up every time I changed USB ports.
Rebooted
Turned controller off and on.
I get absolutely nothing when I try and connect.
I did research this a little but got kind of confused on Arduino driver/app. I’ll take another crack at it tomorrow.
No smiley faces in this post. This is frustrating.
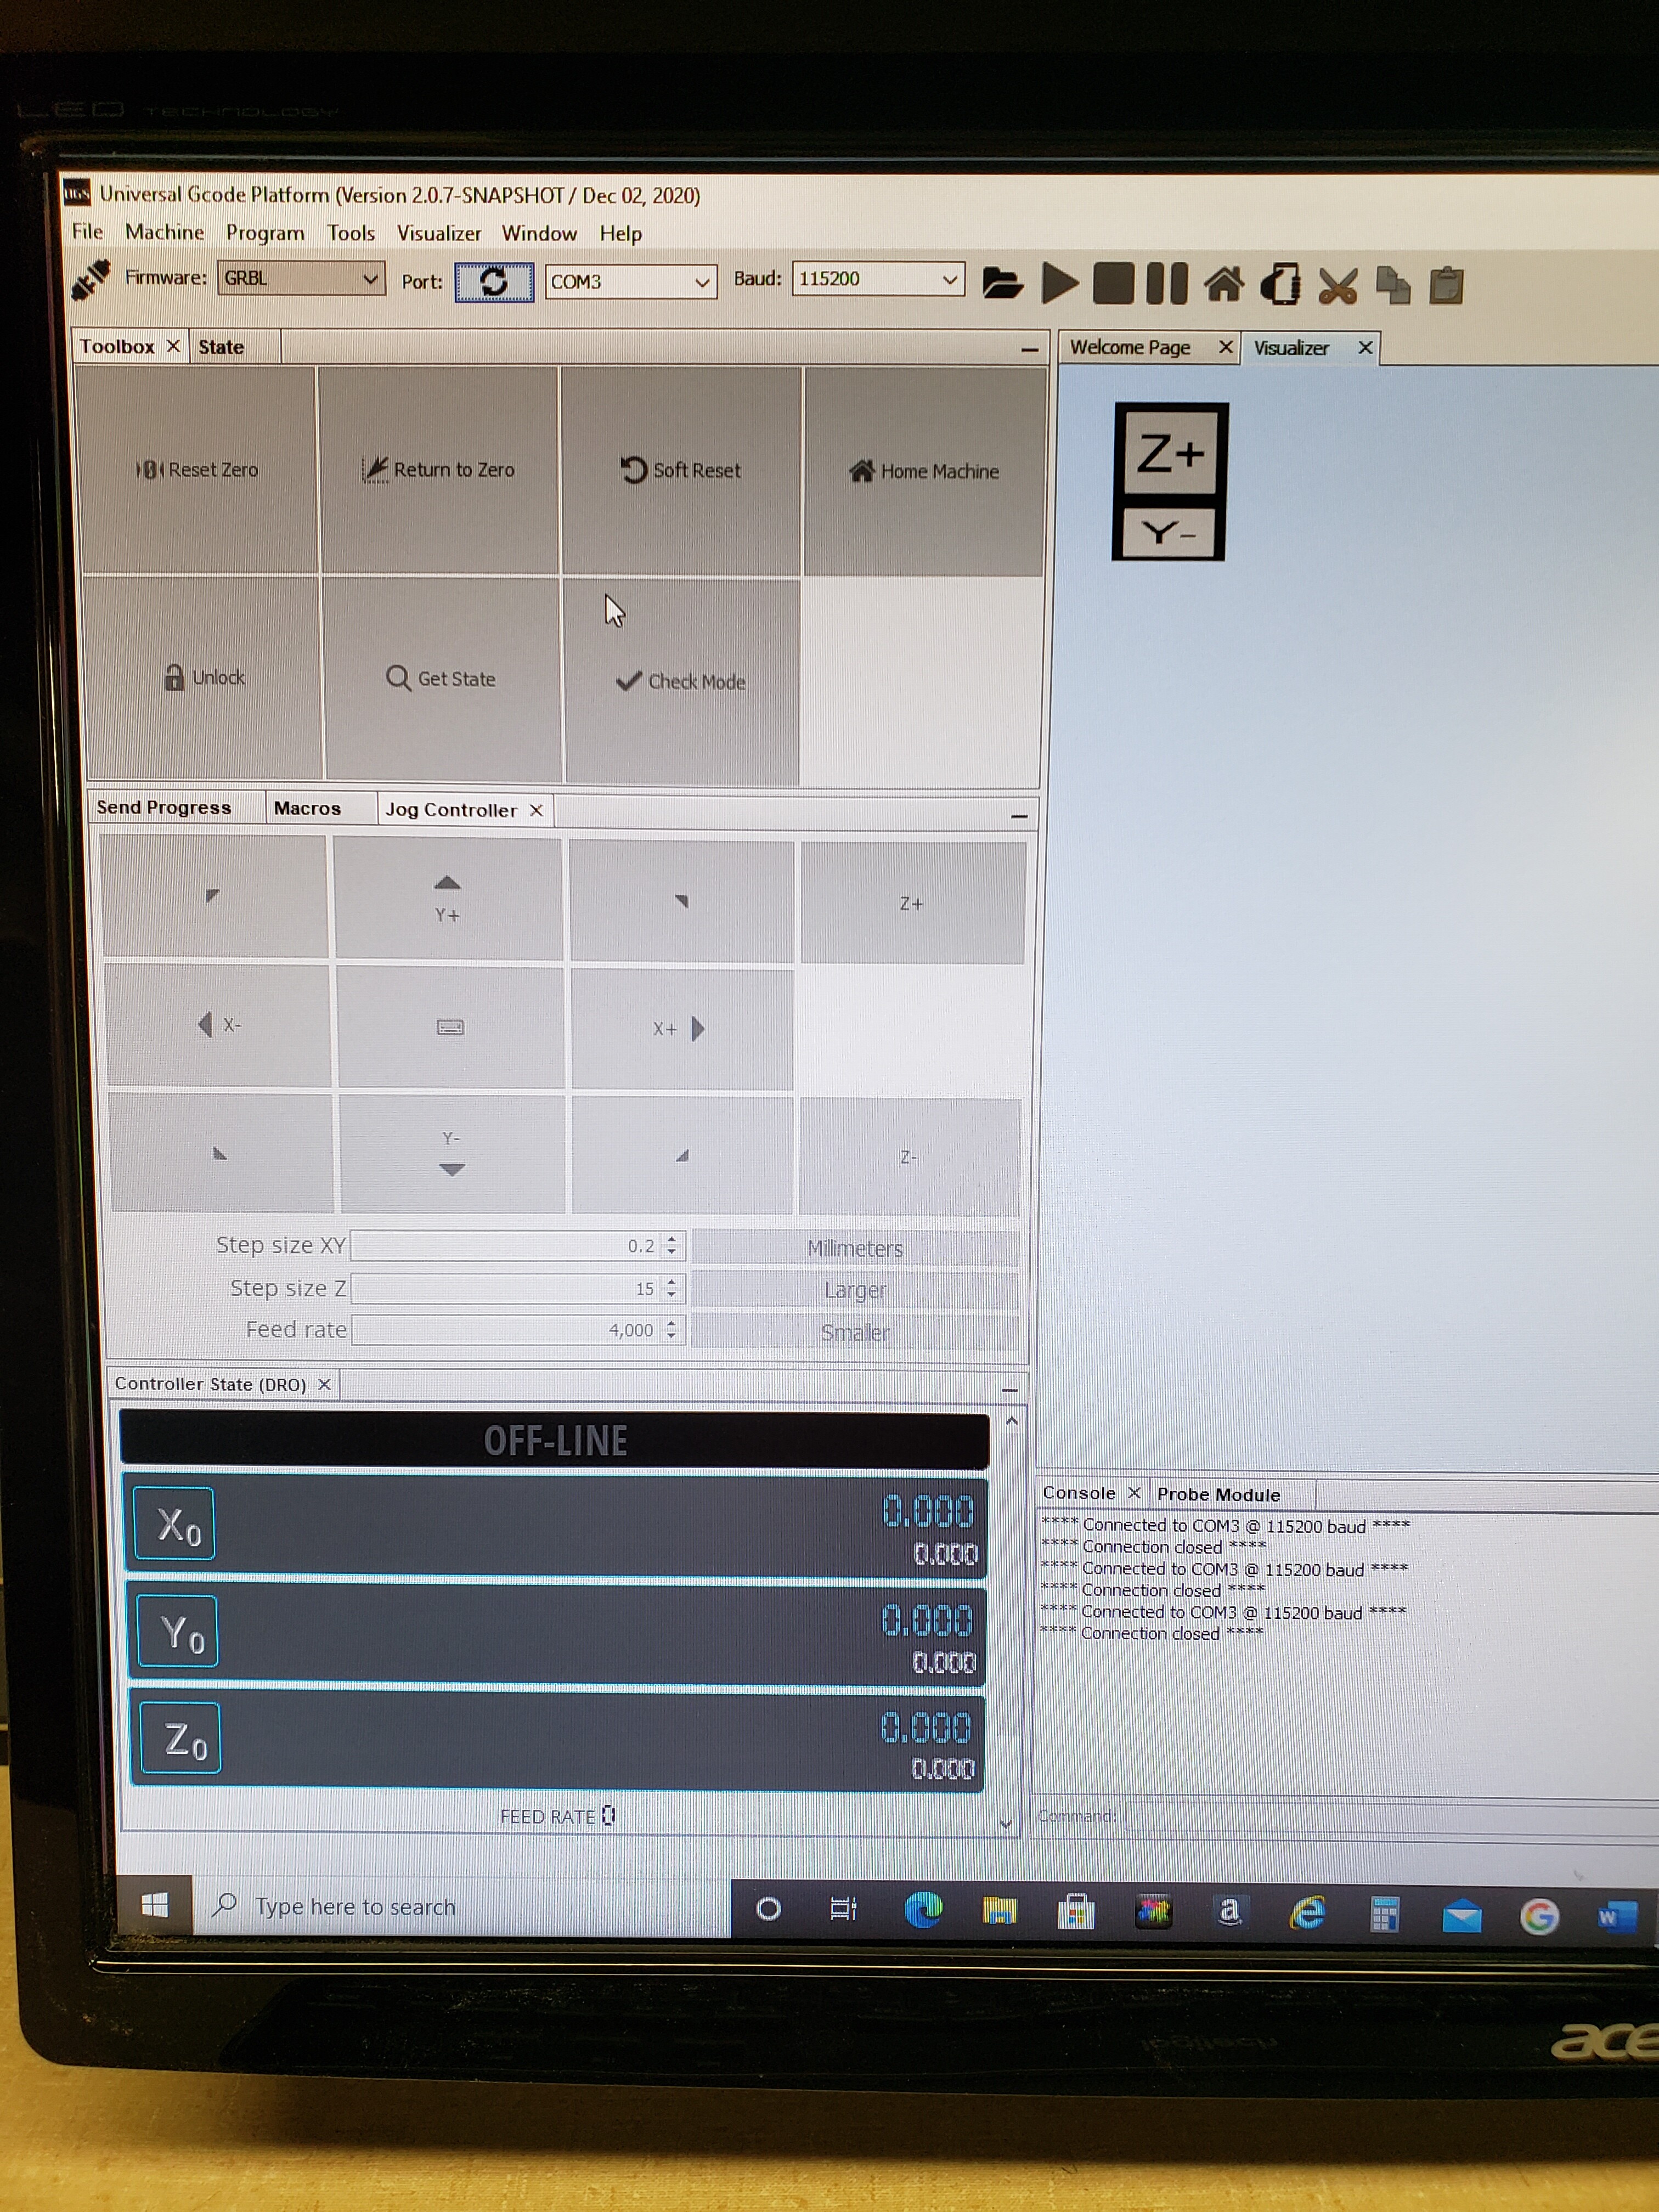
@oxbowbob When you click on the “connect” icon, just to the left of the word "firmware’, what happens?
Since you mentioned that the USB connection at the controller was sloppy, you may want to try wiggling it (technical talk - sorry) to see if you can get a connection.
@oxbowbob I can see that the connection icon in the upper left is orange, showing that you are connected. I can see in the console window that the last line says that you are connected to com4 at 115200 baud. Click the “soft reset” button. What happens?
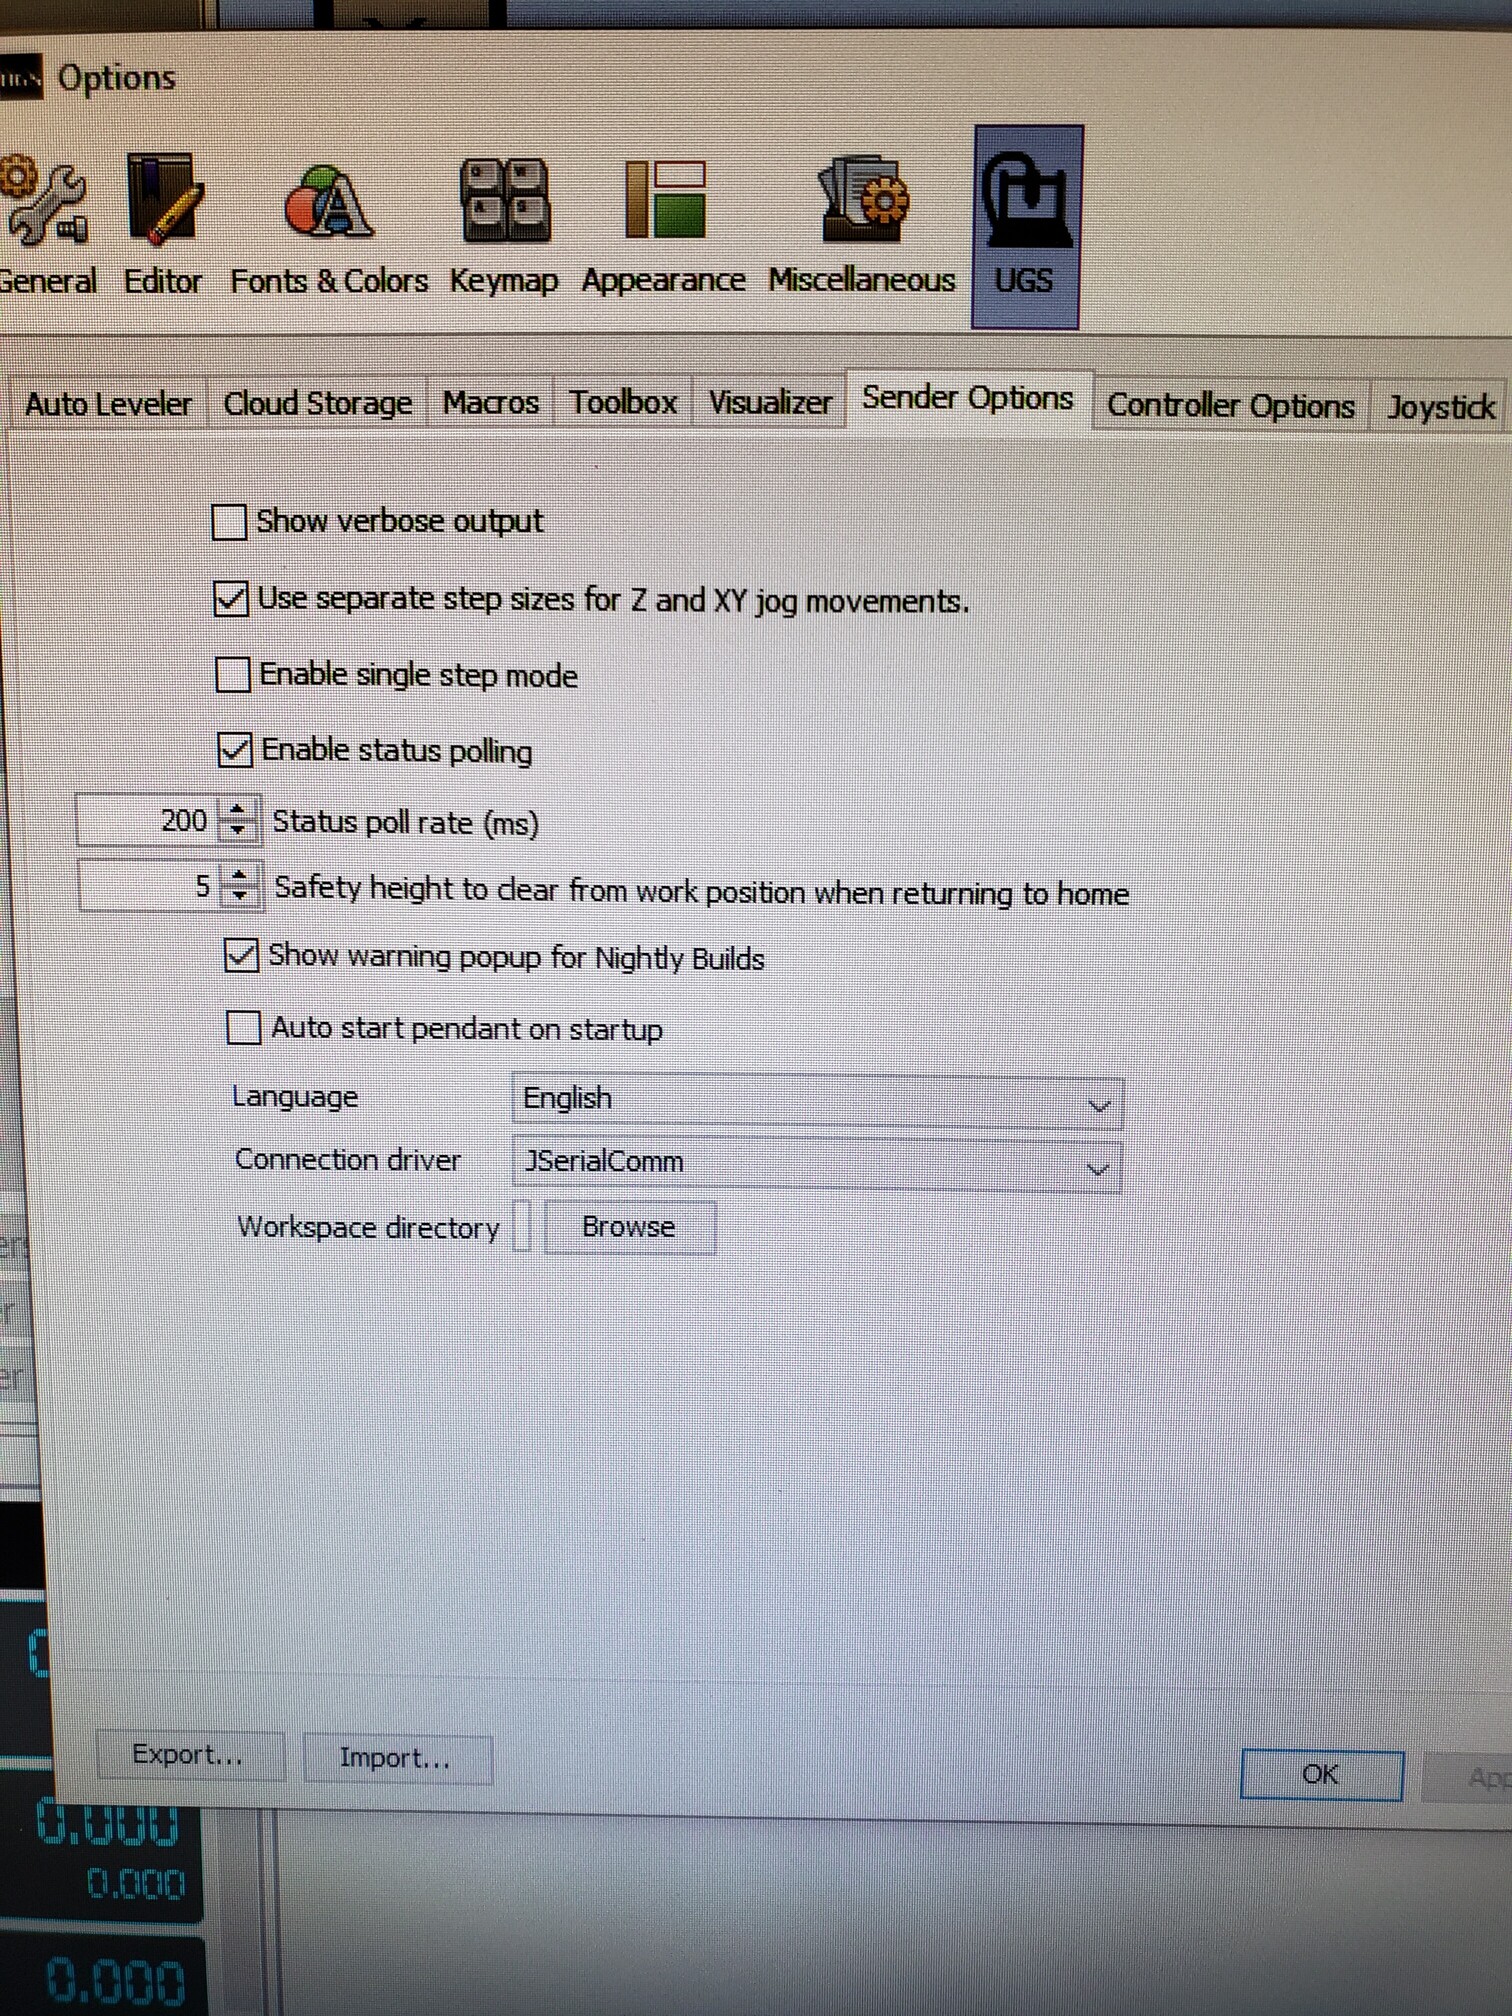
Also, in UGS, go to tools, options, ugs, sender options. Make sure that the connection driver is set to JSerialComm.
@oxbowbob Damn, Bob. I’m running out of ideas here. This is a hail mary. Try changing the connection driver to jssc. Then click the disconnect button on UGS and close UGS. Power off the controller. Then power on the controller and fire up UGS.
I’m not confident at all that this will make any difference. I can’t get my head around the fact that this has worked for you. So, what changed?
I’ve posted the issue to the UGS Google Group. With luck, someone much smarter then me will have a solution.
I have no idea what could have changed. Could it be that the stopping issue was something that was on it’s way to breaking and now decided to quit? That’s just too much of a coincidence.
I watched a video where Chris was talking about some people were worried about breaking their machine when they first get them. He said not to worry about it …“we have never broken one” … and then here I come
Thanks for posting that. This thing takes up too much room to just be a conversation piece.
Hmmm…just this minute when I turned off the controller I got one of those quick notes on the bottom right of the screen. Said “USB device not recognized”. I turned it off and on a bunch more times but didn’t get it again.
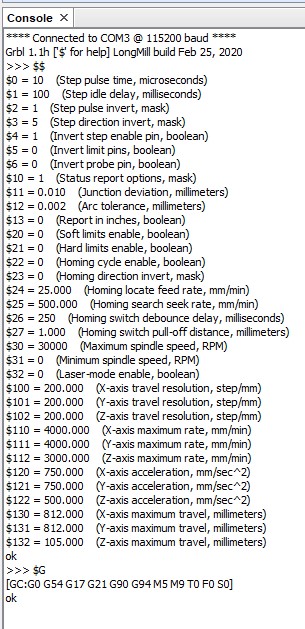
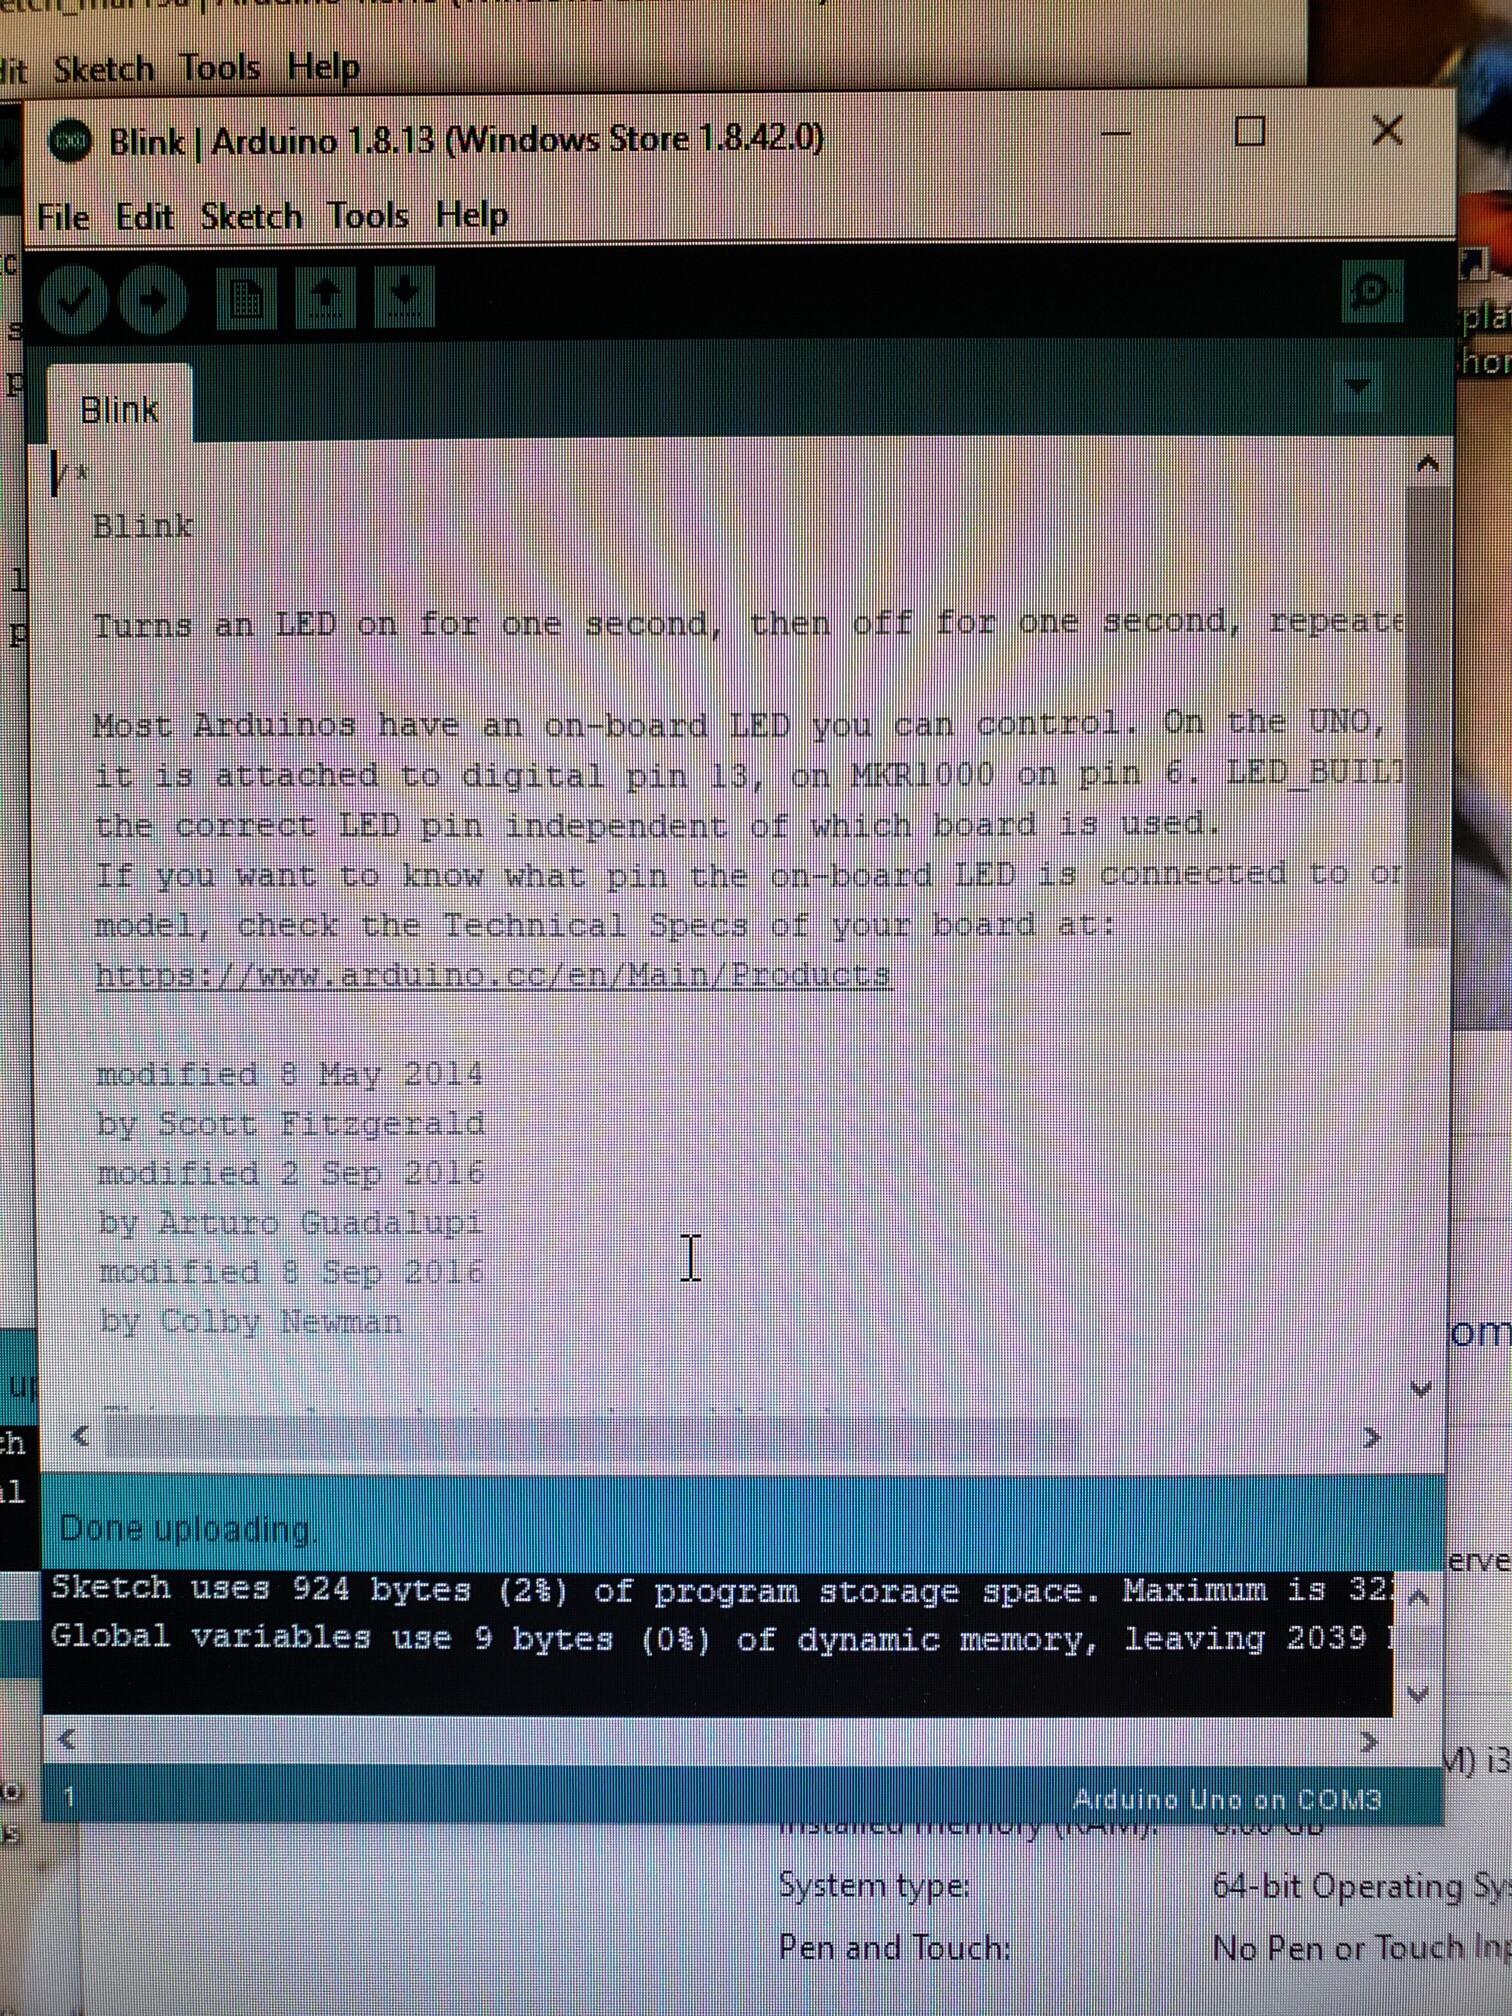
@oxbowbob I got a reply from Joacim on the google board. He saw right away something that I missed. You are not getting the grbl “welcome” stream in your console window. After the connected line, you should be getting a line showing the grbl version you are running, then all the grbl settings. It should look like this
Since you are not seeing that, I suggest you start by re-installing the arduino uno driver. In device manager, you will see the uno listed under whatever com port it is using. Update the driver, or uninstall it completely and let windows re-install it. Make sure the controller is off when you uninstall it, then turn the controller on and let windows re-install the driver.
If that fails, I would suggest that you flash the Arduino with the newest firmware from Sienci. Maybe, somehow, your board has gotten corrupted. Here is the link to the firmware and the flashing instructions:
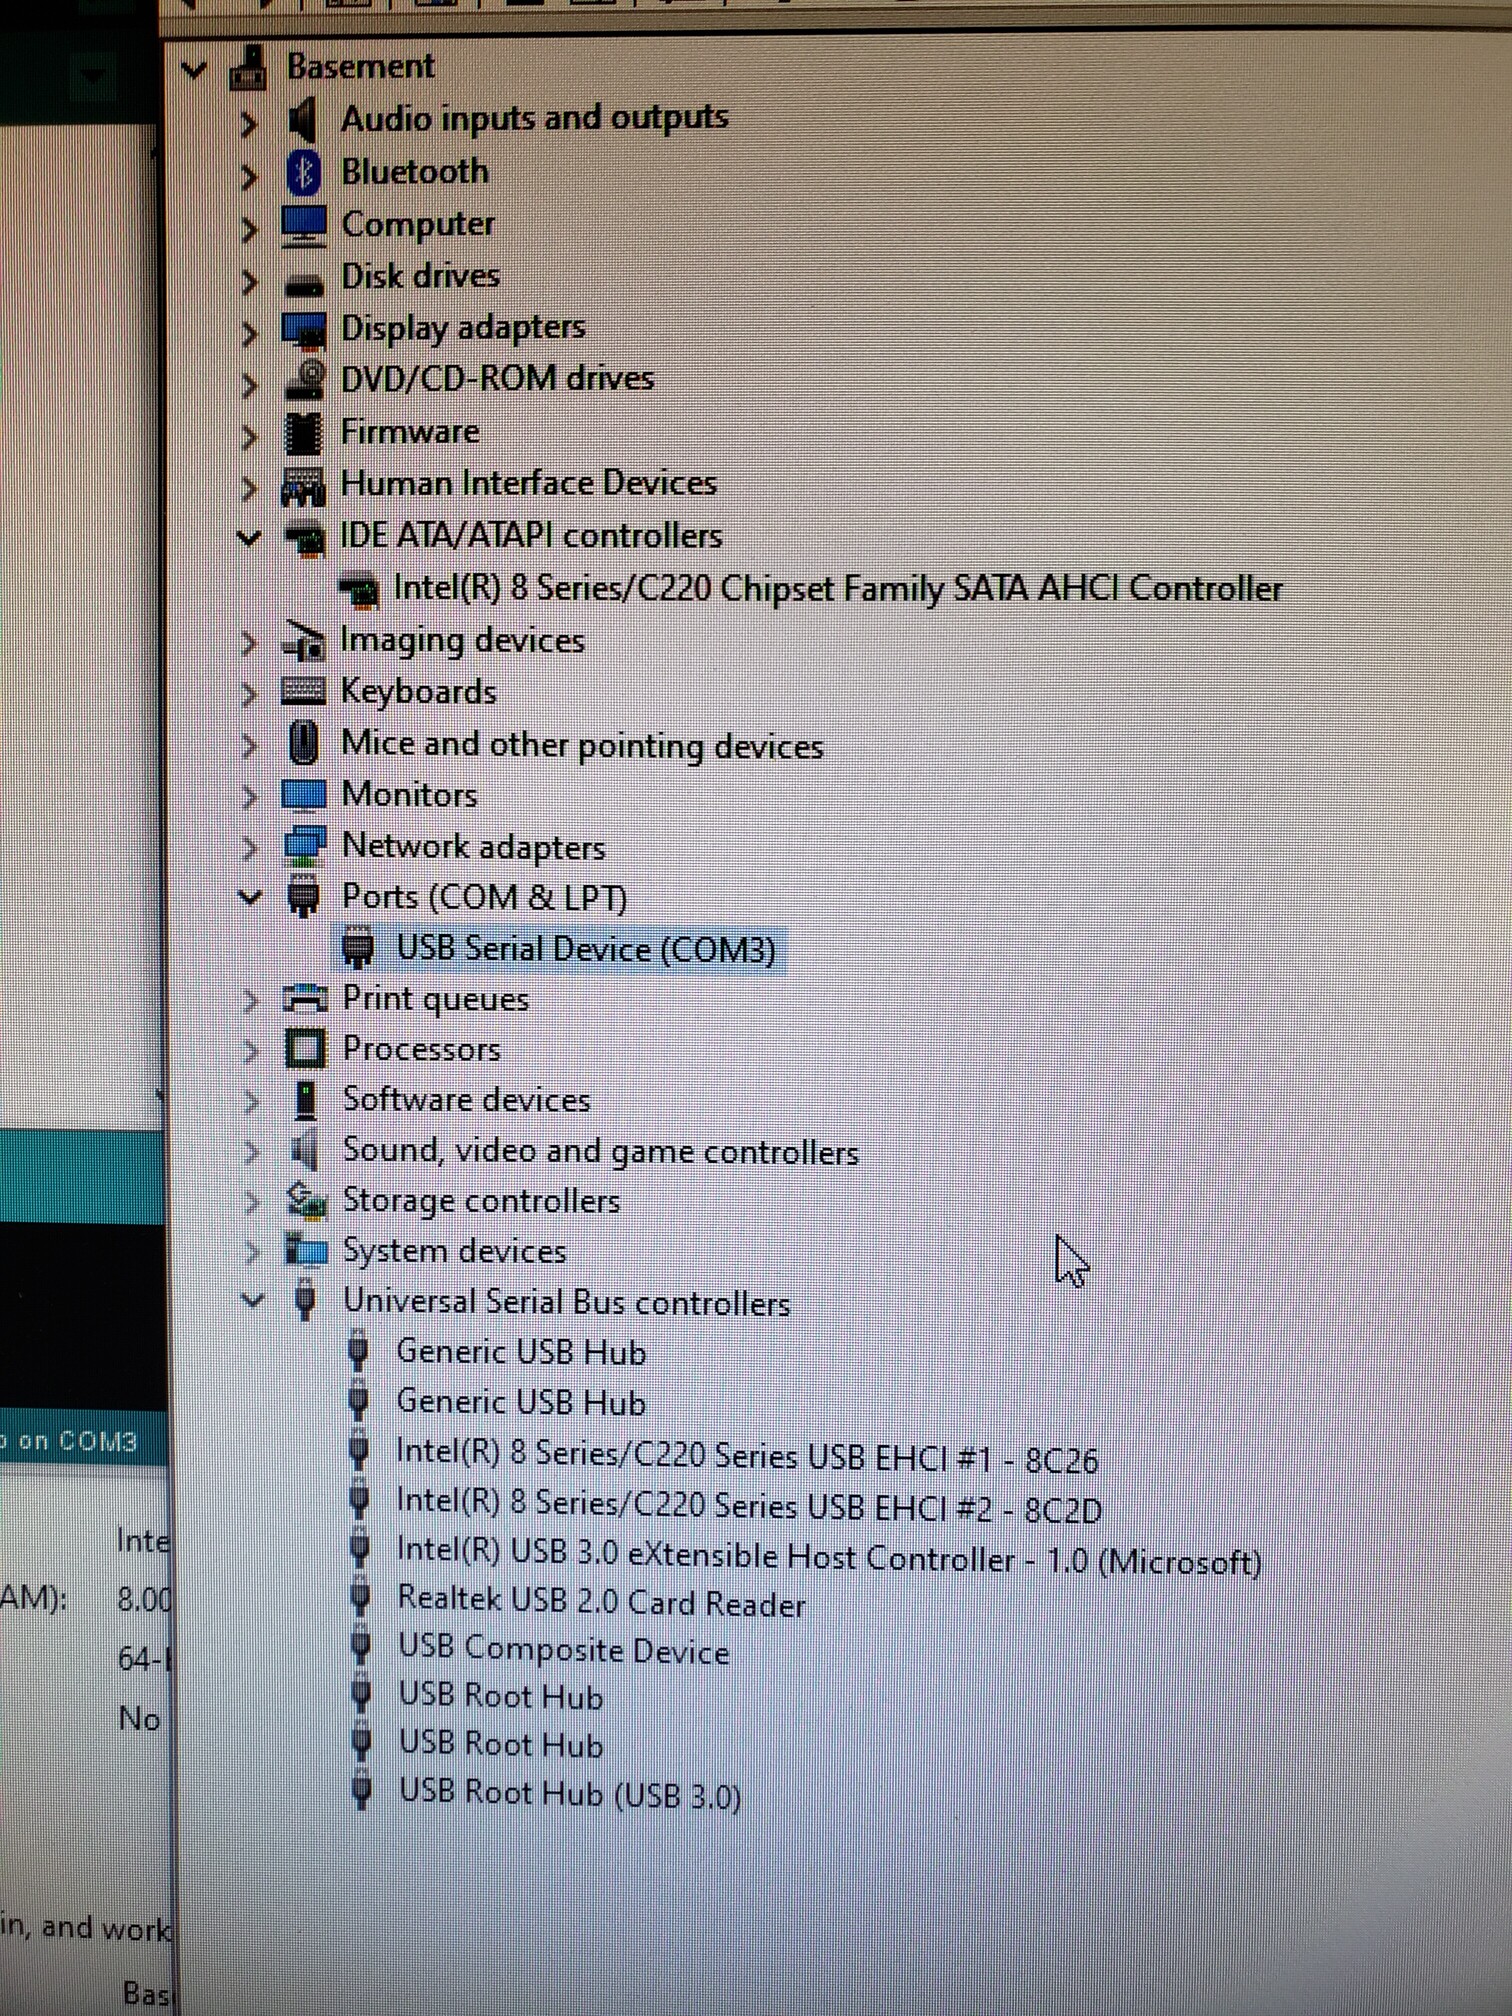
Well right off the bat I’m not sure if I did this wrong because I couldn’t find what it told me I should see. Under COM & LPT I did not have “Arduino UNO”. I only had USB Serial Device - COM3 & didn’t have “other devices”.
SO …While that screen was up I unplugged the controller. USB COM 3 went away. Plugged in controller in. USB COM3 came back. I deleted USB COM3 and plugged the controller back in. Got a new device message and conformation new drivers were installed and device was working. USB COM3 came back.

 I have to start somewhere. May as well be moving the PC. I would like to say that the whole first surface job was done before I had the 30’ cable. I only had an extension cable and used a USB coupling between 2 cables to run that surface job.