Hi all. In preparation for my new Long Mill, I’ve been looking at gcode senders. There are quite a few, like Universal G-Code Sender, Source Rabbit, Candle, etc. I was reading the GRBL docs and read that the GRBL team highly recommends UCGS.
UGCS is an easy install, especially if you have Java already installed. It will start up and load a file, and you can make some config changes, but to simulate a machining operation you need to be connected to a machine. I found out it’s pretty easy to simulate a connected machine before your machine arrives, and I thought the process might be of interest to the other anxious waiters.
Since the controller for the Long Mill is an Arduino Uno, you can convince UCGS you have a machine connected by simply flashing GRBL onto an Uno, and connecting it via USB to your PC. Now you can watch UCGS send the G-Code commands as if it was routing for real. I think now is the better time to learn how it works than after your Long Mill is assembled!
You can buy an Uno for <$20 at Adafruit.com or Amazon, and instructions for installing the Arduino IDE and flashing the Unu, and a ton of useful info about GRBL, are found at Home · gnea/grbl Wiki · GitHub.
If you add LEDs to pins 2, 3, 4, 5, 6, and 7 of the Uno you can see how direction and move signals are sent. Put a 470 ohm resister in line with the direction signals (5, 6, and 7) since they either on or off. The step signals are very short and if you put resistors on line the LEDs are hard to see.
And, if you put normally closed (NC) switches on pins 9, 10, and 12 you can simulate homing switches.
After I did all this I discovered that GRBL does not like some things, like the M6 command, that Fusion 360 adds to the standard GRBL post file. If you get this you can delete it from the file, but better yet is to tell UCGS to ignore it in the future when it asks. I understand the latest post configurations from AutoDesk eliminate this added command. Glad I caught it now.
I hope somebody finds this useful. Hve fun.
@BillKorn: Knowing nothing about arduino, I searched locally for the uno. Can you pls tell me if this one will do what your are suggesting?
https://www.active123.com/A000066-Arduino-Uno-R3-Board-Prodview.html
thanks much
I would highly recommend looking a cncjs as well. It is updated regularly and the layout is easy to use.
@BillKorn: I’m in Canada. ADAFruit is in the US, as you likely know. I looked on their site and as usual, the shipping cost of the board is more than the cost of the board itself. By the time I add in shipping and convert the price to Candian dollars, the one that I linked to is much cheaper and the store is local.
Tks .
@gwilki another ‘local’ canadian retailer is buyapi.ca also has Arduino stuff. I bought a bunch of Raspberry Pi stuff from them over the years.
https://www.buyapi.ca/product-category/arduino/arduino-boards/
I have also bought a bunch of stuff from Adafruit which is an excellent open source / hardware company. Shipping is always a killer, a couple of ways around it I have found over the years is using digikey.ca which is an electronics parts supplier our of the US with free shipping over $100 canadian including covering the import duties. Also buying from the UK is sometimes cheaper too with no duties on any of the orders I have placed, including stuff from Adafruit. (pimoroni.com, modmypi.com, thepihut.com). It all depends on which site has the all stuff I am looking for so it’s a single shipping fee.
@BillKorn this is exactly something I was hoping to do, thank you very much for this post.
This will help me play with a bunch of different gcode senders I have been looking at for performance on a Raspberry Pi 3 B+, wireless keyboard and a 4" HyperPixel display I purchased from buyapi.ca.
The ones I have been looking at are:
- Universal Gcode Sender
- CNCjs
- bCNC
You dont need any of that stuff guys. G Code sender platform is good and after that figure out what program you want to use. I understand wanting to play around but you don’t really need grbl and stuff. Its already set up as far as I know.
Yes I agree there is a lot to learn but its way easier to learn with the machine in front of you. For me I cant learn a lot just by messing around with the software. I need to design a project and learn say a program like easle or if you like fusion 360 and draw it out first. The gcode sender will make the machine do what you want it too to a certain extent. One thing I am learning is if you want to cut say a square ring out of mdf how do you make that happen without making the waste in the center sawdust. LOL. I figured that out and its in the commands you give the program in the cuts you want it to make. Once you figure out that you need the machine to create a groove inside 3/4" from the outside of the edge of the finished piece you click on that and make that a cut through. That eliminates the need to cut the whole center into sawdust. Wasting all that material. Can save the inner waste for another project. The pieces I was trying to cut yesterday for a client were 24" square mdf. He needed square rings 23.5" across 3/4" wide. I couldn’t think of how to do it in front of the machine and him. But I did just morning thinking about it in my head.
@GregsReinventions What I am hoping to learn with this is the performance of different gcode senders running on the Raspberry Pi with a 4" screen on it. From what I have read the web based gcode senders can have some performance issues, but are more customizable in the interface than Universal Gcode Sender. I also want to see how they all work with a wireless keyboard and possibly an XYZ homing plate.
I will have my LongMill in the garage and don’t want to bring out my laptop every time I am running a job for the full length of time. I used something similar for my 3D Printer having a Raspberry Pi running OctoPrint, but the start of a job on the CNC is a bit more involved than on the 3D Printer.
With some of this testing I can hit the ground running and hopefully run into less snags after I get it setup this summer.
Man that sounds really complicated. Way beyond me. I like raspberries but not in pie LOL
That should work really well for you.
You too. Sounds like your going to have fun with it playing it like a video game LOL.
This looks really nice. I’d be interested in the Fusion 360 file if it’s still available.
Thanks,
-Jeff
I think there is a small amount of activity over on the Facebook discussion too, but I’m not on Facebook and won’t be joining. I’d certainly prefer if all the discussion migrated here but I guess we’ll see what happens as machines start shipping.
-Jeff
Nice design Bill  and feel free to pass around the LongMill as much as you want, it is an open-source design after all
As an aside: I’m hoping to start migrating more conversation over to the forum since it’s a better place to store and communicate information amongst everyone.
So, my initial thought was to have this beastie (30 x 30) set up in my finishing room in the basement. After much thought, three things are forcing me to consider setting it up in the garage.
- noise
- dust
- power
To have a pc, router and vacuum (likely) all on the same circuit in the basement is just looking for trouble, IMO. A guy that’s doing my cnc work until I get my Longmill up and going said it would be in the basement for about a week and I’d be kicked out by the wife. Most of the dust will be contained by the dust boot and vacuum but if it’s in a finishing room, I think I’m just asking for trouble. The room isn’t all that large anyways and a 48" x 48" table would gobble up a lot of valuable real estate in there.
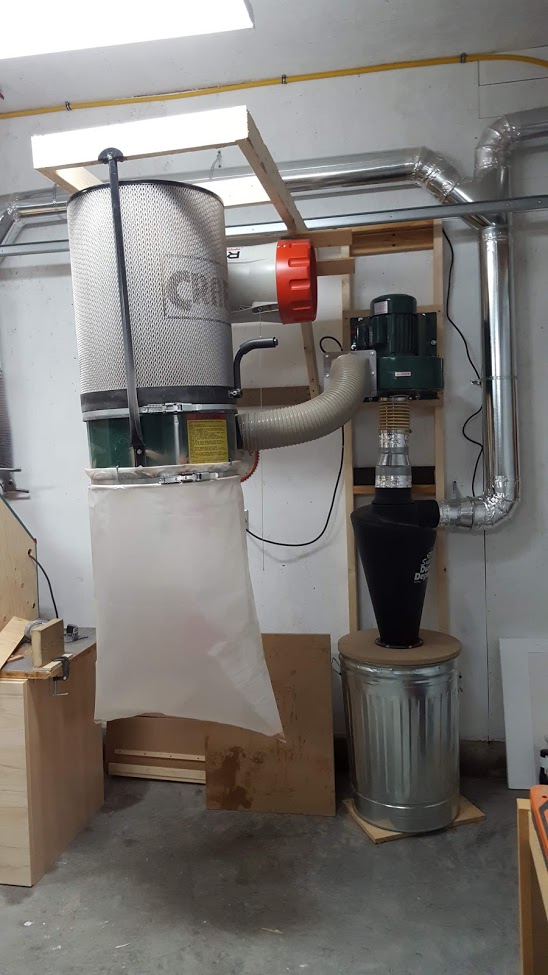
I would also suggest your expectations of the dust boot may be too optimistic depending on what materials you are cutting and your feeds and speeds. Chips and dust are necessary by-products and the boot can only do so much, and is relative to the suction power of your vac. I started out with a simple 2 HP Shopvac from Canadian Tire when I first got in to basic woodworking and the step up to a 5 HP Ridgid unit was massive in terms of noise (noise went DOWN with the bigger hose diameter and motor) and suction (way up). Even so, when connected to my track saw which is very good at containing dust, it doesn’t get everything. The router produces substantially more dust…
Regarding noise, I went ahead and used up various MDF panels I had around and built something like this to contain the vac noise: http://www.startwoodworking.com/post/how-silence-your-shop-vac
It works very very well. I lined mine with thick rubber floormats (cut to size for all interior surface) that were on sale at Home Depot one day. I can now stand beside my operating 5 HP vac and have a normal conversation. It’s actually quite plesant and the overall frequency of the larger vac is more pleasant than the smaller 2 HP one as well. If I had known all this I would have just bought the bigger unit from the outset. If anyone is intersted, I think mine is an HD1200 or similar from HomeDepot. Lifetime warranty too…
As for router noise… well unless you also build a silencer cabinet around that you’re still going to have motor and cutting noise too. I’m with your buddy, the basement probably isn’t going to be ideal.
-Jeff
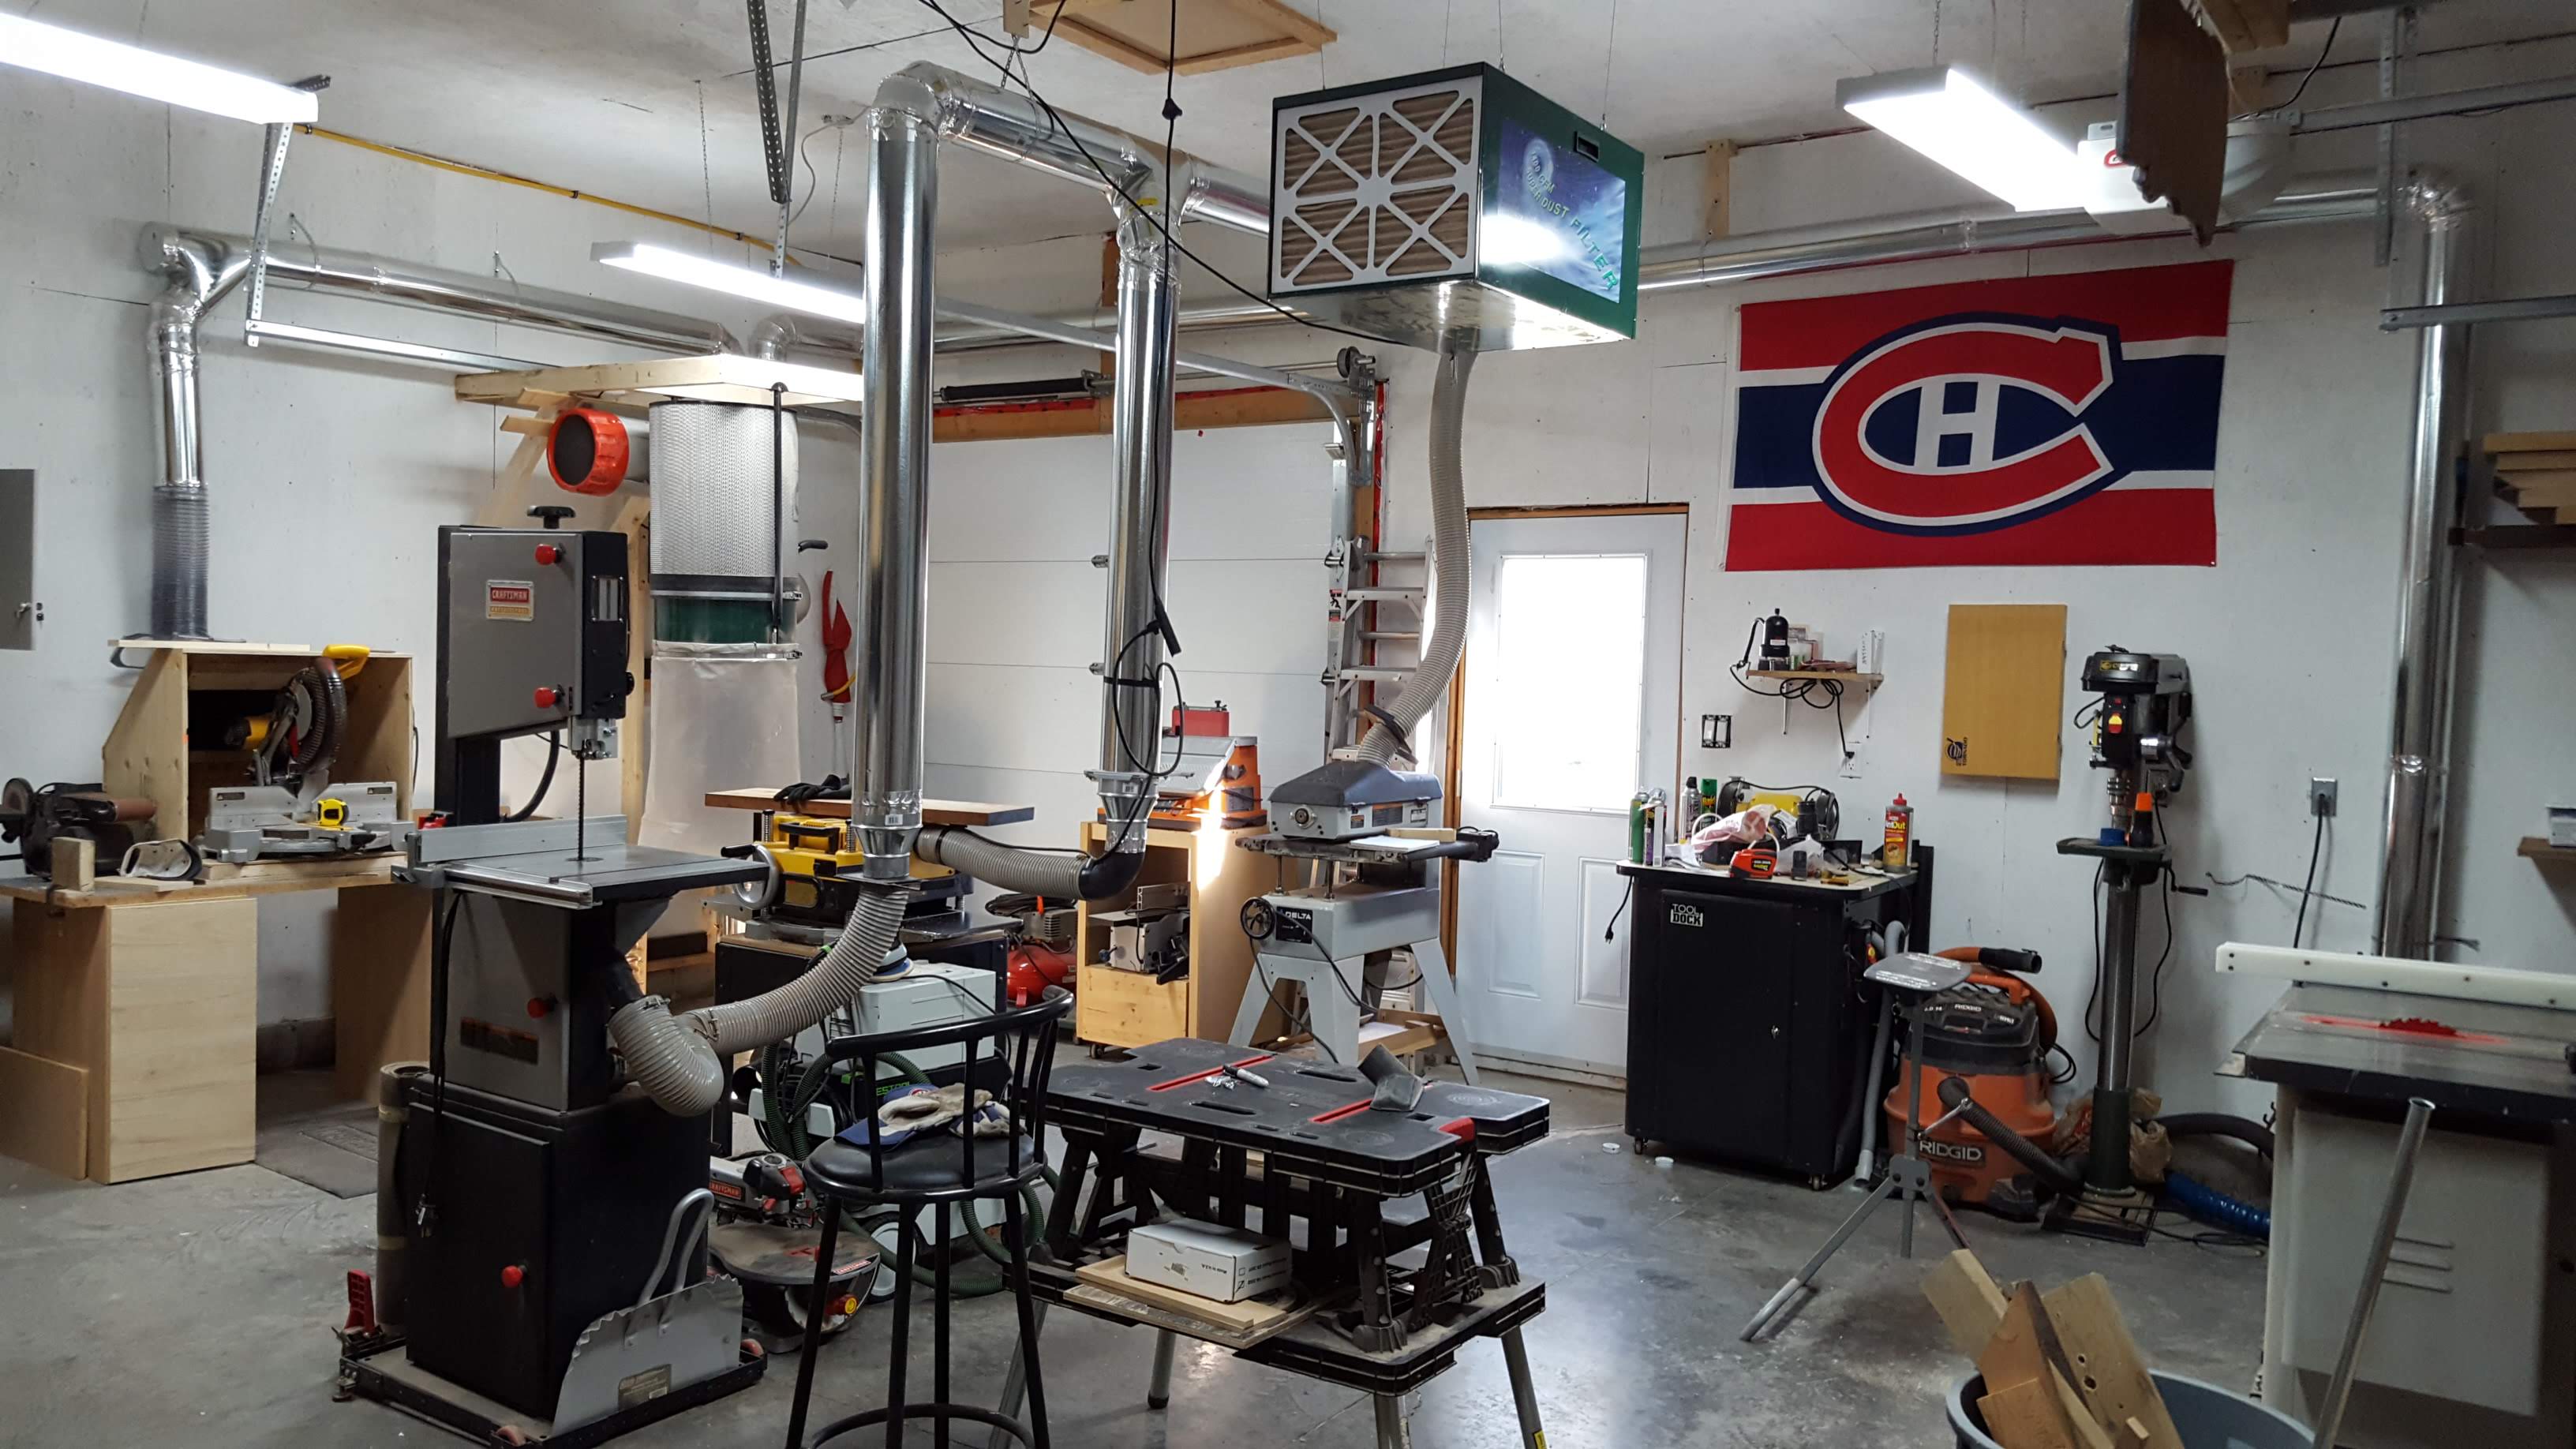
My DC setup in the garage is pretty decent, does a good job. With it and 2 air filters, the dust level is not too bad. I’ll either run an add on leg to the DC system or just use the shop vac I have, left of this setup.
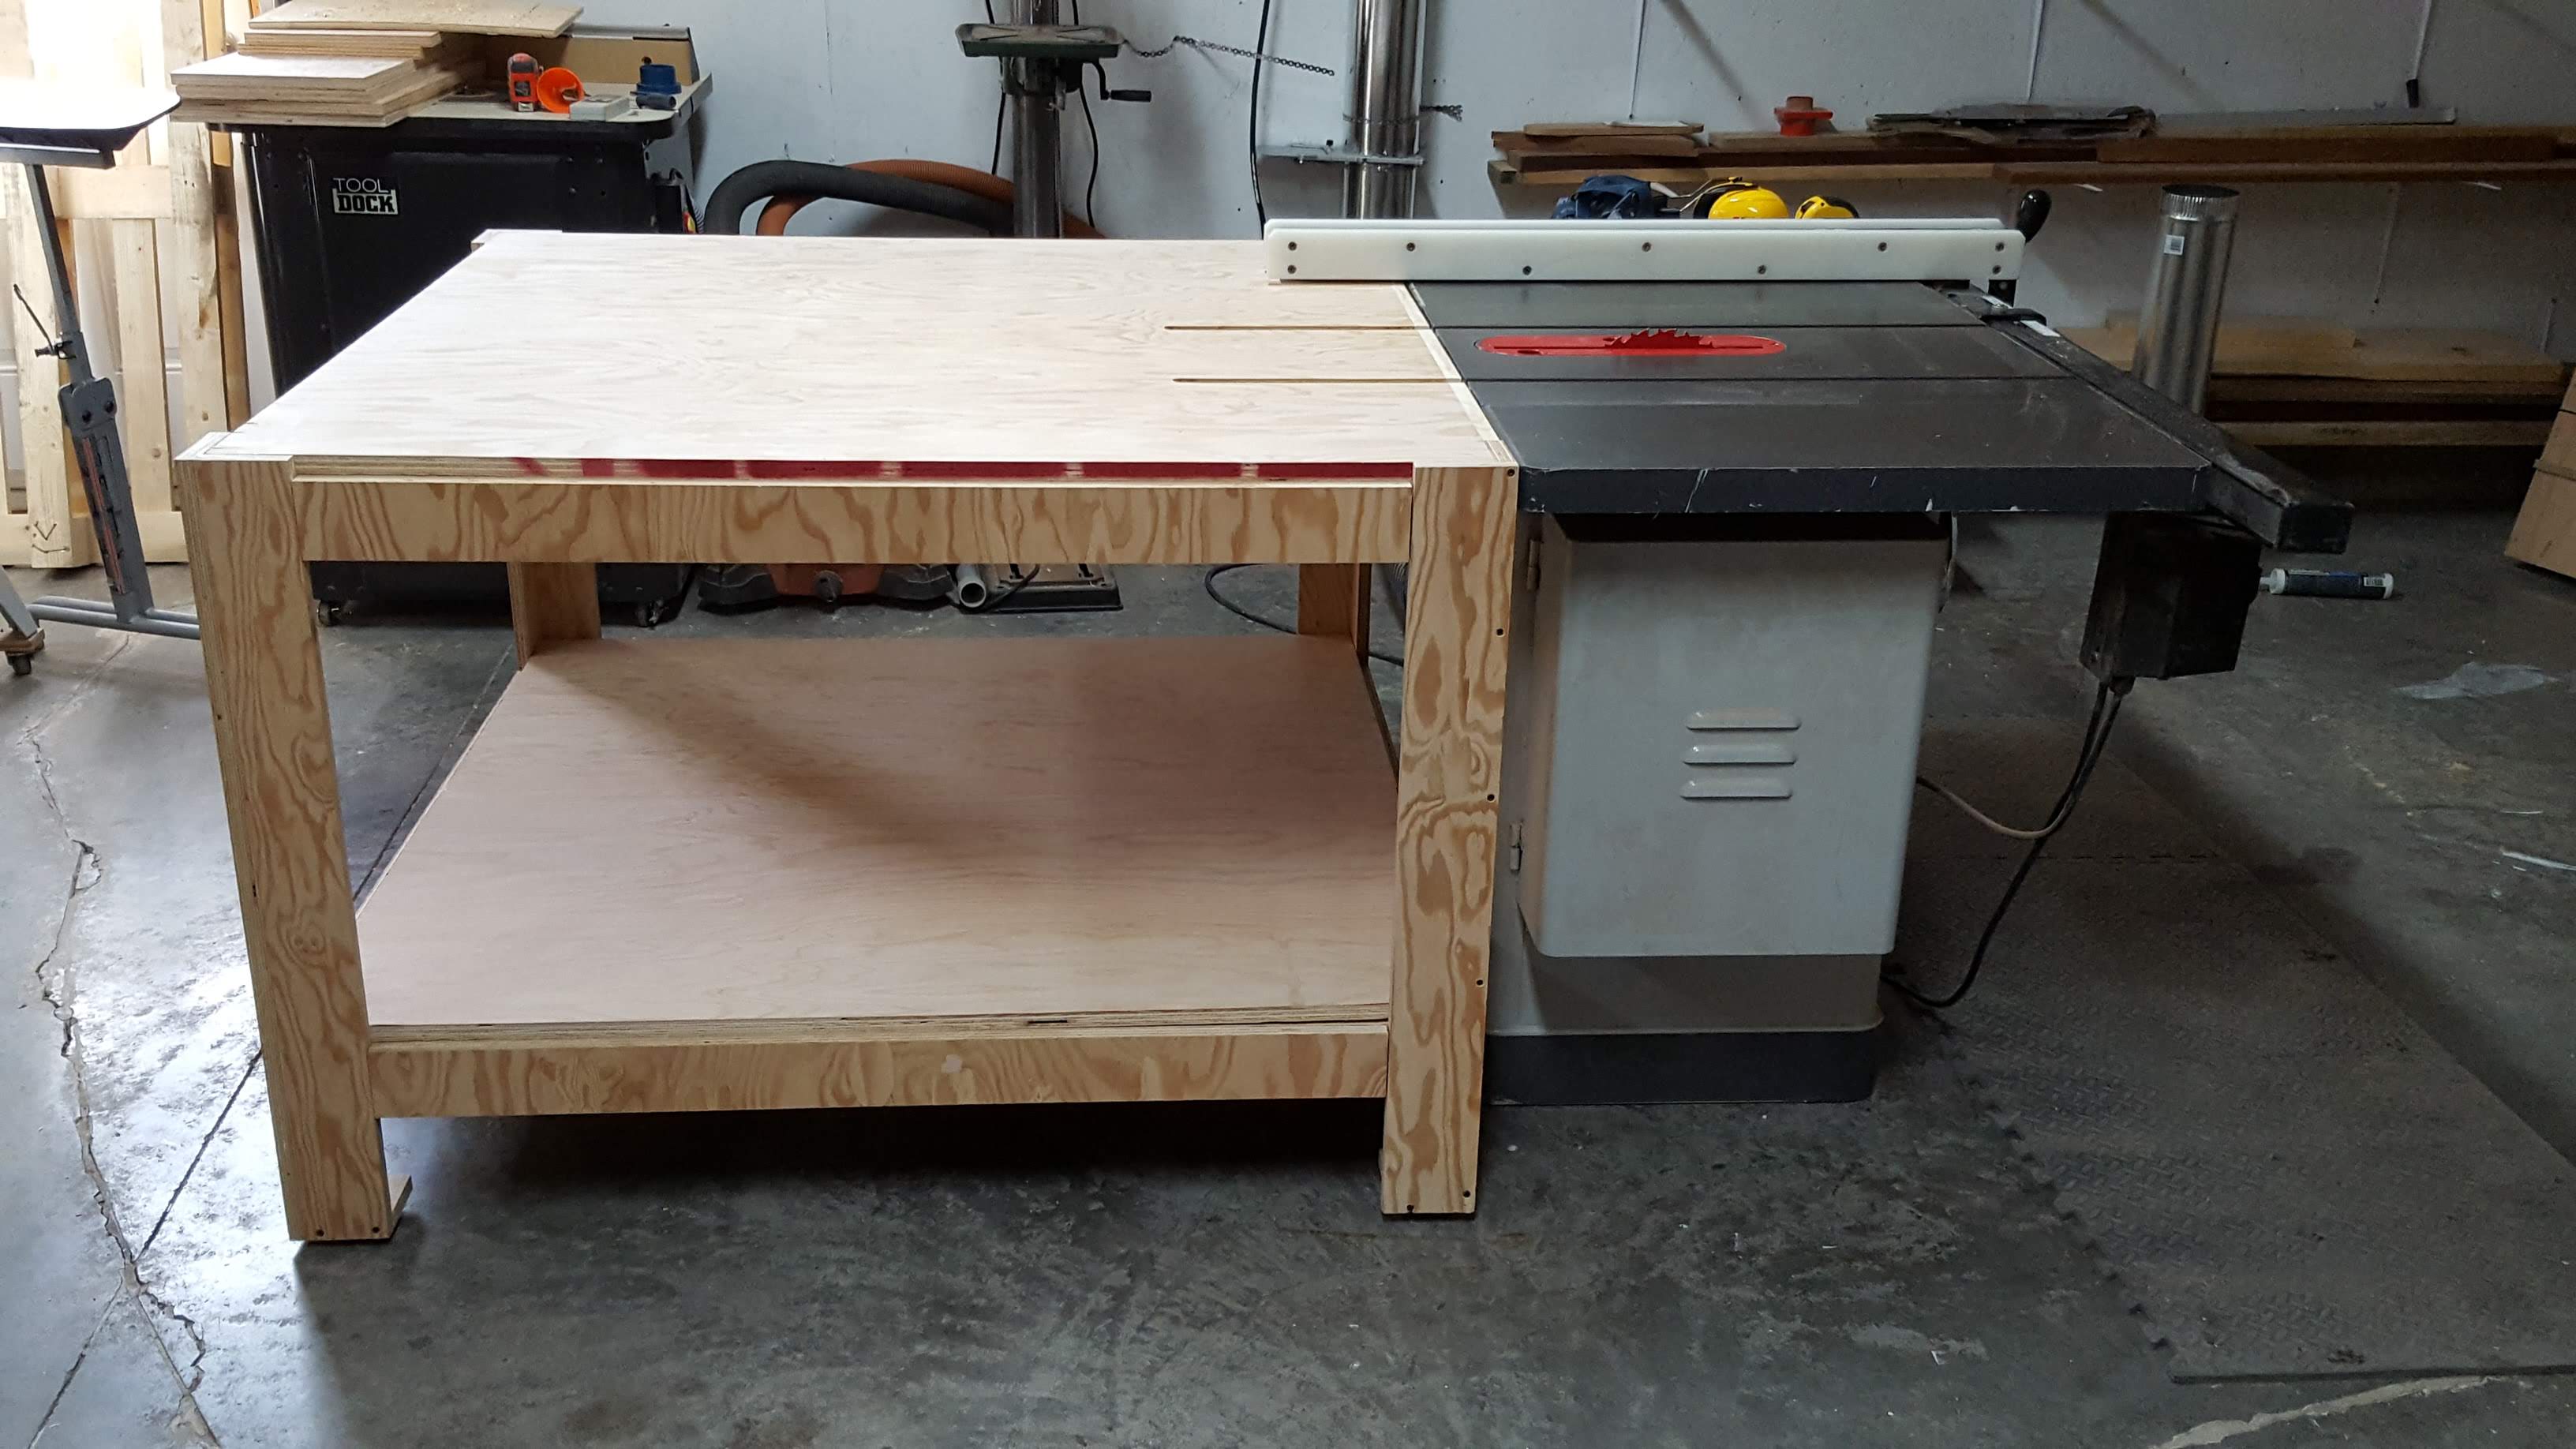
I took my buddy’s advice and started building/adding on to the existing bench in the garage. I’ll post back once she’s all done
Wow that is nice. I’m jealous. The garage here is weird. Ceiling is finished as their is a “bonus room” over it, so I’m crammed in at 8’3" ceilings. The garage doors are tight against the ceiling so no room to go vertical really, it’s made things especially tricky. To make it worse, the garage doors are 9’ wide each instead of 8’ and there is about 4" on either side instead of the customary 18" or so.
-Jeff