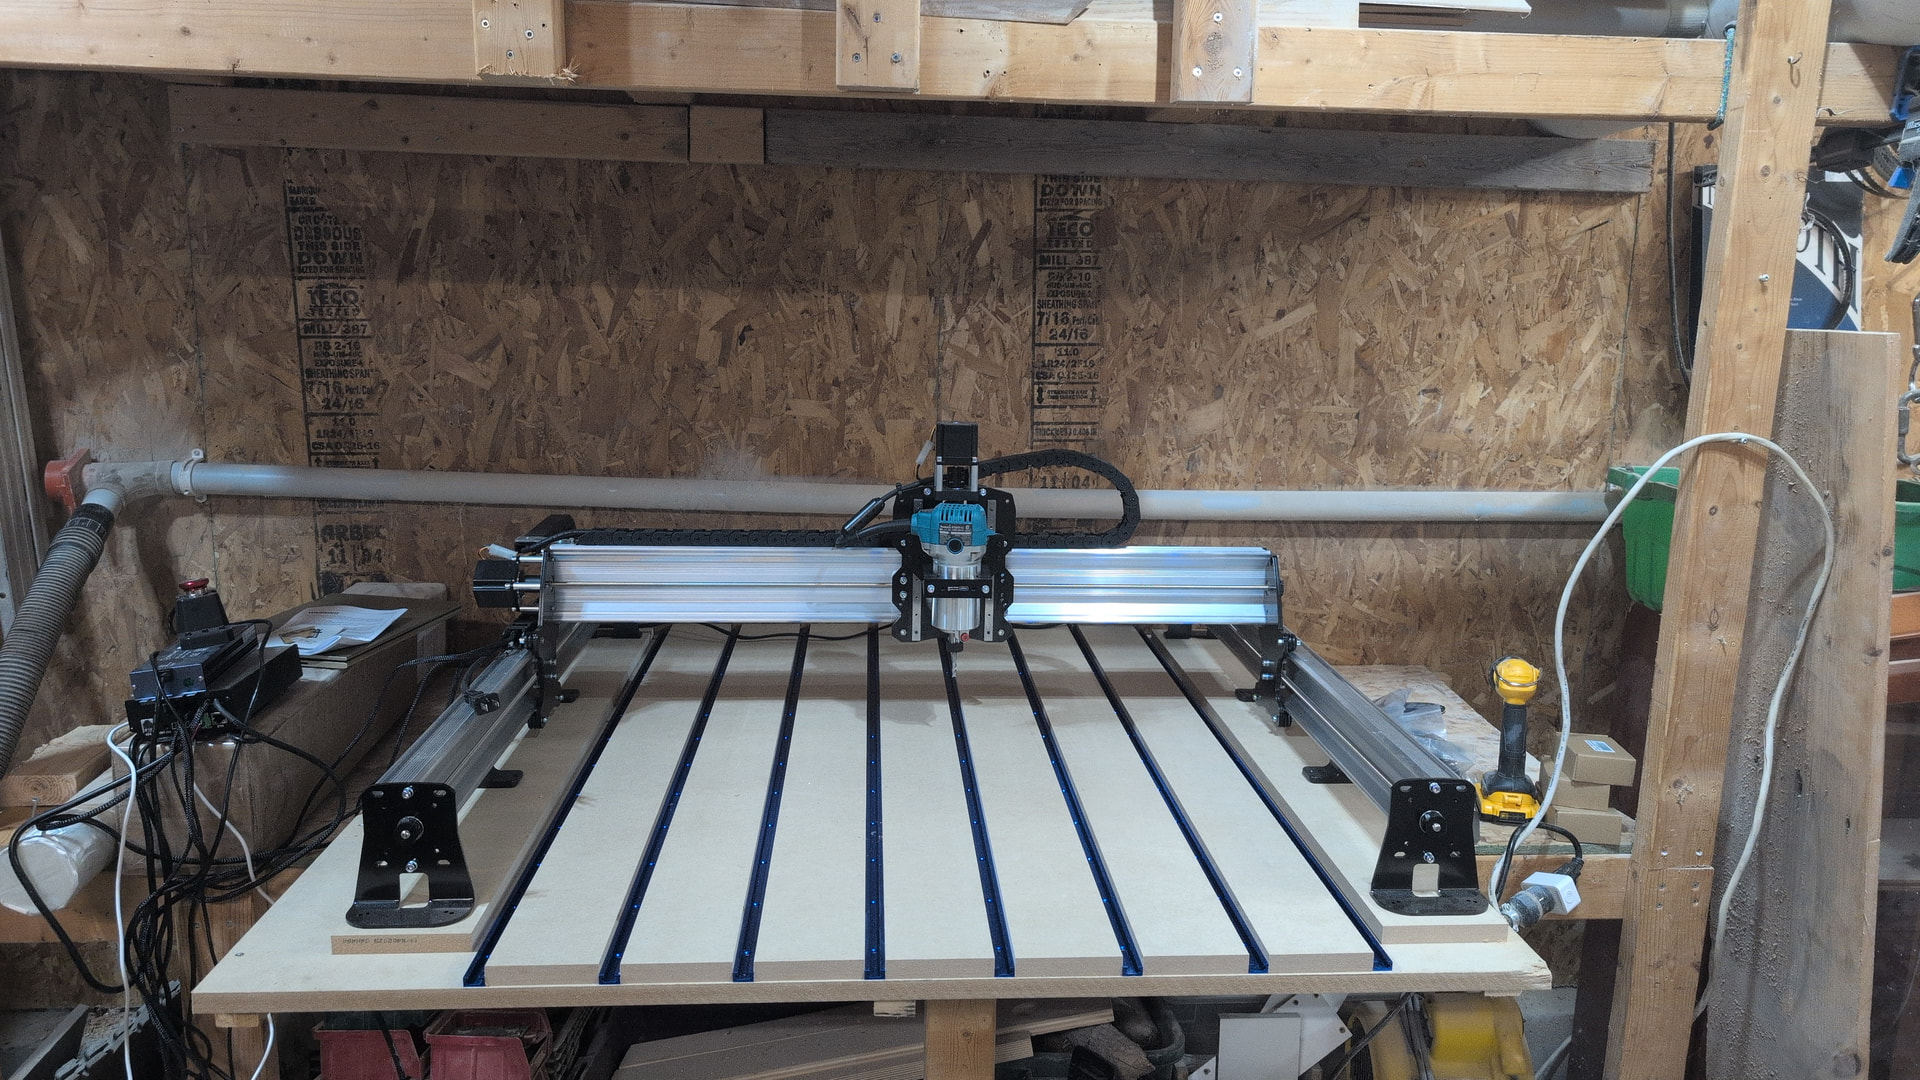
Before I secure the waste boards and t-tracks, does anyone have any suggestions and tips?
Hi Cam,
Apart from my normal ones, conserning kill swiches away from the machine (wayout-switches) I’d say, secure the wbs with screws sank below or equal the depth of the t-racks so you can surface the wbs without hitting them too soon.
I like the hightened machine mouning. Keep options open to easily heighten even more when you encouter having to lill z-reach or too thick to fit material. It’s something I am seriously considering adding to my longmill. It is mounted directly to the machine bed. If I had your strip mounted machine setup, it would have easier to implement.
Your wasteboard seems to be easy to change after this initial setup so I would say, go with it and see what you encounter that needs a changing. Everybody has different needs and you will only find those while doing the deeds.
Looks great. Congrats so far.
Oh one last tip, shower after surfacing, not before. Annnnd find a way to catch as much mdf dust while surfacing. Mdf dust sucks, so you better do away with it at the source! I have banned mdf milling with my machine all togther.
It looks like the mill hasn’t been fastened yet but I could be wrong. If the mill isn’t mounted yet are you planning on securing the mill to MDF strips and bolting the strips through a slot to allow adjusting the rails forward and back?
If you do it that way you can set it up so that’s it’s easy to square the mill back up if something happens and the Y sides get out of sync. I’m not sure if the newer LongMill’s have auto squaring now but my Mk1 doesn’t and the slotted setup allows you to get the rails just right so that moving both sides all the way back until they hit the end will square the mill.
EDIT: You can take a look at how I remounted my mill if you like.
Thanks for the tip on singing the screws at least the depth of the t-tracks when securing the WBS. Never thought of that. Will do that.
When you say surfacing the WBS, I didn’t think that needed to be done considering that it is super accurate 3/4-in MDF on super accurate 3/4-in MDF.
The manufacturing tolerances of 3/4" MDF can be up to 0.5mm which is way higher than the tolerances of the CNC machine. Add in tolerances for any deviations on what it is mounted to plus environmental changes and it can add up. That being said I have only done pretty small items so far and have not surfaced my spoil board.
I agree with you about the MDF maybe not being perfect and you don’t have to remove much to check. I did 0.5mm passes on mine and if I noticed it didn’t hit somewhere I cancelled the job and started 0.5mm lower to save time. It might have 0.25mm passes, can’t remember for sure.
That said I’ve given up on keeping my spoilboard surfaced. It just moves too much with humidity changes. I’ve adopted @Spamming_Eddie’s method of mounting some scrap for my work to rest on and just surfacing the scrap.
Somehow I was under the impression that the strip method was something to look down upon. It is the lazy way out a wee.. lot (and it certainly has the lazy looks to go with it.) Never thought it would be adopted by such respected and knowledgeable members the likes of you.
I am humbled. Lazy.. but humbled.
And tired now.. being humbled is exhausting. 
The mill hasn’t been fastened yet but I wasn’t thinking of slots that allow me to adjust the y rails.
I bought the inductive sensor kit which hasn’t been installed yet. Following the instructions says I should install them last, and I’m assuming that would eliminate a need for me to adjust a y rail forward or backwards.
Does the inductive sensor kit have a sensor for both rails now? If you have four sensors then you should be able to auto-square and having a rail a little off front to back can be compensated for in the sensor adjustments.
I bought the sensor kit for my Mk1 but it only had one Y sensor. This was before the SuperLongBoard and grbl-HAL came out so auto-squaring wasn’t an option, at least with Sienci’s parts at the time.
EDIT: I just looked at the store and it seems the sensor kit still only has three sensors. With only one Y sensor you can home but if the X gantry gets skewed you need to intervene some how to fix it. Being able to use the end opposite the Y sensor to square up means you don’t need to use a square or some other tool to fix the problem.
Now it’s too late for me because I’m down the strip road too far, but what is the alternative? One big slab?
The opposite.
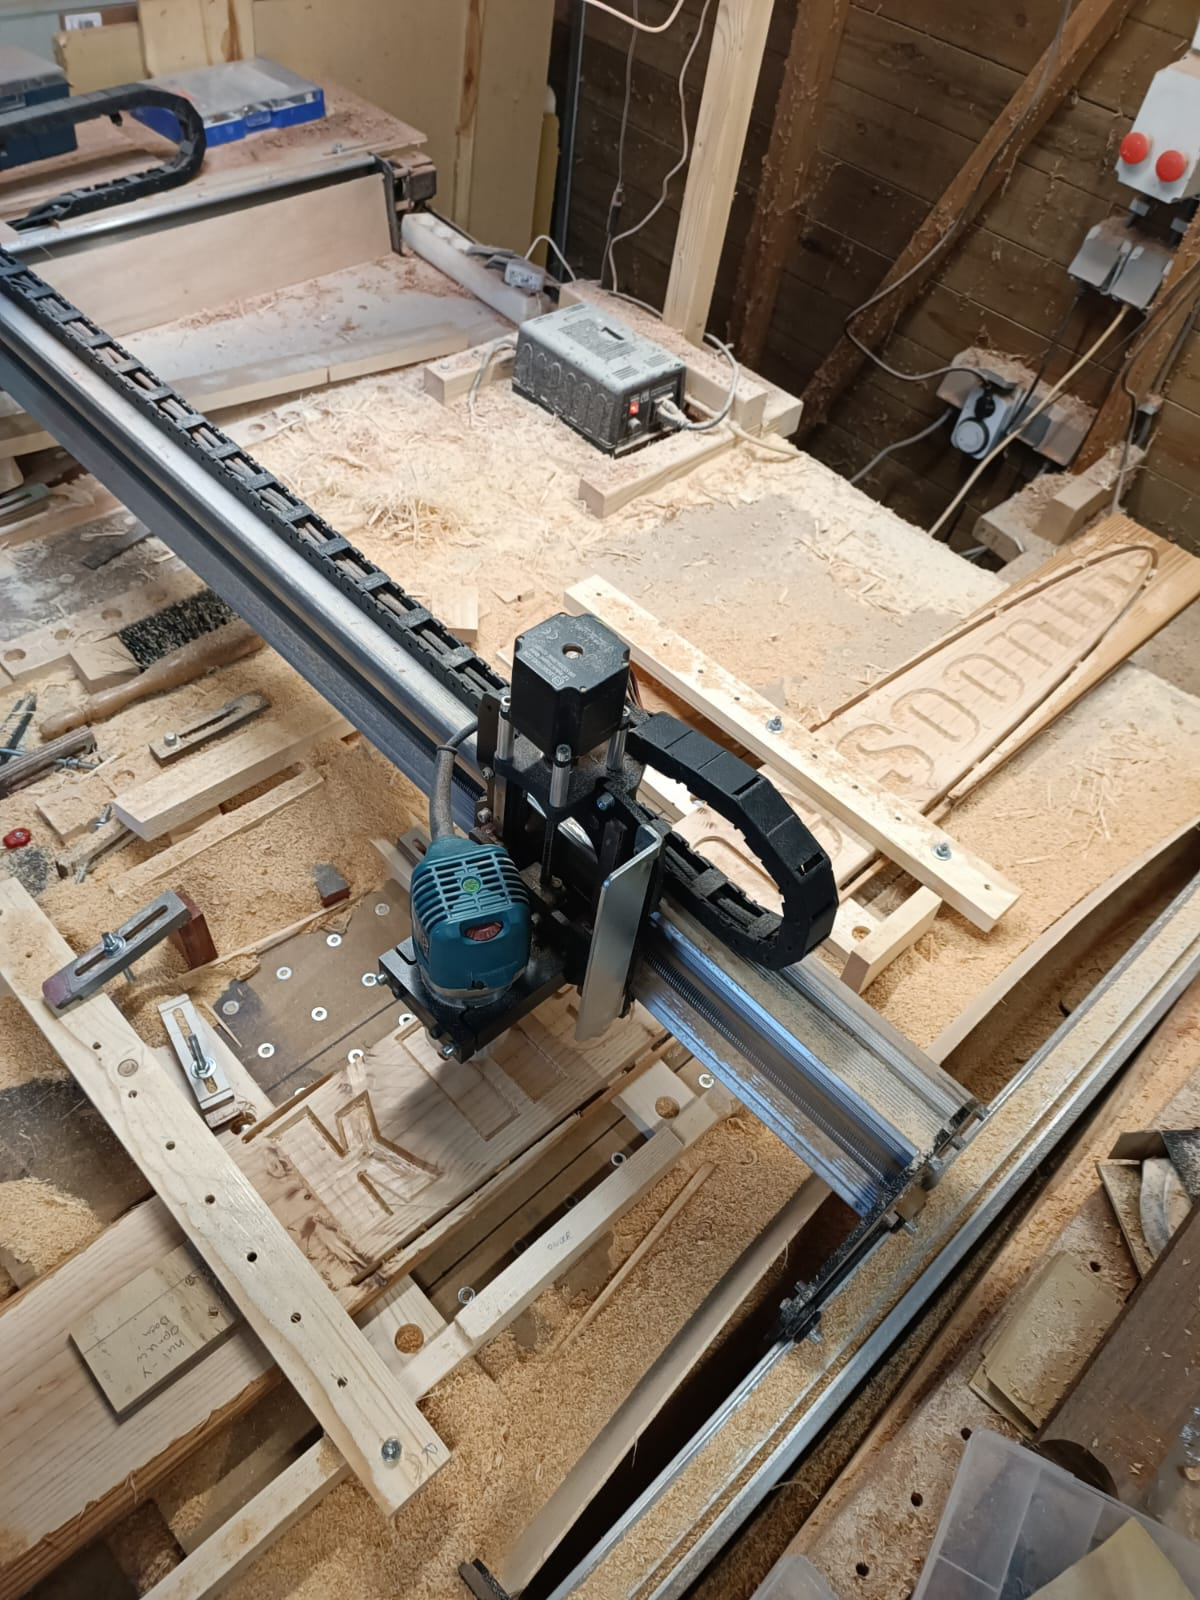
Small strips that get surfaced. My setup is insert heavy so I use strips of pine with wholes that fit my machine bed layout. There is no need for thst though. You can clamp strips and surface them as needed to support your project. Mine looks like this when in use.
And like this when not.
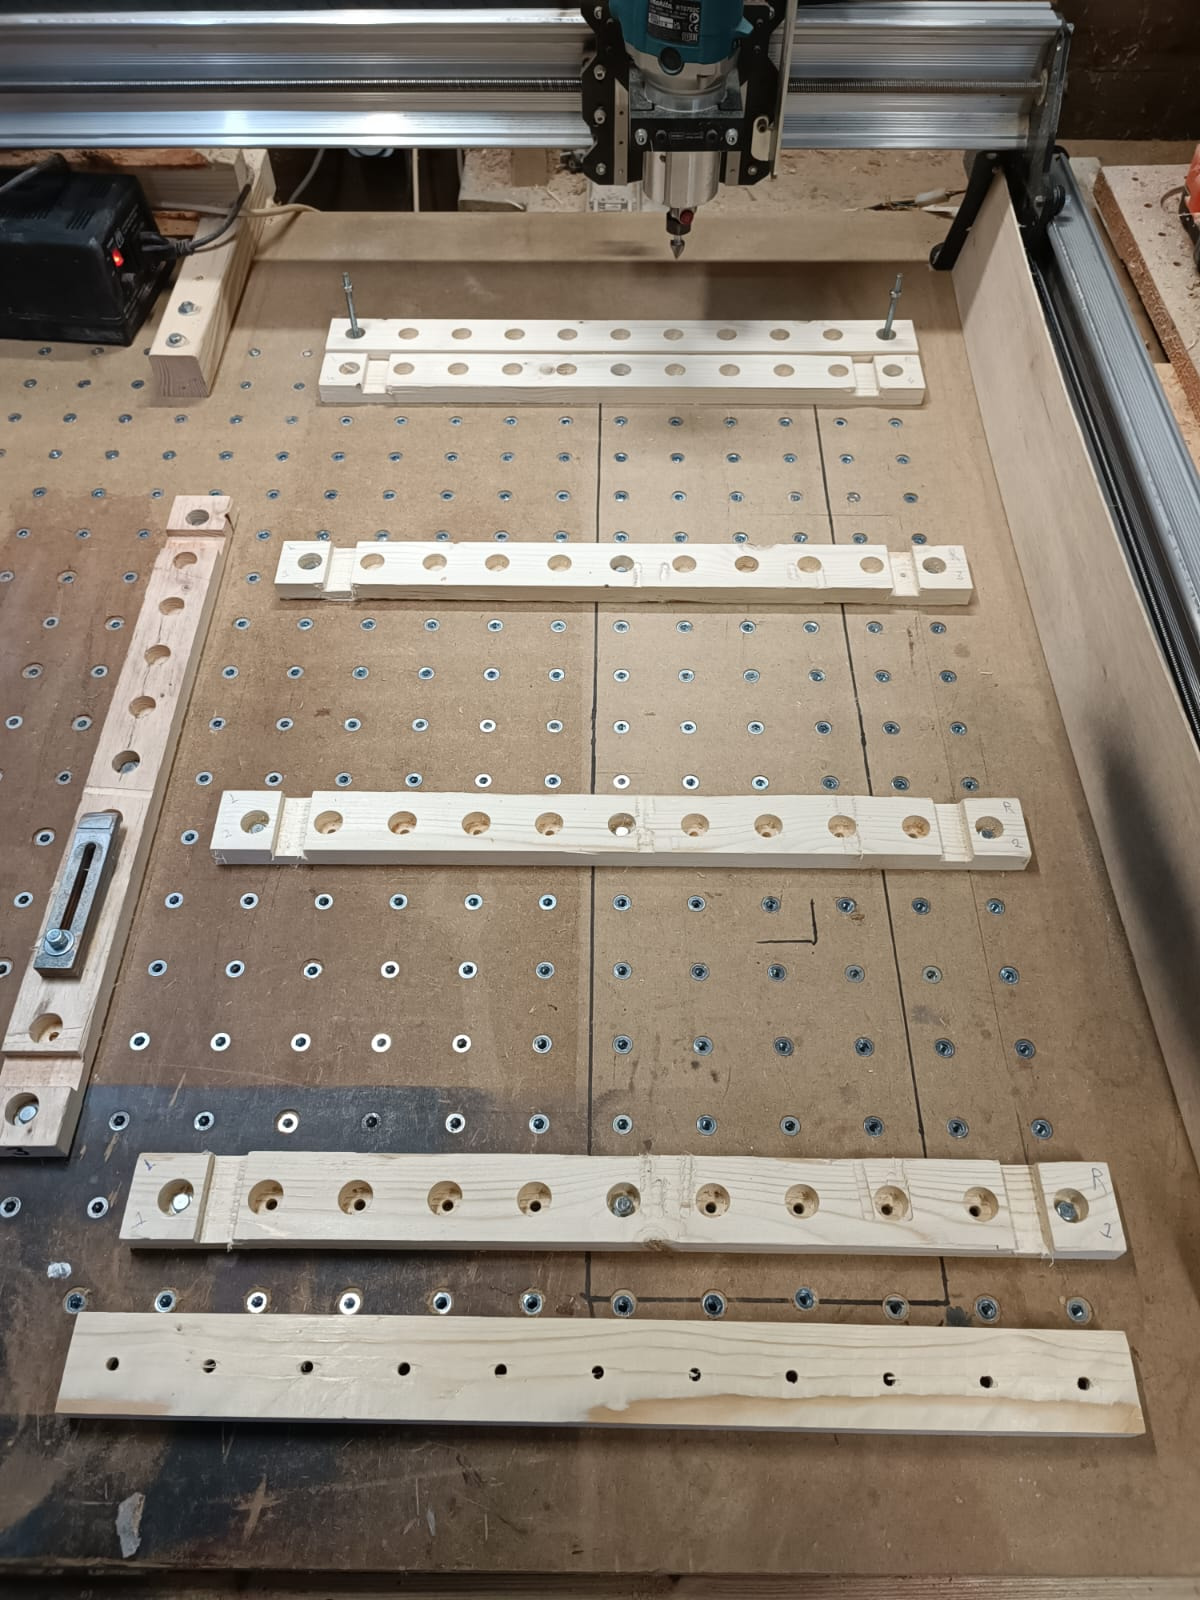
The strips can be moved around for they fit anywhere on the machine bed (that hasn’t been surfaced, ever). I have a few toolpath to (re)surface these strips and a project to turn blank strips into these fenced ones with the hole pattern. It saves a ton of time on surfacing spoilboards or whatever, while working just as well. (Accept for the z height loss. That’s why your solution is intriguing me.)
I mounted my mill on two strips of MDF glued together on each side because bigger is better right? The mill is so high that I had to use a big dovetail bit to surface the last couple of times because my surfacing bit was too short to reach!
Anyway the extra height is useful now that I’m using Eddie’s method. I still have my T-tracks and strips I just started using the small strip method on top of what was already there.
@Spamming_Eddie I remember a picture of your mill where the chips were piled so high it looked like the X gantry might have been leveling them out. I haven’t quite ‘advanced’ to that level so I still have room for improvement!
It takes a different mindset to actually want to see your machine swipe chips into a neat flat surface before you start thinking it might need some cleaning. It involves looking at the mess and thinking, I bet I can swipe clear enough space to get away with juuuus one more project before I will clean. It’s kinda like a spend tube of toothpaste. It somehow never runs out.
You just need to squeeze hard enough.
Oh, and I remember that pile-up you are referring at, and yes.. it was leveled by the x-axis. My proudest moment, finally a level wasteboard.