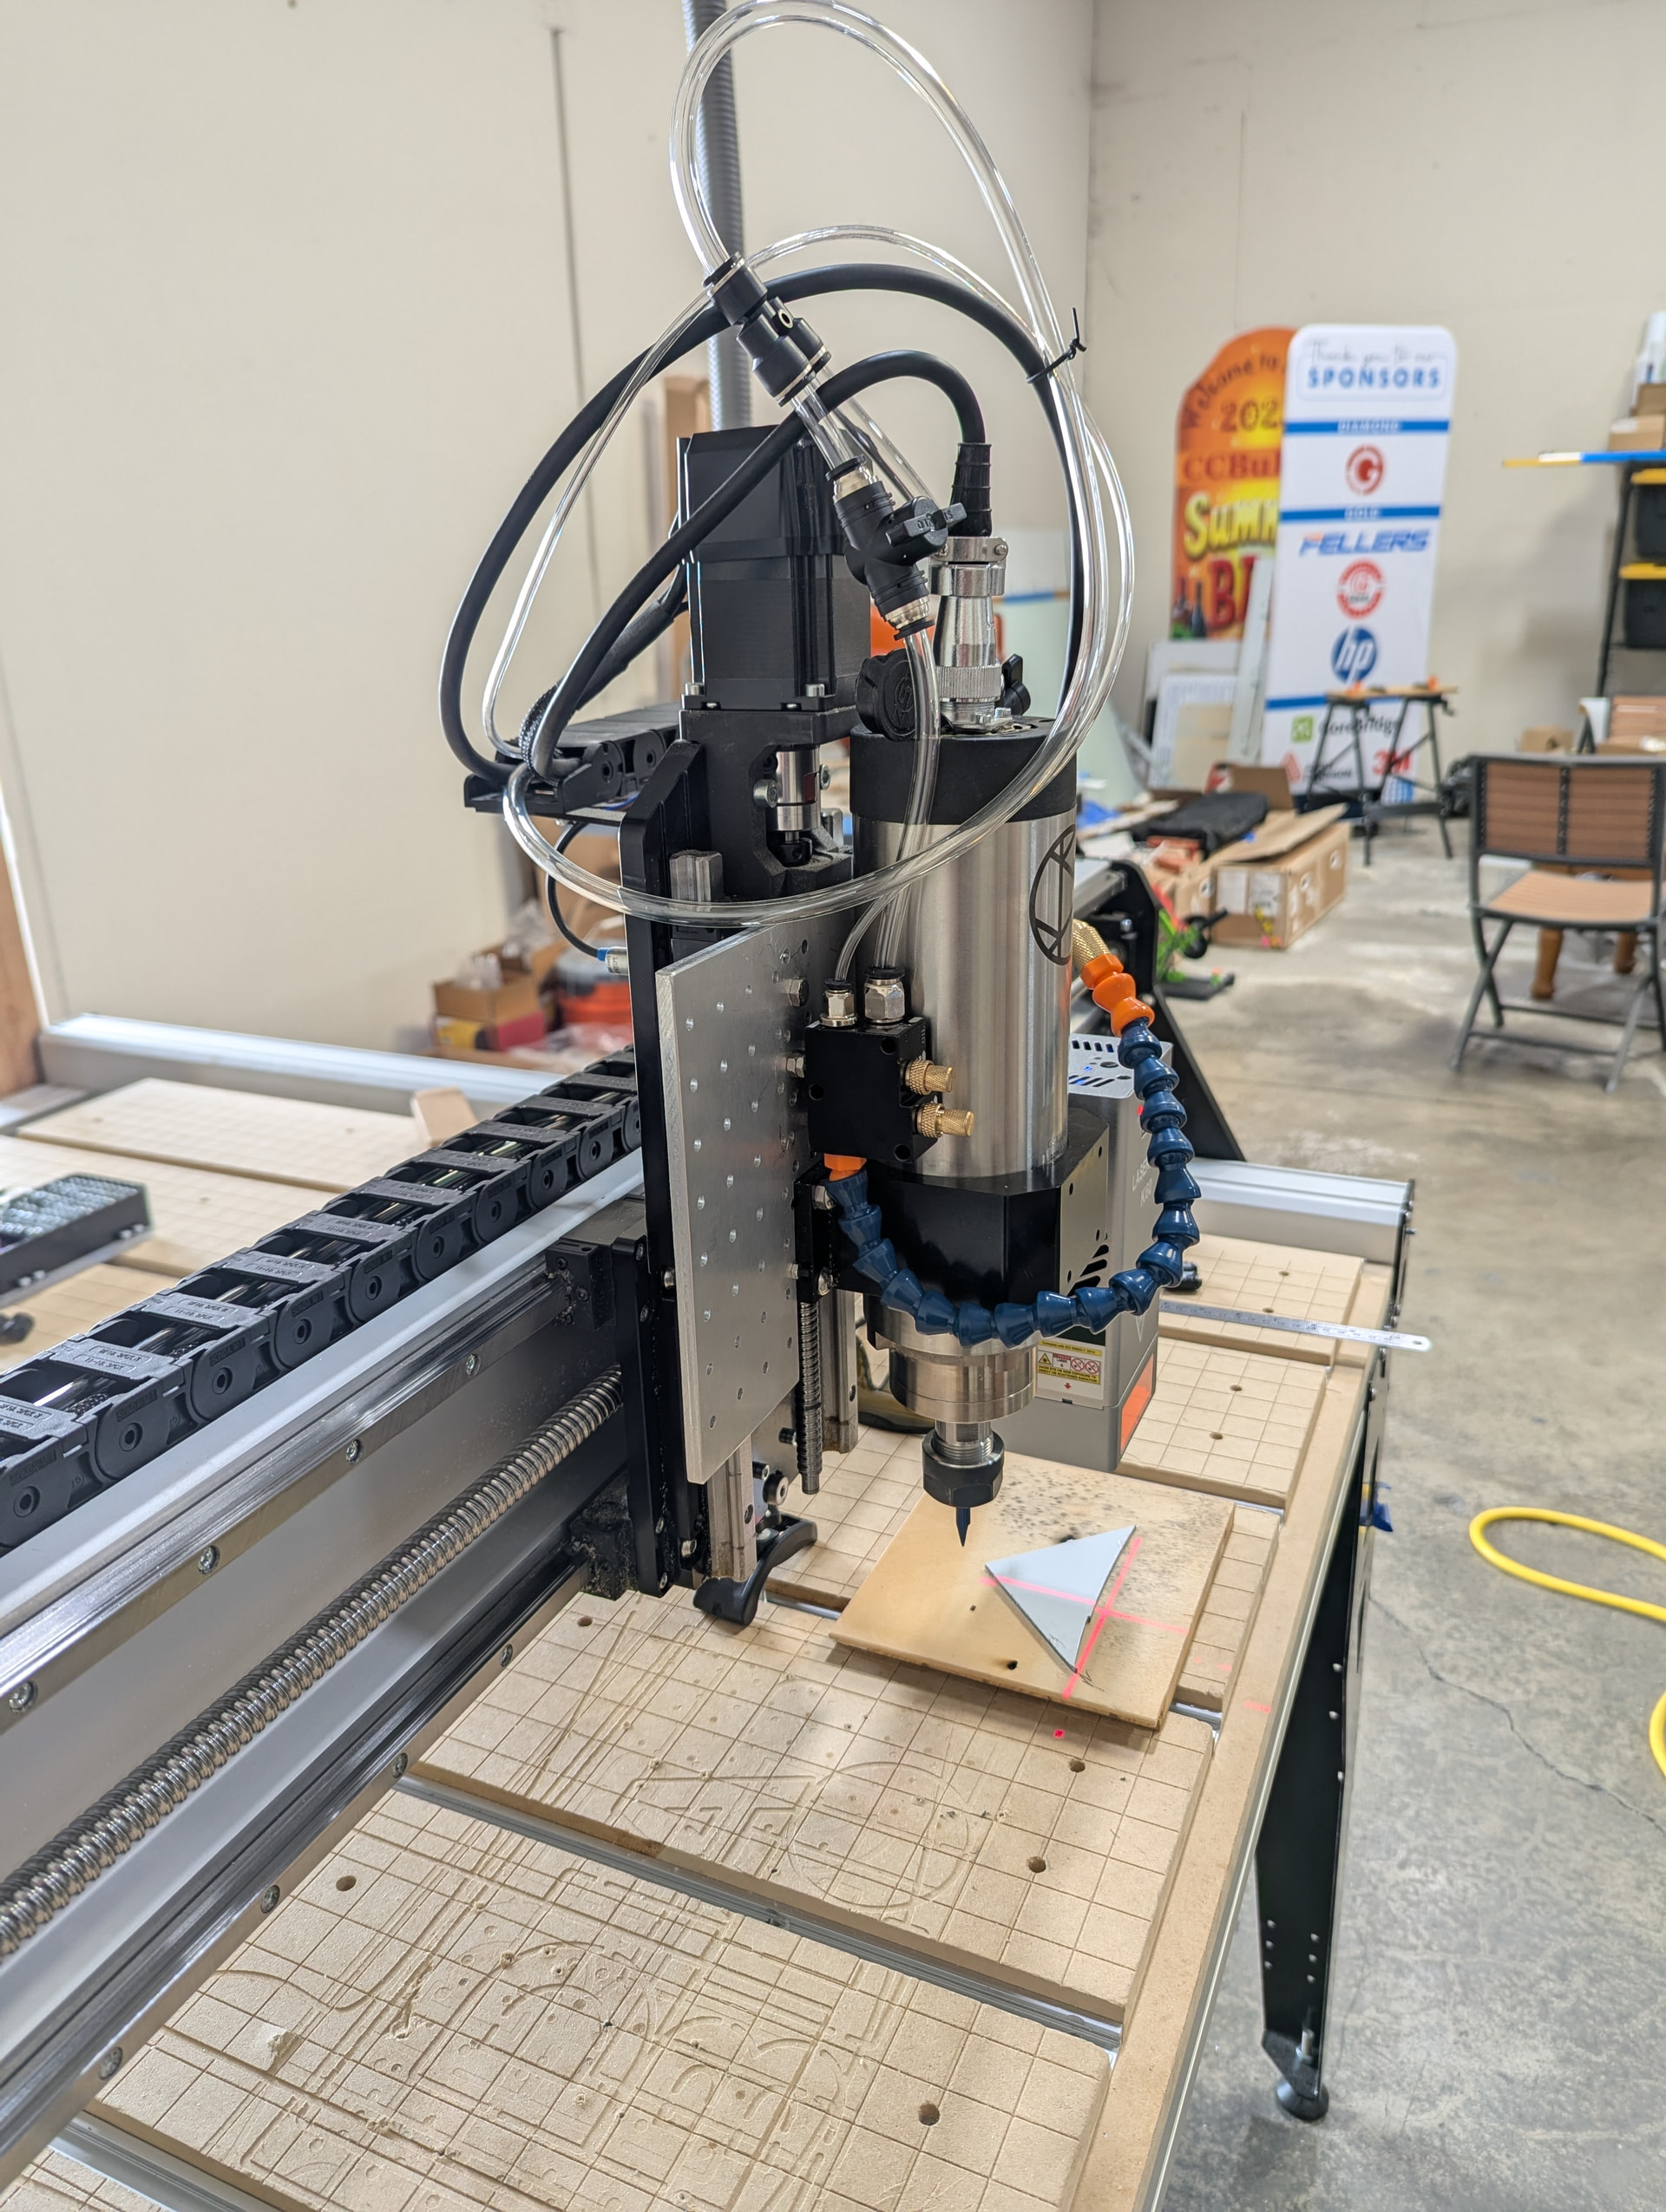
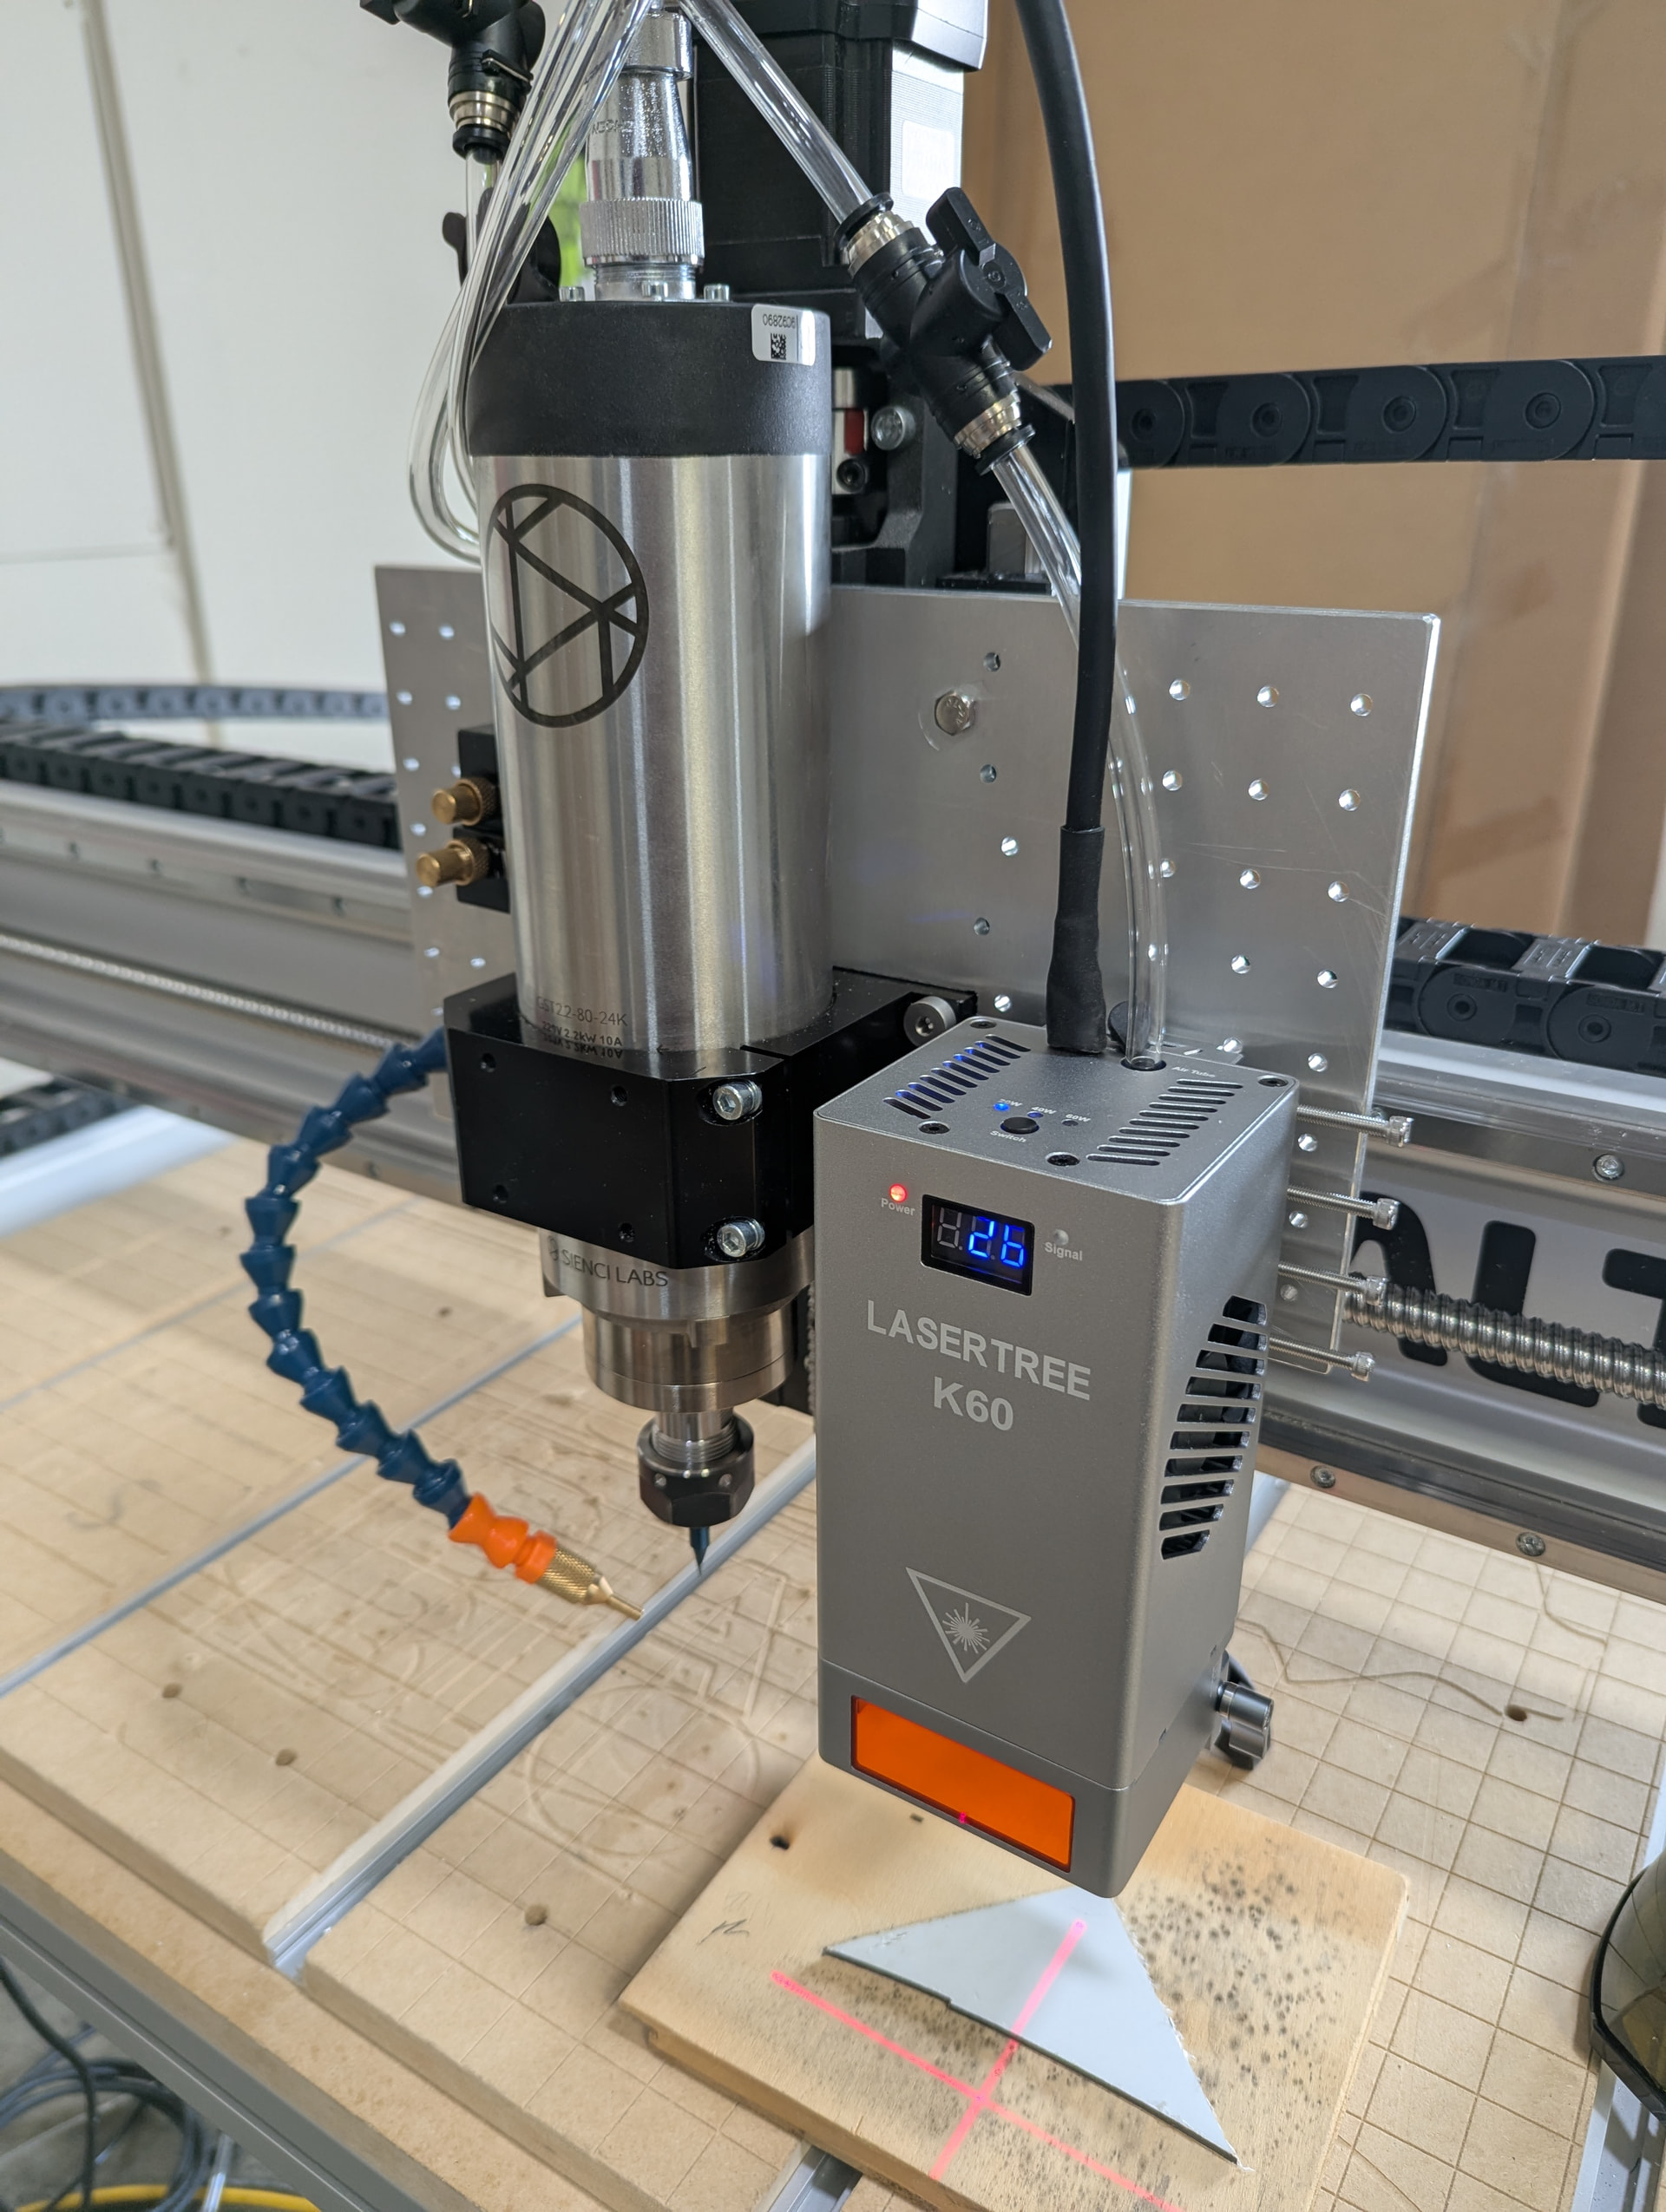
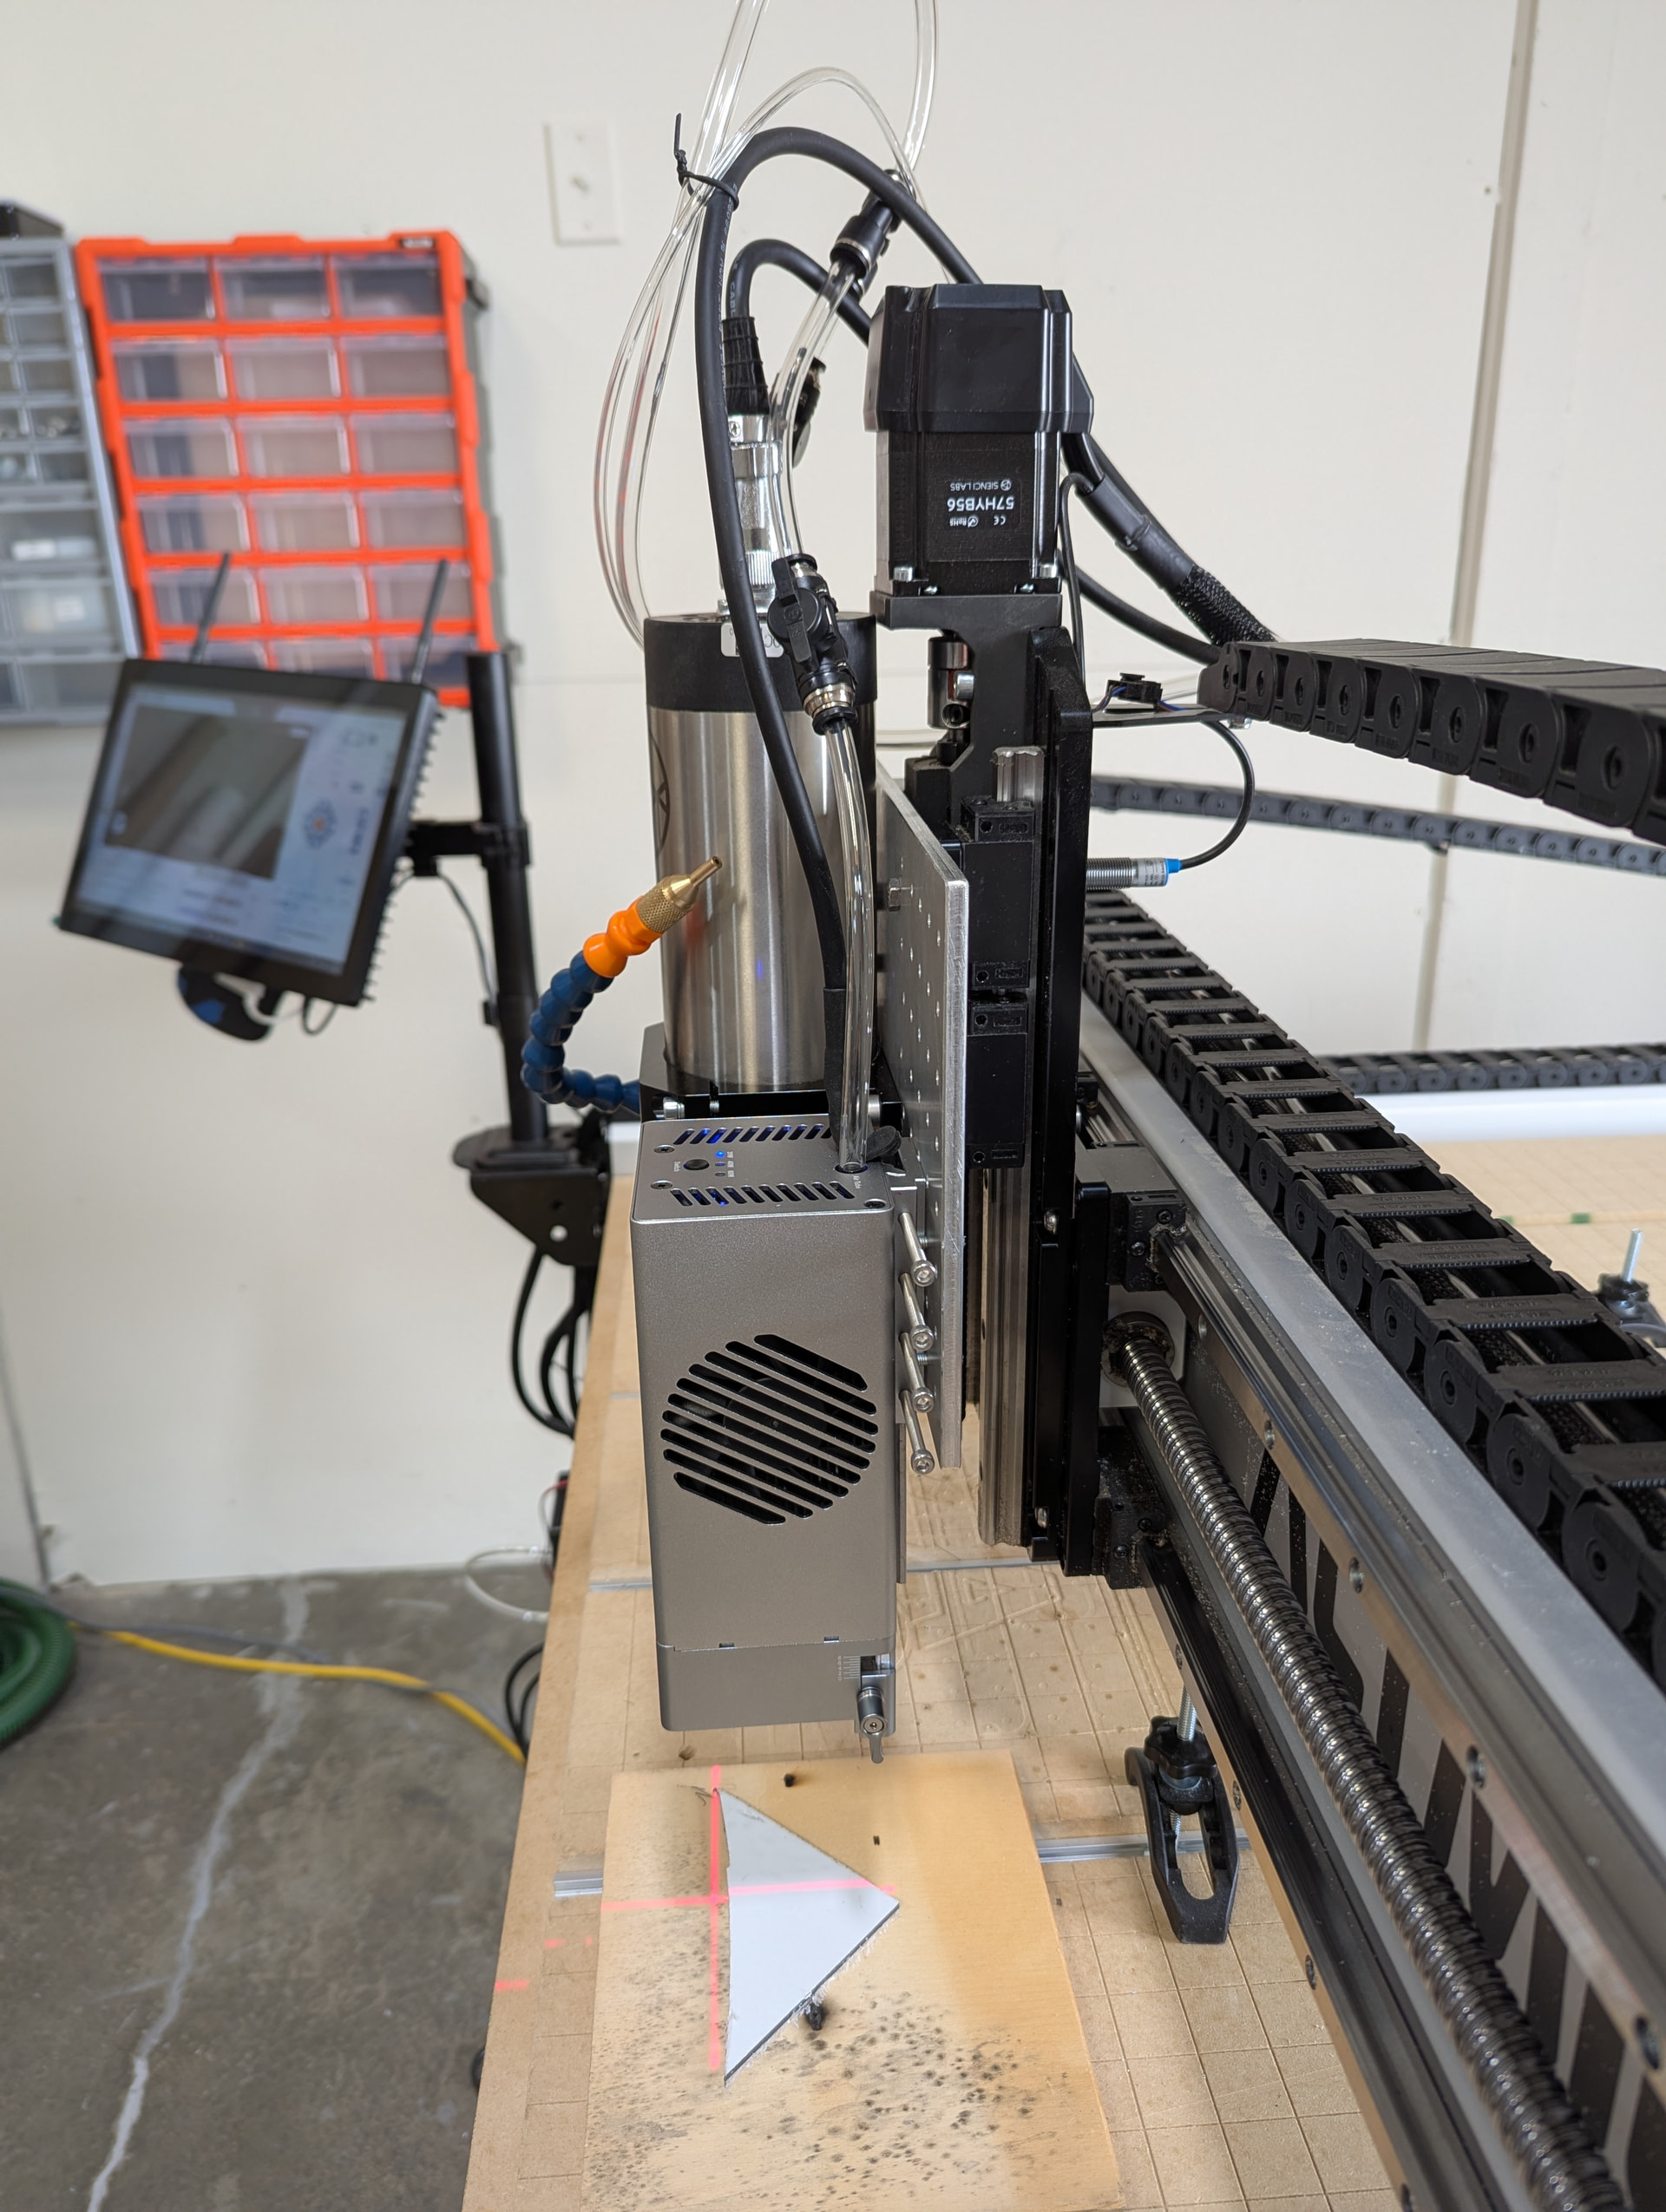
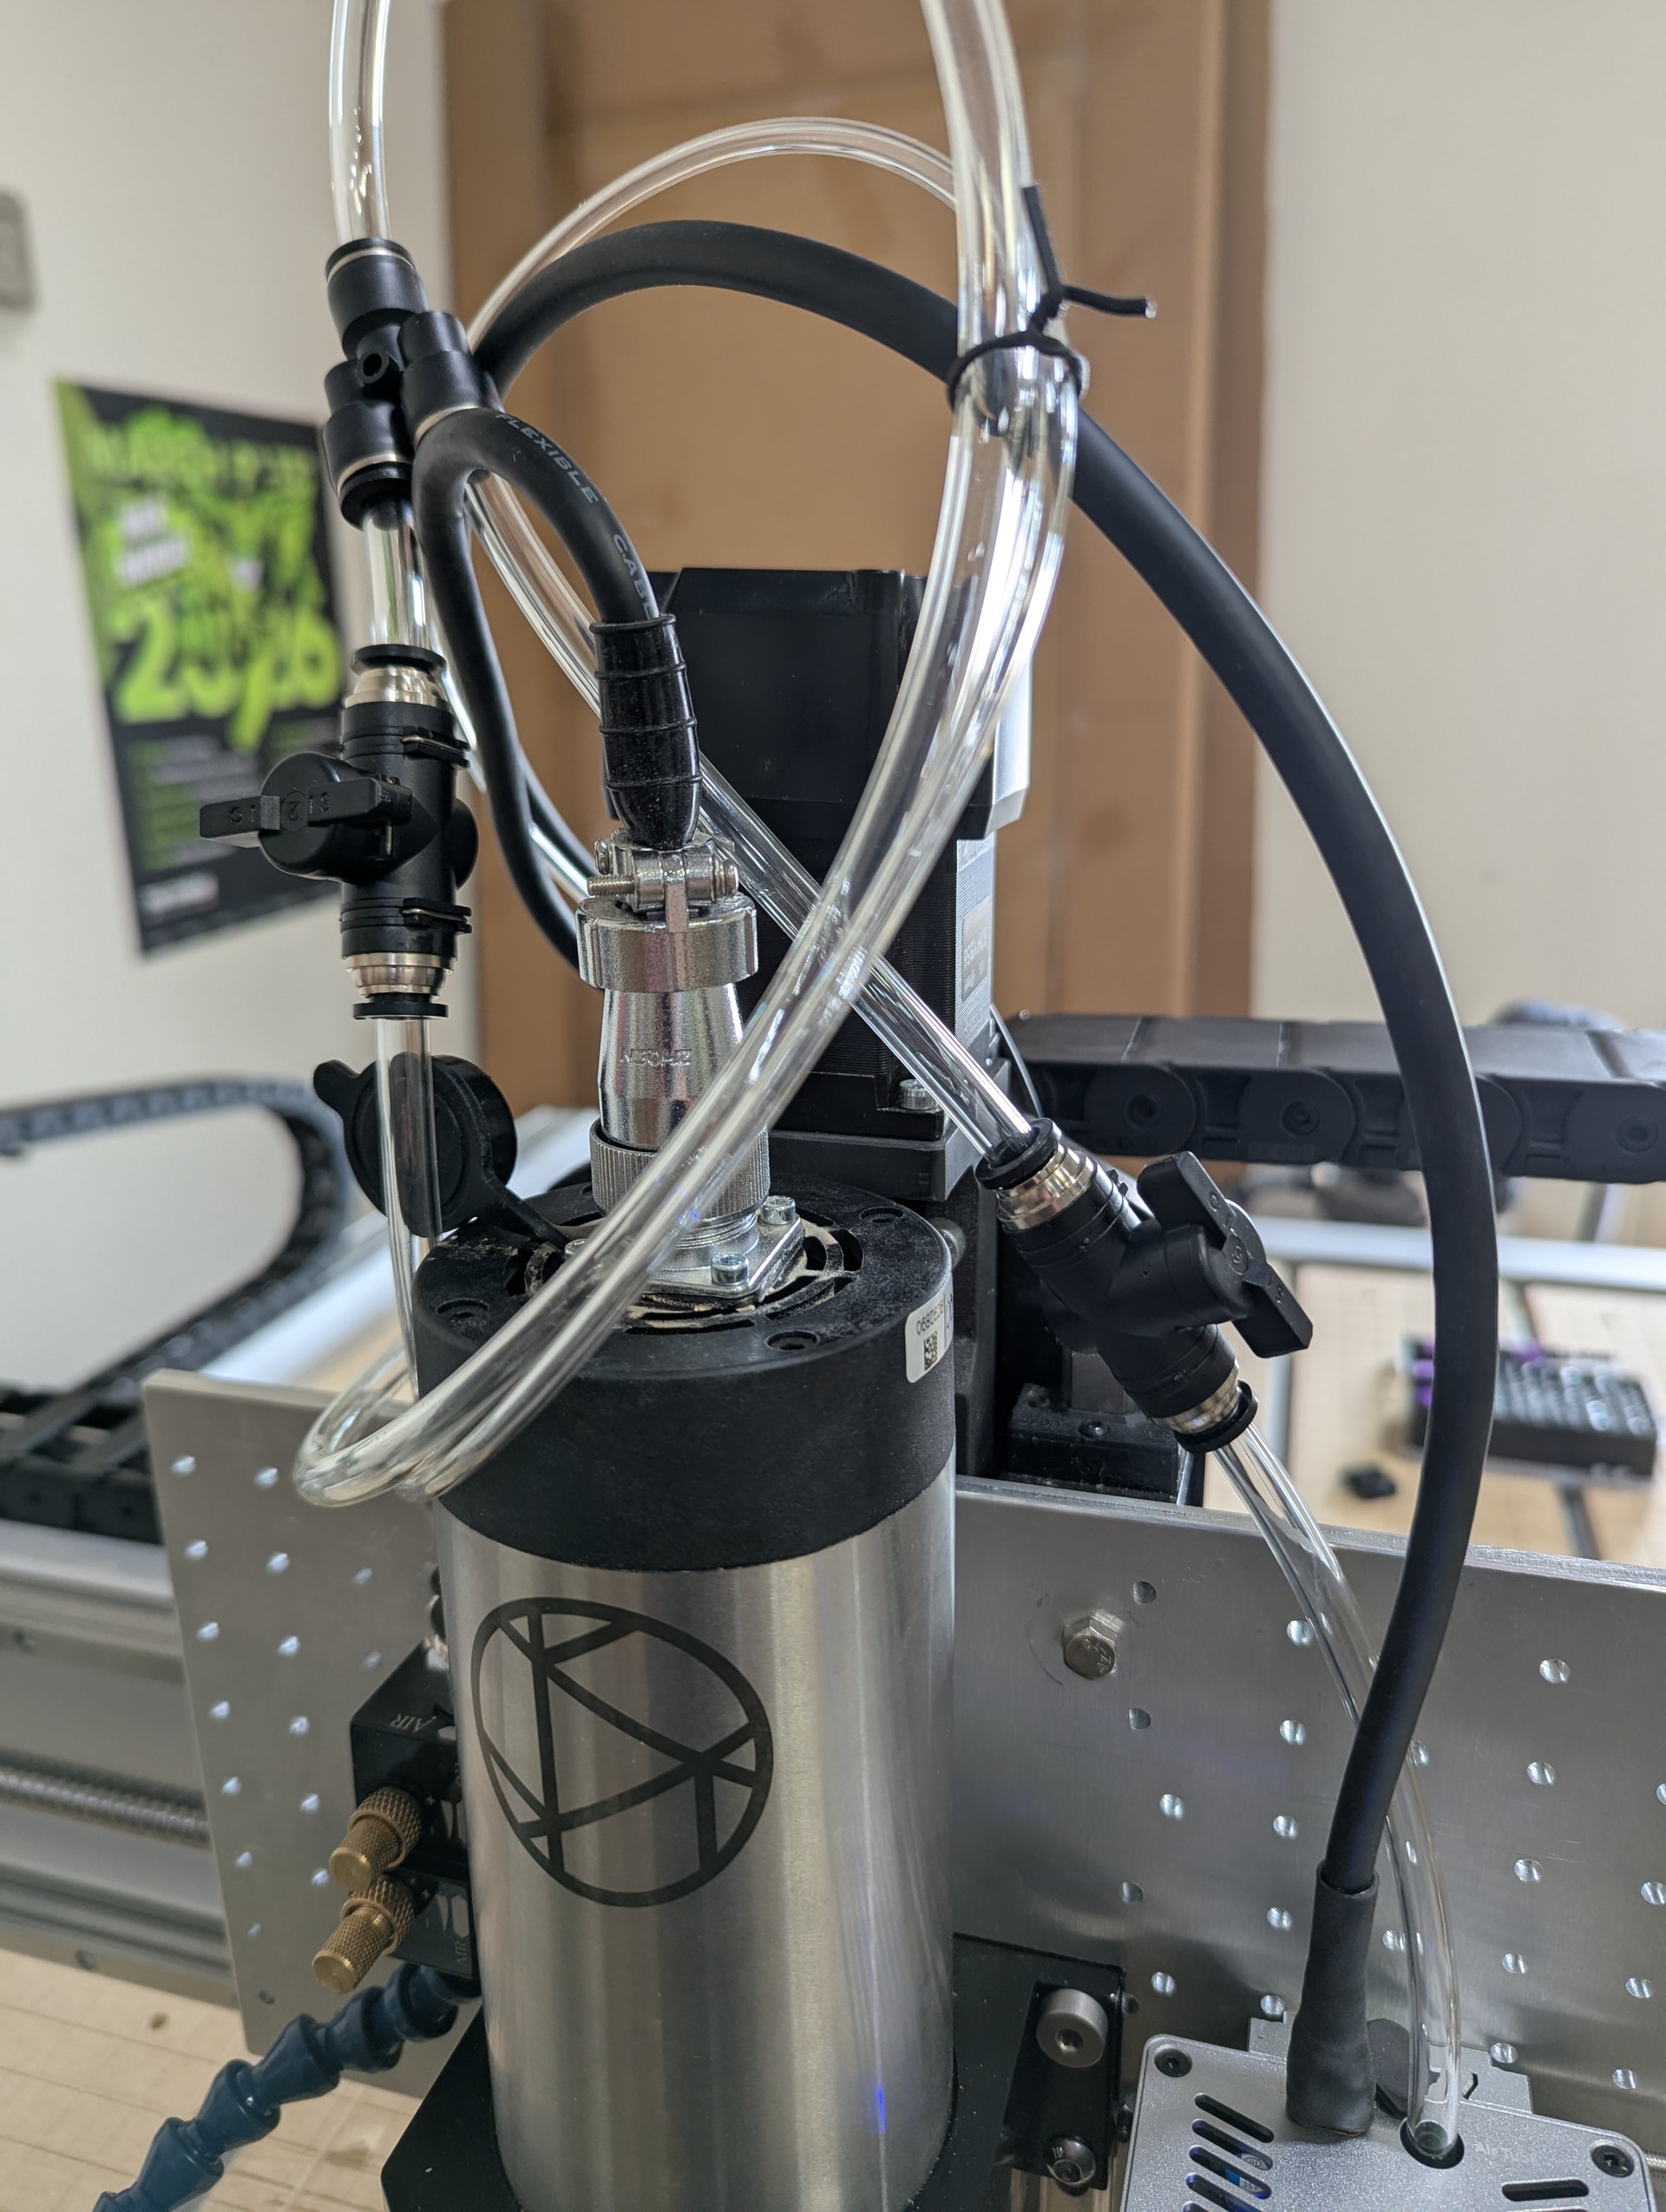
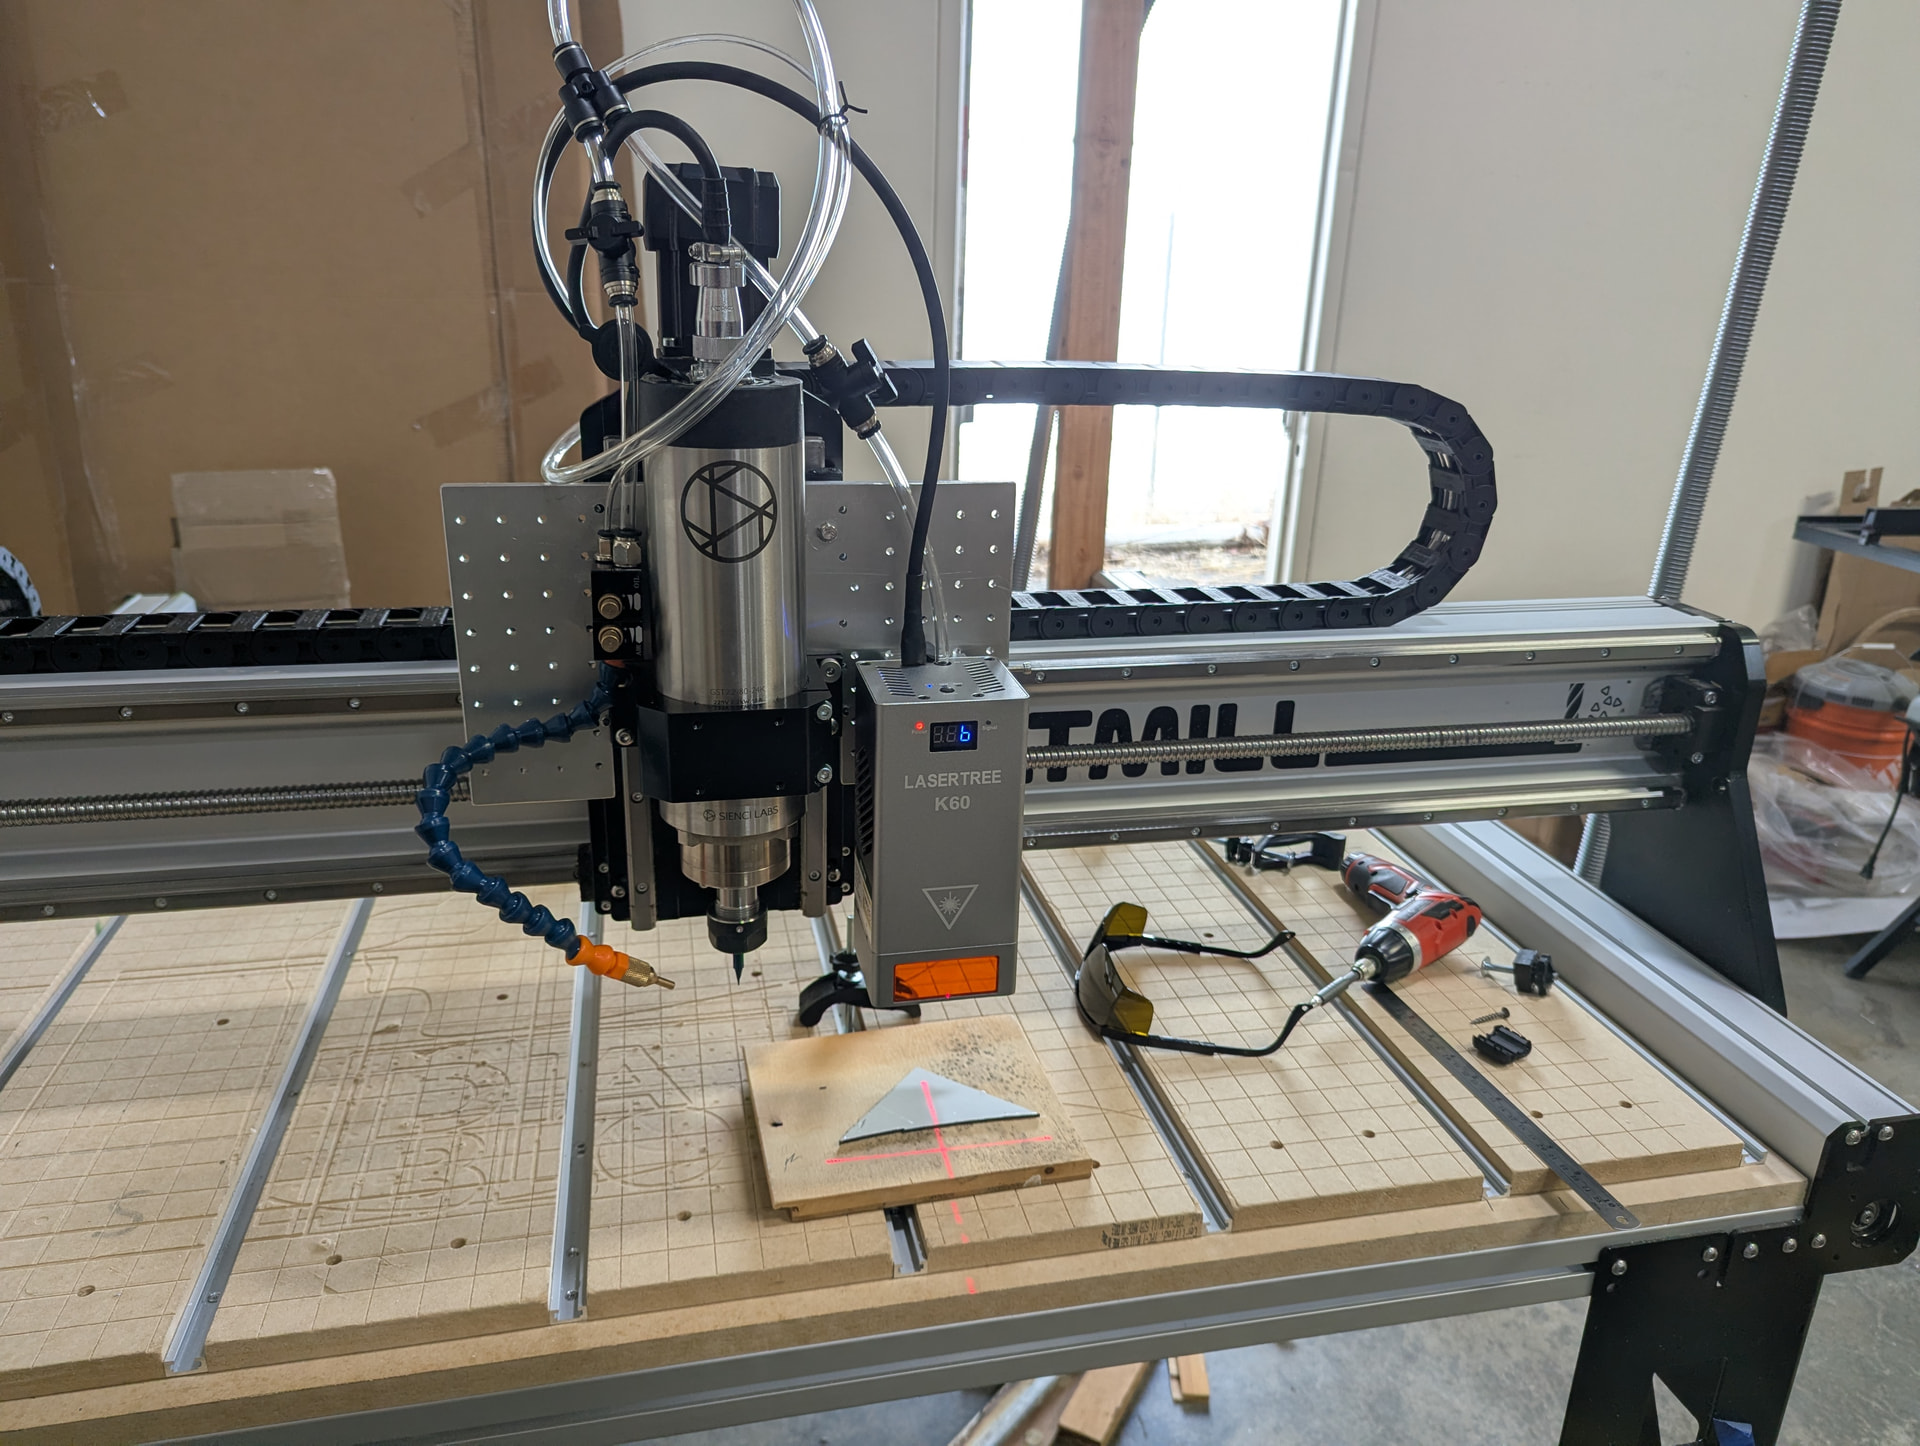
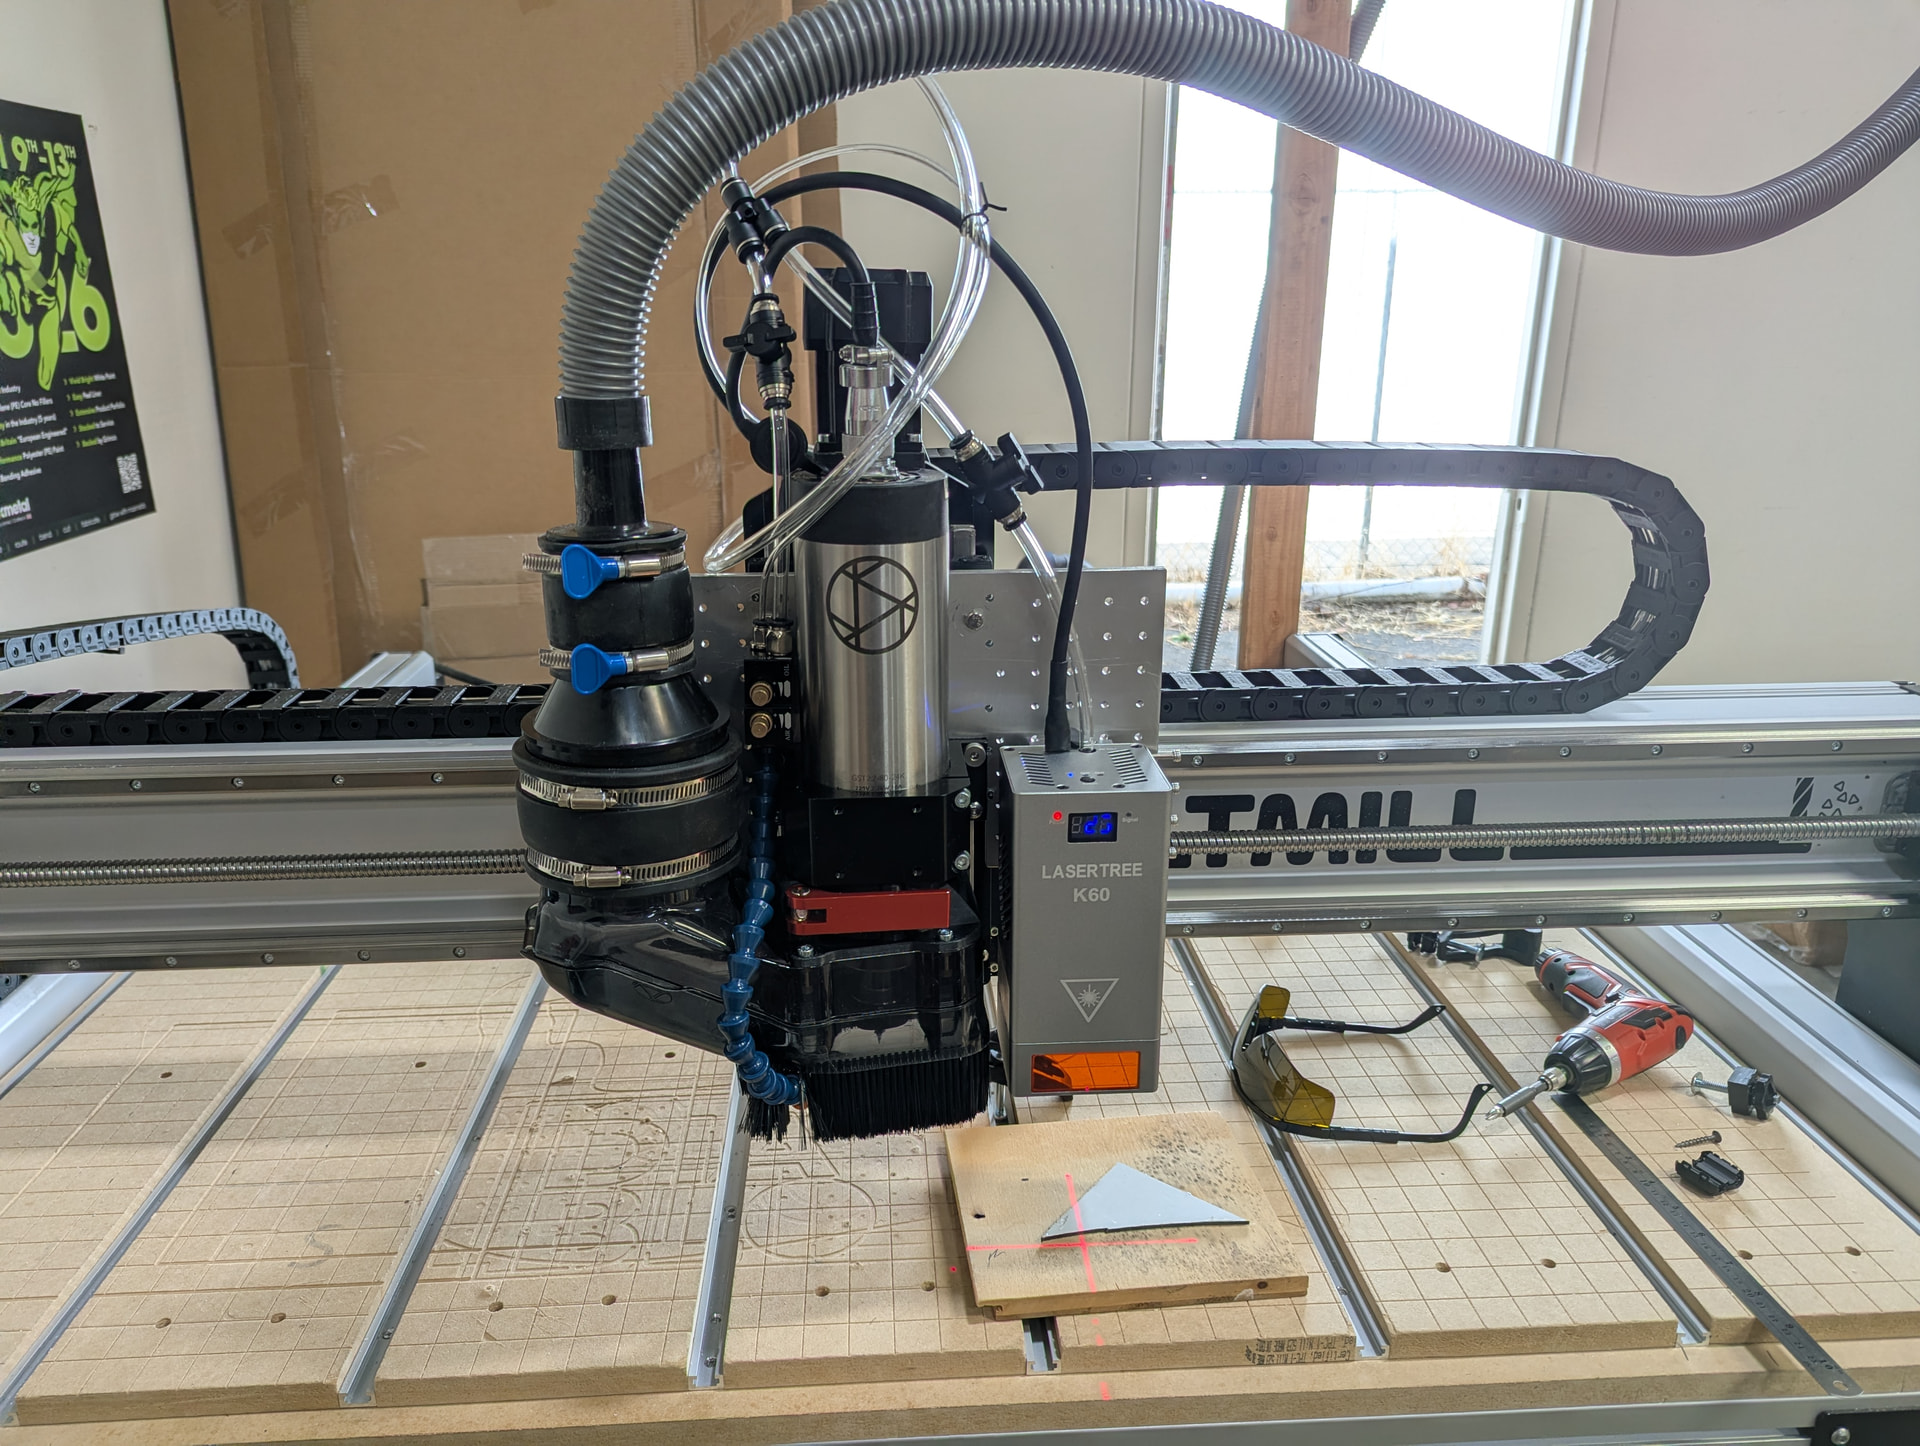
Here is my LaserTree mounting plate design (FreeCAD file attached).
Design objectives:
- Provide variety of mounting options for K60 laser module as well as other accessories if any
- Mount must work with SL dust shoe. Once bottom part of the dust shoe becomes available I’m planning to buy another one and adapt it for use with the laser module. Holding shop vac hose manually to evacuate the fumes while machine is working is not fun
- Since I have air assist pump for the laser I can also use it for CNC bit cooling including coolant mist option
- Mounting plate must not interfere with normal CNC operations when permanently attached i.e. not run into gantry parts etc. It must not limit range of motions at least when laser is removed
- Laser head must be easily removable and attachable as it will be used as-needed. Primary task of the machine is still CNC
For coolant mist I’m using the following: https://www.amazon.com/dp/B0DP9BSMTW?ref=ppx_yo2ov_dt_b_fed_asin_title
The plate itself is made from 1/4" aluminum sheet: https://www.amazon.com/dp/B0DBLJXHDD?ref=ppx_yo2ov_dt_b_fed_asin_title on the AltMill itself, obviously. There are two operations:
- Use clamps and drill all the holes first.
- Then screw the plate to the waste board, remove clamps and cut the perimeter
Dimensions were taken from SL’s open source mechanical design (thanks SL!): https://cad.onshape.com/documents/e6c1dae7dec3a7538aec8593/w/b499e6bd64fb86ce75f092e0/e/05197fc6fd9cfdca2440066e. I intentionally did not introduce any manufacturing allowances between the plate and the AltMill spindle mount. So it did require some quick filing of the material on the sides, but the plate is sitting on the mount without any gaps whatsoever. Same goes for the mounting holes. They are very tight. You can modify the FreeCAD model if you like to create less tight fit.
Both laser module and coolant mister can be installed on a grid so you can vary the position if you like. For now I installed the laser one column of holes to the right of left-most one so I have some clearance for the dust shoe. I might move the laser mount to the left-most column when I come up with adapted shoe.
You also have an option to mount laser on the left side of the spindle. Holes are provided. Obviously X-Axis range of motion will be somewhat limited on the right (or left) side when laser is installed and lowered down. You can change AltMill limits or just be careful not to run laser into gantry. Mount is mechanical (v-slot and screws) so it will not fall off as some magnetic mounts used with some other lasers.
If you use a different dust shoe you might want to adapt the plate to accommodate your particular one. SL’s dust shoe is touching the plate when installed, but I don’t see it as a problem. You can cut some additional metal from the left bottom edge of the plate if you need clearance.
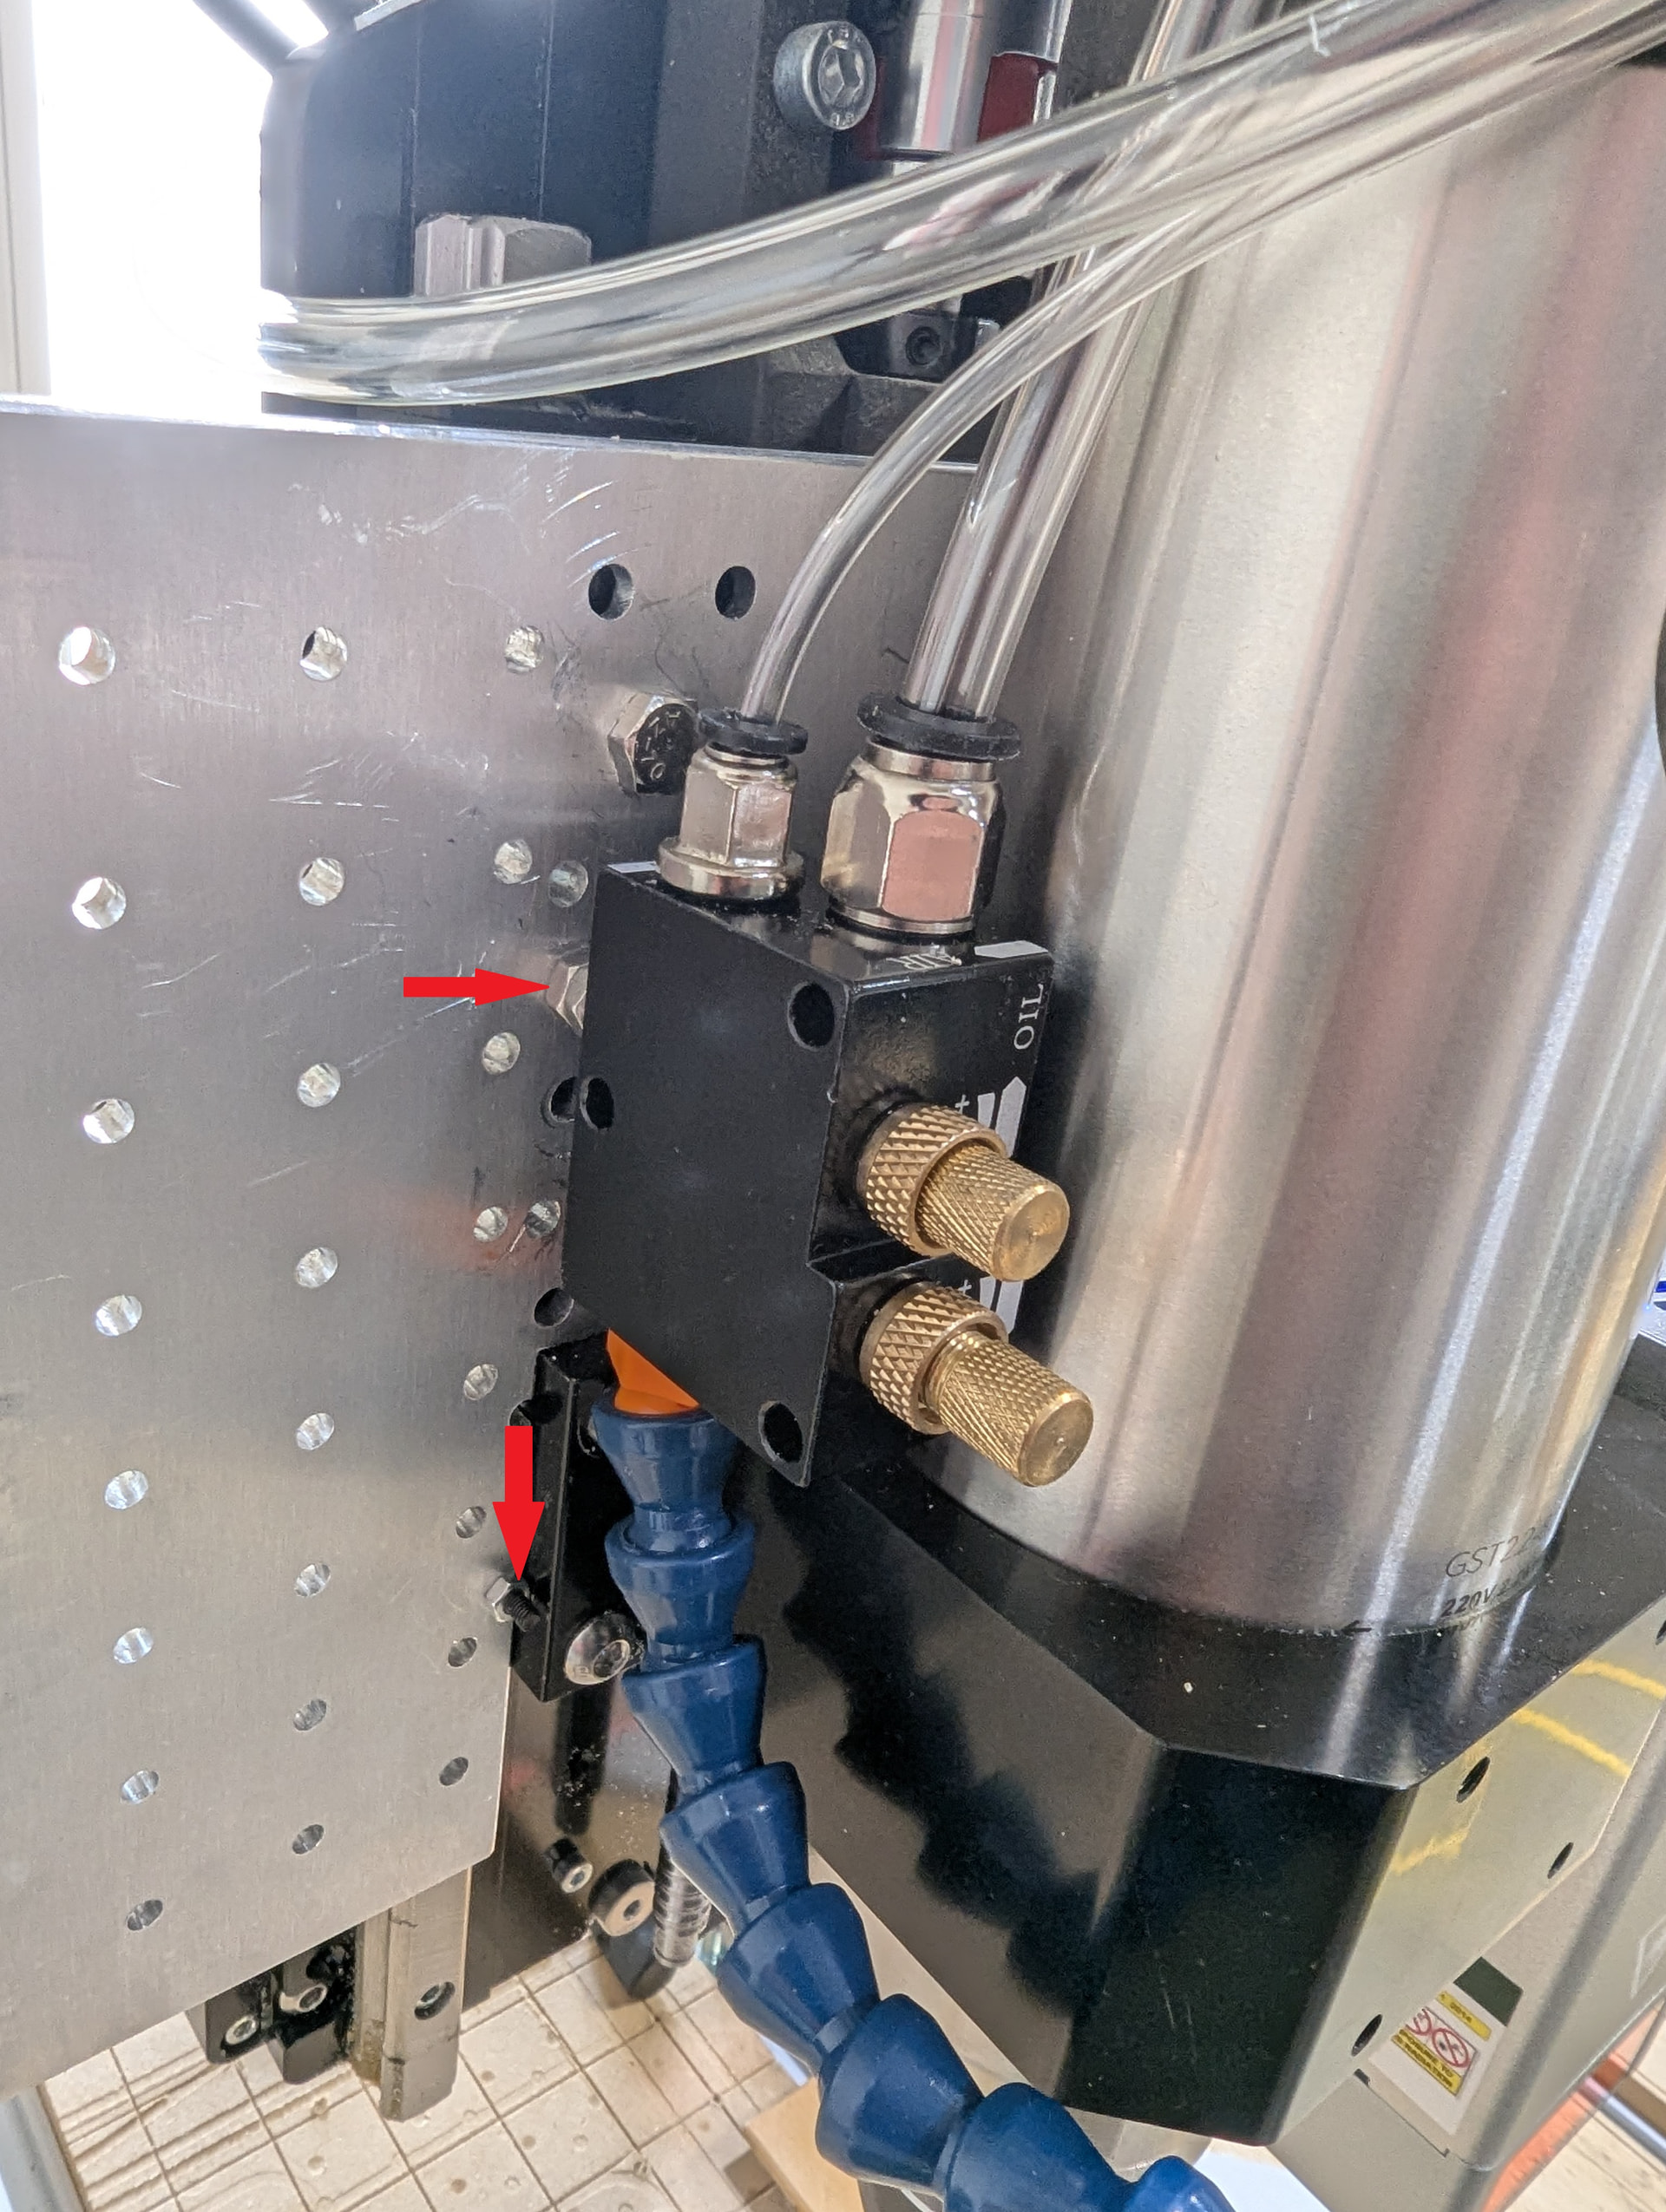
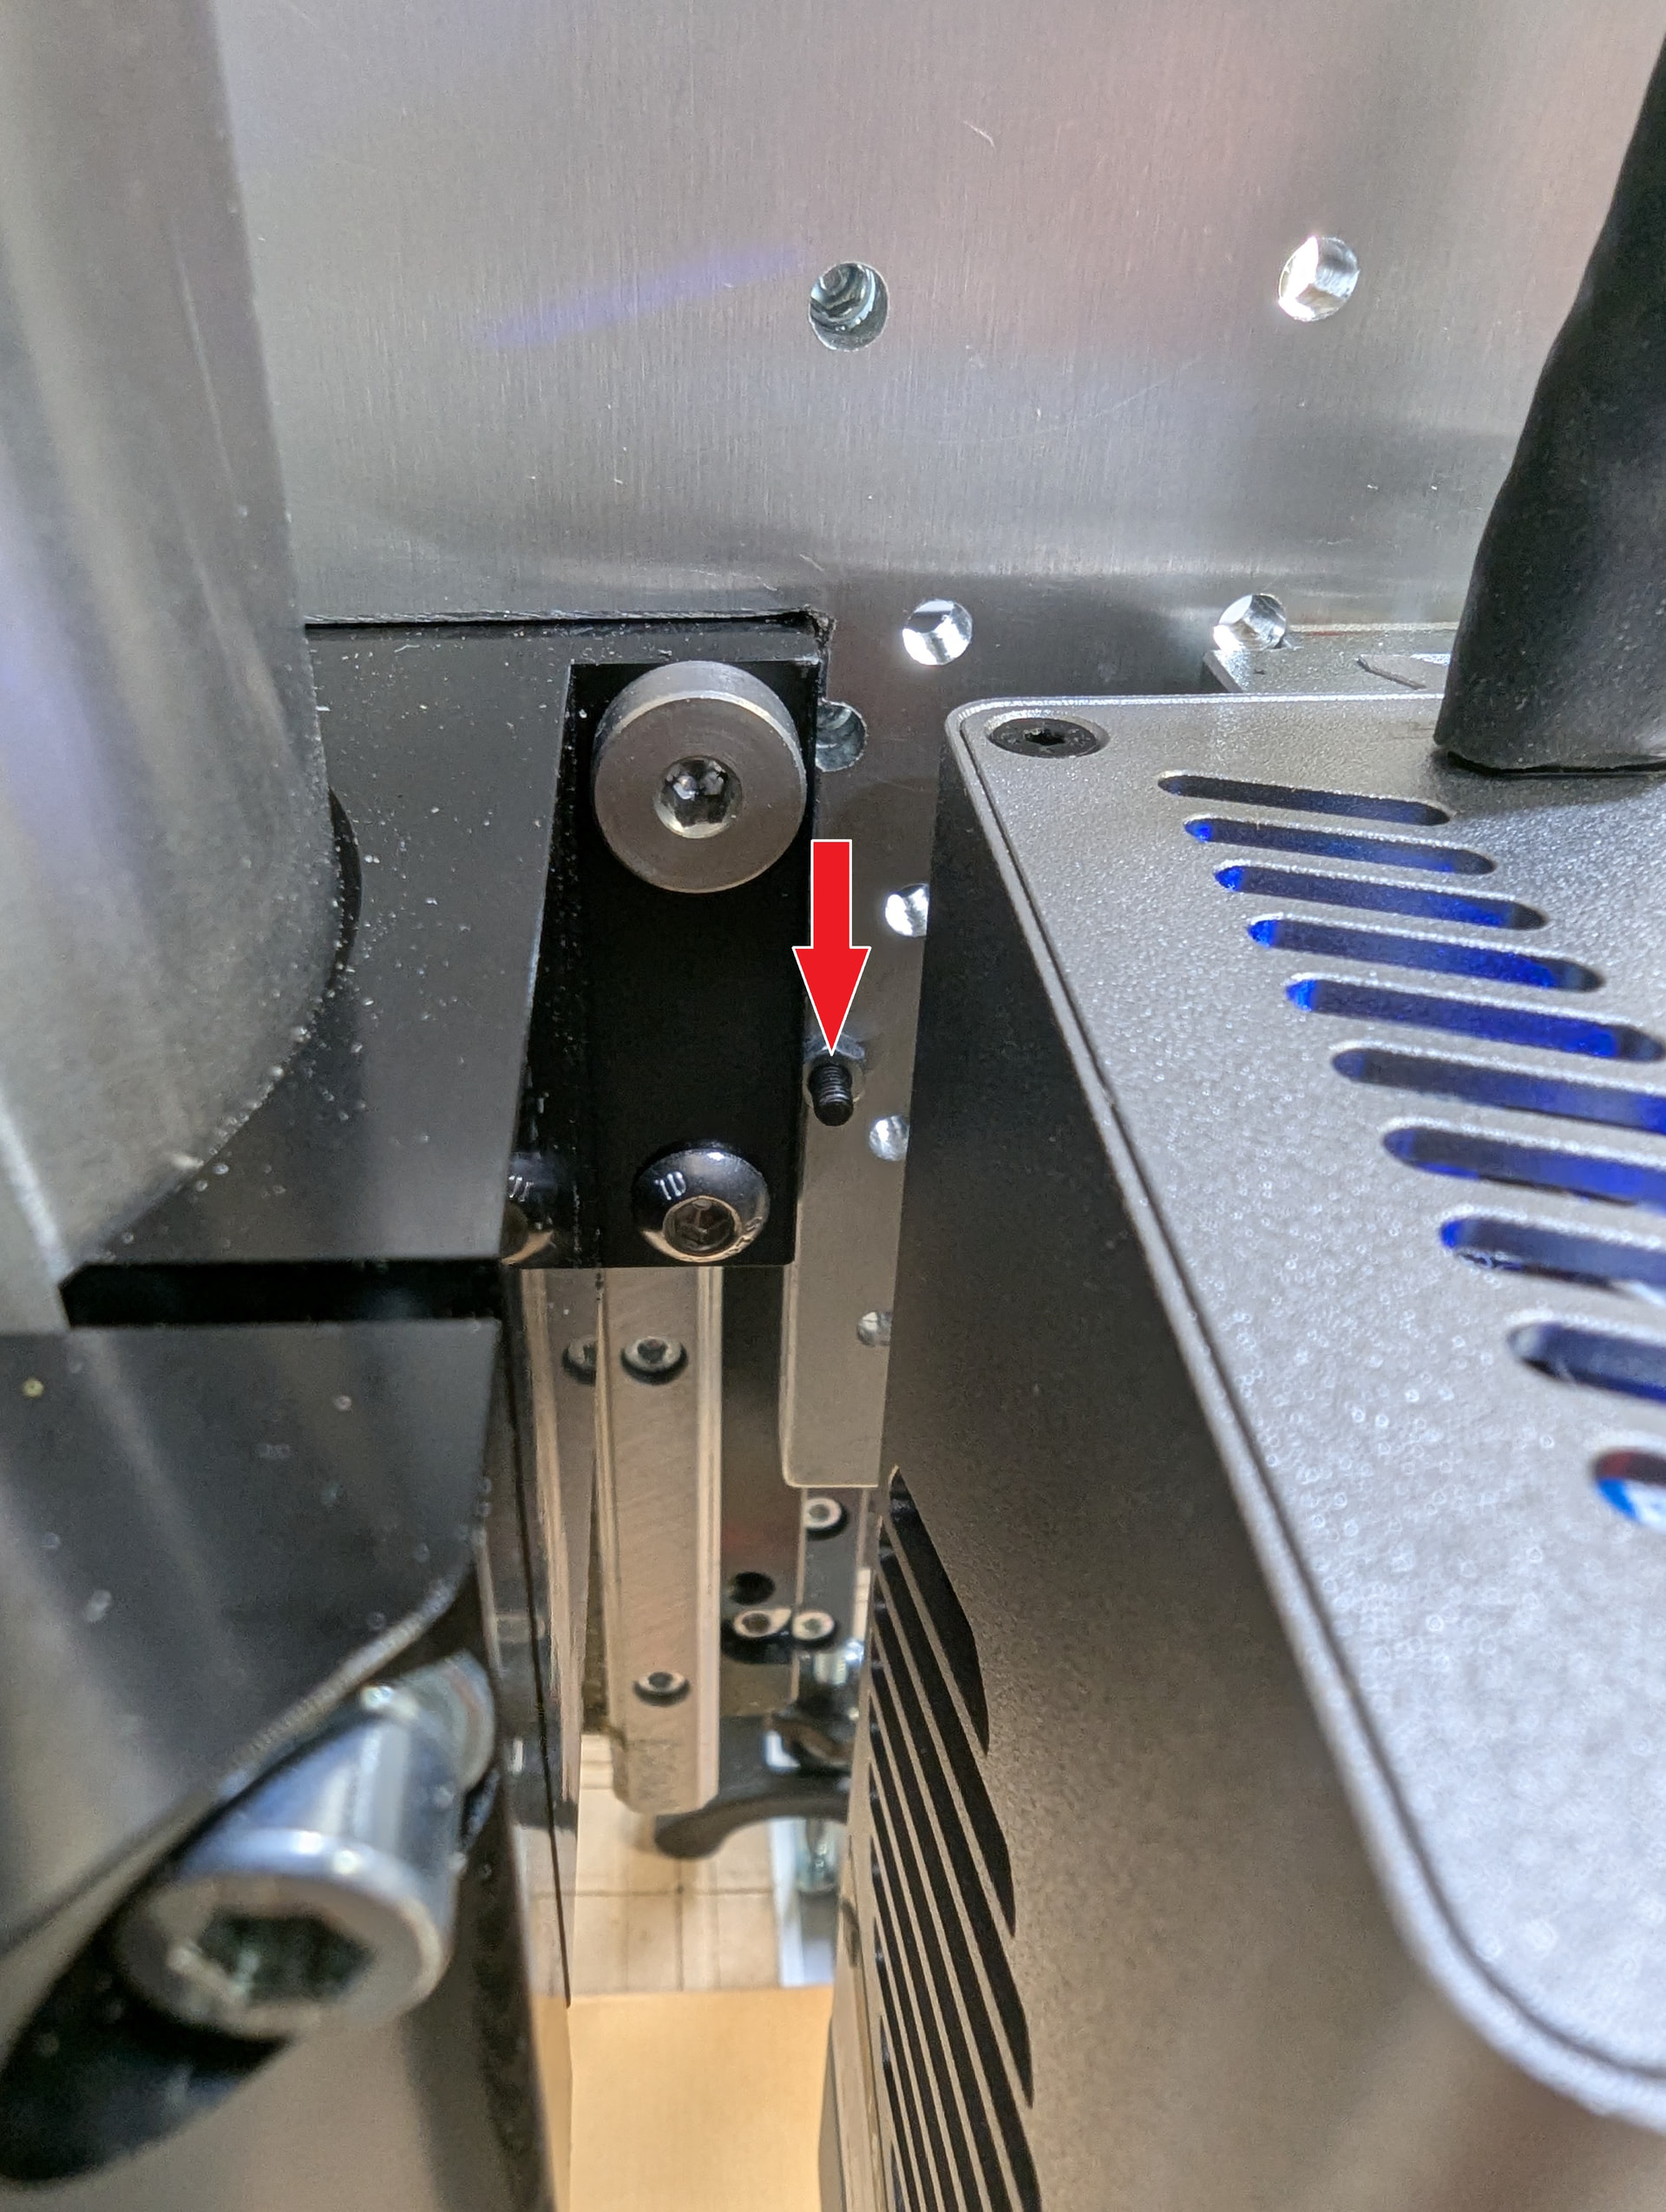
Plate is mainly affixed to the Z-Axis sub-assembly with two M6 bolts (using existing holes on the sub-assembly) which is rather sturdy to begin with. However I also added two M3 bolts with nuts through unused holes at the bottom left and right (see pictures, bolts marked with red arrows). Bolts are smaller than holes and you’ll still need to file nuts on one side to fit in those very tight places, but now the plate is fixed in four points and very sturdy. Alternatively you could replace some of the bolts holding linear bearings with longer ones. Holes are provided. I’ve decided not to mess with it.
Mister needs to be installed on standoffs as its bottom surface is not flat. I’ve just used a couple of nuts as standoffs (see picture, marked with arrow). I’ve used flat head screws and made chamfers in the mounting holes on the back side so screw heads are sitting flat with the plate. You have an option to install mister on it’s side, but I’ve found it less convenient. I’ve also used clear hoses https://www.amazon.com/dp/B0GZHDPH1T?ref=ppx_yo2ov_dt_b_fed_asin_title for the air and https://www.amazon.com/dp/B08GC9LKN7?ref=ppx_yo2ov_dt_b_fed_asin_title for the mist along with valves https://www.amazon.com/dp/B0D2941ZYL?ref=ppx_yo2ov_dt_b_fed_asin_title. Now I can direct the air to spindle or laser as needed. I did not try the mist yet, but I don’t see any reason why it would not work.
All cables and hoses are placed into the drag chains so everything is tidy. When I don’t need the laser I can disconnect the control cable from the laser and the 8mm hose from the valve and take the laser module away. I could not find quick disconnect for the hose, but the valve has somewhat quick disconnect feature so it’s not a big problem. In case the hose get scratched or deteriorates in any way I’ll simply replace the short length between the valve and the laser. I’d avoid disconnecting the hose from the laser as air assist pipe on the laser does not look that sturdy.
You’ll need to find or make bolts of proper length for all the places
For K60 long control cable solution see https://forum.sienci.com/t/lasertree-k60-problems/26793
LaserPlate_5_3.zip (436.5 KB)