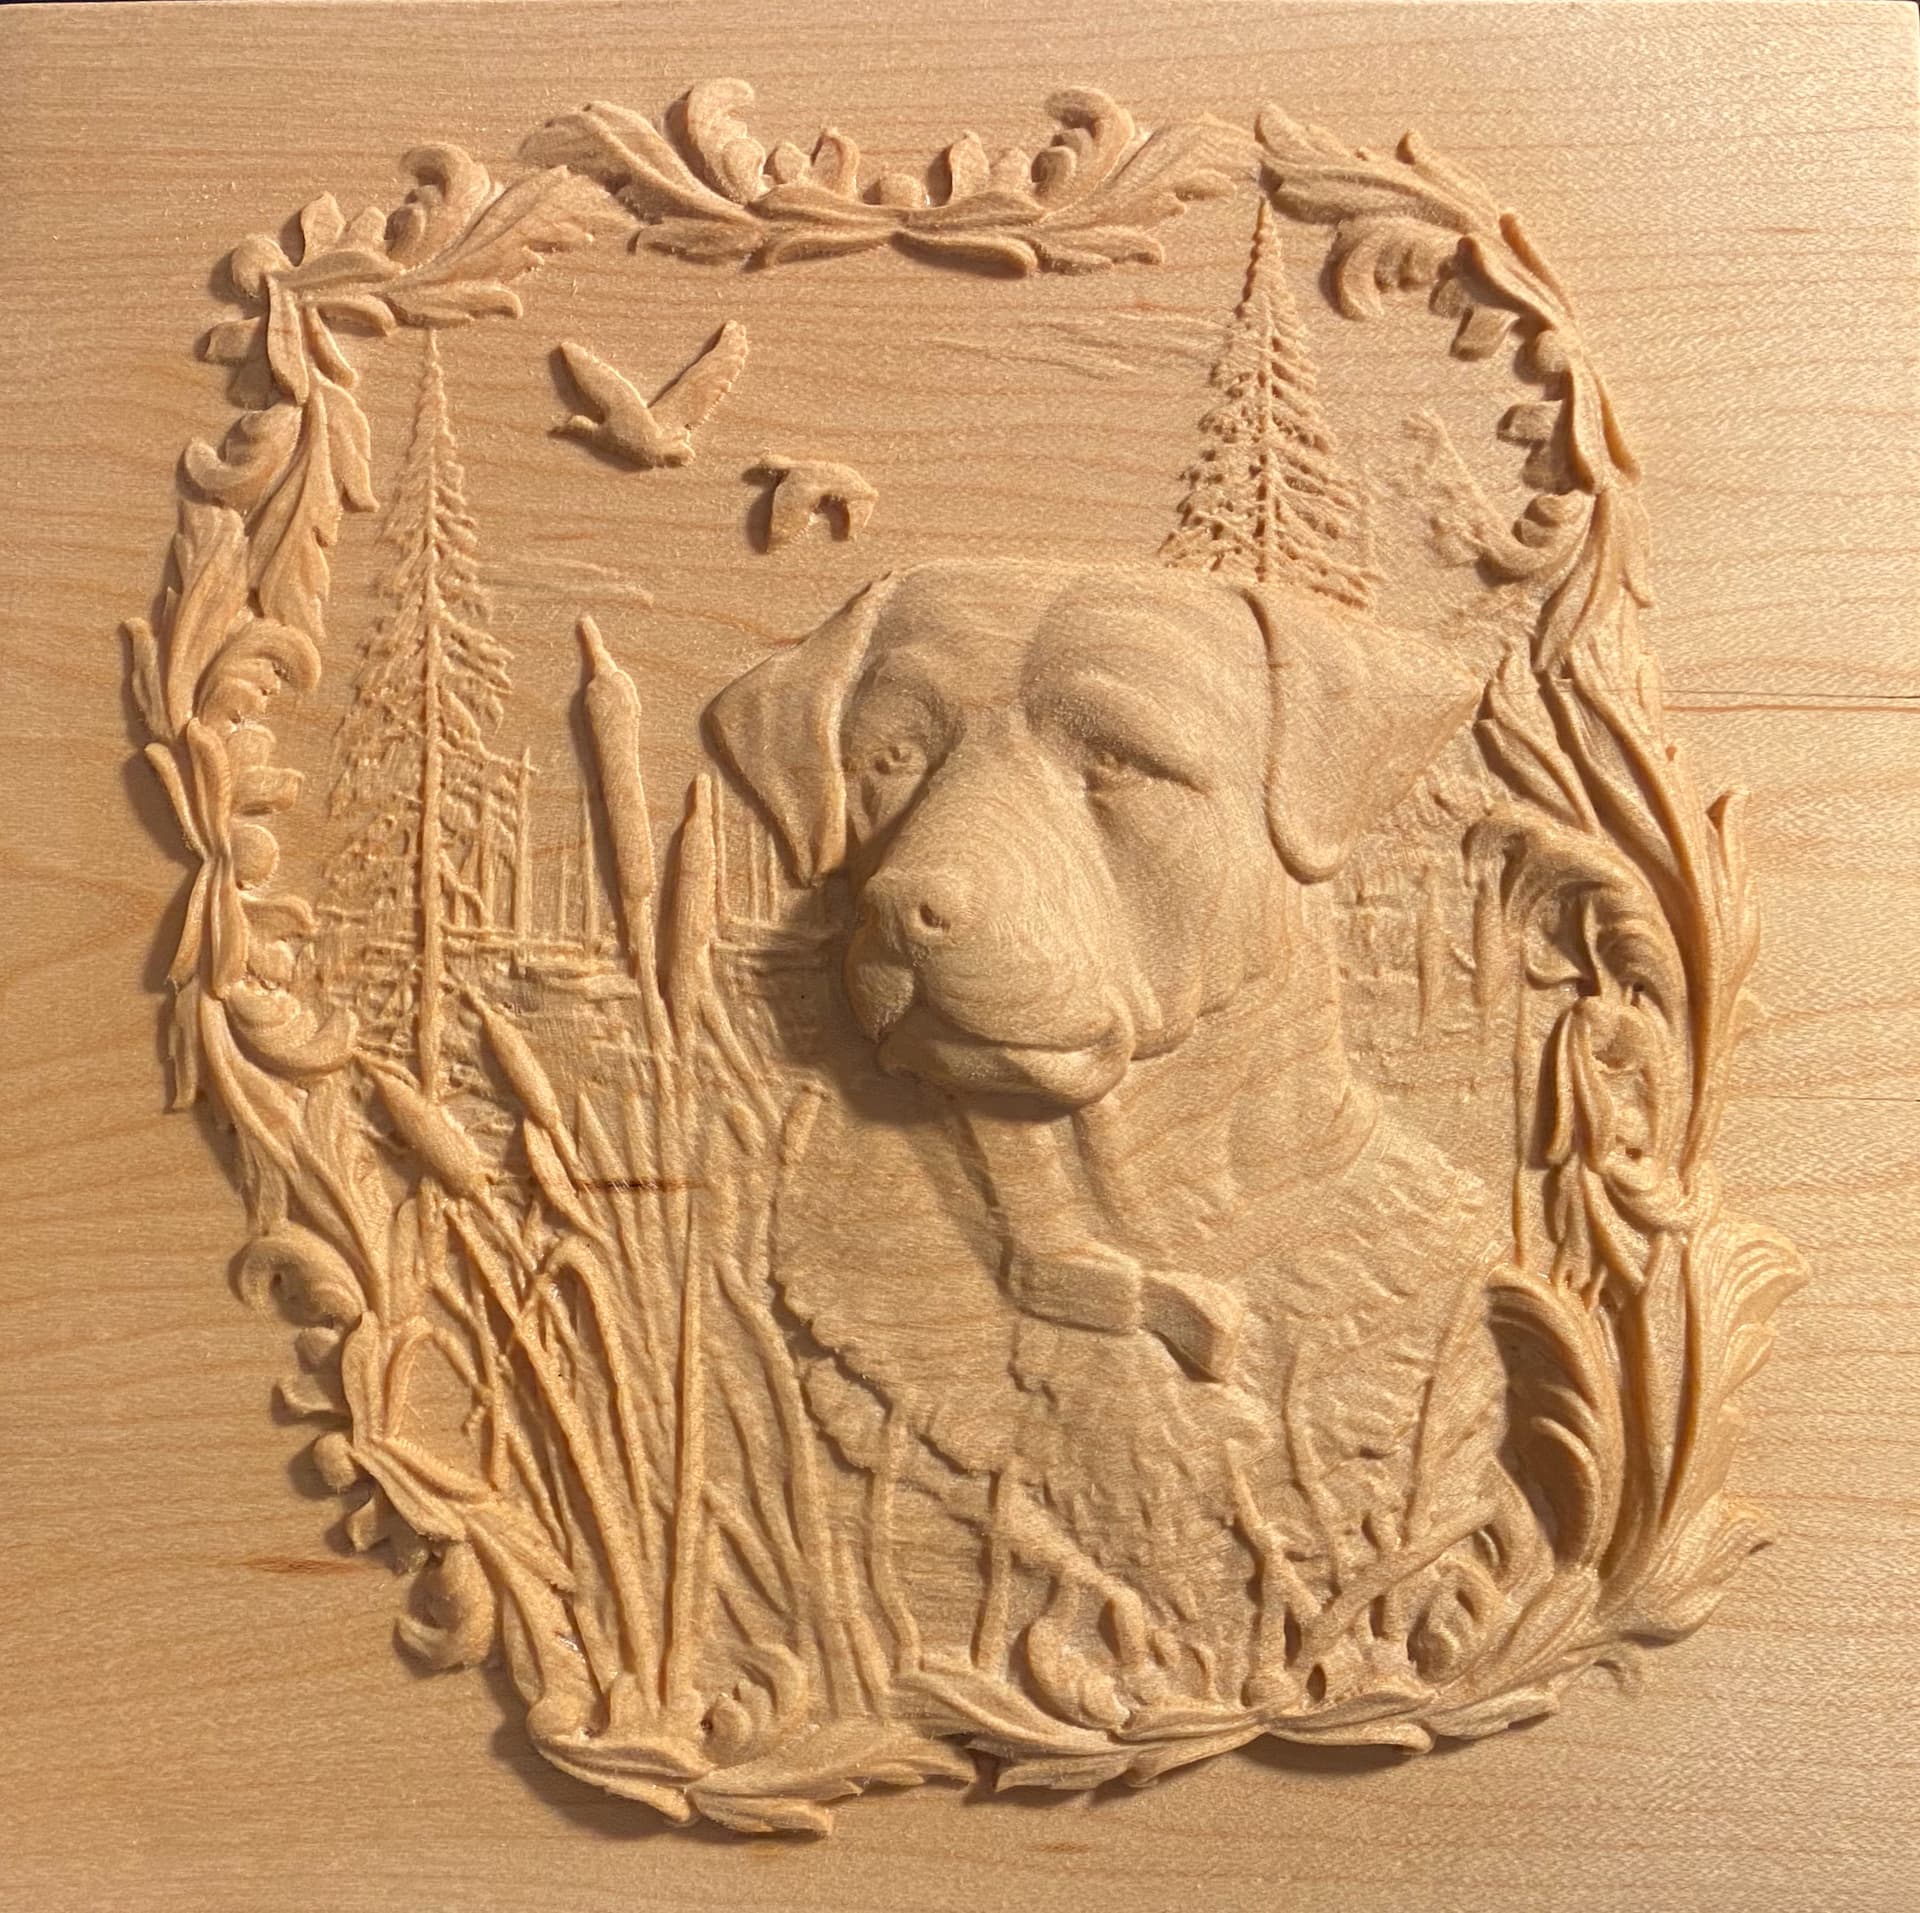
American maple 23mm in depth. Finished size = width 179mm x 175mm in height. Finished workpiece as it came off the machine. Beeswax and walnut oil creme applied with just a single coat. Designed in Carveco Maker from an STL file. Both the roughing and finishing toolpaths were run in gSender. I will support this image with some video, pix and a technical account.
After a technical issue had occurred, I used gSender to halt the process and restarted the carve from the line number at which the process had been halted. I will add the data for the toolpaths with other technical material. I would not have finished this piece of work but for the gSender facility to halt the program and continue at a later time. gSender is outstanding control software for which I thank the development team.
The image below is the finished workpiece. The Carveco offset roughing and spiral in a box finishing toolpaths had really contributed to such a smoothly finished article. It is noted that it did not require any additional sanding. All and any comments are welcome.
Some additional images and information. All cutting was done with the Makita Trim Router rheostat set to marked position 1 (c. 10,000RPM). The feed rate was 1500 with a plunge rate of 250. Issues with speed control meant that cuts 1 & 2 were carried out at 758mm per minute. American Maple is a nice wood to work with a hardness of 1450 on the Wood Hardness Chart.
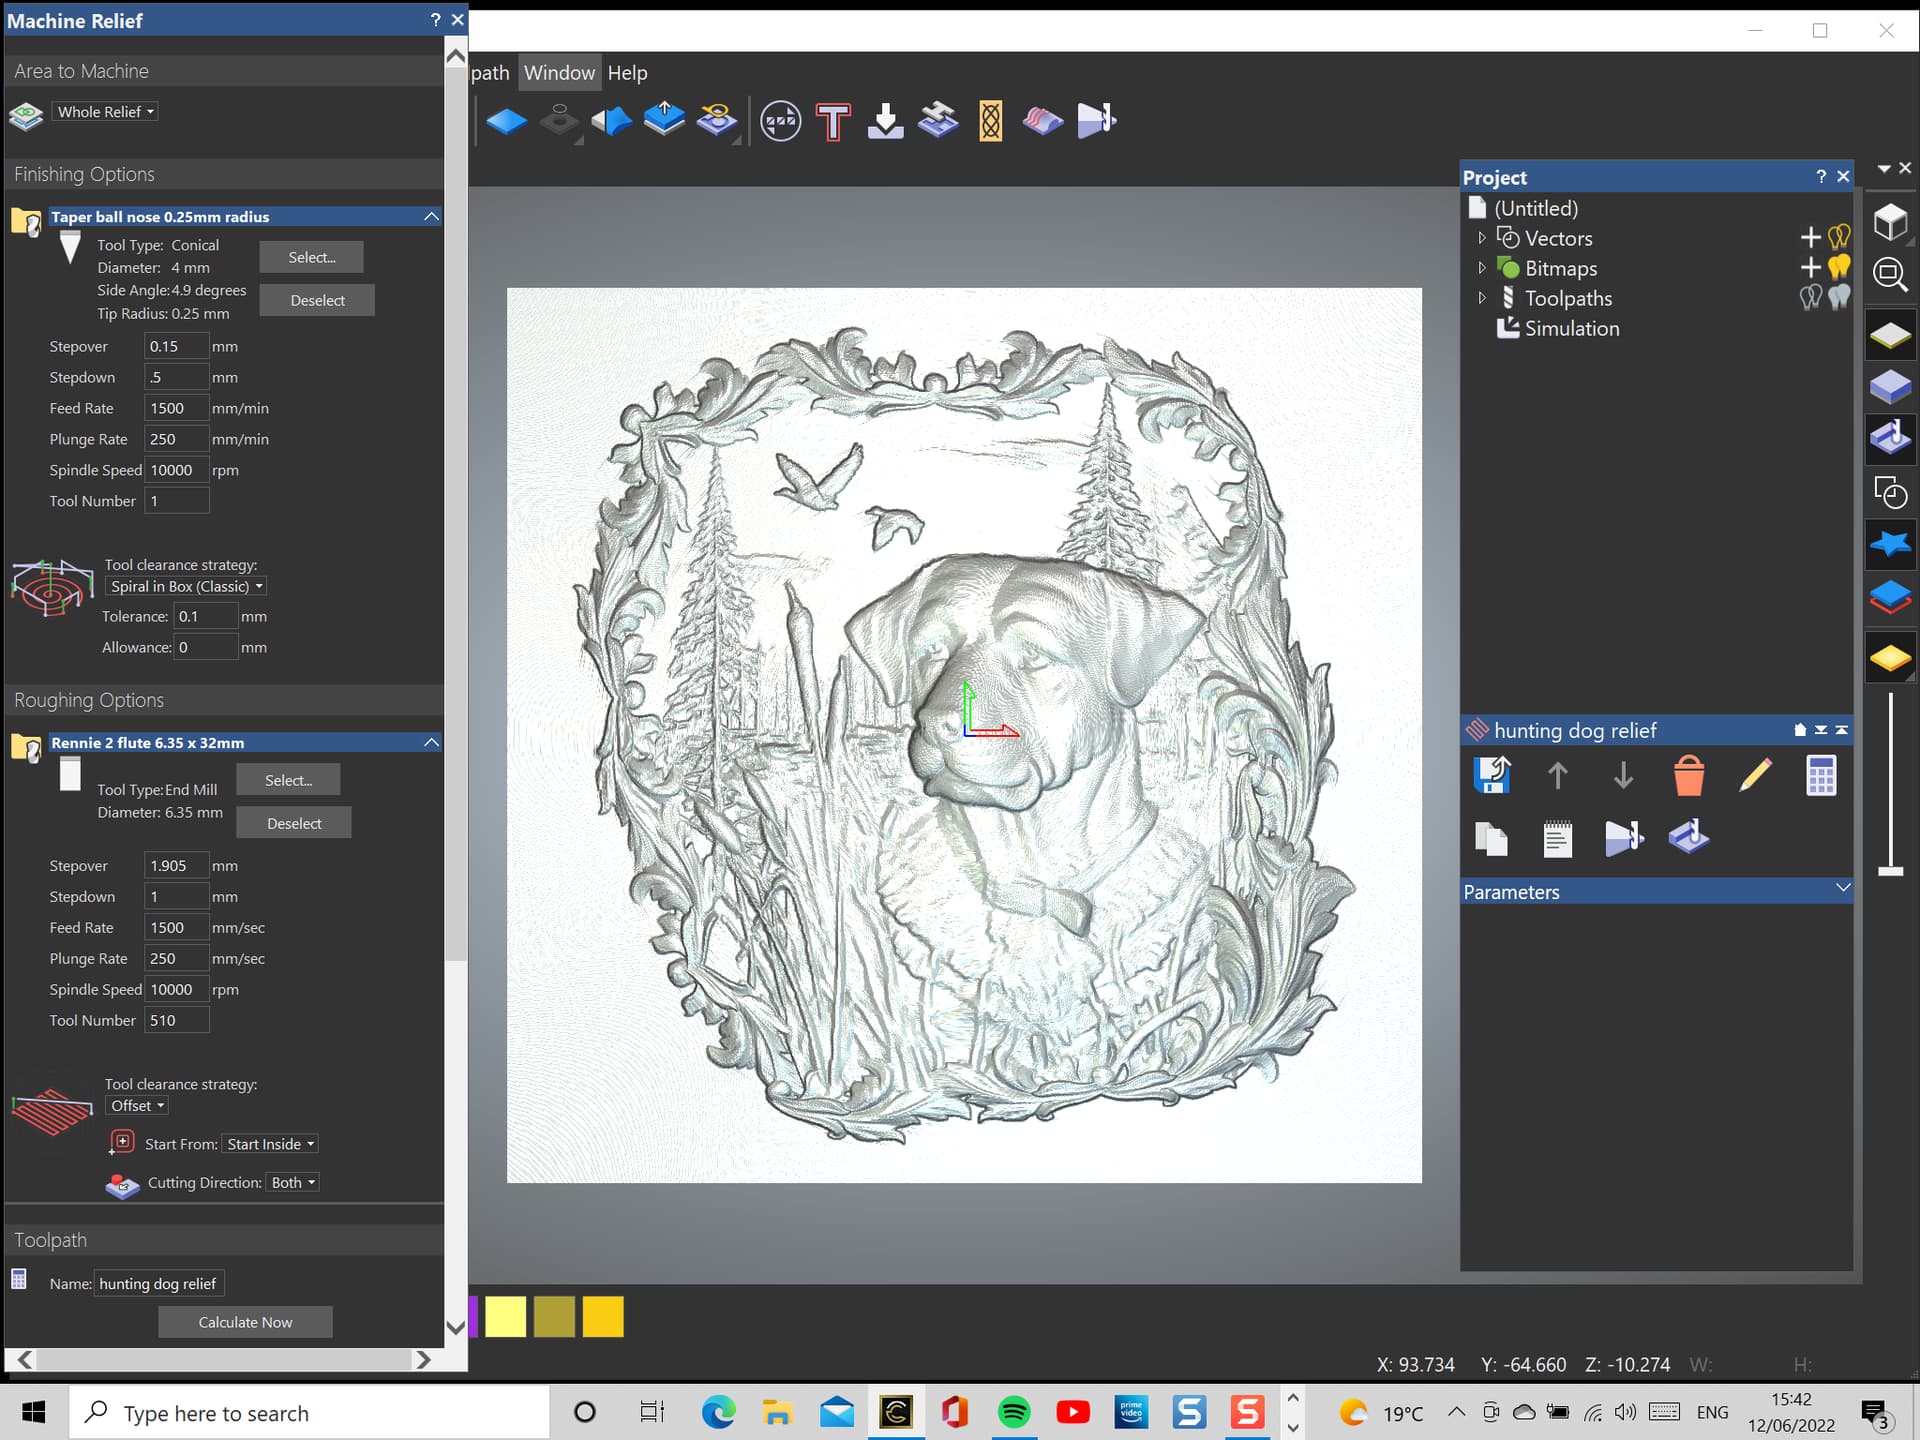
Stepdown for roughing was 1mm and for finishing was .5mm. Stepover for the 6.35mm roughing cutter was 1.905mm. Stepover for the .25mm radius tapered ball end mill with 4.6 degree angled sides was 0.15mm.
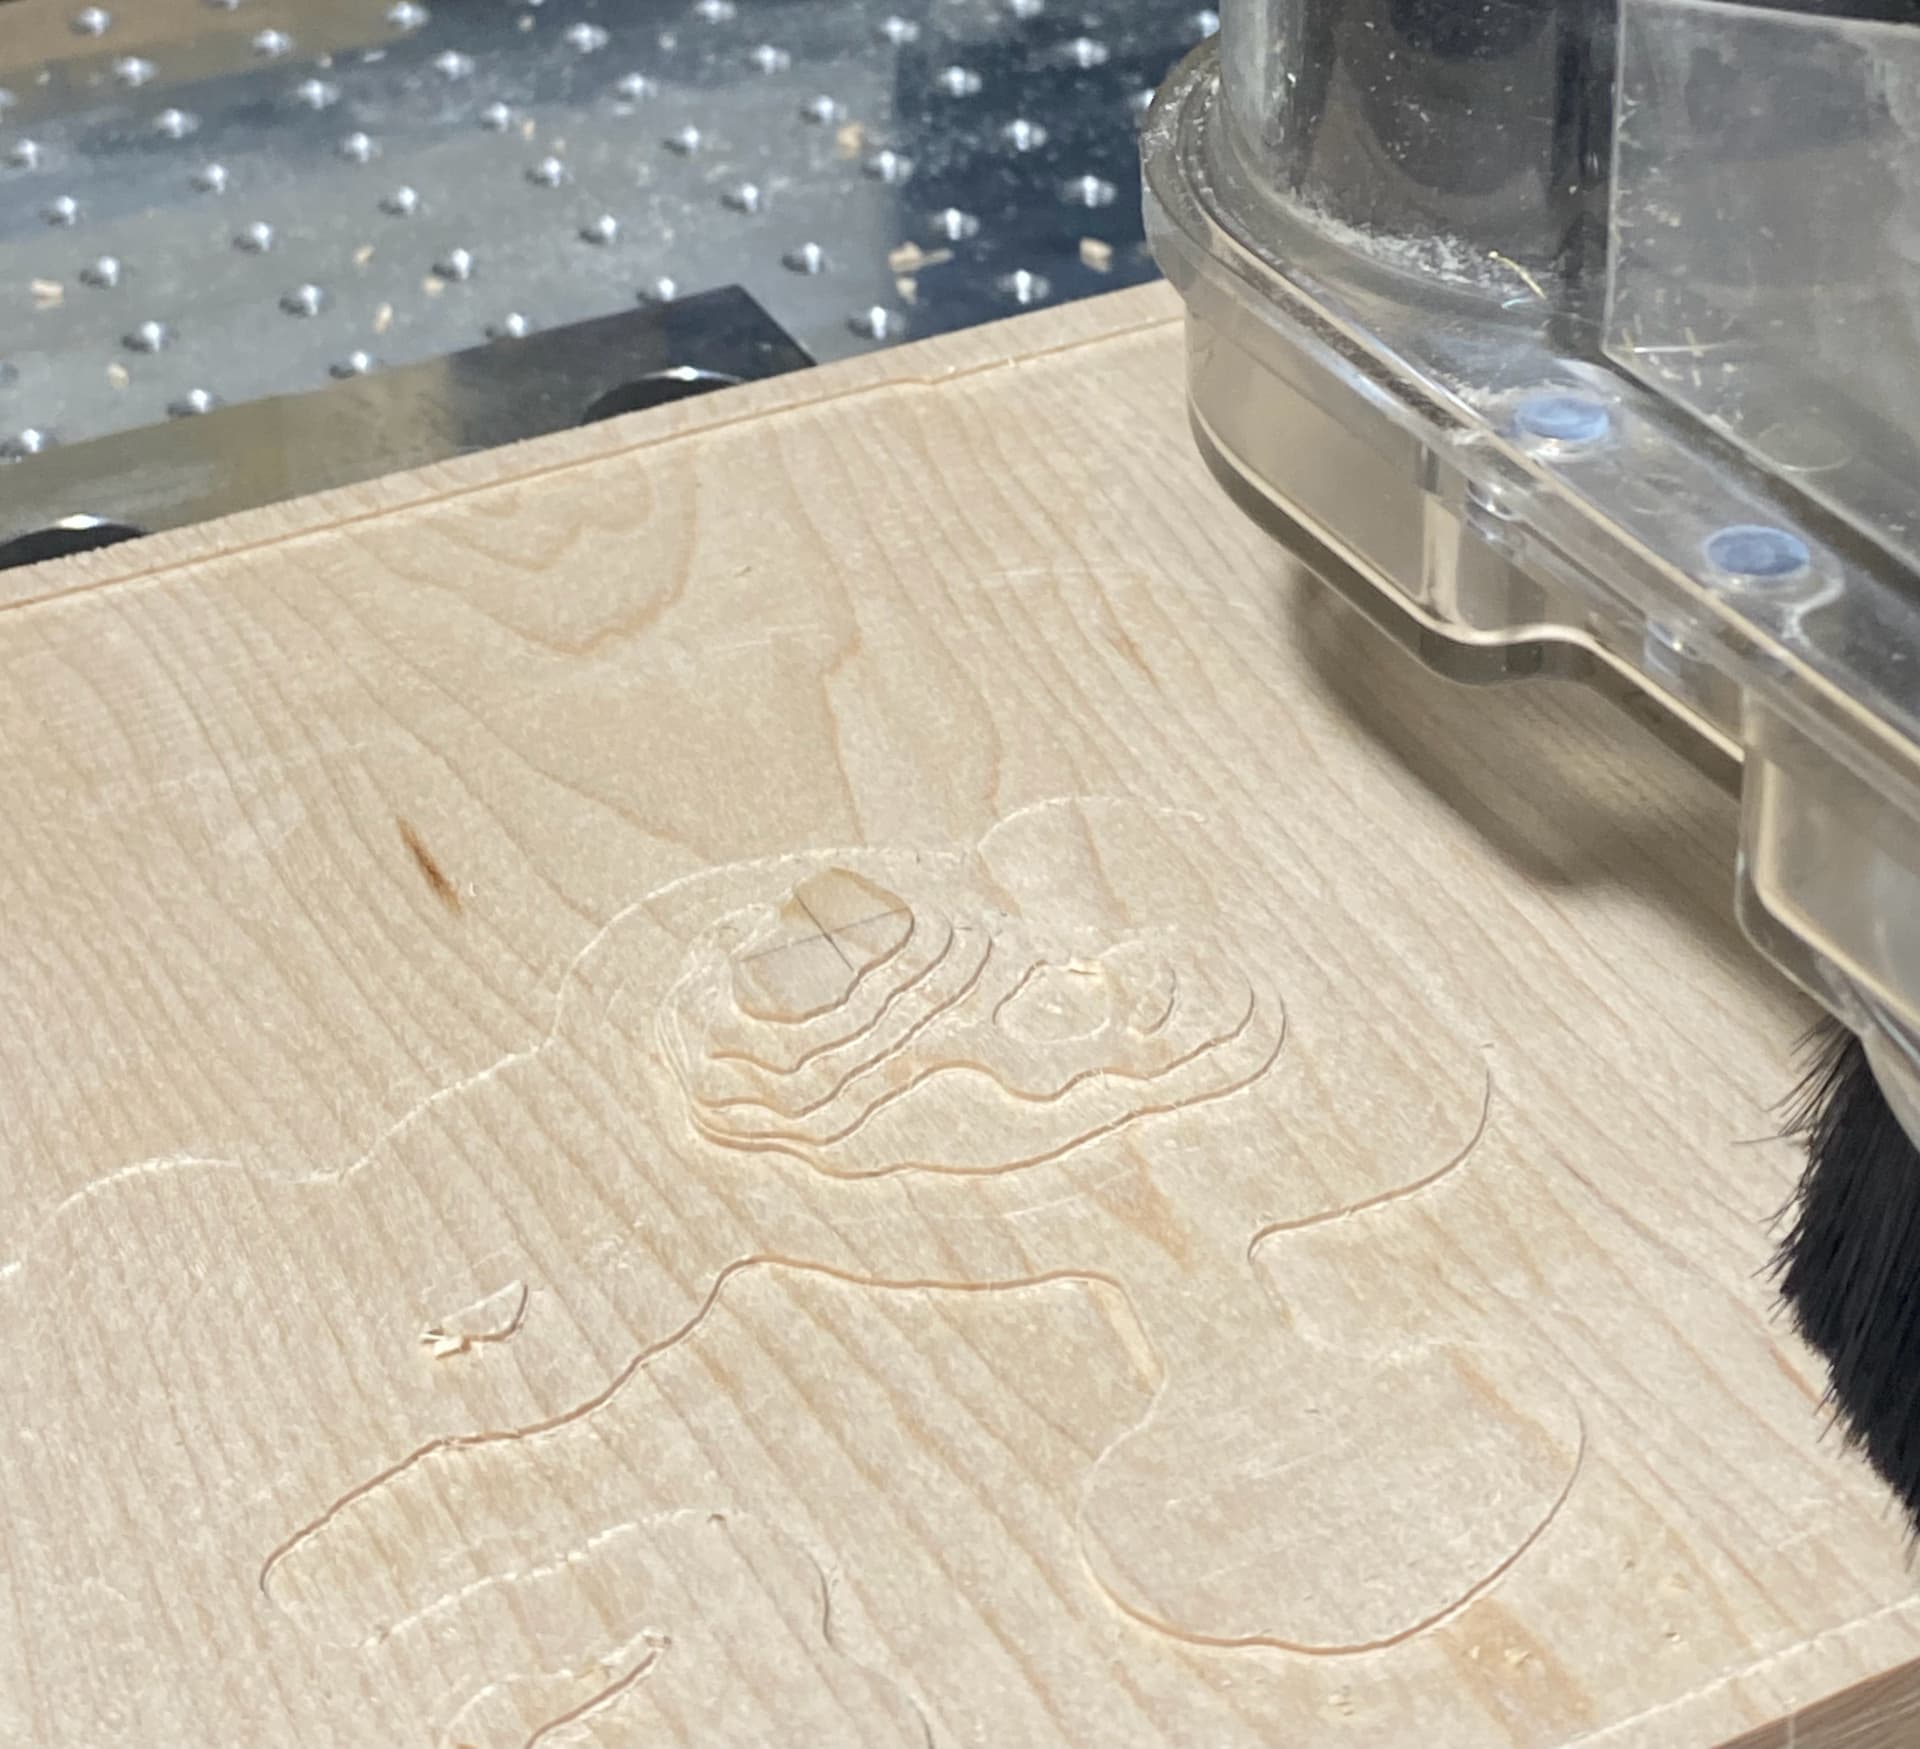
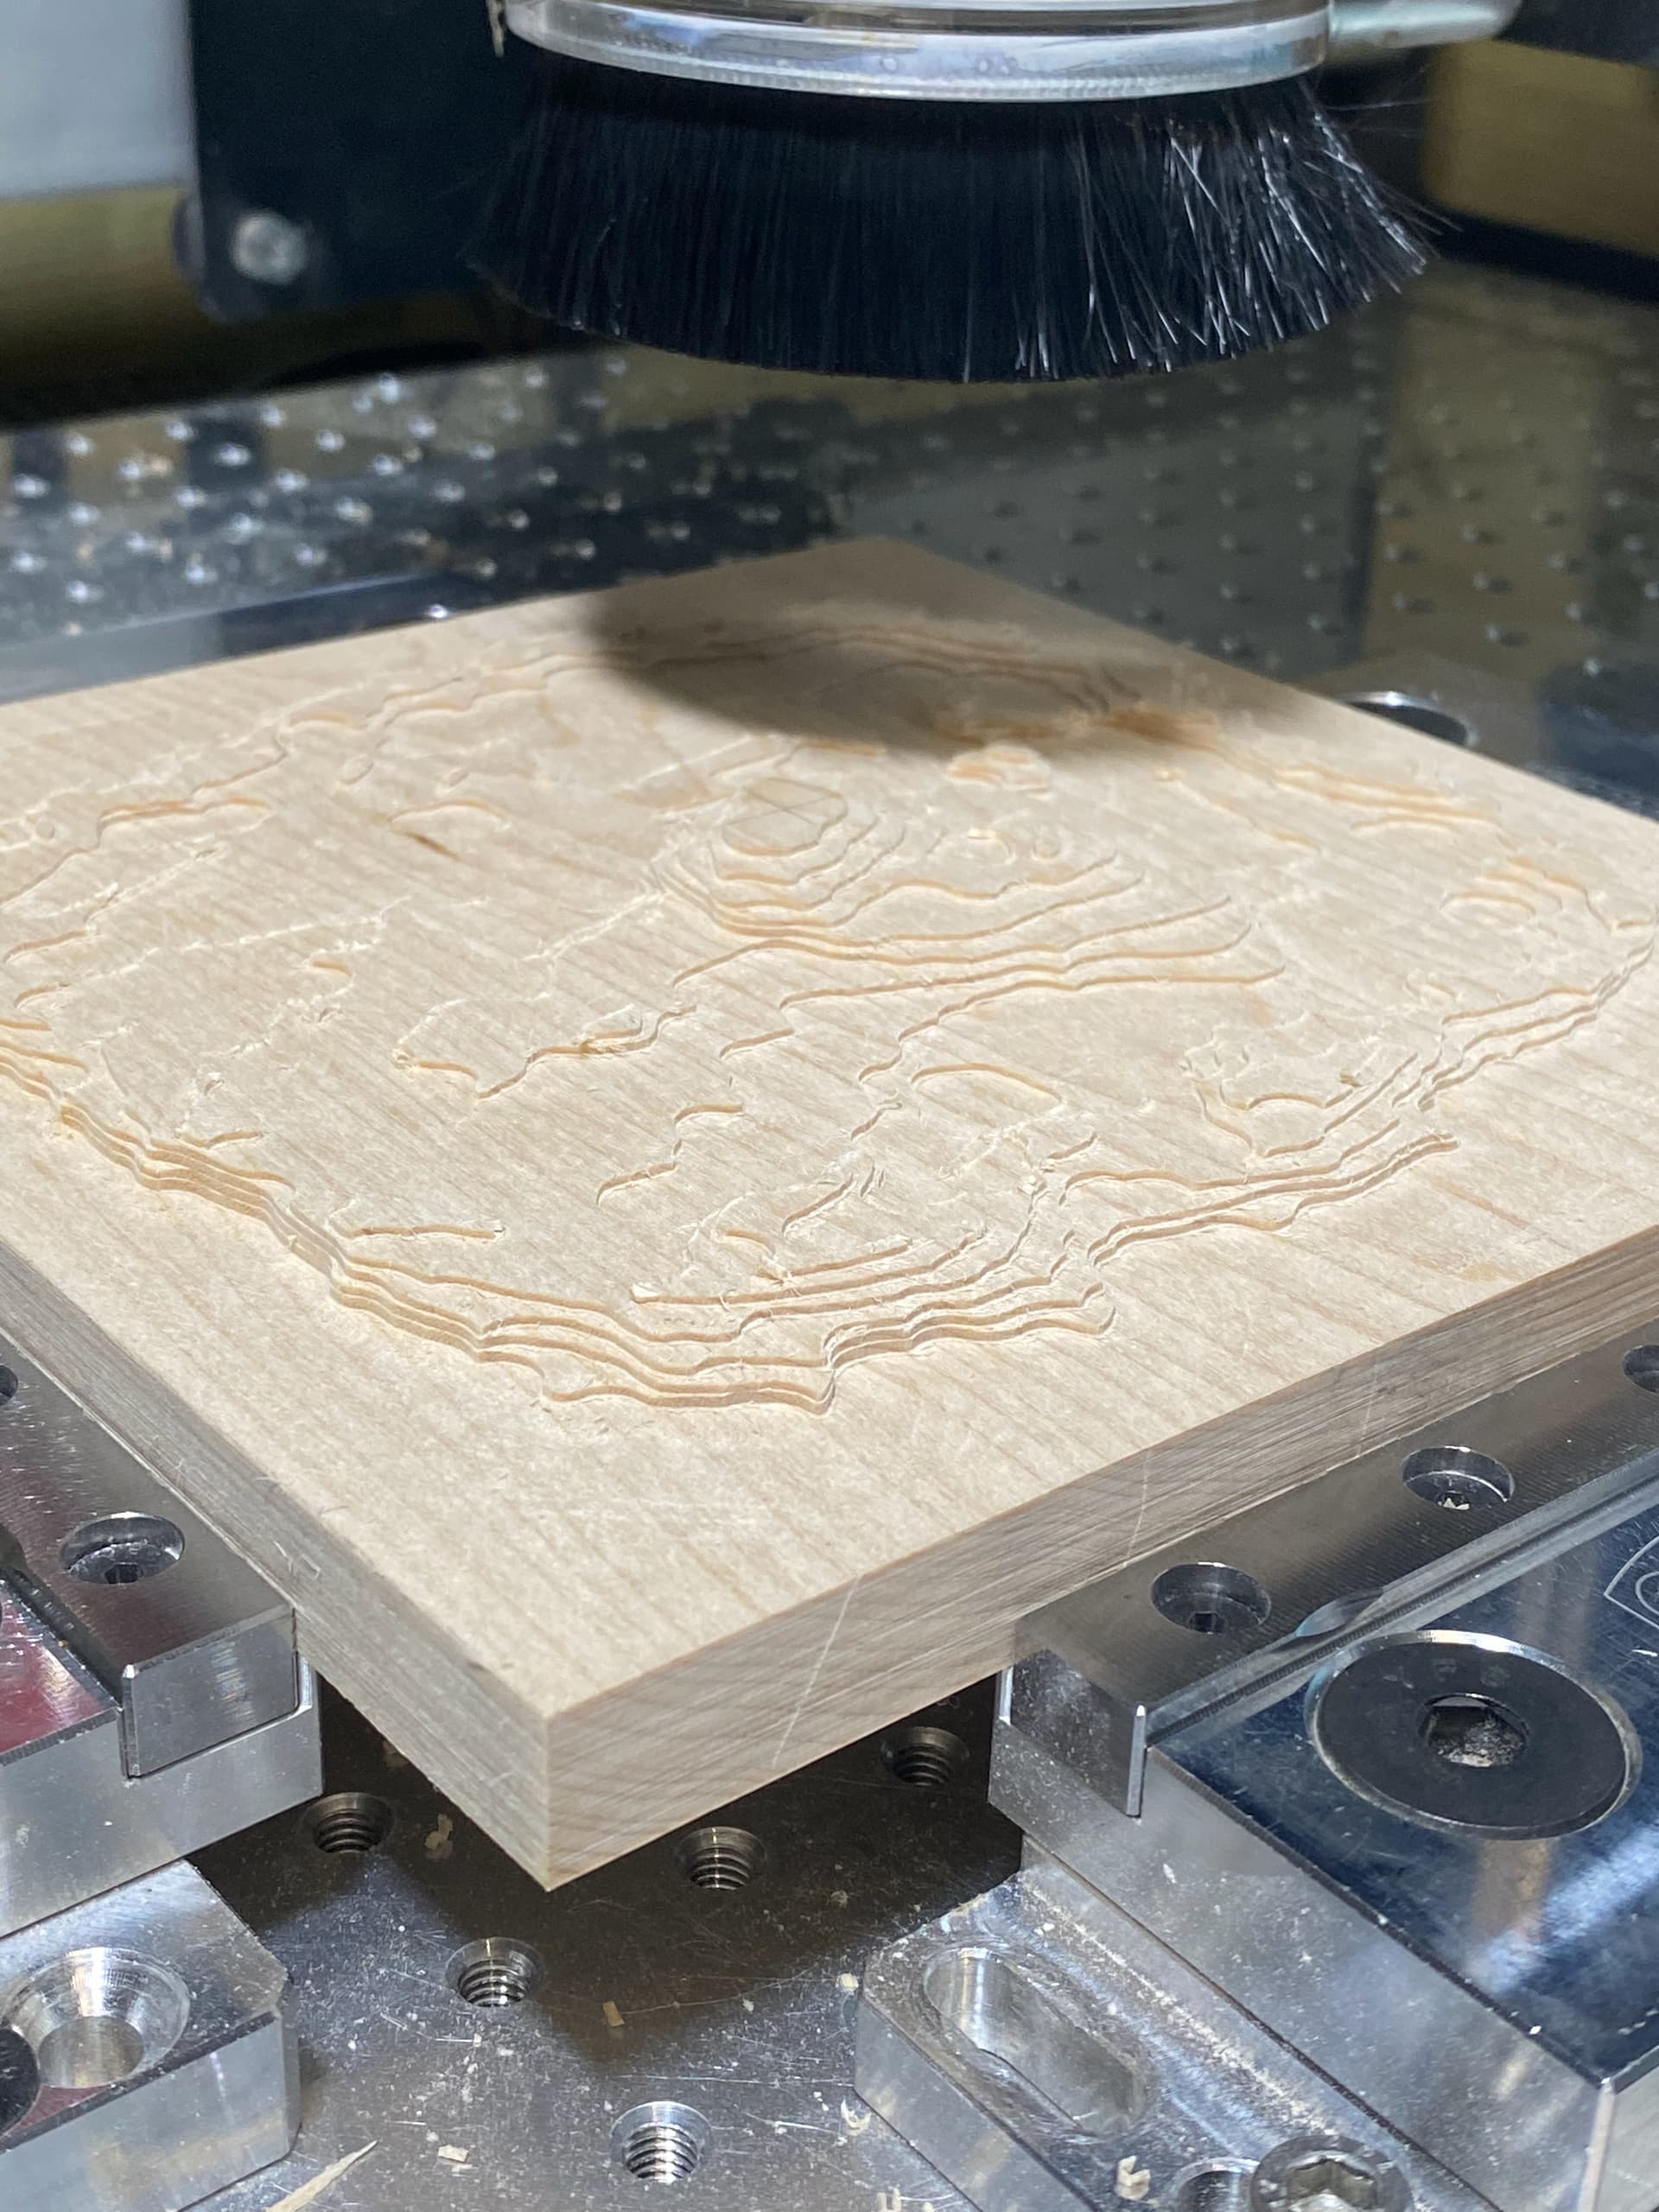
This image shows the start of the roughing cuts. That value of roughing is it gives the finishing cutter much less work to do and preserves the life of your cutter’s sharp edges.
Adding the simulation image from Carveco Maker. The image shows how well Carveco manages to simulate the toolpaths chosen to a high level of fidelity. Things to note are the chosen toolpath strategies. The roughing toolpath used an offset strategy which started cutting from the inside and working outwards. I also prefer to let it cut bidirectionally to shorten the cut time. I use this toolpath instead of a raster toolpath (moves horizontally left and right) to avoid missed edges of the model, which must then be cleaned up by hand.
The toolpath strategy chosen for the finishing carve is a spiral toolpath. This works radially from the centre of the model and moves outwards. It prevents the ball ended cutter from using a raster movement and ploughing the familiar furrows we see when a tool moves left and right in the same plane but changes by the diameter of the cutter (in line with the stepover percentage.
Carveco Maker refines the spiral toolpath by permitting a box to be specified at the same time as the spiral toolpath. This way, when the tool reaches the edge of the model, it continues by just machining the excess stock at the corners. Very useful for not hitting vices and clamps. This toolpath also moves the centre of the cutter to a new part of the model on each pass. The result is very smooth stock that does not require sanding to remove tooling marks. The dog’s nose and head demonstrate this very well.