A while back I constructed a drag knife for cutting thin materials like poster board and foam based on a design for 1/2" routers by Brian Oltrogge. http://www.grunblau.com/DragKnife.html. I’ve used this knife quite a bit for card stock and it works great. Well worth $5 - I recommend it.

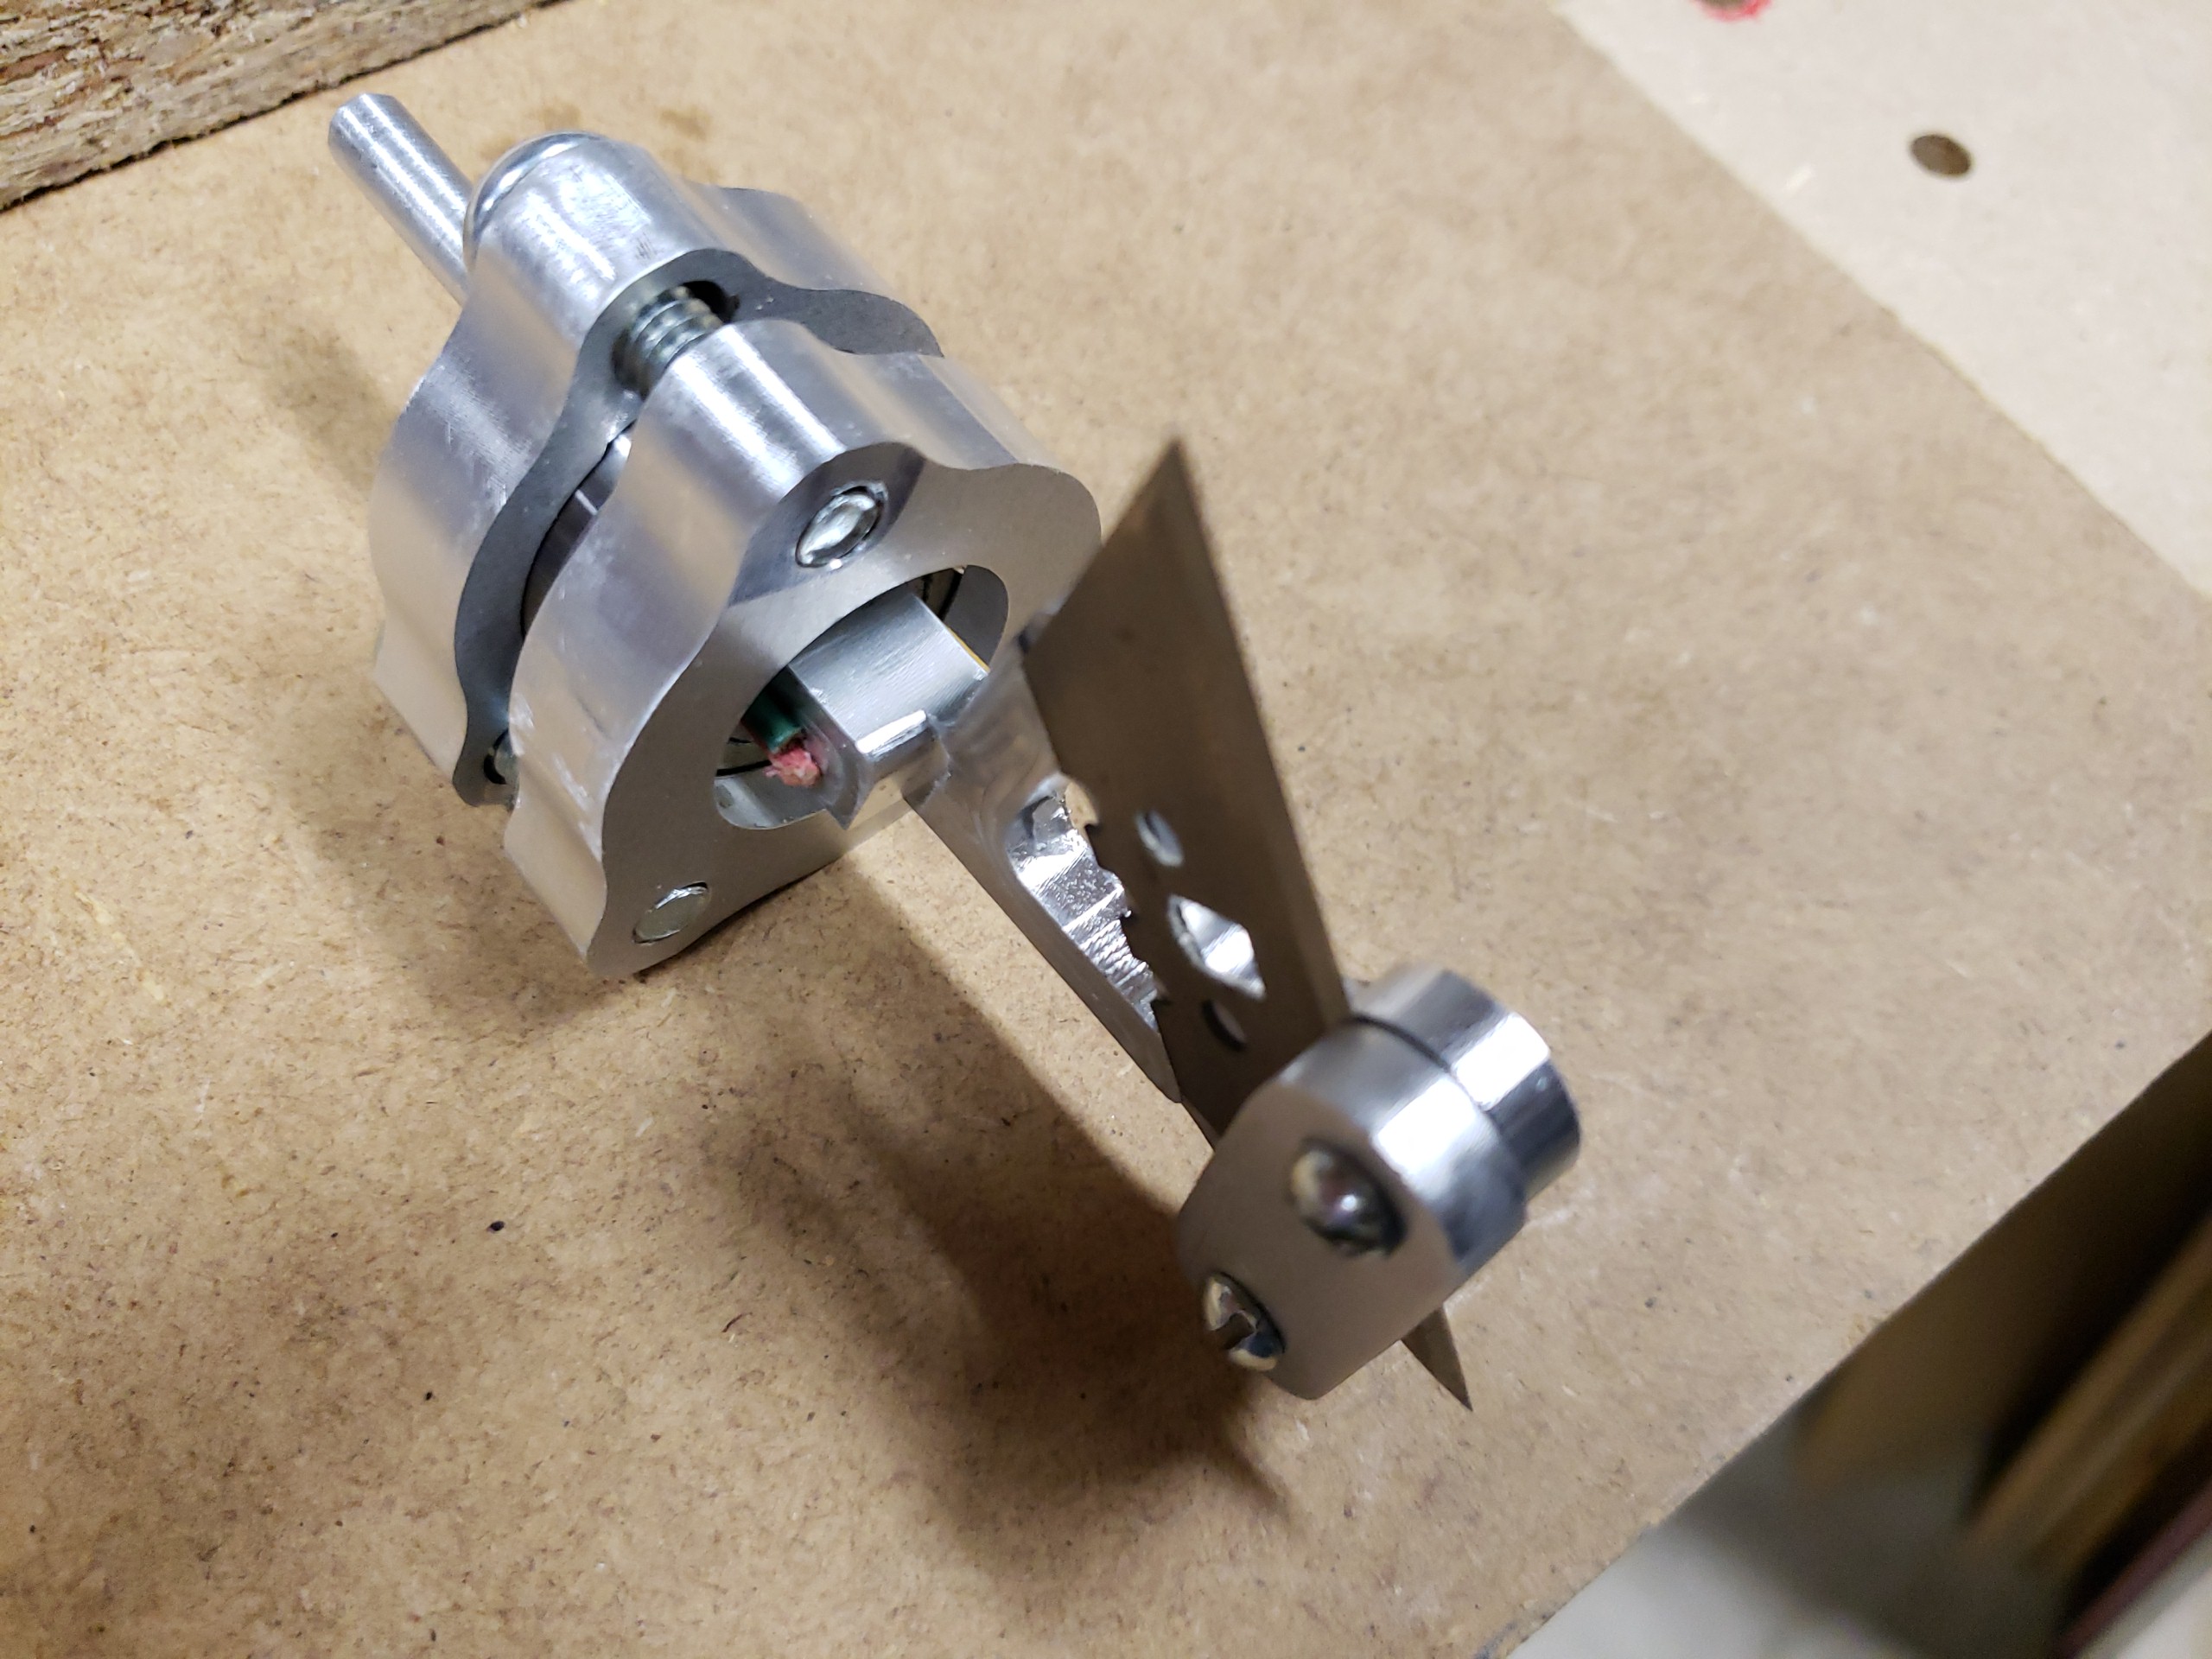
As I watched the knife cutting I noticed that most of the time the entire assembly, not just the blade holder, turns in the router. Apparently the shafts on this size router are so easy to turn that the knife’s bearing assembly is unnecessary. Forum regular gwilki commented on the same thing. We decided to try to make a simpler version.
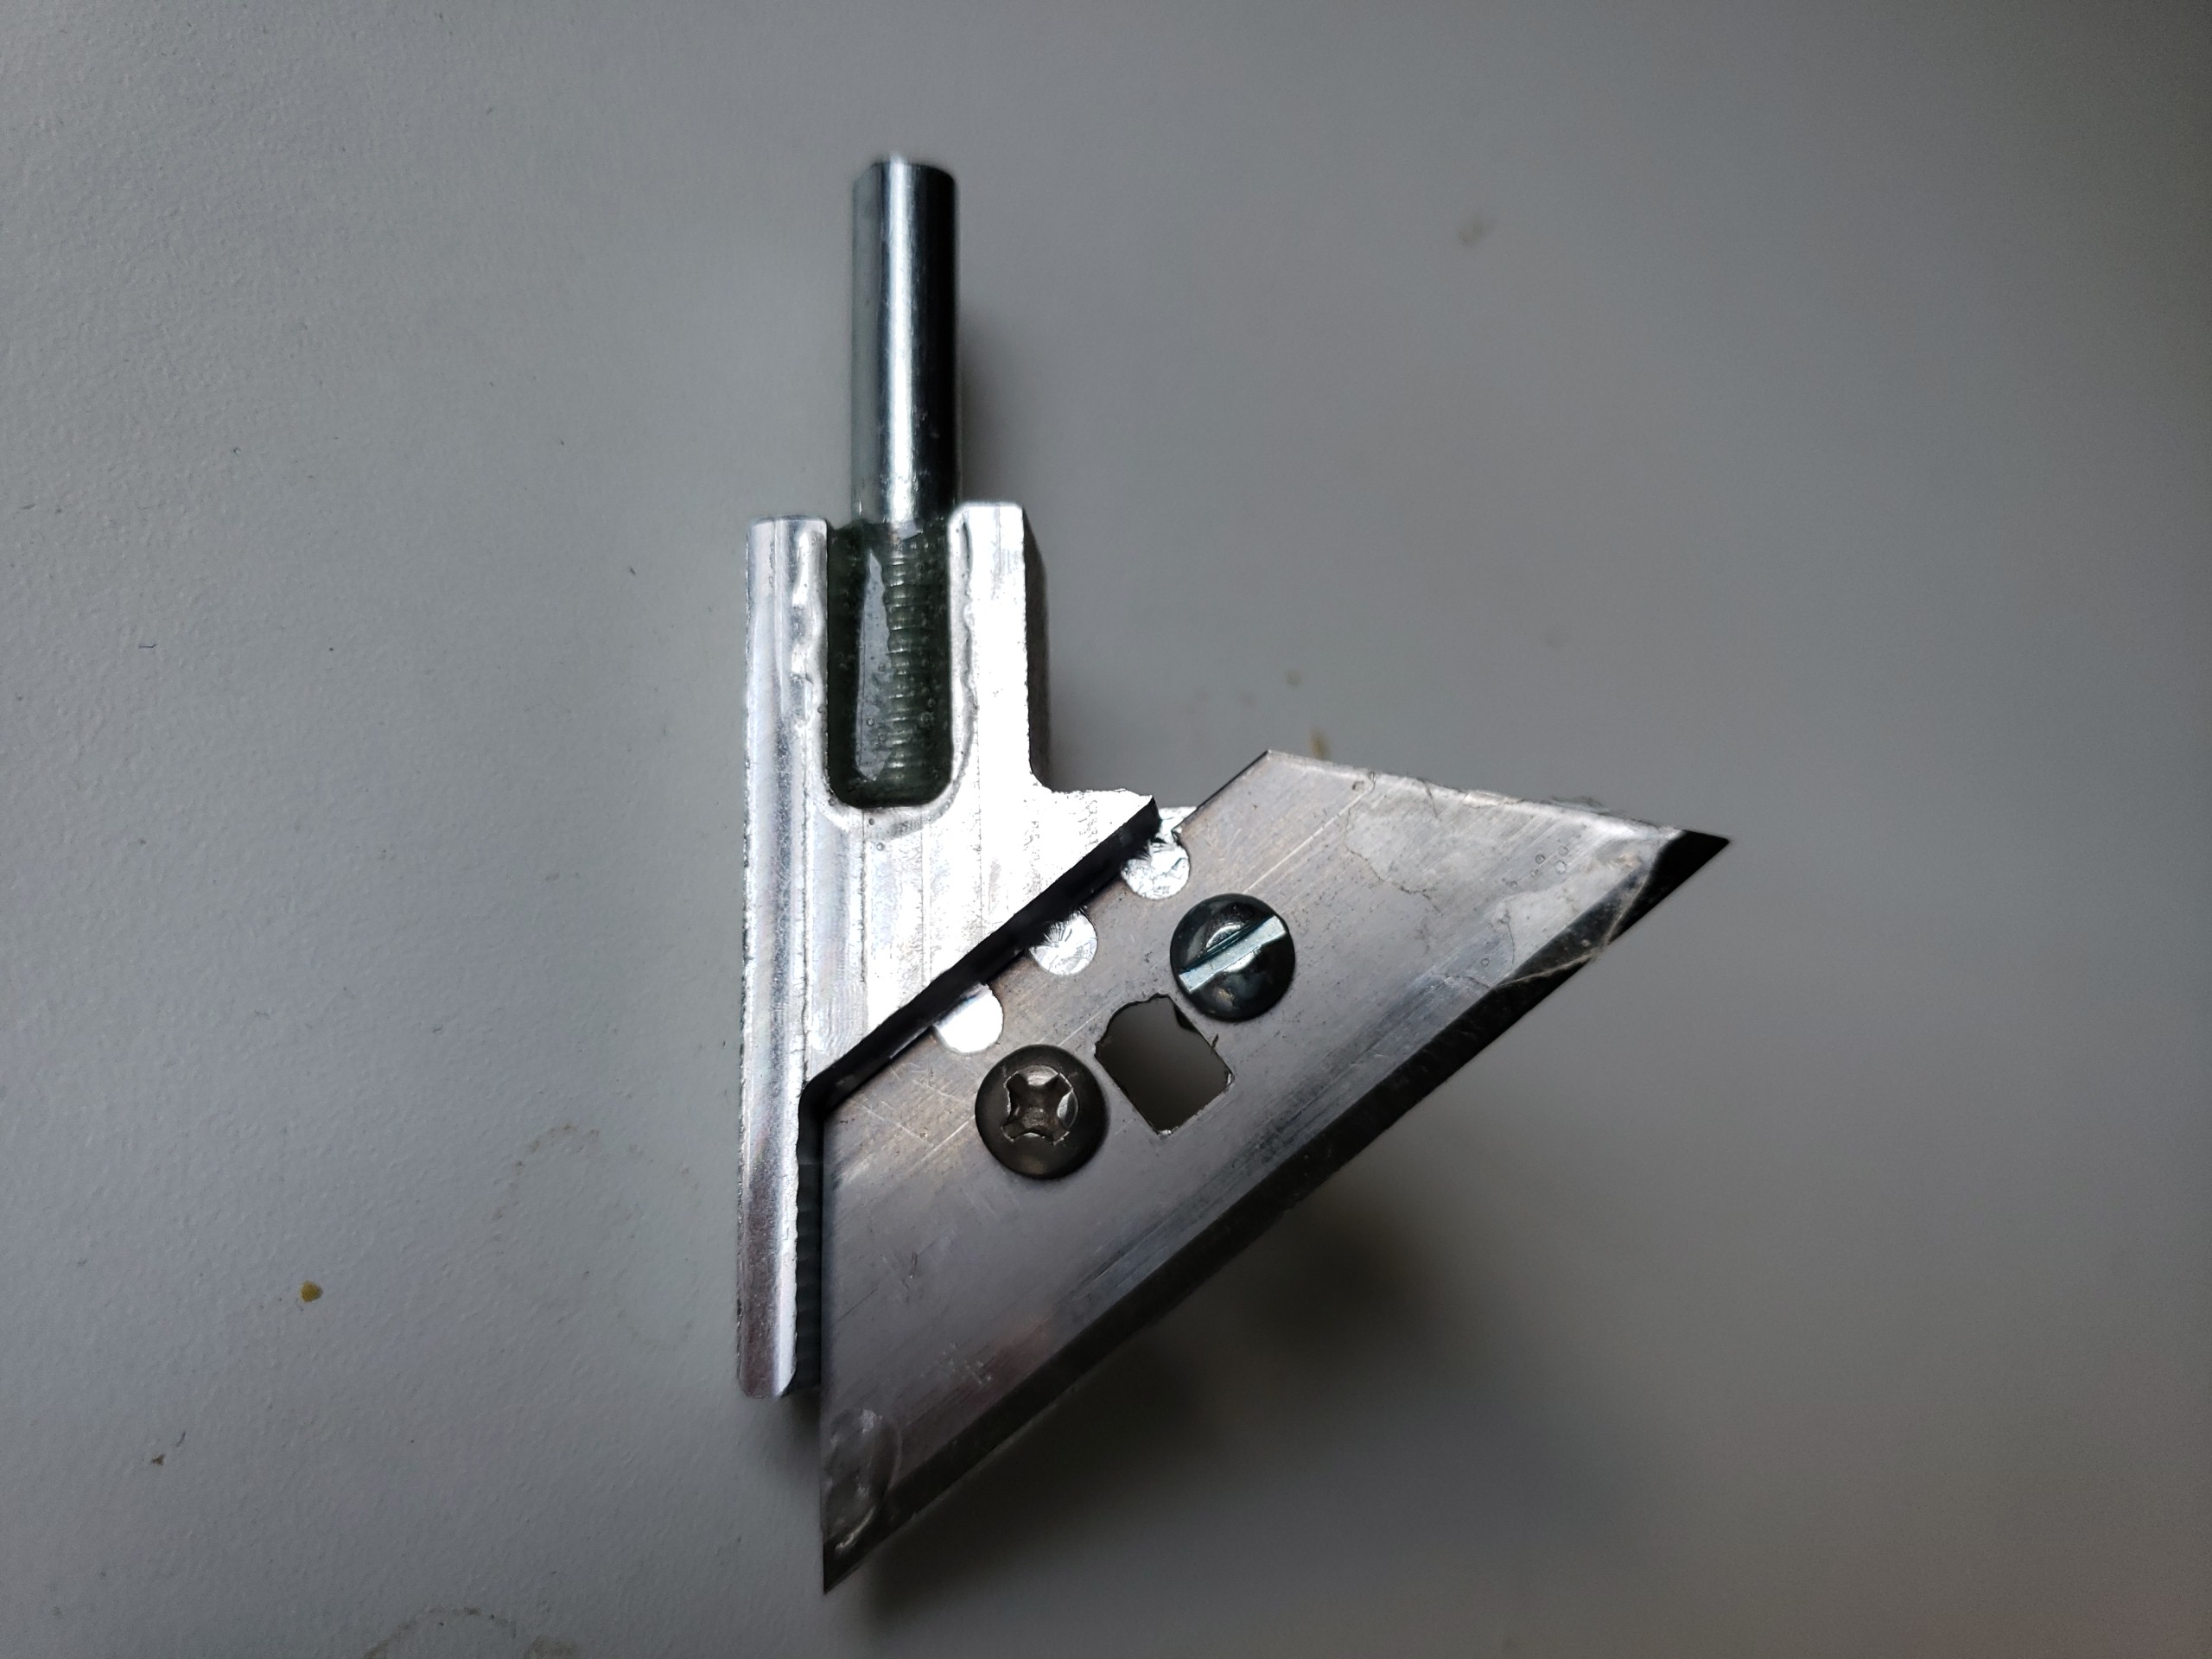
Over the last couple weeks gwilki and I prototyped and tested several versions, and now have a version that seems to work. This version uses only one part, is easy to machine, doesn’t use bearings, uses screws to hold the blade, and is shorter.

The frame was designed parametrically in Fusion 360 so it can be easily modified to suit different blade shapes and stock thickness. Machining time using fairly standard speeds and feeds for aluminum – 22 in/min cut, 0.012 stepdown, 0.06 stepover – with a Sienci 1/8” single flute mill for aluminum at 18,000 RPM is about 55 minutes with no drama.
The only assembly required is to cut the head off of a 2” 1/4-20 shoulder bolt, secure the threaded end at the bottom of the slot to keep it aligned with the blade, and epoxy it in place. Secure the blade with two #8 screws and nuts, sand the plating on the bolt shoulder a little so it slides into the router chuck, and you’re done. The shaft-to-blade setback is 0.175”.
On thin material, like 0.014” card stock and poster board, milling is pretty straightforward. Set up a contour job with a tool of any small diameter. I use 0.005”. Tell your CAD program to cut on the line. In Fusion 360 you do that by turning off cutter compensation in the Passes tab on the Setup page. Direction doesn’t matter. The router must be off.
Small radius turns in thicker material can chew up the stock because at the top of the stock the blade is wider and needs more room to turn. If you use Fusion 360 I recommend the Drag Knife add-in available in the app store https://forums.autodesk.com/t5/fusion-360-design-validate/drag-knife-support-has-landed/td-p/8693250 that raises the blade until only the tip is still in the stock, swivels the blade, and lowers the blade to continue the cut. Very cool to watch. Some senders like bcnc have drag knife widgets but I have not tried them.
It’s also very important, especially in thicker material, that you set up your toolpaths so that the blade starts a new cut facing the same direction it was in at the end of the previous cut. Again, easy in F360. Set up each cut, like the inside of an O and the outside of the O, as separate toolpaths. Select the Entry Point for each cut in the Position section of the Linking tab on the setup page. Remember, the router must be off when using the drag knife, so it’s nice and quiet! Turn the blade manually in the direction it will start the first cut. Pick a flat section of one letter as the entry point and it will end at the same point. Then pick a flat section of the next letter and the blade will move there and start in the same direction. Do this for each individual cut. CAUTION – If you do not line up the blade directions you can jam the knife, break the blade, screw up the stock, and damage your router. Wear safety glasses!
Tip – Since you may have many toolpaths – I used 35 to cut “Drag Knife Test” with a stencil font - in Fusion 360 save a toolpath you like as a template. Then copy it into each new setup, and use the Duplicate function to add additional toolpaths in each setup. Saves a ton of typing and minimizes errors.
Setting Z zero can be a trial and error kind of thing because the stock is so thin, and keeping your stock flat is important and tricky. These two things may be the most difficult to get right, and will certainly require practice to get acceptable results.
Is this simple drag knife as good as purchased versions like the Donek, or other DIYs like the Grunblau? Maybe, particularly in 1/4” collet routers. Is it worth making? That depends on your need for the tool and your willingness to experiment. Is it easy to use? If you spend some time with it I think it can be. It can certainly be a challenge, but that’s fun, right? If you make one and decide you’ll never use it, you’re out a 1x2” piece of stock and some time.
Thanks to gwilki for all his prototyping and testing. I only used aluminum, but he also used Corian and wood. Grant proved that other materials work as long as they are relatively stiff and machineable. We didn’t try acrylic, but I think it should work. The basic design uses 3/8” stock, but Grant used 1/2” so you can use what you have. It may be hard to get enough surface area for good epoxy bonding with stock less than 3/8” thick.
All of the F360 files and drawings, and preliminary test cut videos for the final version are available in my Sync folder here Secure cloud storage that protects your privacy
The F360 file includes the machining setups, but be sure to double check and simulate them before using them. Note the tool diameter used and the machining order.
While I don’t think everybody needs a drag knife, it can open up other uses for your LongMill. It’s easy enough to make that you may find it useful. Please let us know if you try it and how it works, and by all means improve it where you can. I’ll be glad to help with any questions, and I’m sure Grant will too.


