Still fairly new to the CNC world, trying to get some experience with creating inlays.
I’m unsure if this is something the forums are for, or if this is even the correct place in the forums. If not, just let me know.
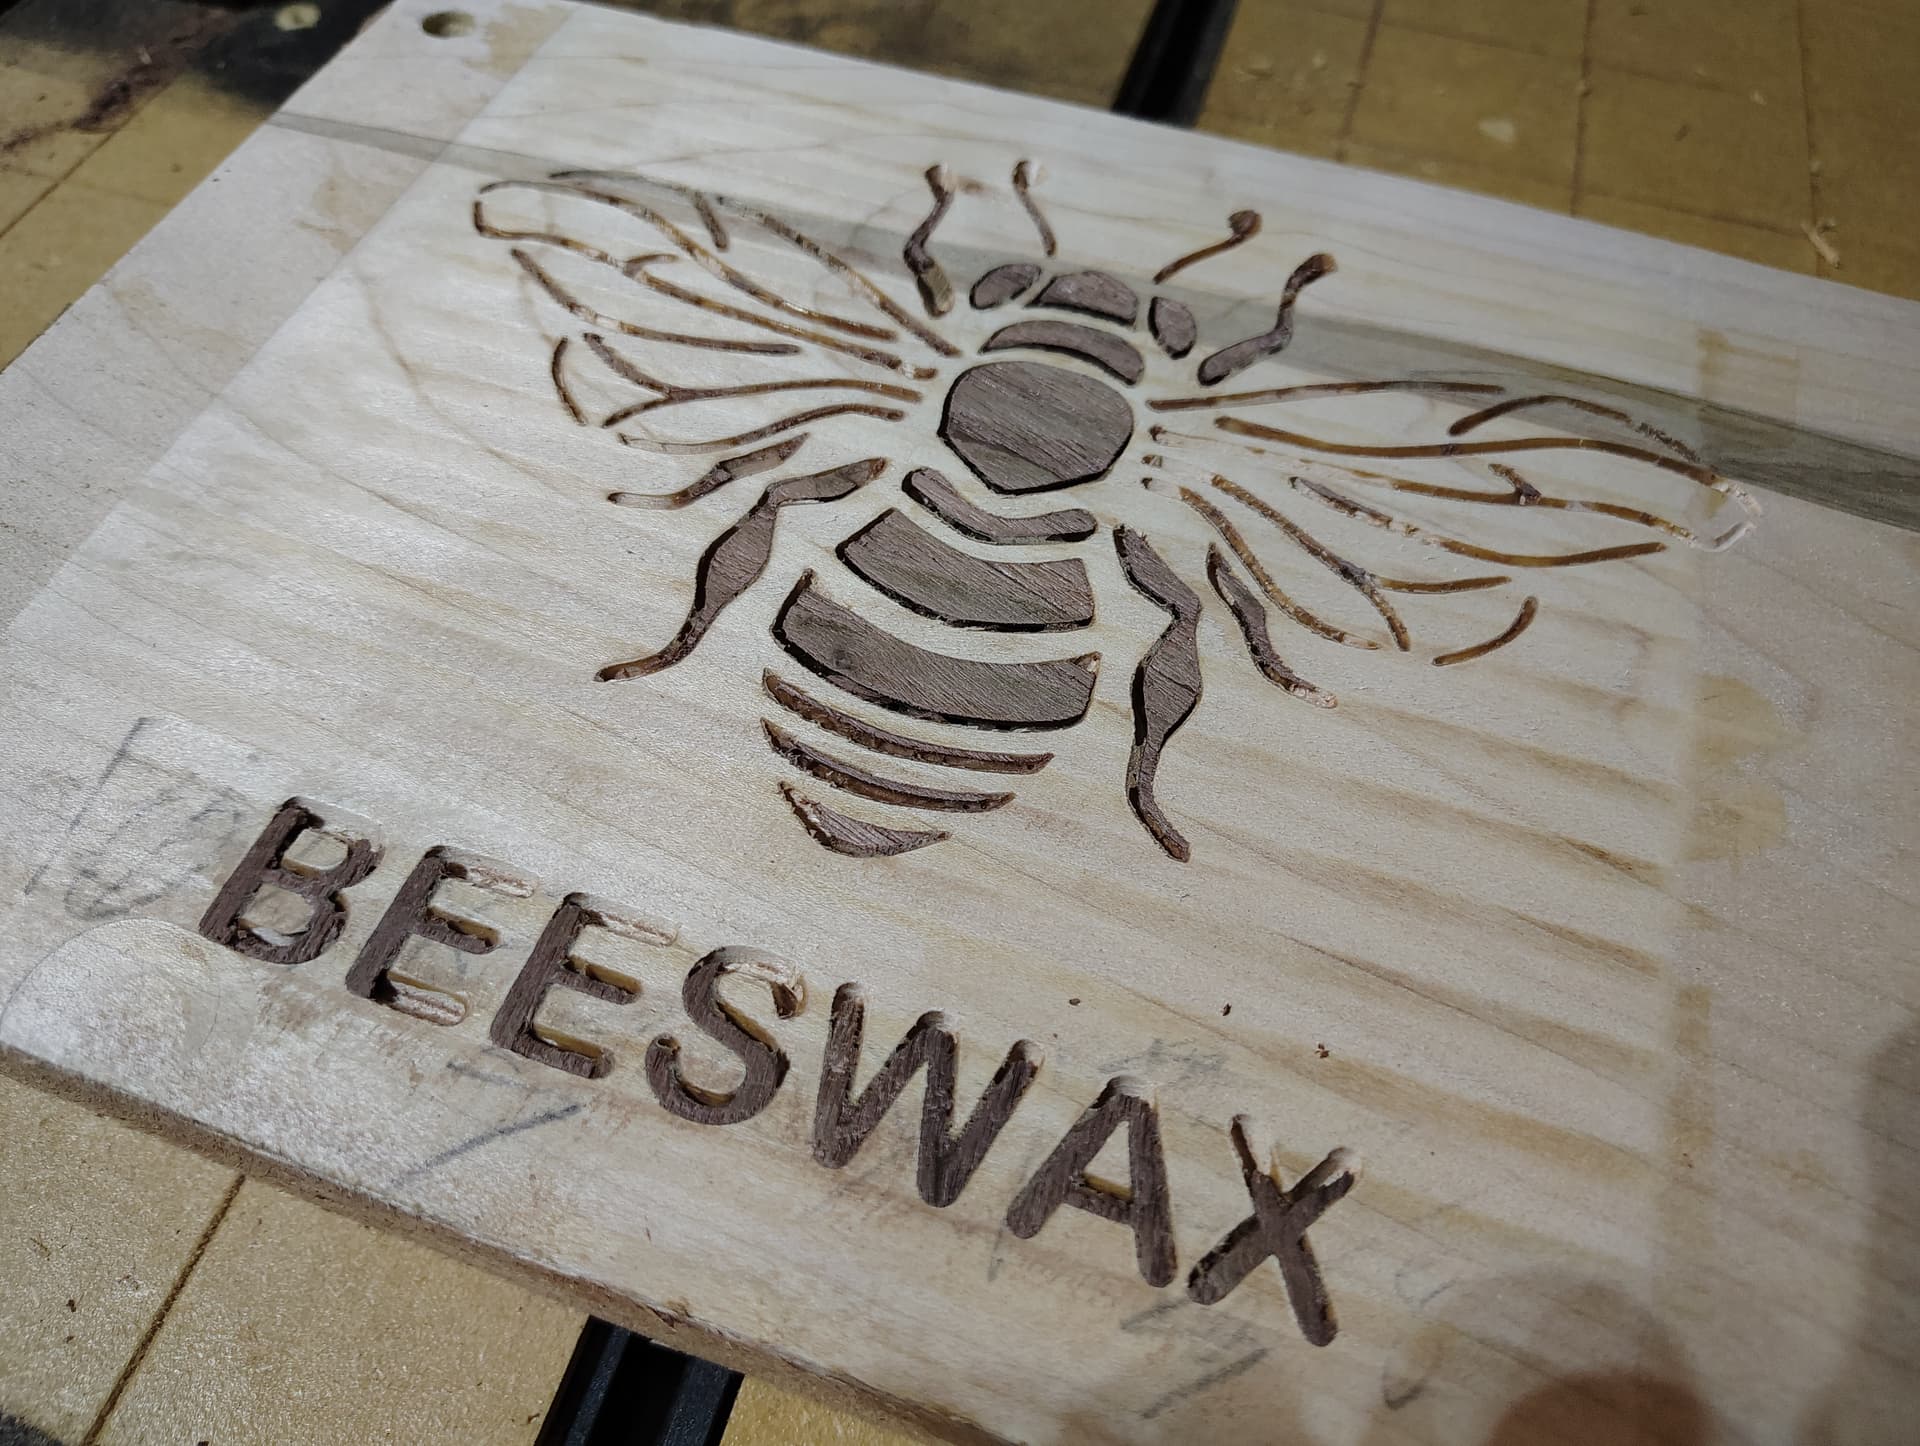
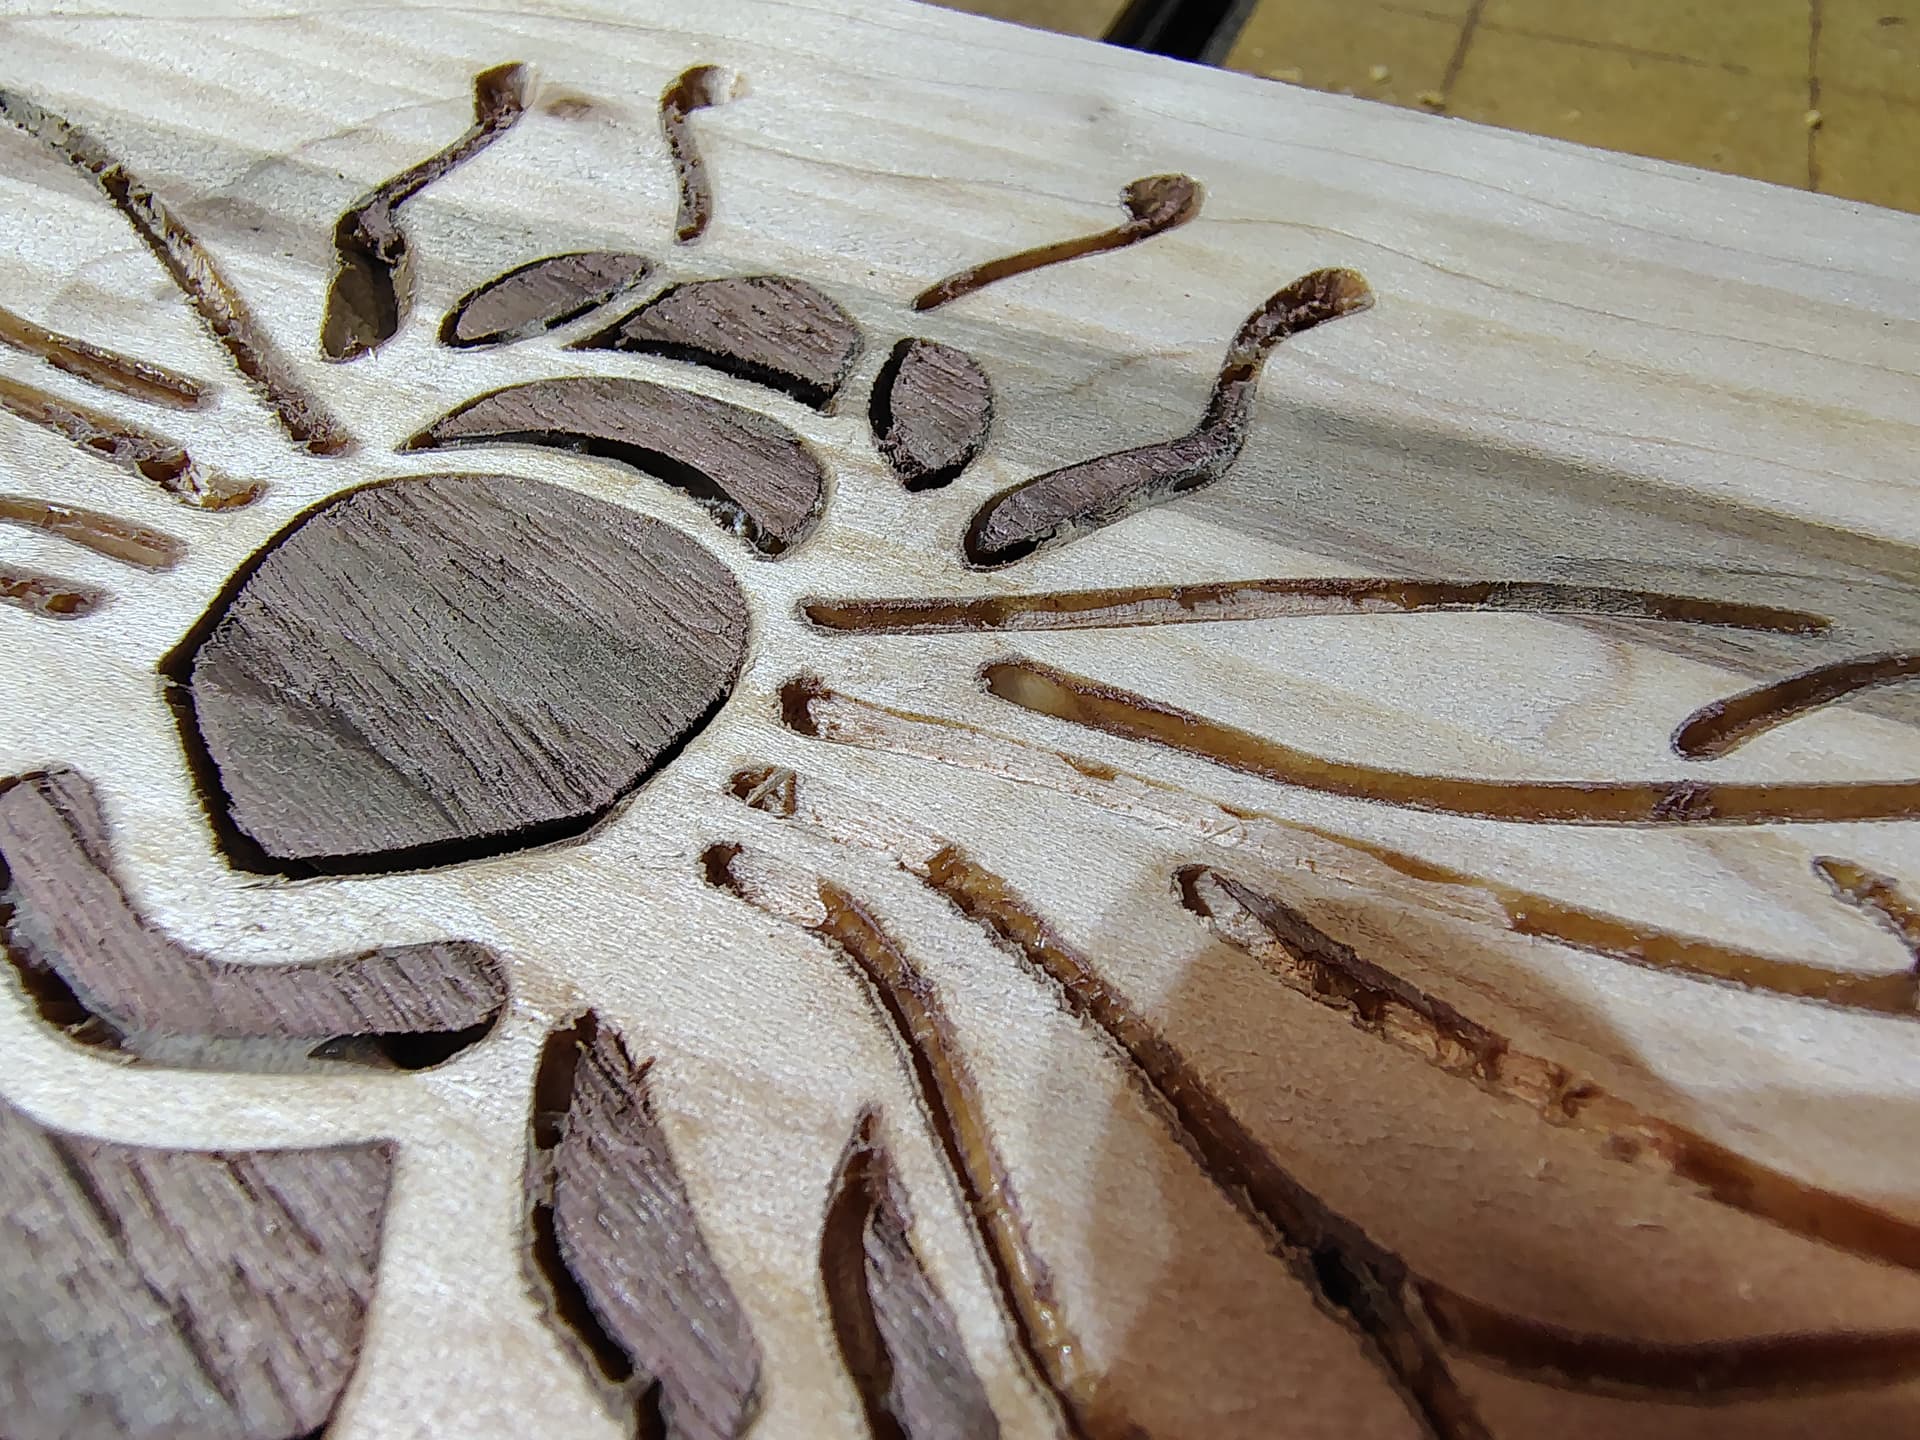
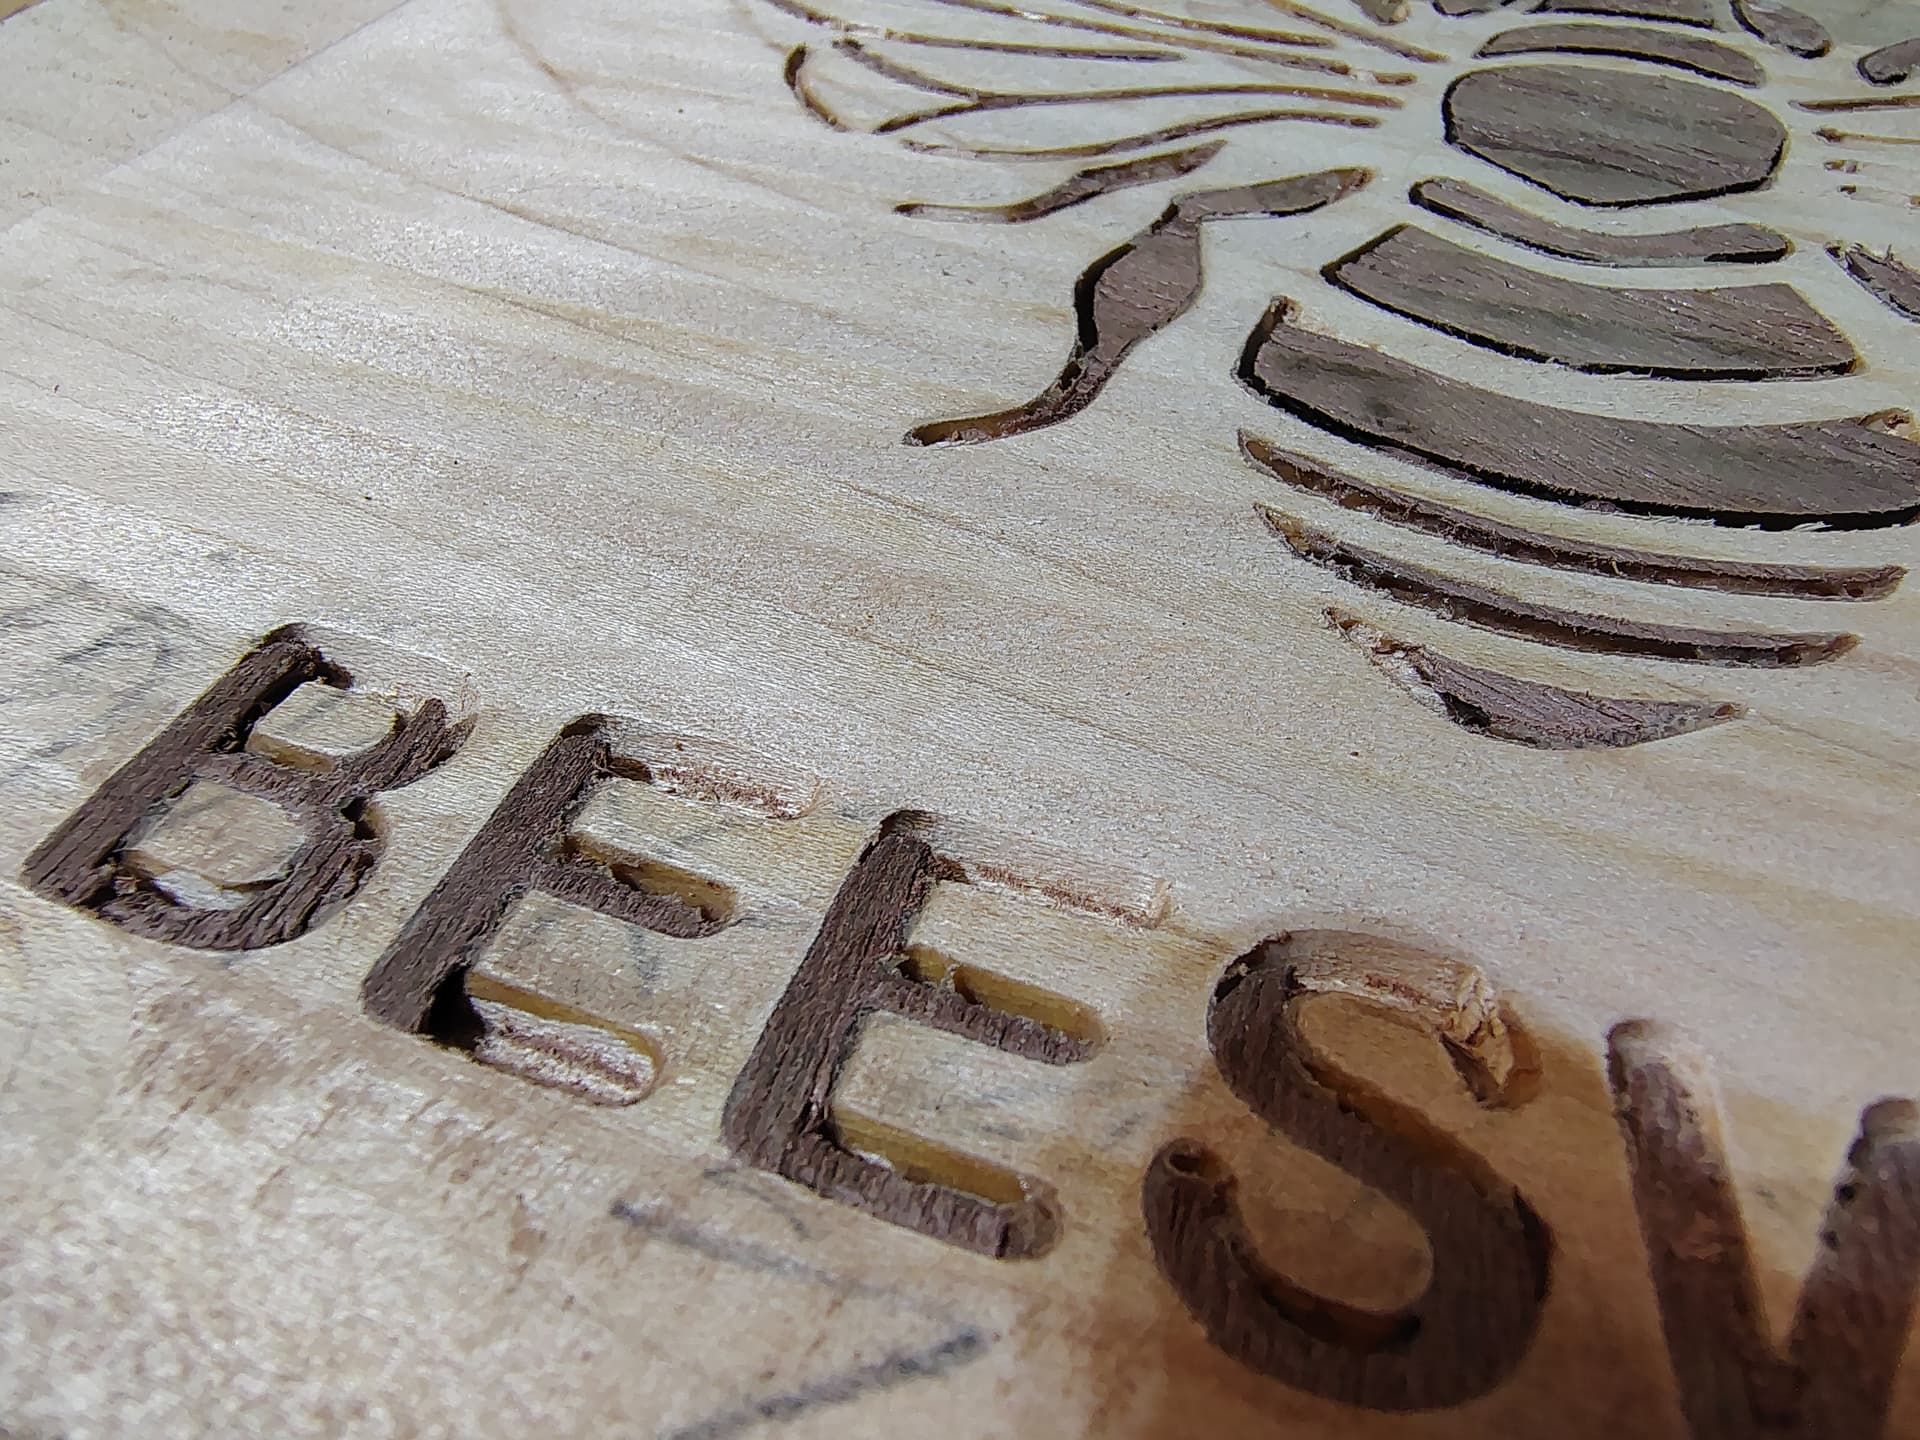
I’m having difficulty with inlays. Currently working on a cutting board for a friend, but have been testing my inlay skills on test pieces. The plugs aren’t “filling in” the pockets completely. So when the extra plug material is removed, there are areas where the plug is missing, & sometimes only glue is left. In other areas, there are gaps around the plugs. Also getting some chip out on the smaller/ finer details of the plug.
I’m unsure if I’m not applying enough clamping force, using the wrong bits for this job, not using the right feeds/ speeds for this job…
Here are the details of my last inlay job:
Machine: Sienci LM MK2
Pocket material: Soft Maple
Plug material: Red Oak
Clearance bit: Bits&Bits 425-CM125LR 1/8″ Long Reach Spiral Compression Bit
V-carve bit: Sienci 60 Degree V-bit
Clamps: 2, 35# weights, stacked on top of each other
Glue: Titebond 3
About 1 week from glue-up to surfacing extra plug material
Check the opening post of this thread for pictures of my end result. There is a v-carve inlay cheatsheet and I do my best to explain what the settings mean.
That post also links to this one where I posted the cheatsheet and a PDF about the v-carve procedures that I found somewhere.
If you have any questions after looking at that stuff let me know and I’ll do what I can.
EDIT: Another tip I’ve heard is to do the clearance pass last because that way you have more wood supporting intricate areas of the carve and are less likely to get chipout. Not sure if that is mentioned in the other stuff I linked.
Your welcome! I also wanted to mention that the cheatsheet and my posts were using VCarve before they added the V-Carve Inlay toolpath. I don’t have a new enough version to know exactly how the old way, with plain V-Carves, translates into setting up the new toolpath.