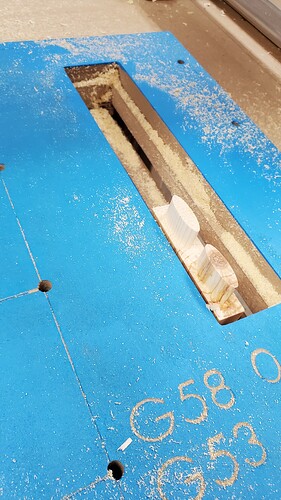
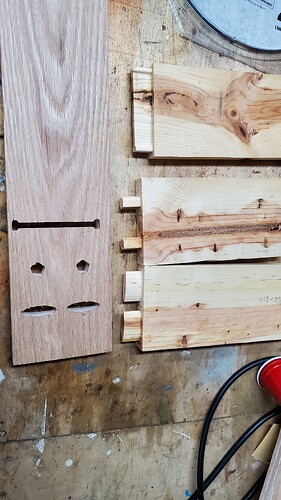
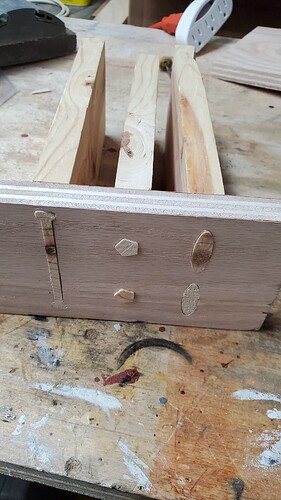
A while back I added a vertical slot into my table but hadn’t really used it yet. Tonight I decided to make some test joints and find out if I really understood the process. I am happily shocked to find out I do. The very first joint fit exactly as I planned. I’m posting it here to give others idea on what they can do as well. I’ve found i get my best ideas after see the steps that go into others projects and wanted to pass my ideas along.
Since this was only intended as test pieces I used the IDC Badger 1/8" roughing end mill for all carving. These fit great and I didn’t use any Allowance setting. I suspect if i used a cleaner cutting endmill i probably would have had add a small value to it. When carving I set the XYZ (spoiler board) for G54 to the Hole piece and XYZ (project surface) G58 for the Pin piece. This made it easy to bounce back and forth without re-zeroing after each test.
What a great idea Lewis! I have been thinking of doing the same thing to create mortise and tenon joints but I hadn’t thought of the limitless possibilities for the design of visible through tenons! What did you use for an under the table clamping system?
Most of the vertical mounts I’ve seen use a Moxon vise. You can see mine here in my dovetail guide. It’s rather crude but it works. There is another one shown later in the thread that looks more professional. It’s a long read but you can also learn my method for making dovetails if your so inclined.
You can see @gwilki’s setup here and some pretty neat joints too.
EDIT: Here is @LewisB314 's.
Back in November 2023 I posted pictures of the clamp under the table. “Vertical Table Addon”
Such a great idea! I’m in the process of redoing my spoil board and will finally be adding my rotary and I wanted to add the vertical capability to it, but was not sure how to incorporate it along with the rotary but I think the way you did it will work great!
Thanks for posting!


