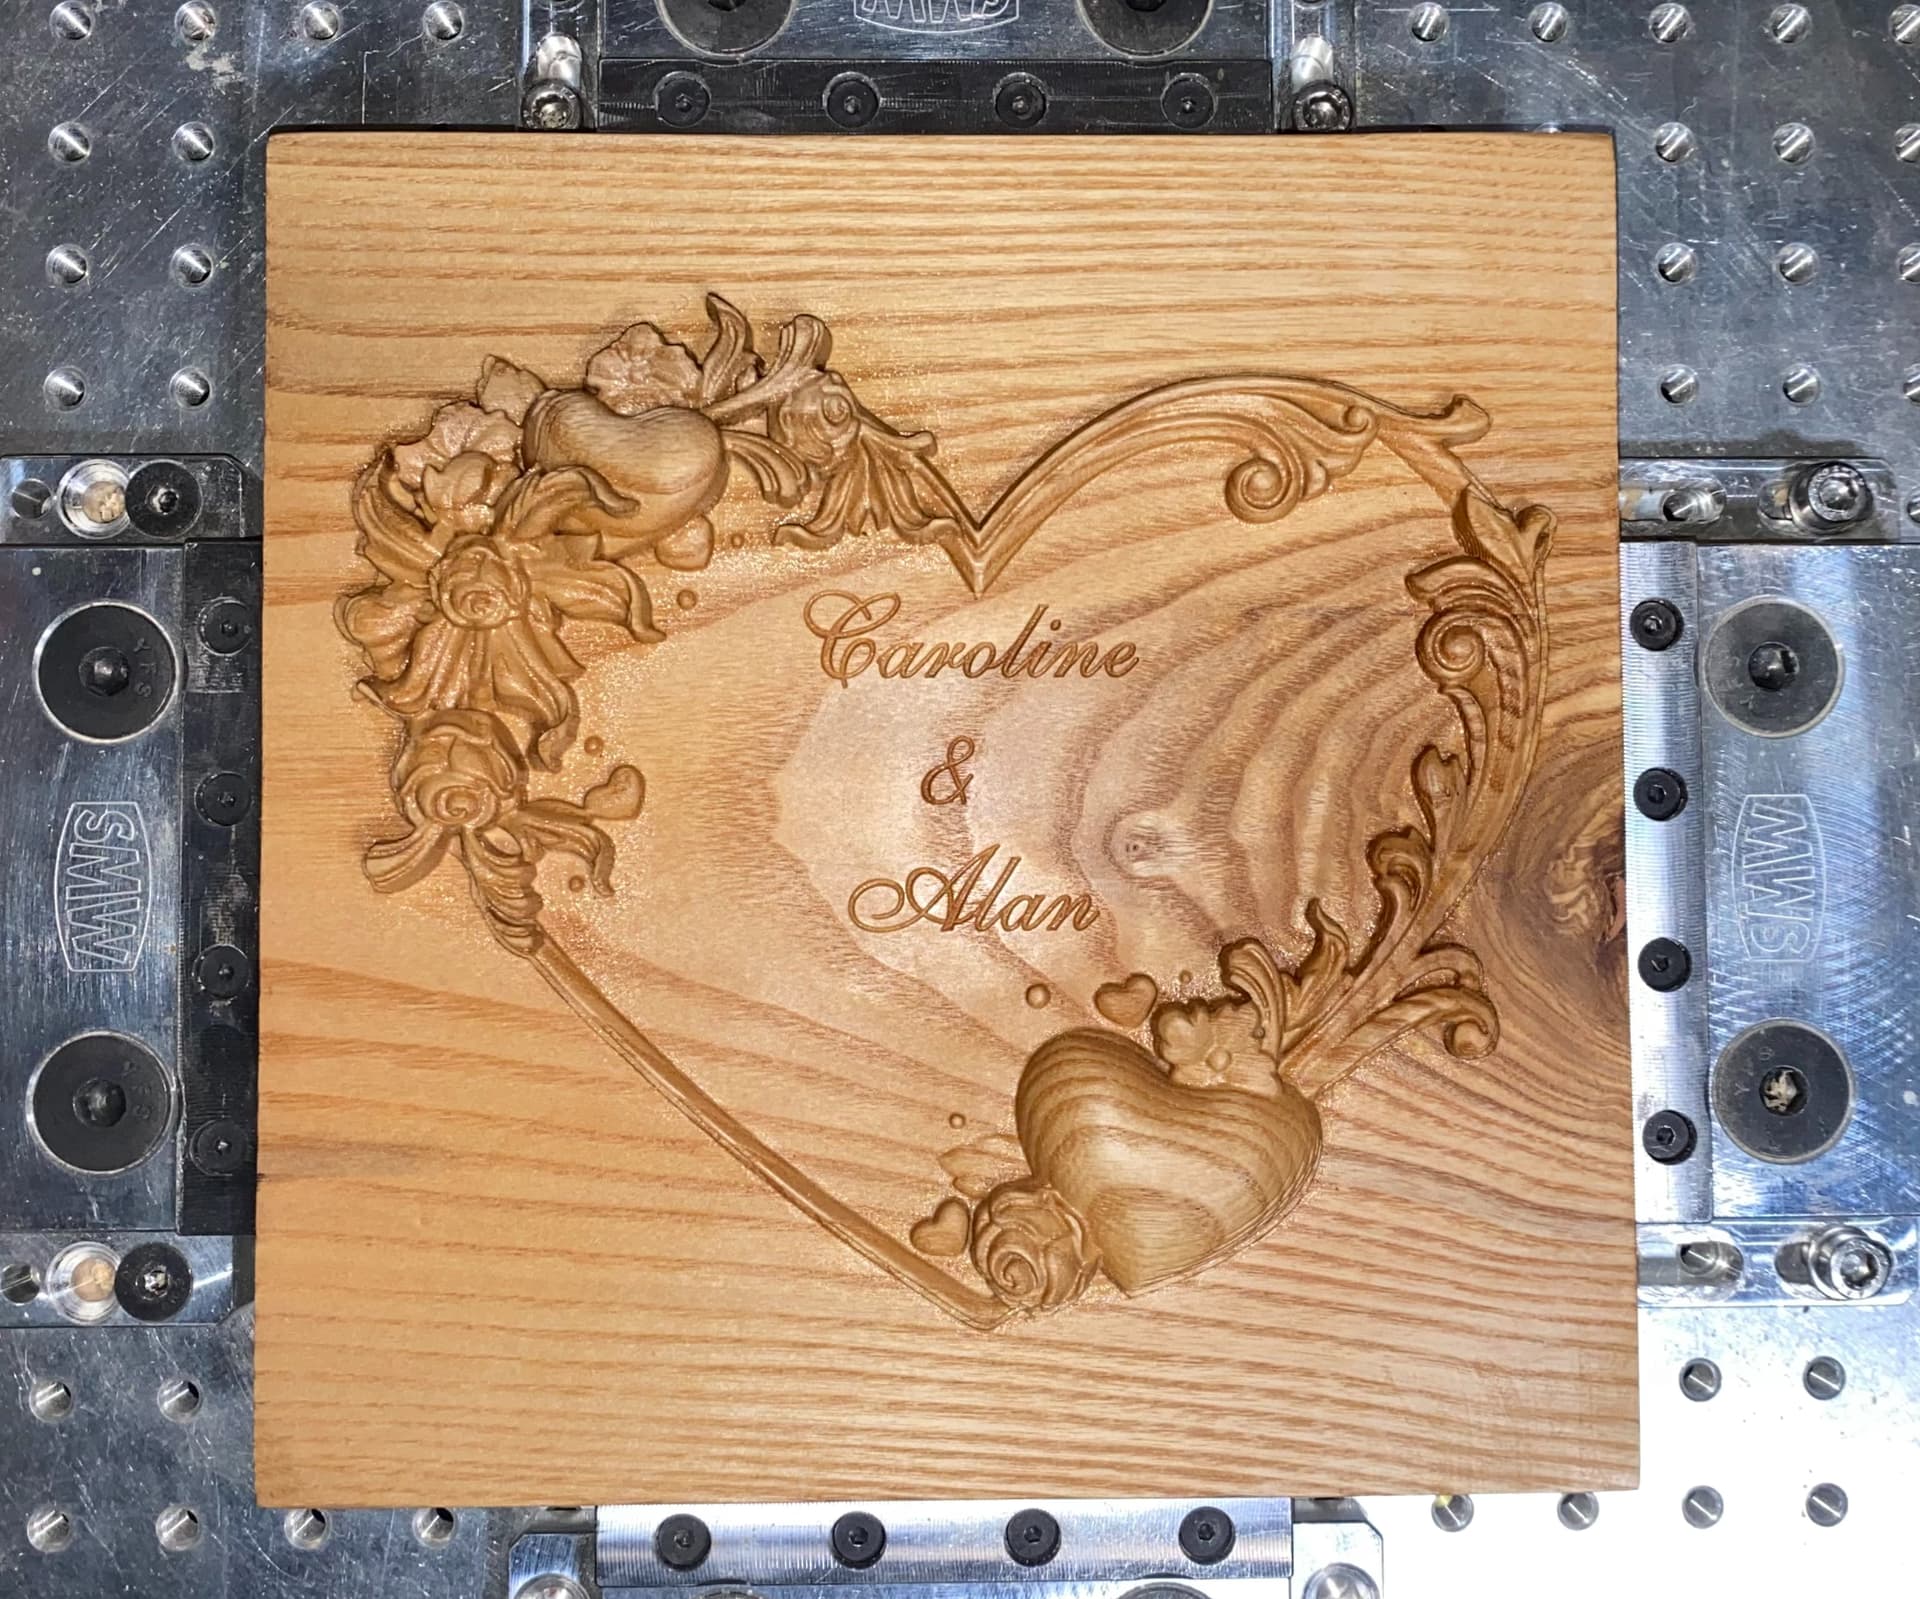
A small project 200x 200 x25mm in Ash wood. It is for a friend of mine and I made this as my wedding gift to the happy couple. As ever, sanded by hand using 3000 grit and finished with a commercial mixture of walnut oil and beeswax made into a creme and used primarily on chopping boards.
The relief work was carved in Carveco Maker from an STL file, I had laying around. The model was roughed with a 6.35mm uncoated carbide 2 flute cutter. The finishing cut was made with an uncoated carbide, angled (4.6 degrees) ball ended cutter, with a radius of 0.25mm. The engraving was made with a 60 degree V bit (Amana 6.35mm with a spectra coating.
Cutting feeds and speeds
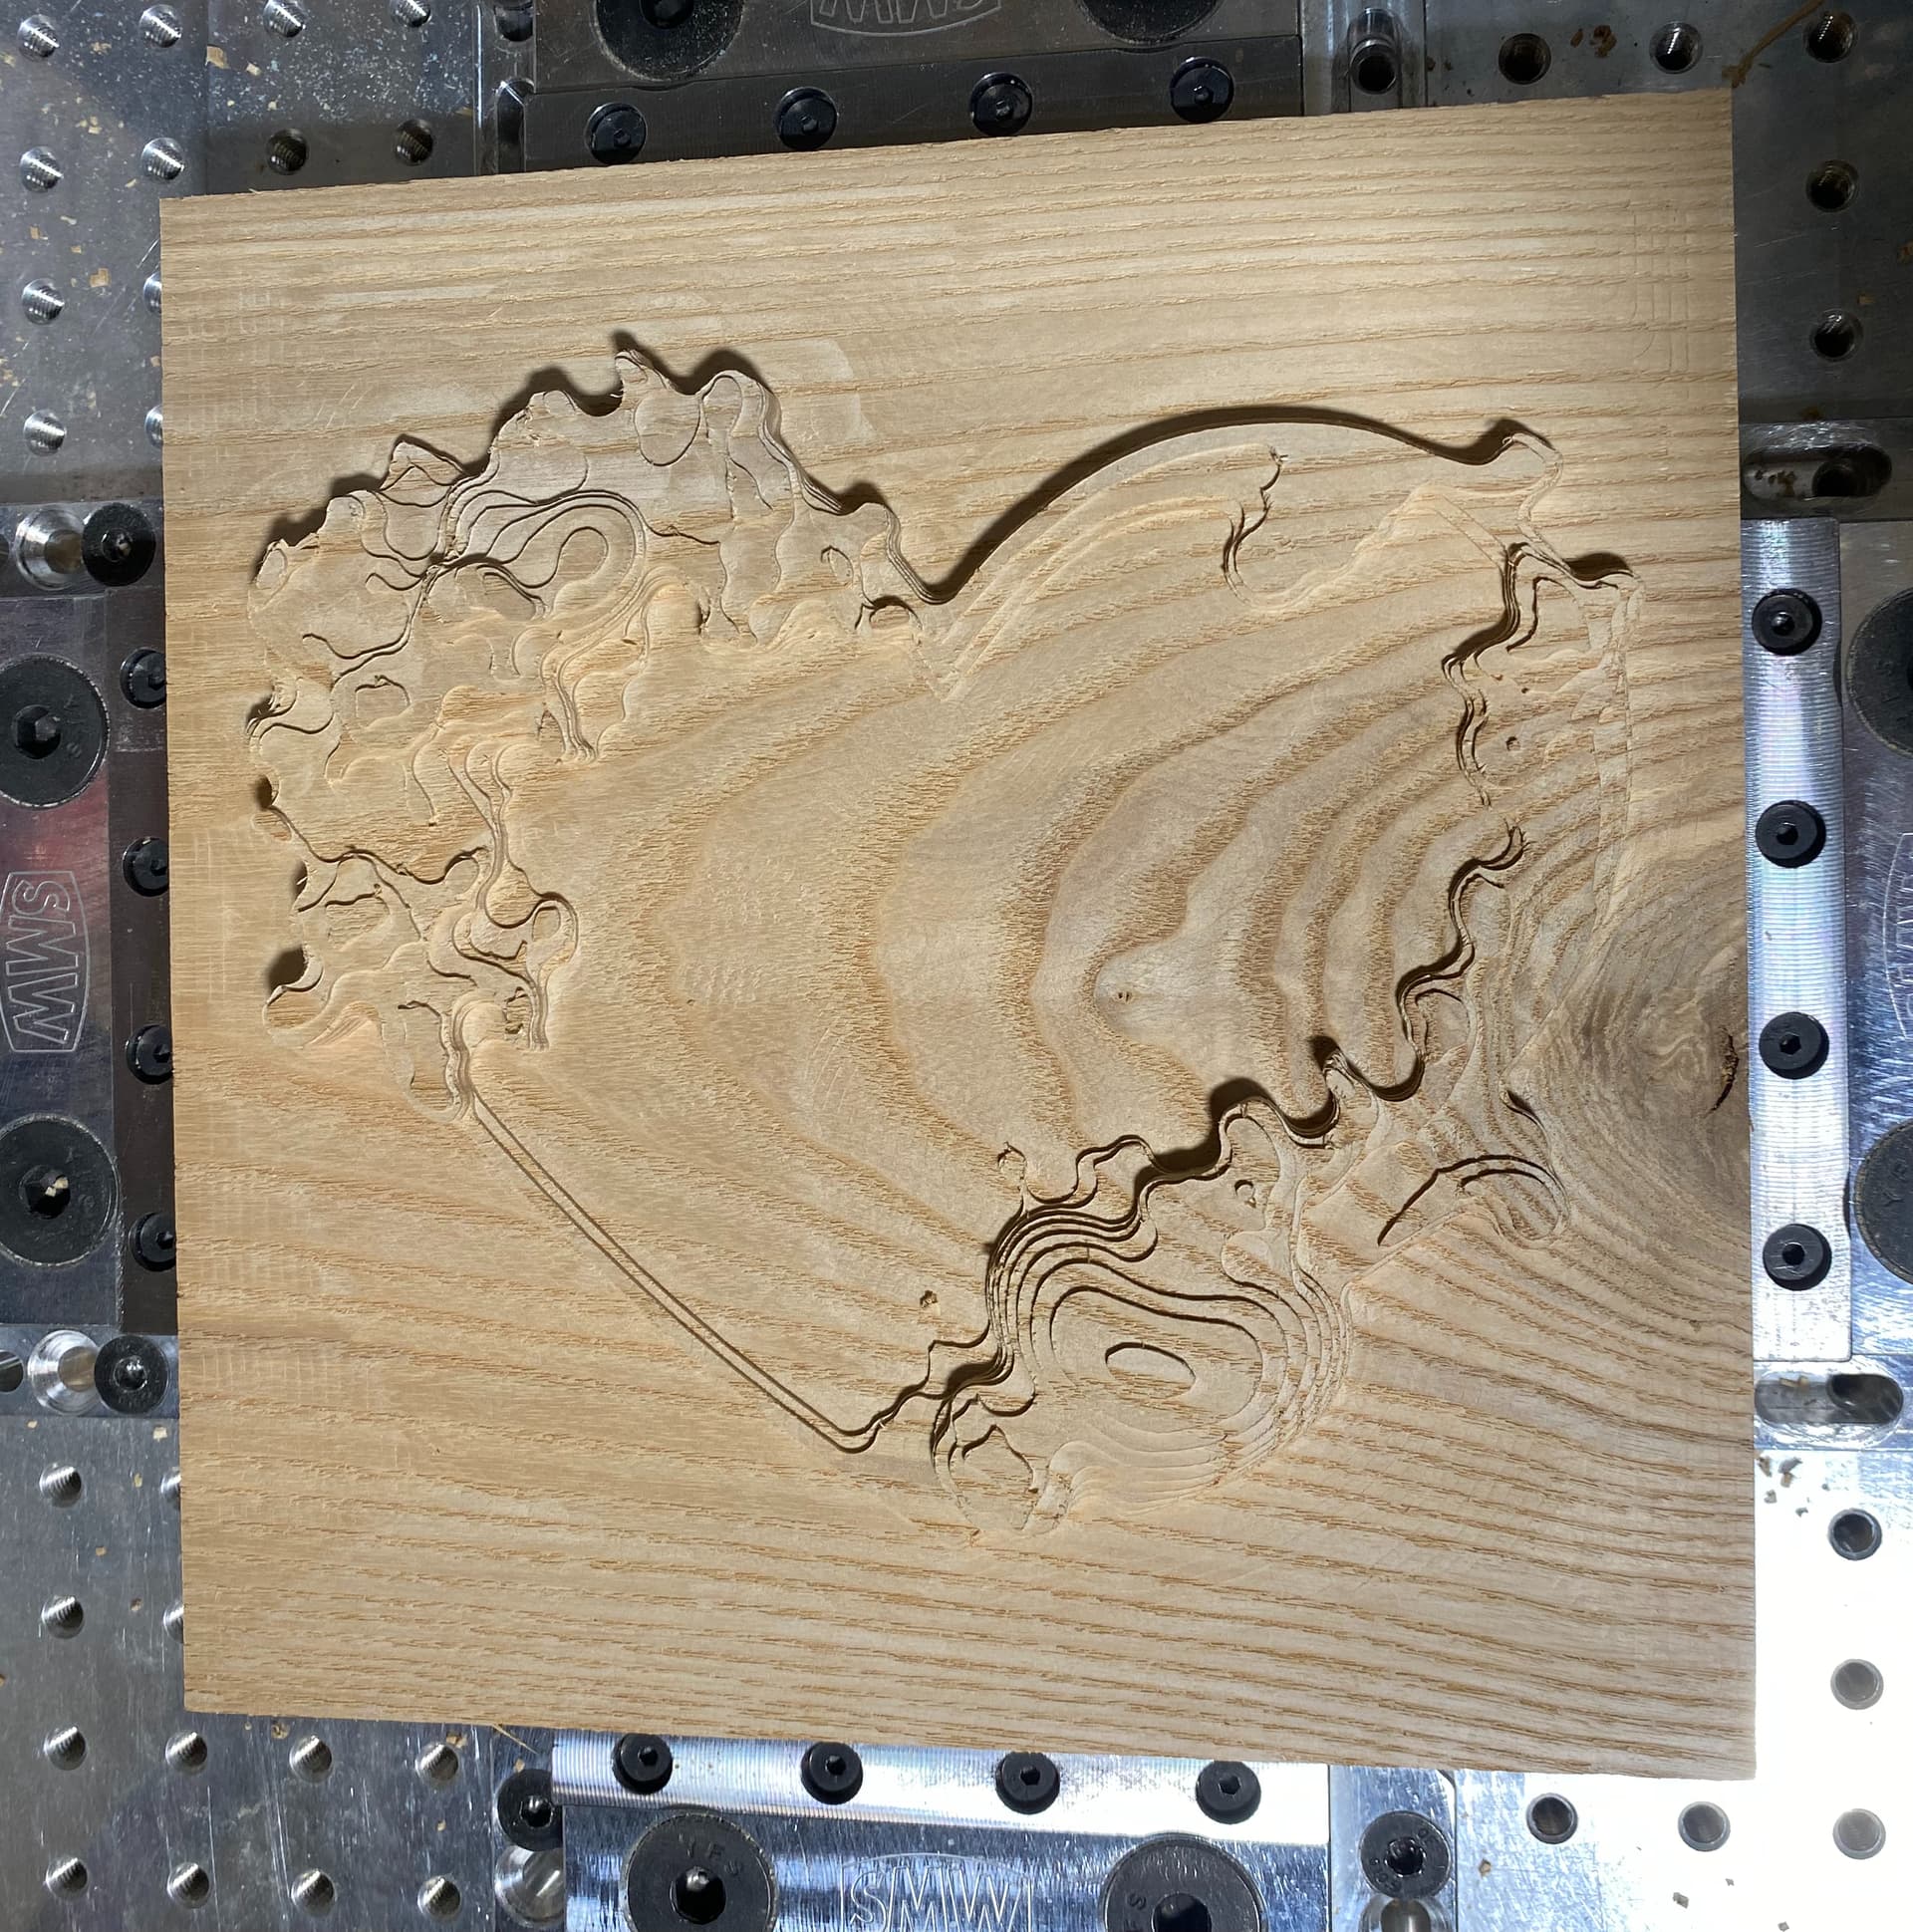
Roughing feed speed - 2000 mm/min, Plunge speed - 500mm/min, Stepdown 0.5mm - Stepover 40% RPM 10,000. Roughed steps were 1mm in height.
Engraving feed speed - 500mm/min, Plunge speed 200mm/min, Stepdown 0.5mm. Total V bit cut depth was 0.5mm, RPM 10,000.
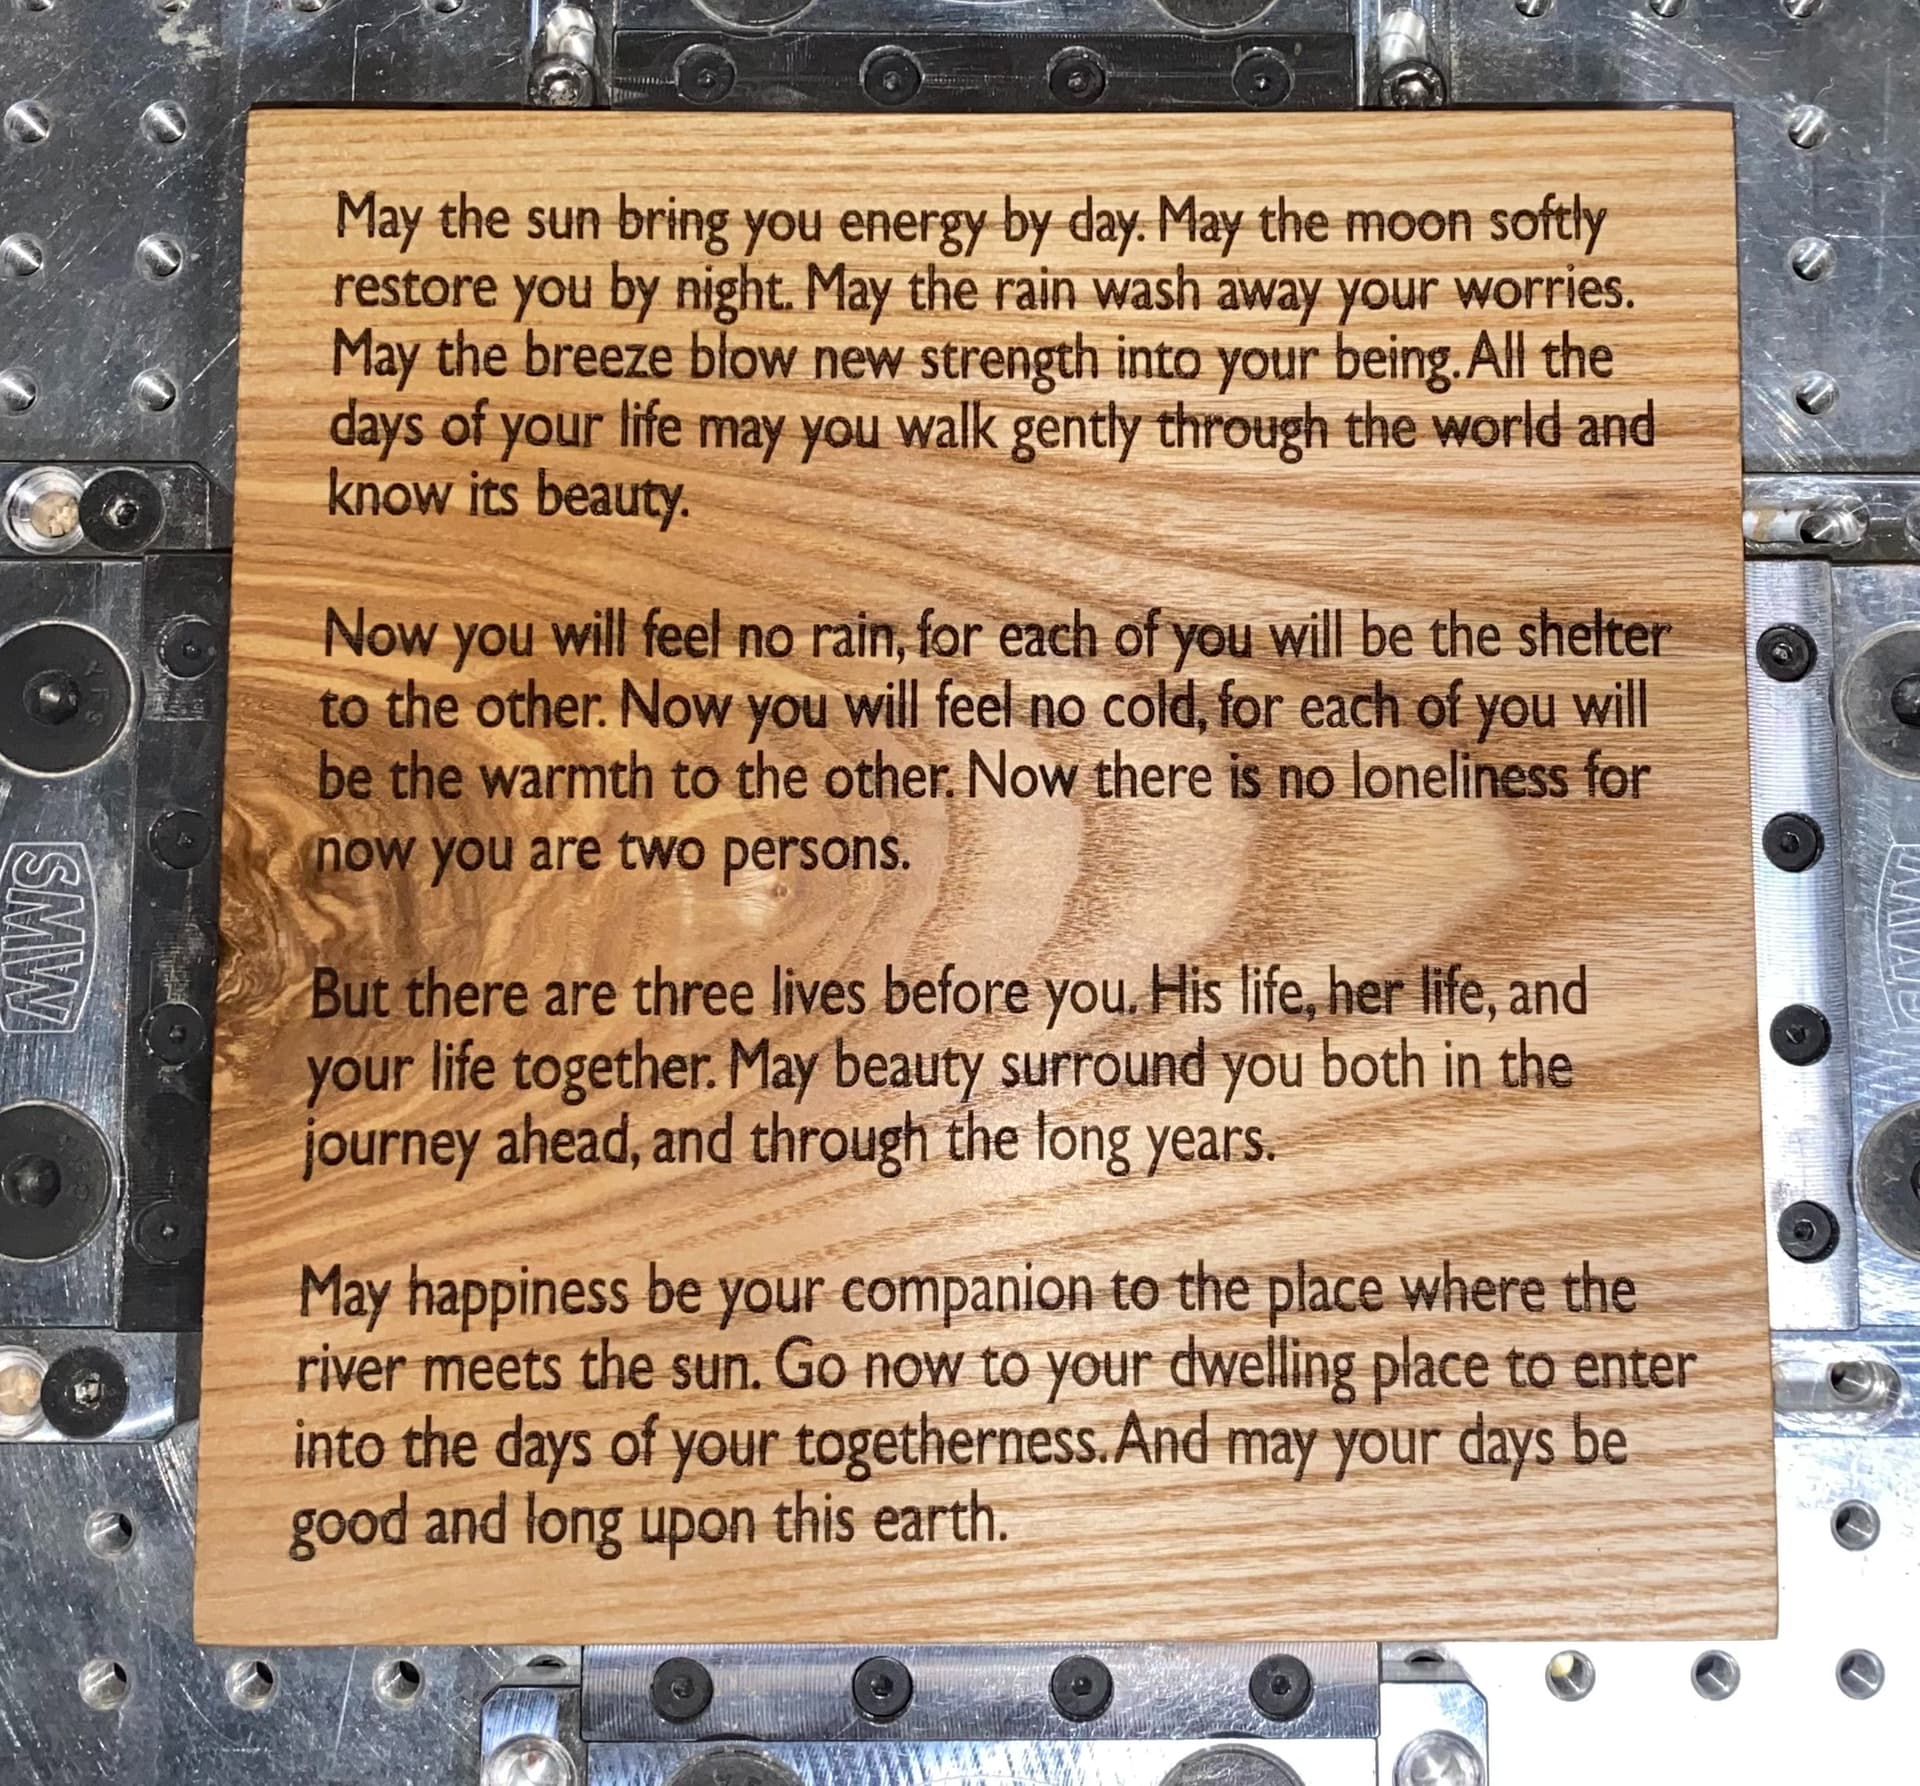
Laser Engraving: LightBurn 20% Power and 500mm/min feed speed. File was simple SVG file text created in Affinity Designer. Laser is 4.2W model from JTech.
Total project time start to finish: 4 hours Planning, designing, carving and engraving, 2 hours Laser engraving of SVG text file and 6 hours hand finishing.
Thank you for the plaudit Michael. All of the bits are readily available. I have stopped using very variable quality bits from Amazon, where the quality of manufacture was often cheap and not subject to good QA controls.
I use Rennie Tools in the UK for all of my bits, with the exception of specific Amana bits. I know that Rennie Tools do have an Amazon shop so they should be available where you live if you have access to Amazon. I see that the angled ball ended cutters are now available as coated with TiAIN, while my original cutters were uncoated. I found them to be super sharp and very resistant to wear. The angled sides helps bolster the resistance of small diameter cutters to lateral forces and properly fed, they do not break.
The Amana tool I had purchased from Amazon at around £46 about 1 year ago. The USD price from Amana is $100! There is an uncoated version of the same cutter for around £38 in the UK.
Pic shows roughed model using 6.35mm two flute cutter
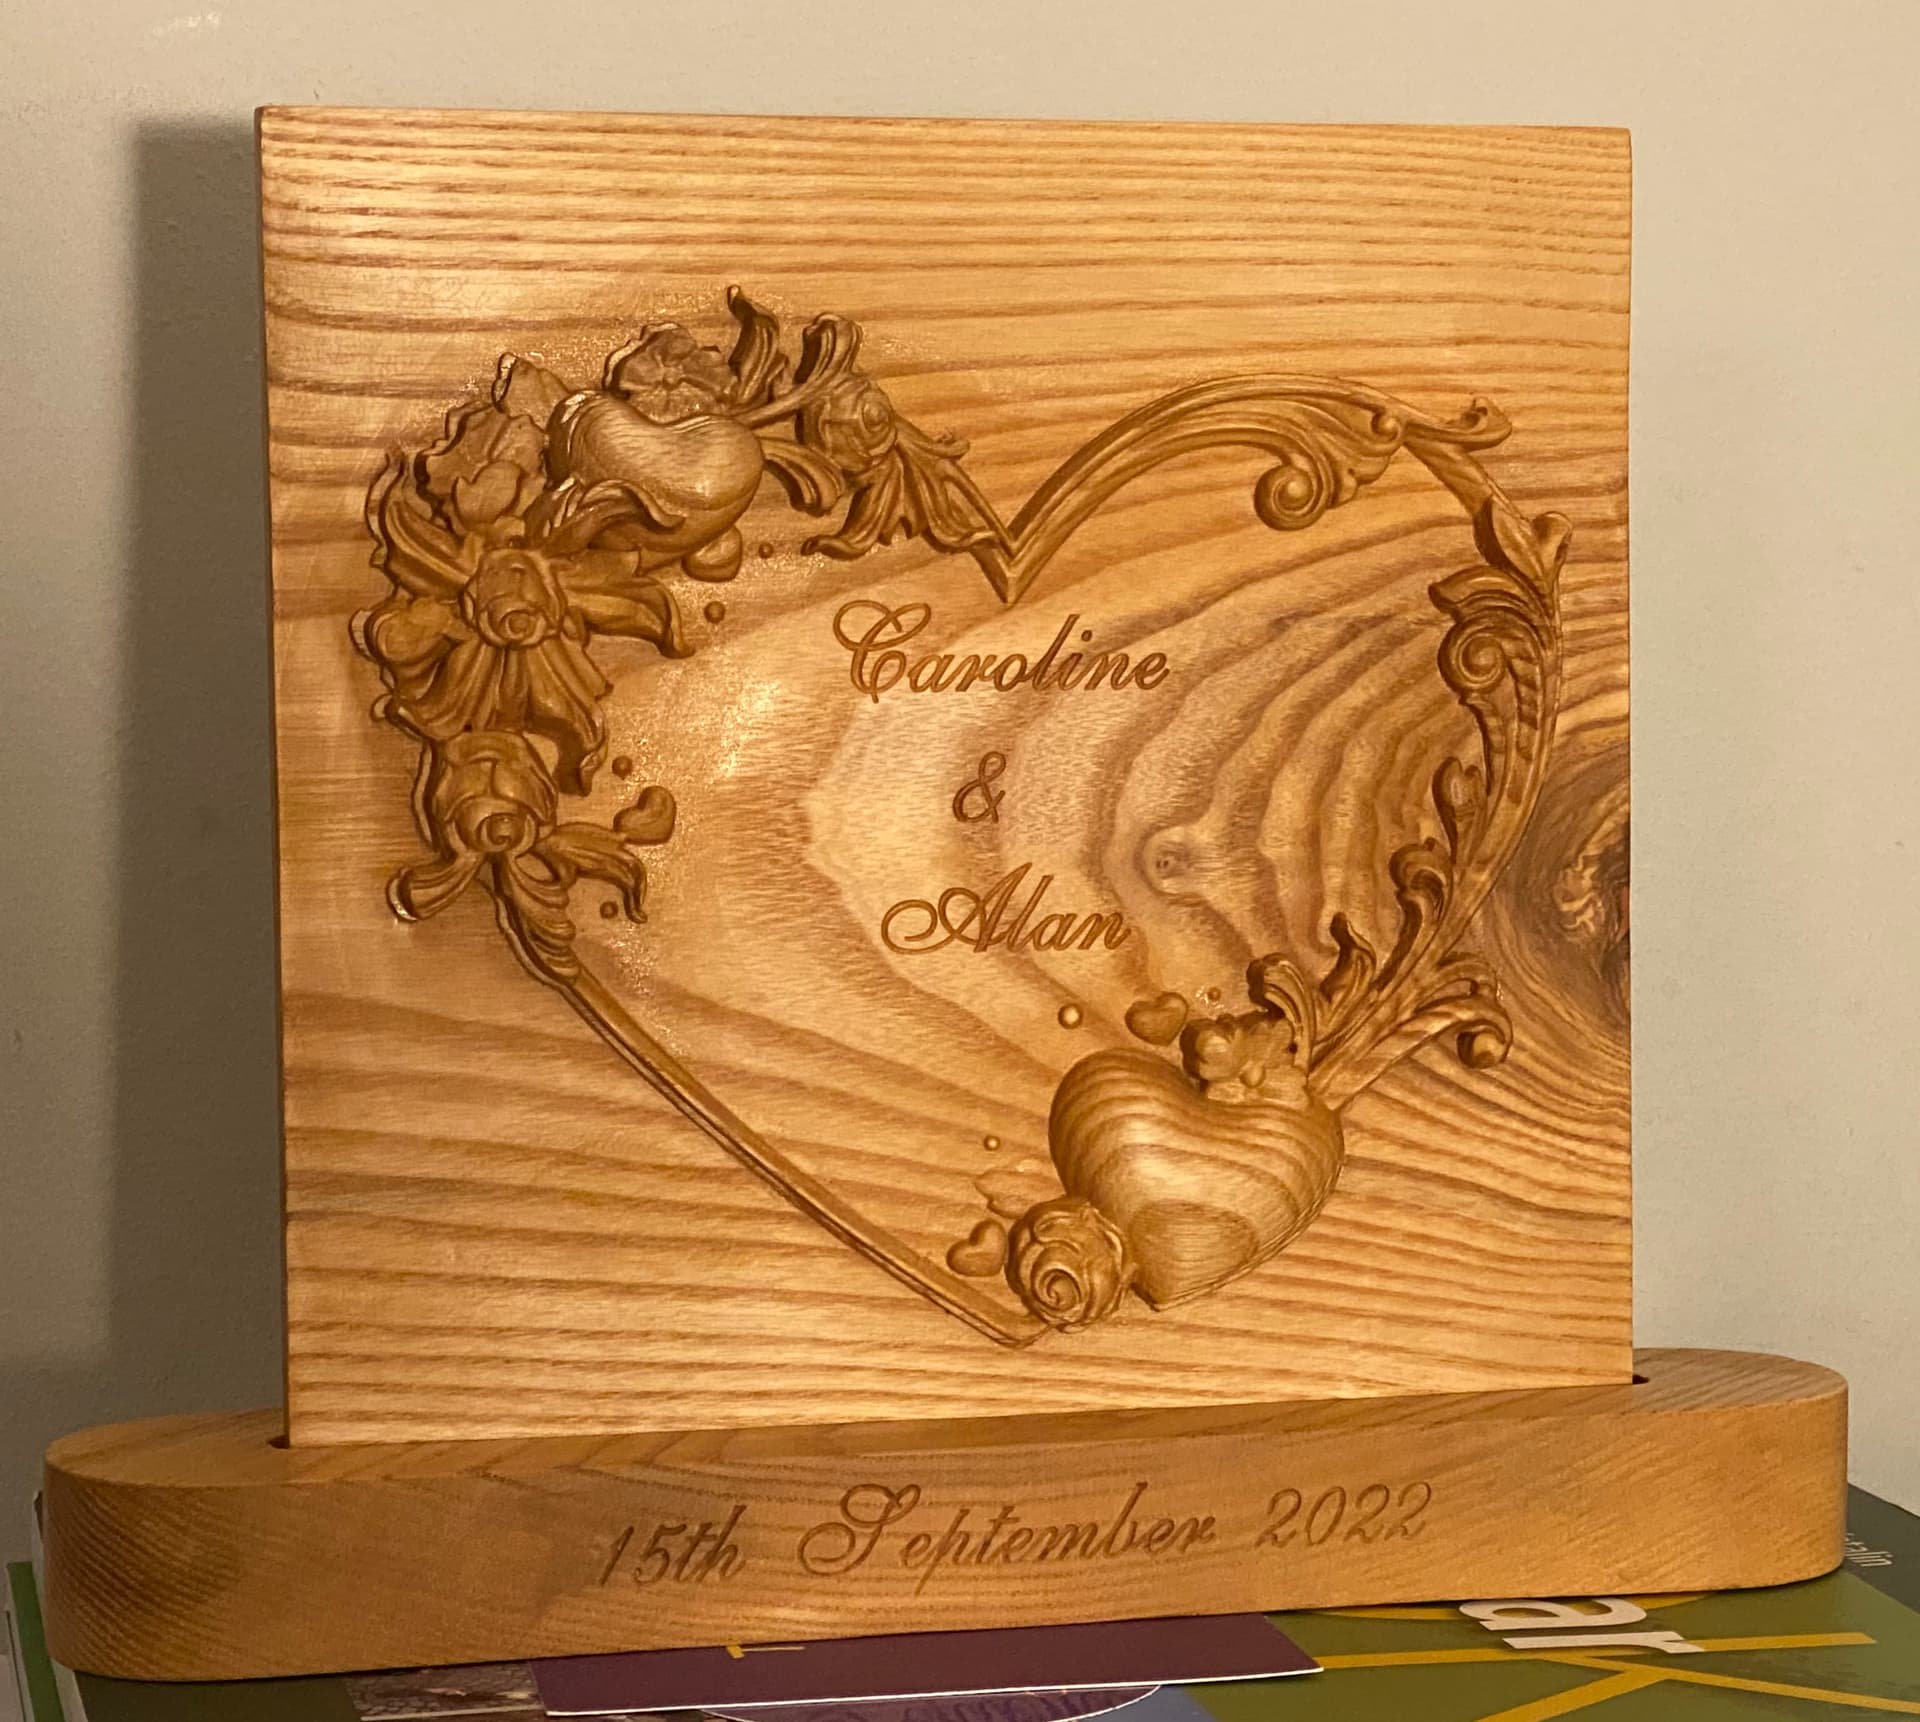
Lesson learned… instead of cutting a 90 degree slot perpendicular to the top face of the stand, it could have done with a slight angle, say 15 degrees so that the artwork was tilted backwards slightly. It is ok if viewed when it is at eye level but any lower than that and it becomes hard to read.
Hi Neil. I really appreciate the comment. You have always freely given your time when asked the dumb questions that newbies ask, and I have asked far more than my fair share of dumb questions. I am now in the better position of being an improver, having graduated from newbie status. I have milled wood, copper, aluminium and brass, slate, plastics and aluminium sandwiched plastics. I have used my 4.2W JTech laser on plate glass, float glass and glass tiles, ceramic tiles, hard and soft woods and slate.
My CNC machine is still the original standard sized Shapeoko 3 with the modified SMW baseboard and vices and these have been the very best modification I could have made. These perform as expected and permit me to routinely machine to ±0.001" . The modified belt tensioning system, using your own design of tensioner, has settled into faultless performance. I check the belt tensions weekly and have not adjusted the belts for 6 months. I keep them tensioned to 135Hz.
In the coming months, I am going to attempt to mill some harder metals (Rennie Tools provides cutters that will work) and hopefully I will be able to make a few useful widgets. Notwithstanding the limitations of hobby CNC machines, I am going to try my hand at milling some small pieces of cast iron. The Carveco Maker software continues to do well for me and I am going to try and learn Shapr3D this coming year. I like both the interface and the design concept. gSender continues to be a reliable method of talking to my CNC machine and despite the limitations inherent in GRBL, my machine is doing everything which I ask of it. If I can spare any time, I may attempt to change the controller for a 32 bit card so that I can comfortably add a fourth axis.
It is good to hear from you, Neil. Happy new year to you and yours.
Jeff
Thanks Marty. I was not sure about trying to V bit engrave a large block of text like the laser engraved block. I probably would want to set the depth of the V bit to no more than 0.1mm to prevent the text from looking too dense. The ash wood used in this project responded well to the V bit.
I think the laser has the advantage of rapid set-up in LightBurn; which I really like and use a lot. Carving software may add an unwanted layer of complexity which I would prefer not to have. My laser test turned out fine so it was no hardship to set it going and then waiting until the job was finished. My feeling is that V bit text creates a requirement to think more about whether it will be filled text or how it may appear if coloured or left uncoloured,
My 3D carves are reasonably pleasing to look at these days and I am happy with where my set-up and machining is located these days. I hope to try some home grown 3D files soon and I have some plans to try and make something like the Go board in this video. The craftsmanship is perfect! Worth a look if you can spare 20 minutes.
Turned out great! Just curious as why you run your laser at a slower speed and slower output? Have you found this provides a better end product? I have a stand alone 6 watt laser and I often run it at 80-100% but at higher speeds of 1000-1500 mm/min.
Your laser work turned out very crisp so maybe I need to adjust my settings. Thanks!
Yes, the results are (in my experience) much better if you use speeds slow enough to burn all of the model and with sufficient power to leave a mark and yet not so powerful that the edges of the workpiece are scorched wherever the laser beam touches. I aim for smokeless engraving and then I know that I have the right power settings.
Laser diodes are components that can wear out with use. Running the laser at high powers constantly will shorten the life of the diode. The clue is always going to be the manufacturer’s claimed diode life. When they claim 10,000 hours of use, I very much doubt that this figure is at 100% power output. Perhaps some person with knowledge of this subject will be able to clarify the point.
I see no point in using a laser beam, which is very fine, if the end result is a blurry image. One of my projects here was a birdhouse. I needed to laser engrave feathers and you can see how they turned out here:
The wood was a soft cedar that scorches easily. The first image is a view of the feathers and using too much power would have spoiled them. Too much speed will not permit the laser to burn the image everywhere. I see no reason to save five minutes if the end result is worse than I wanted. The text of the wedding piece was important so it had to be legible and because it was bold text, I wanted to take care that it was sharp without the over-burn that would make it less pleasant to look at and potentially illegible.
Happily, LightBurn has the facility to specify travel further than the edge of the image so that the laser beam burns to the edge of the image and then turns itself off, while the laser head is slowing down. From its stopped position the laser head accelerates up to the image edge and then turns on. Fantastic software that will do all it can to give you great results. You could try to reduce the power and speed you are using and see if your burns look sharper.
You are welcome. One of the useful things that will serve as a reference is to set up a table and engrave it once for each material. Light. Here is a reference table from the LightBurn forum to get you started. Set your own machine up to produce something similar and it will save you a lot of work.
I love how clean the finish turned out; that walnut oil and beeswax mix really makes the grain pop. Whenever I’m working on gifts like this, I peek at ideas from places that offer wedding packages just to spark themes or motifs people enjoy. Your toolpath choices look spot on, and the 3000 grit hand-sanding clearly paid off. The couple’s going to spot this on the wall before they even notice the cake.