You mean like in v5 posted above ?
I put two of those supports on each ear. Let me know if you want to remove the inner or outer supports.
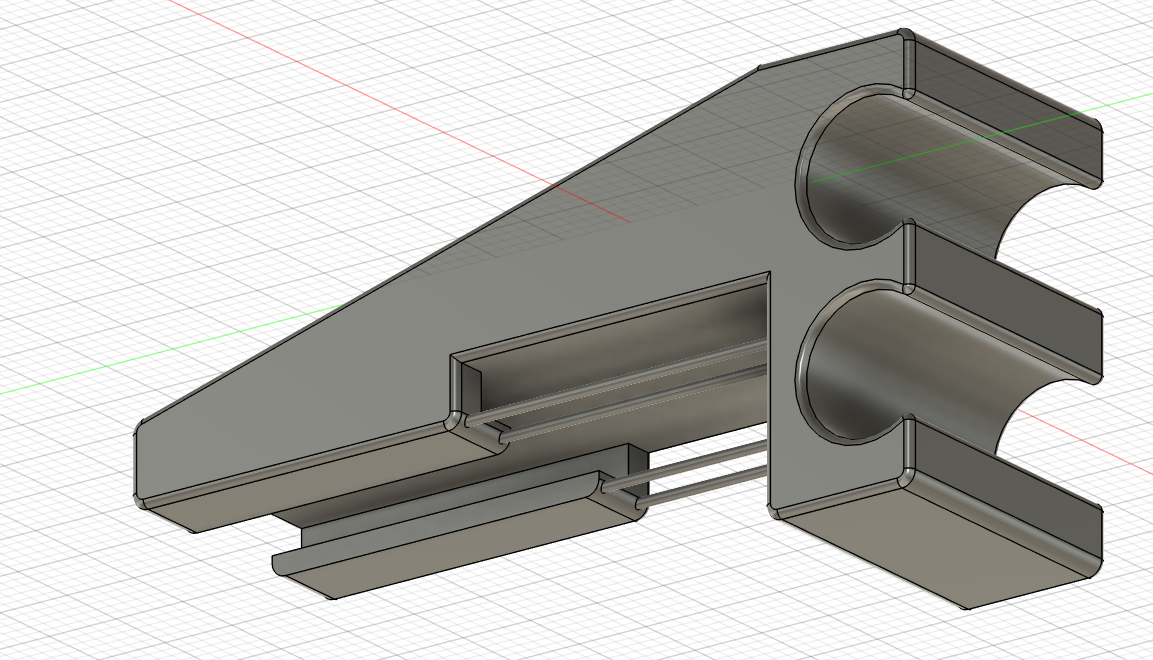
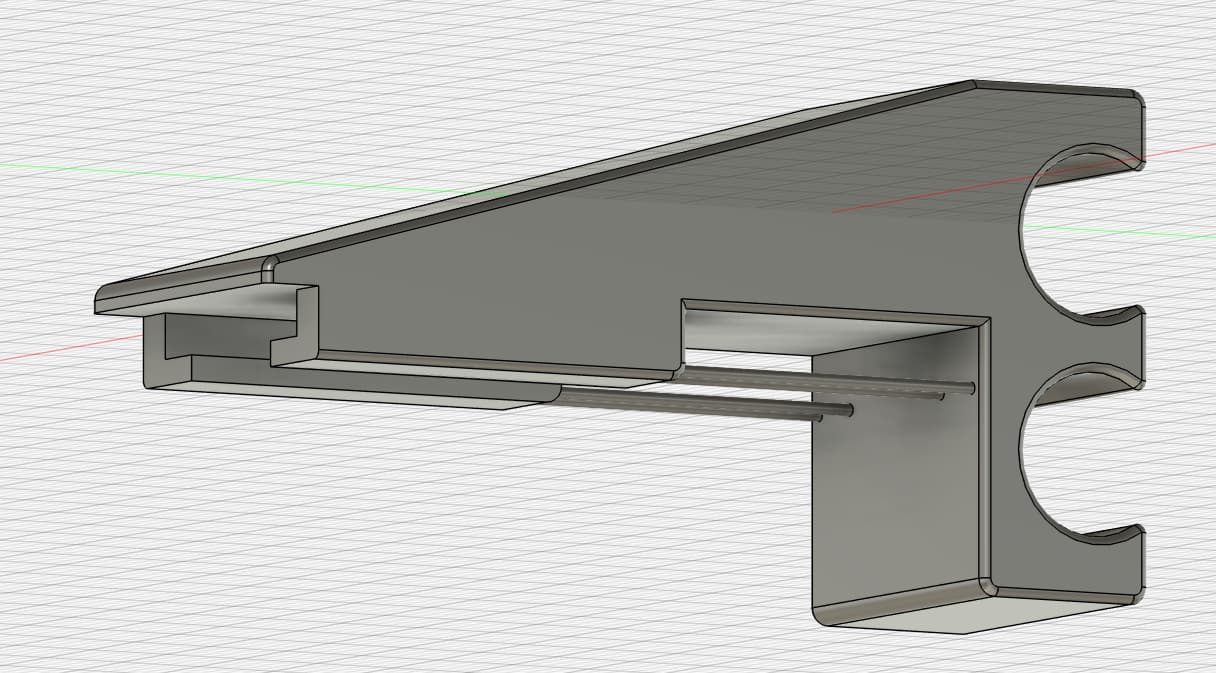
Tube_holder_v7.stl (938.5 KB)
Correct
While the Bambu slicer is based on PrusaSlicer, I do not know how they handle the filament change situation. In PrusaSlicer, on a multi extruder printer, you select ‘multiple extruders, then go to the ‘extruders section and designate an extruder for the support material/raft interface extruder. In that same section you make sure that all the other extruders are set for whatever extruder uses the standard material for the model. In other words, the only different extruder is the one for the interface material.
You might have to play with the setting for ‘Support Material’, ‘Options for support material and raft’ and choose a setting for ‘Top Contazt Z distance’ (I use 0.25 mm when running 0.2 mm layers)
In the same section make sure that ‘Top Interface Layers’ is set to ‘2’ which likely is the default.
For ‘Interface pattern’ I use ‘Rectilinear’ and for ‘interface pattern spacing‘ use 0.2 mm.
A lot of these settings are determined experimentally and a small test model helps with that.
I am not sure how all of these settings are supported if you select organic support but it should work out.
Organic support is mostly easy to separate and in this particular model might even fall off when you separate the model from the print surface. At worst, you will only have tiny bumps left over which will come off very easily with a file, knife or sandpaper. Also, with the support being on the underside of the model, the tiny bumps are not seen even if you leave them alone.
yes v5 is correct.. i was looking at v6 when I said that!
Go to your cottage already! lol. Ive been busy cleaning house all morning. The wife has grand designs on an upstairs remodel now that our youngest is off to school So I have been doing a thorough cleaning getting ready for it to happen. But version 7 looks like a winner!!! if I need any more changes they can wait until next week! enjoy the rest of your weekend! I really appreciate all your help.
Yeah Bambu has a really good wiki on their X1C printer and all the settings and what they do. For the most part, I have just been running on stock automatic settings. Ill dive deeper into their wiki on print settings! Appreciate your time and help on this subject!
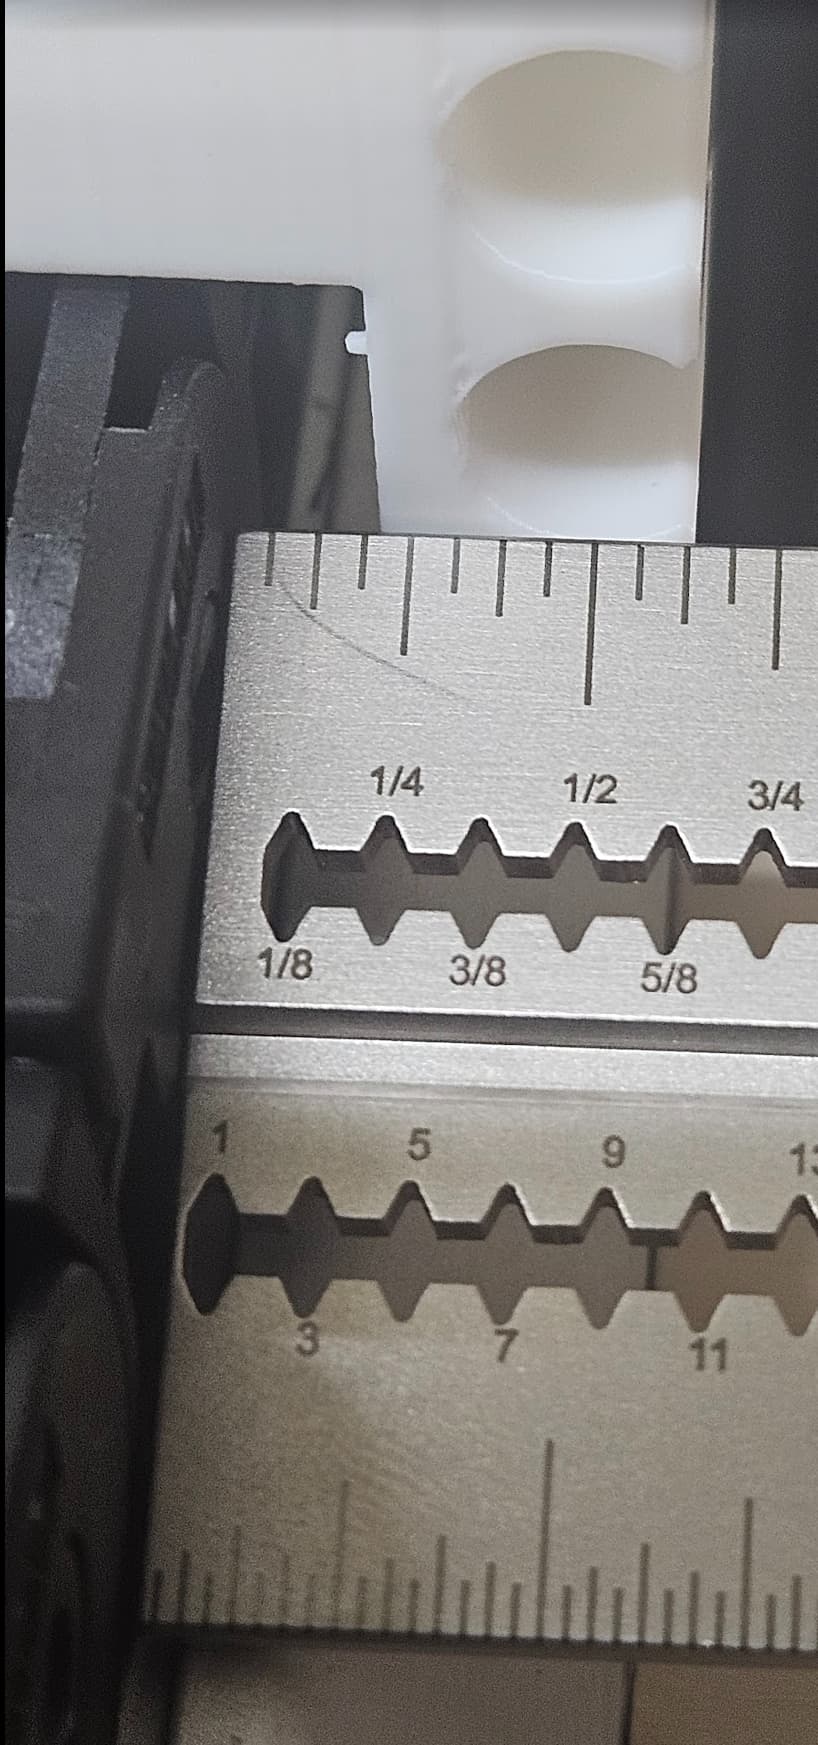
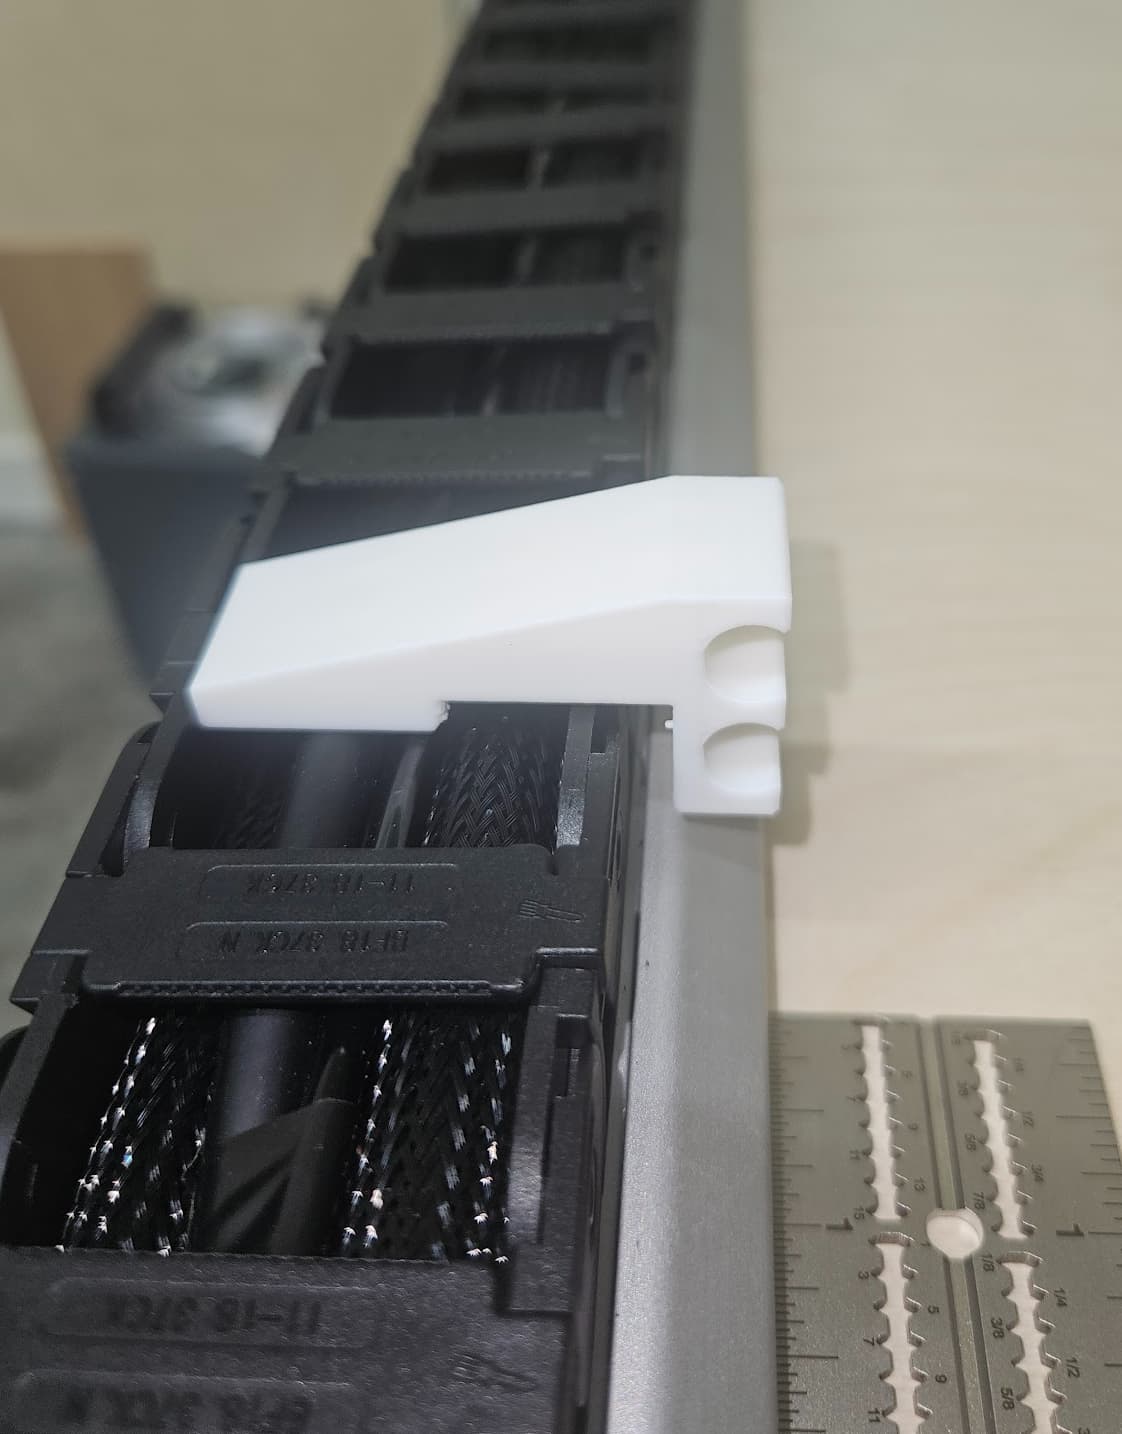
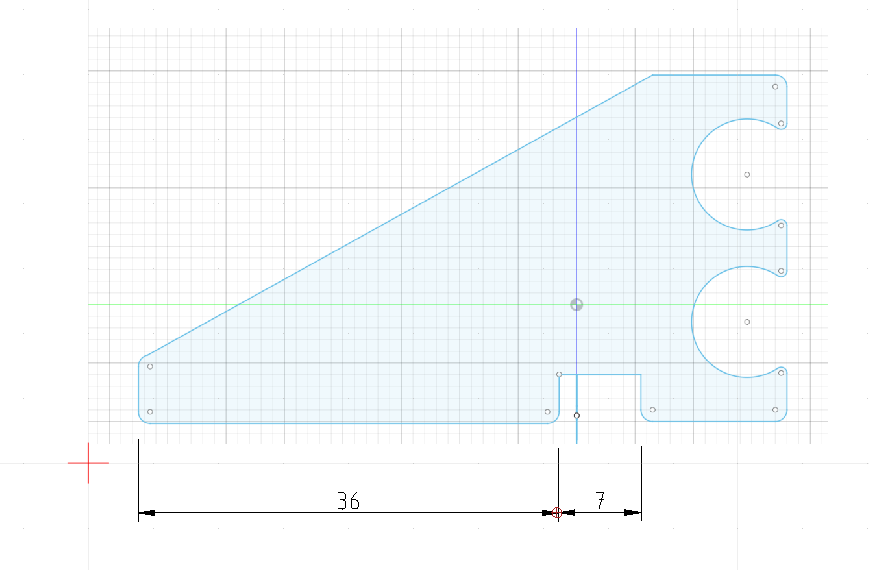
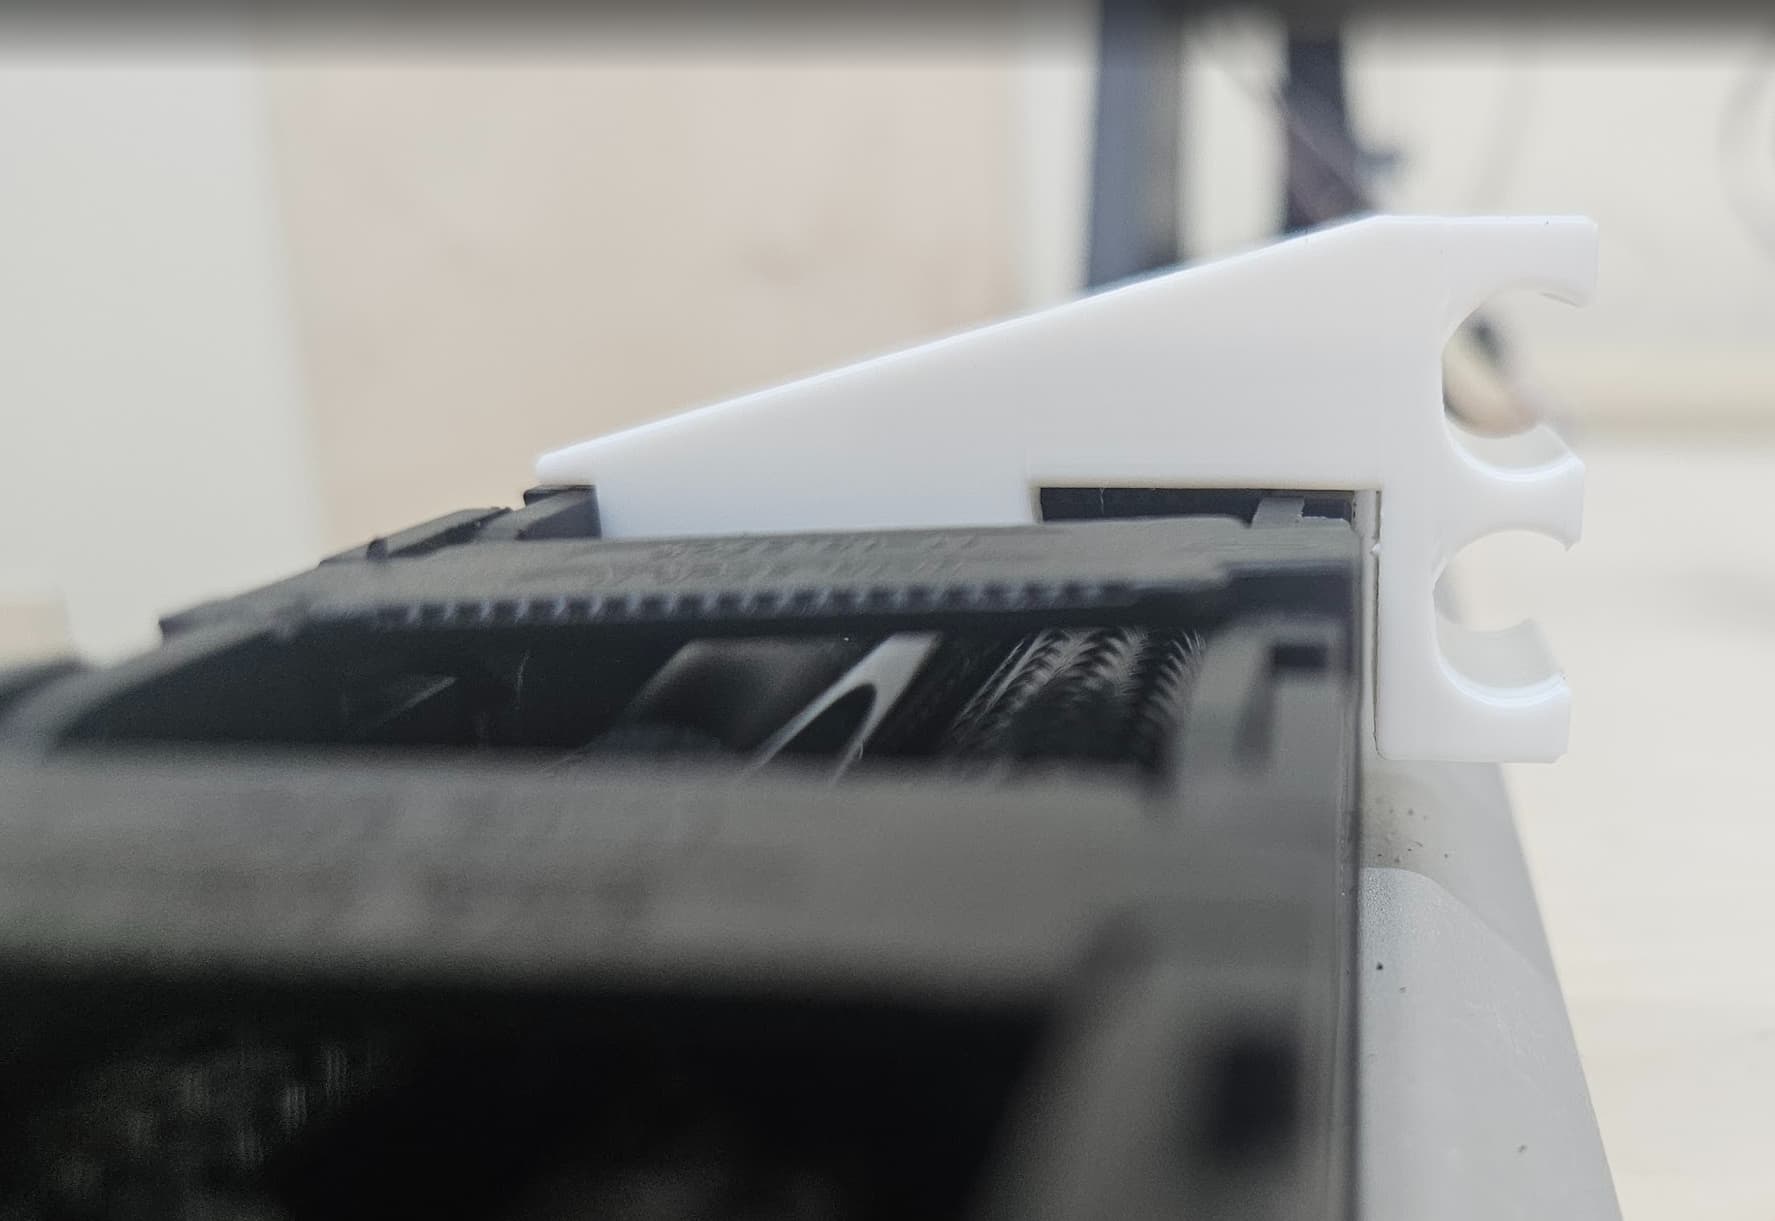
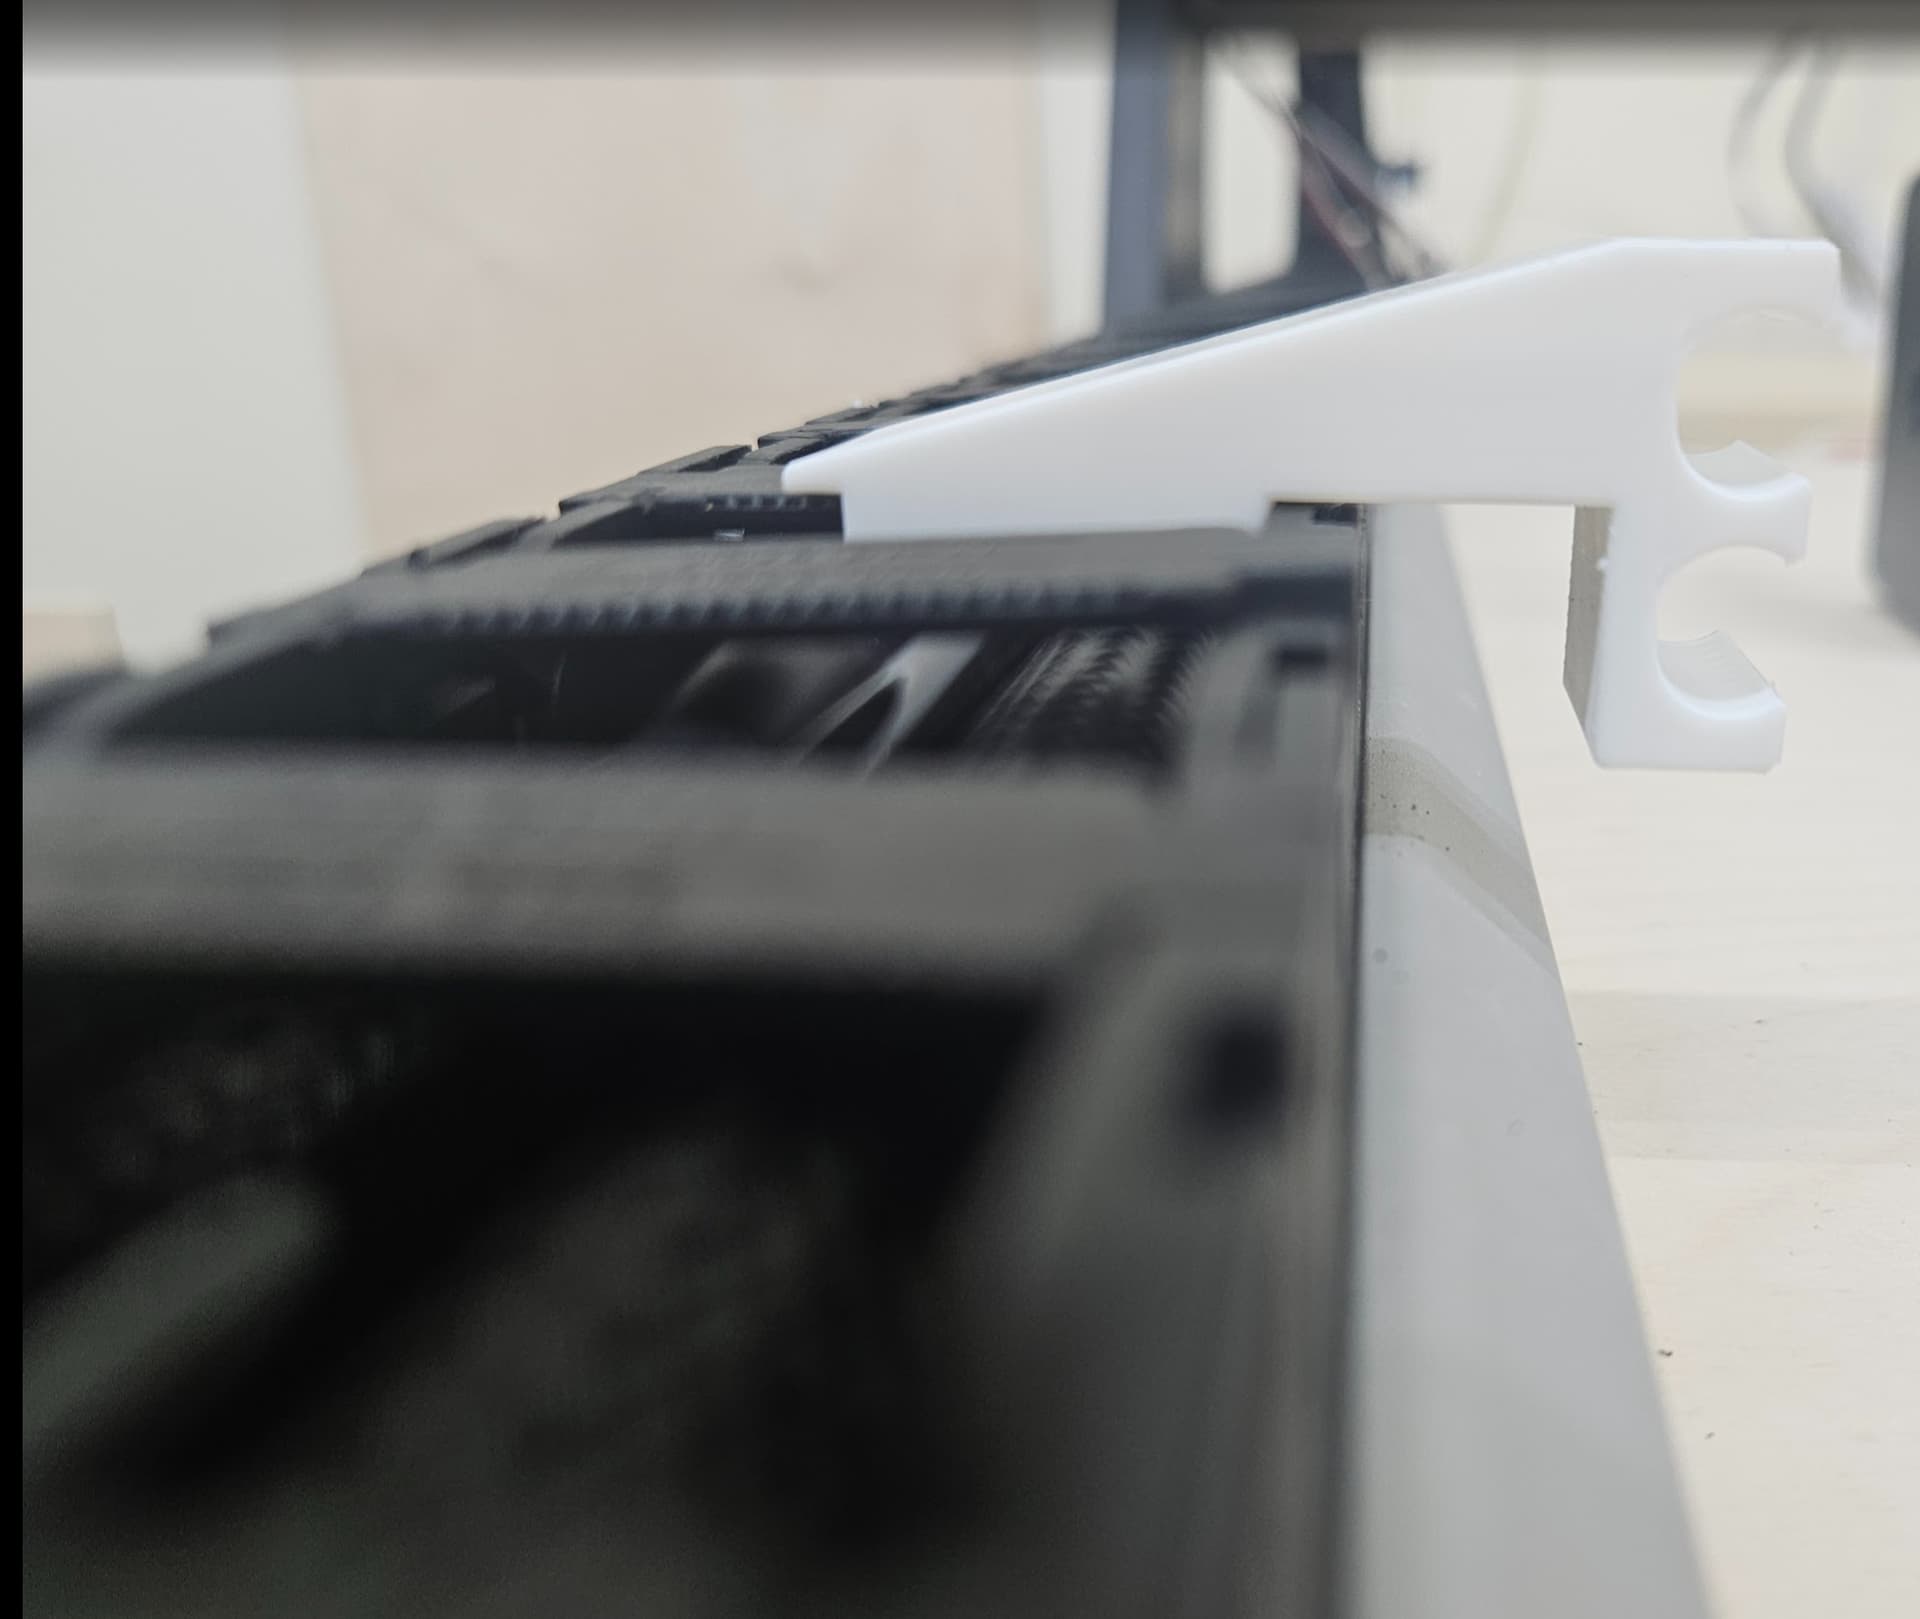
Just completed my test print of version 7. I am impressed with how strong the clip area (foot) is . I was expecting it to be weakened by removing 1.5mm of material but it is strong! Also those supports worked well. They were easy to snip and I got a good print on the ends of those t tracks. Removing the T slots in the middle worked way better than I expected. The fit is tight on the drag chain clips and it does require some force to slide the tube holders back and forth along the clips. I think we nailed being able to slide the clip to the right to allow enough access to unlatch the clip with a small flat head screw driver. That will be great when its time to make changes inside the drag chain wiring. There is only one last item that needs to be resolved. Now that I can latch the drag chain clips I discovered that we also need to delete about 3mm of material from left end of tube holder (the part that still has the t track in place) Or maybe we just delete the last 3mm of t-track on the left side like you did earlier on the right side. That would probably be better. And if its not too much trouble add the 3 mm of t track that you are taking away from the left side back to the right side! That would make the t track be the same length which is about 25mm or 1” Id hate to have any less than that for strength purposes. I just tested the tube holder part 3mm back from the right inside of the drag chain to make sure there is still enough room to unclip the latch for the drag chain clip and there is. anyway the whole purpose of being able to slide the tube holder 3 mm further to the left is to bring the tube clips/foot closer to the y rail. As it is right now, with the tube holder part as far left as it can go, the tube holder just sticks proud of the y rail and with a tube in place it is slightly more proud by 1 mm. As you can see in the photos below on the print of V7, there is about 5.5mm of space between the Y- rail and the back edge of the foot/tube clip. Reducing that to about 2.5mm will still give plenty of room for things to move freely as the drag chain rolls back and forth freely and will give me 3mm more room to work with on the right side of the y rail. (the first photo is with the block pushed back 3mm from the right showing that I still have access to the clip if we extend the track on the right side by the 3mm we are taking away from the left

Got it. I’ll remove 3.5mm of t-track from the left side. But if I add it to the right, you won’t be able to pull it out as much. Will you still have enough room to get a screwdriver in there?
Wife has decided that cottage will be tomorrow morning.
yes. 3mm from the left will allow me to slide the entire holder 3 more mm further left thus closing the gap between the tube clip foot and the right side of the cable chain which will give me about 2mm of clearance. And adding that three mm back to the right side of the t track should allow me to still access the latch. I I tested it with the block slid 3mm to right to check (first photo above)
it is hard to see in the photo but did slide that block 3mm to the left once it had bottomed on on the right side to make sure I would have the room!
This is going to be very useful for anyone running water cooled spindles as it is a very tight tight fit in the drag chain with them in place. My problem is I also have another bundle of wires for the led lights (5 wires total) and Auto Dust Boot (3 wires total) just not enough room. You should post this file in makerspace or where ever since you did all the work. Plus make a separate post in these forums for the altmill crew!
ill get you the name of the author of the original file. I just asked him where he posts and what name he uses there so you can give him the proper credit he deserves for the original file work. You, though get to take credit for what we have collaborated on!
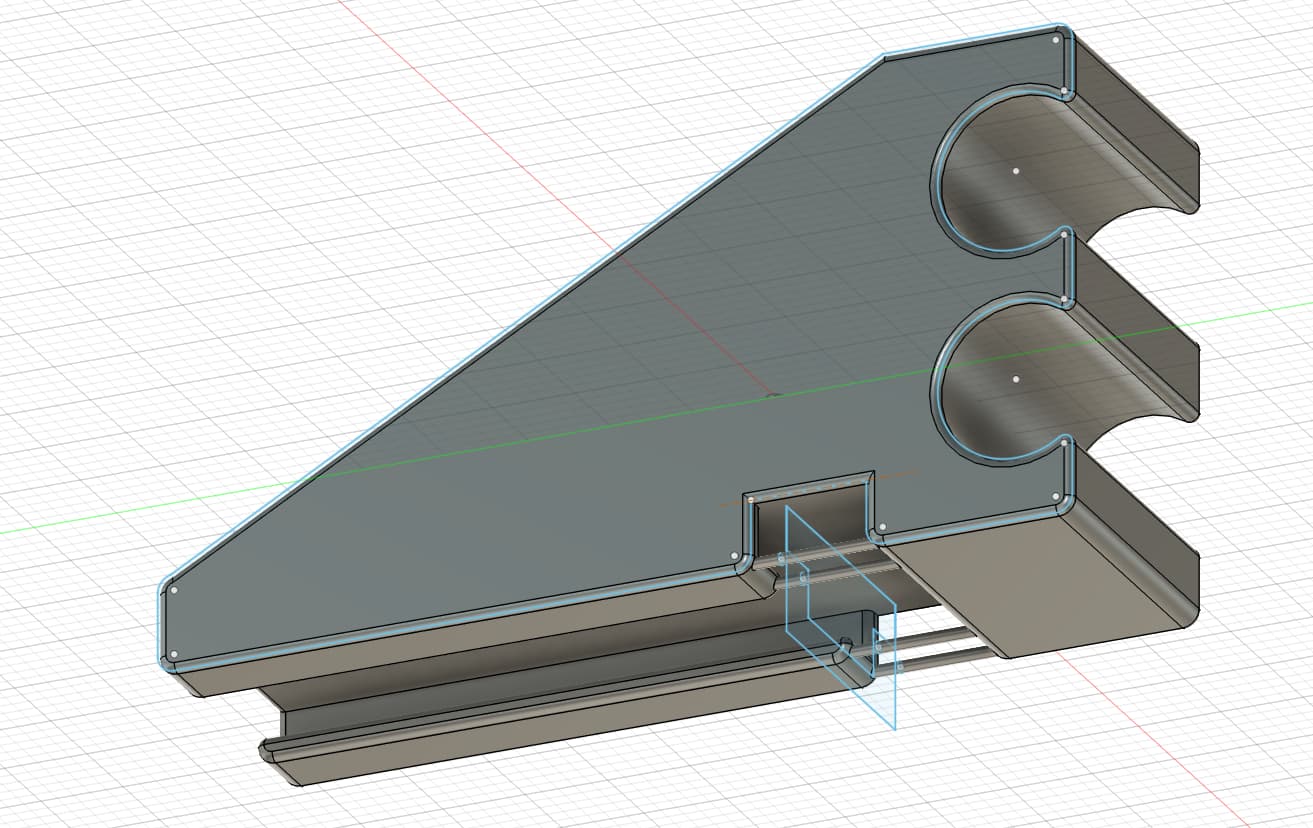
V8 is as shown in the picture; V9 has rounded edges on the narrow end
Tube_Holder_v8.stl (872.3 KB)
Tube_Holder_v9.stl (919.7 KB)
Ill get this printing next.. Hopefully we have nailed it!
@Headshop Could something like this work too? You would not need to slide the bracket to access the screwdriver slot. Not sure if the fact that it sits higher would be an issue.
Tube_Holder_v10.stl (932.9 KB)
I don’t care about taking credit for the file, nor posting it on Makerspace. That’s stuff I can’t be bothered with.
Someone recently explained to me the further away you get from the centerline of the drag chain the bigger the problem you will get with things binding up since they move along different radius. I initially designed something like what you are showing in tinkercad. The problem will be that the radius of the tube bend (where the drag chain u turns) is reduced by the hoses being elevated (above/below depending on orientation of the drag chain) the further away they are from the chord line the worse the radius becomes and things start moving and biding up differently. Best to keep them near the cord line or as close to it as you can like we did. Once I get this printed and installed ill let you know how it works but I think it will be fine since we aren’t that far above the center axis of the drag chain.
Version 8 worked perfectly. We closed that gap up nicely and the tube end is clear of the Y rail which means I can now put the Rapid Change ATC right next to the Y rai! And as you can see when I slide the block all the way to the right I have 9/16” or 14mm of clearance to manipulate a screwdriver to pop on the latch on the drag chain clip. I think I’m going to print 11 or so blocks which which will give me 1 block every 5th clip. This will give me about 7” or about 18 cm between clips
@Headshop v9 has all the edges rounded, if you care for that kind of thing. It’s in the same post as V8.
@Headshop Correct. The further out from the centerline of the drag chain, the smaller the radius will be where the drag chain loops. The tubing will certainly want to move inside the slot. So making sure the hole in the clamp allows for that movement is important. Or accept the fact that the tubing will bend in between clamps. You probably don’t want the tubing to stretch. Too much and it may eventually break/leak.
I saved the V9 file for the day that I get my new ATC. I am waiting for the one from Sienci to be released. I will probably upgrade to a 2.2 kW spindle at the same time since the spindle needs to be replaced anyway.