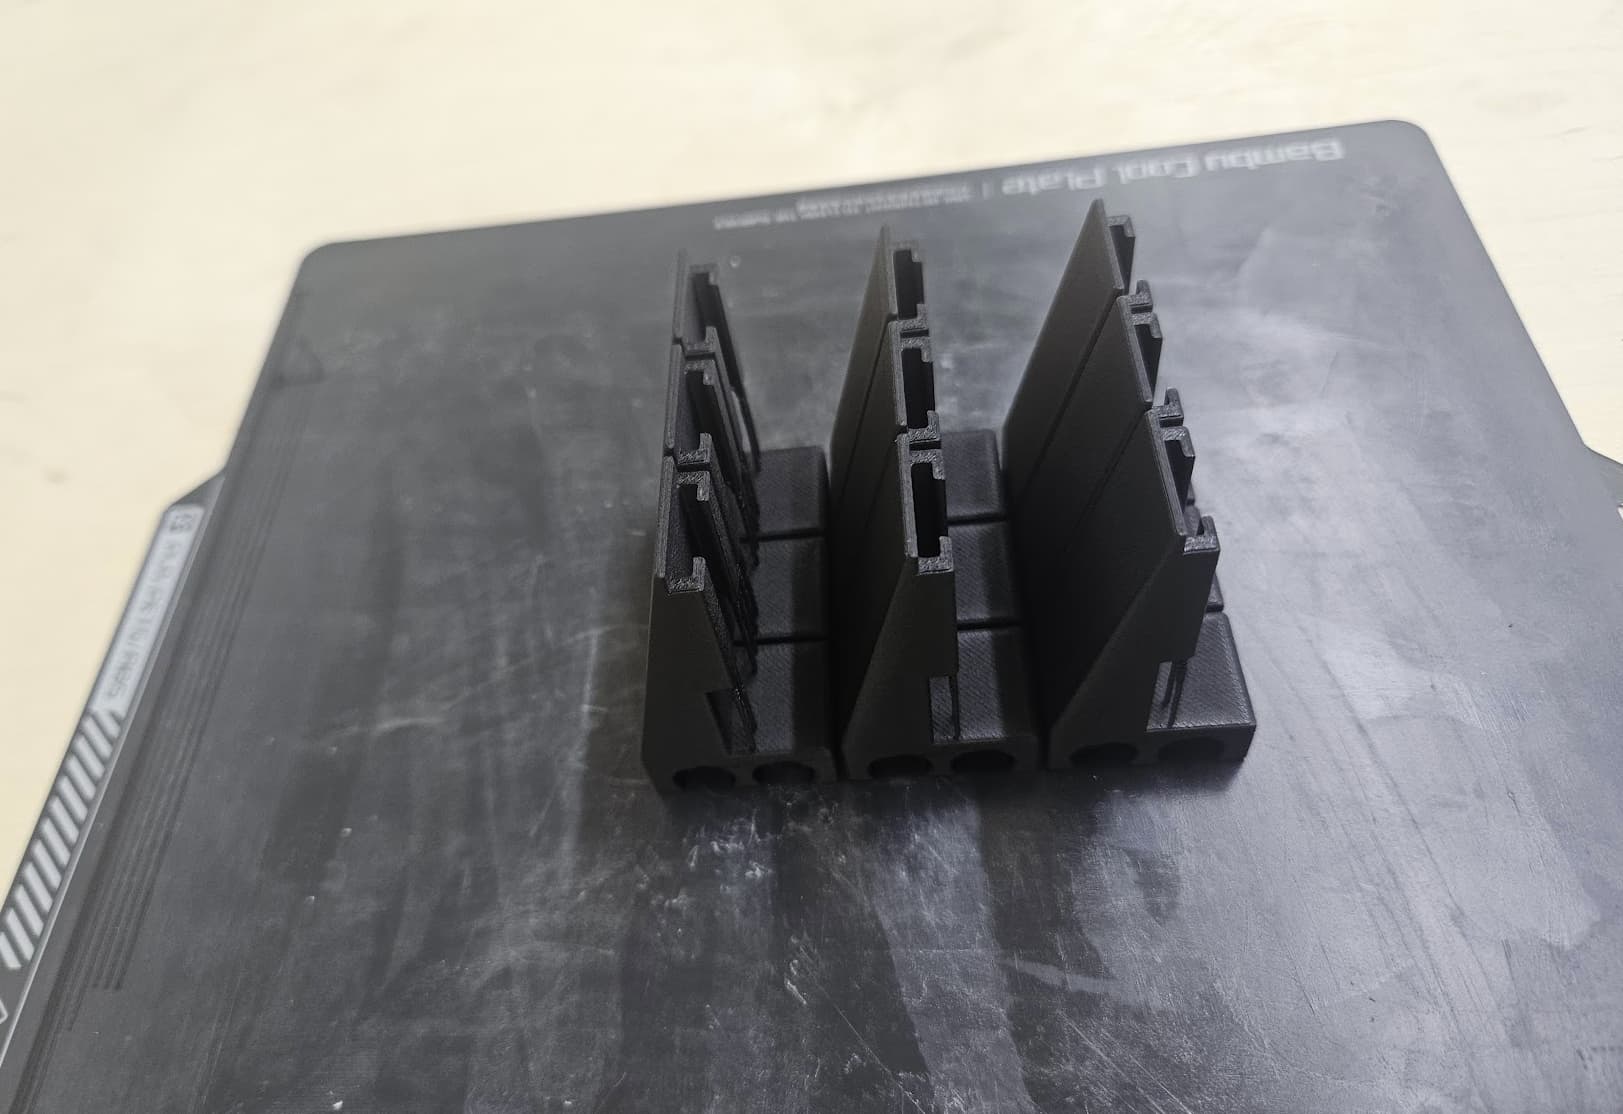
Thanks for guiding me on my print settings. I have 4 of these printing at the moment in PLA-CF. Total time is just under 2 hours and Im running fine quality print settings
I guess I wasn’t too far off with my estimate of 30 min per model ![]() …. that would reduce to 20 min if you are currently using 0.1 mm layers and would go to 0.2 mm layers.
…. that would reduce to 20 min if you are currently using 0.1 mm layers and would go to 0.2 mm layers.
I rarely use 0.1 mm layers. Besides taking forever to print, 0.1 mm layers are not as strong as 0.2 mm layers and pretty much the only time I use 0.1 is when I am printing small threads.
BTW, I don’t know if it is available in your slicer but have a look-see for variable layer height which you can configure to give you 0.1mm where needed and 0.2 or even 0.3 mm where layer height is irrelevant.
if you go with an air system atc these obviously wont work but the ones over and PwnCnc will work with some modifications as they t track is too narrow to fit over the altimill drag chain clips. I solved this by shaving off .050” using a router table and stops. Ultimately, I gave up on that design because it hung out over the table work area by a little more than a half inch.
It’s easy enough for me to make the tubing holes larger. I use Fusion for most of my modelling.
It’s more a case of saving the stl for a starting point.
The guy who drew the original design is a lot like you. Doesn’t care if he gets mentioned or not but if you do want to mention him use BeakerLink if you want to send him credit for the original files.
Oh and please create a separate topic in the forums maybe under Add-ons and Modifications? I’m sure other would love to see this file that is custom designed for the Altmill. Feel free to use any of my photos if you need to.
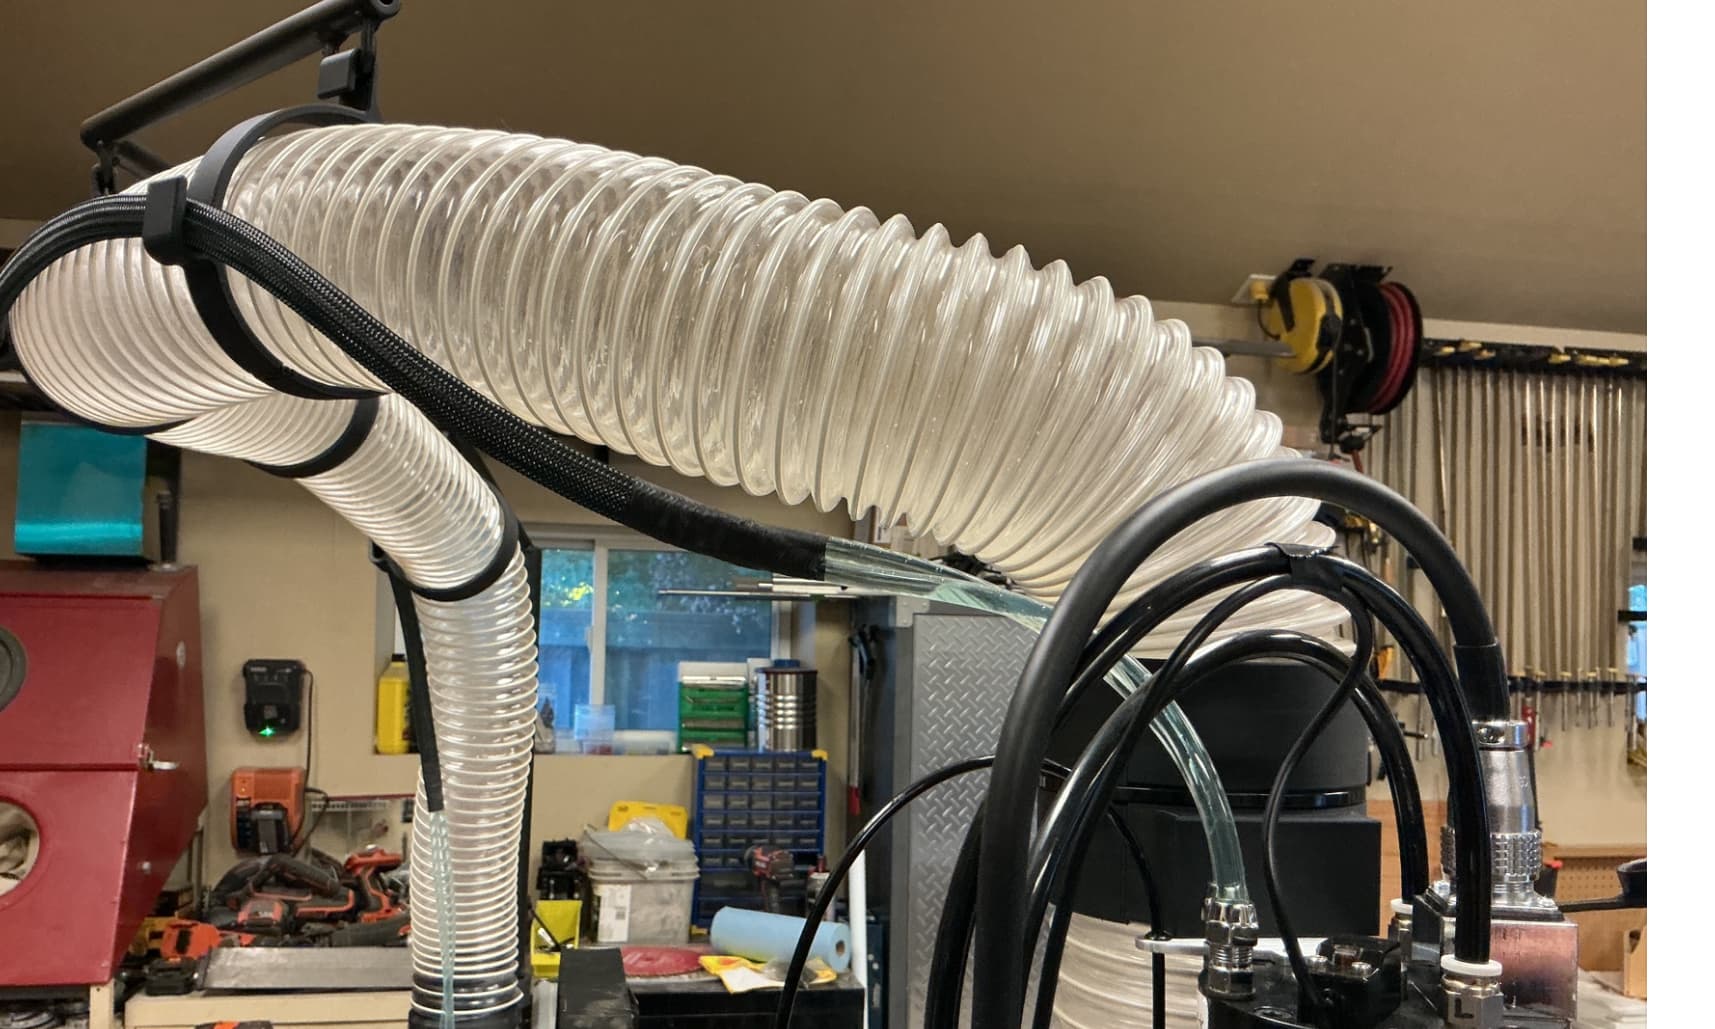
Here it is installed and operational. As I suspected the lines do move at different rates along different radii. I definitely wouldn’t want that bracket any higher from the center chord that’s for sure! There is room to drop the block a 1/4” down (before hitting the Y rail) so that one hose would be just below the center chord and the upper hose would be a little further away (about 1.5 times the distance of the lower tube) from the centerline chord than the lower one but still better than it is now. Though I might just be chasing it at this point. All the tubes will move differently than they do now and now is acceptable as far as I can see. Nothing is binding or causing issues. Cant post anything over 10mb so I’m posting a link for it in google drive . https://drive.google.com/drive/folders/1c9OWS5gRSdt7WLQaVjEGJZZ93029yeZx?usp=drive_link
@Headshop When I get home tomorrow , I’ll modify the design and drop the tube holders by 6mm. Will that prevent you from getting a screw driver in there? Your choice if you want to print them and try it out. At least the modified part will be available to those who want it. Any value in making the hole slightly larger than 3/8” to make sure the tube can freely slide? I can make the opening slightly smaller too so the tube doesn’t pop out. I can also reduce the distance between the two tubes. But I’m not sure what the thinnest amount of plastic would be acceptable.
Yes, the tube should be able to slide.
What is the distance at the thinnest point now?
FWIW, I would think that 1 mm would be ok. There is no load on that center post.
added: I might make it 1.2 mm if the nozzle used is 0.4mm
@Headshop Can you do me a favour a see if you can put the holder so that the tube end is on the other side of the drag chain? And if it fits, does it clear the x gantry plate? What I’m thinking is for each bracket to only have one hole for the tube (located at the centreline of the drag chain). But you would alternate each bracket so that one is on the outside and one is on the inside. Would that work?
Been busy all afternoon reading how to get my PwnCNC 2.2kw spindle to play nice with the SLB EXT so I can move on to constructing the spoil board and then getting this Altmill of mine alive! But yeah we can try several variation of what you propose. As it is now, the tubes are pretty much tight in the slots. They do not slide in the slots whatsoever. I gave them a little extra slack as I was installing them to help them around the corner. Gwicki linked these above https://makerworld.com/en/models/847186-drag-chain-cable-clip#profileId-794472 We could try something similar to that but make it with the mount we have and a little more constraining. The super ethane hoses I’m using like to stick to themselves. It requires a little force to slide them past each other when they are touching. The measurements I just came up with were 9.65mm in diameter per tube. I think what I have now will work but I’m open to any improvements we can come up with!
yes, ill be printing with a .4mm nozzle
Unfortunately no, there is about 1/8” or 3mm of space between the gantry and the cable chain
1 Like
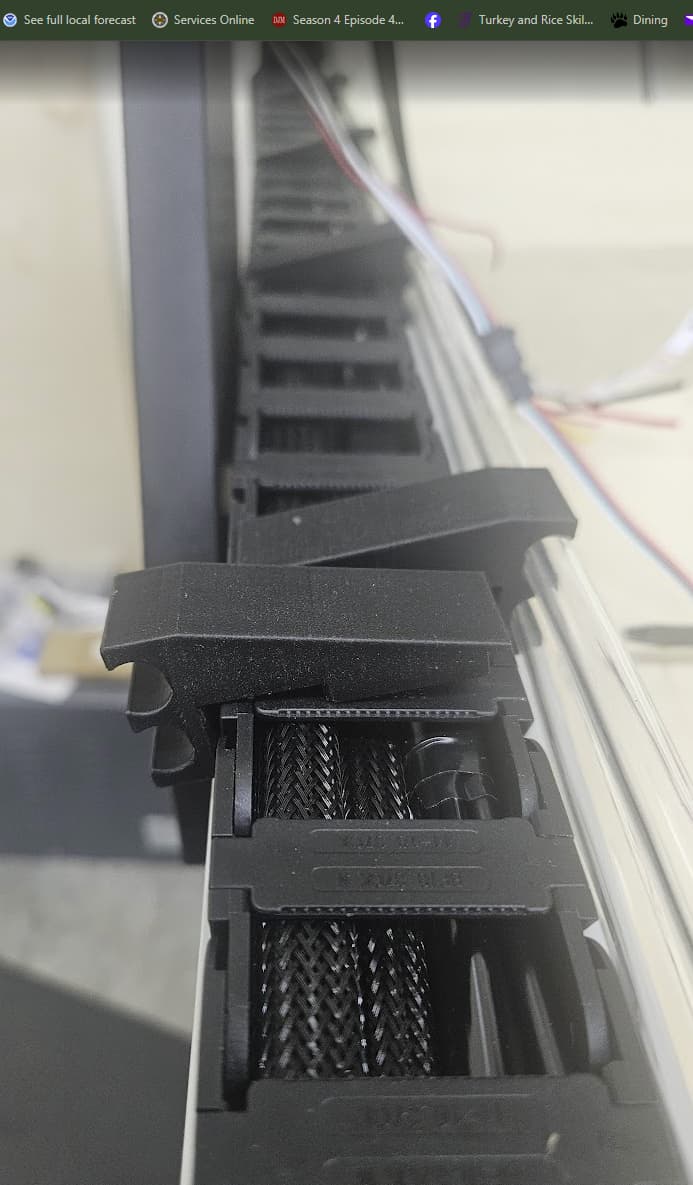
@Headshop the holder that Grant (@gwilki ) linked to could work with the t-track bracket we have, as you stated. If I make the slot high enough, it would allow the tube to move vertically in the slot as the drag chain starts to loop and the radius of the tube changes . Or it could be one hole at the centerline for one tube and an elongated hole above that for the other tube to allow the vertical movement. Regardless, they should be at least 9.65mm in size.
I dabbled with some similar approaches and totally understand the desire for neat and organized. Since I needed dust collection anyway, I found it worked out best to put the hoses on a boom and not worry about rubbing, kinking, and hopefully much less likely to end up leaking on a project. Not the direction you are going for, but possibly a viable approach if you are ever going to have dust hoses hanging anyway.
I printed some custom hangers with a simple side hook:
(Hose is in some plastic braid to try and keep things a little neater)
2 Likes
Observation #1: we’re probably spending way too much time on this ![]() . But I enjoy a good design challenge, so……
. But I enjoy a good design challenge, so……
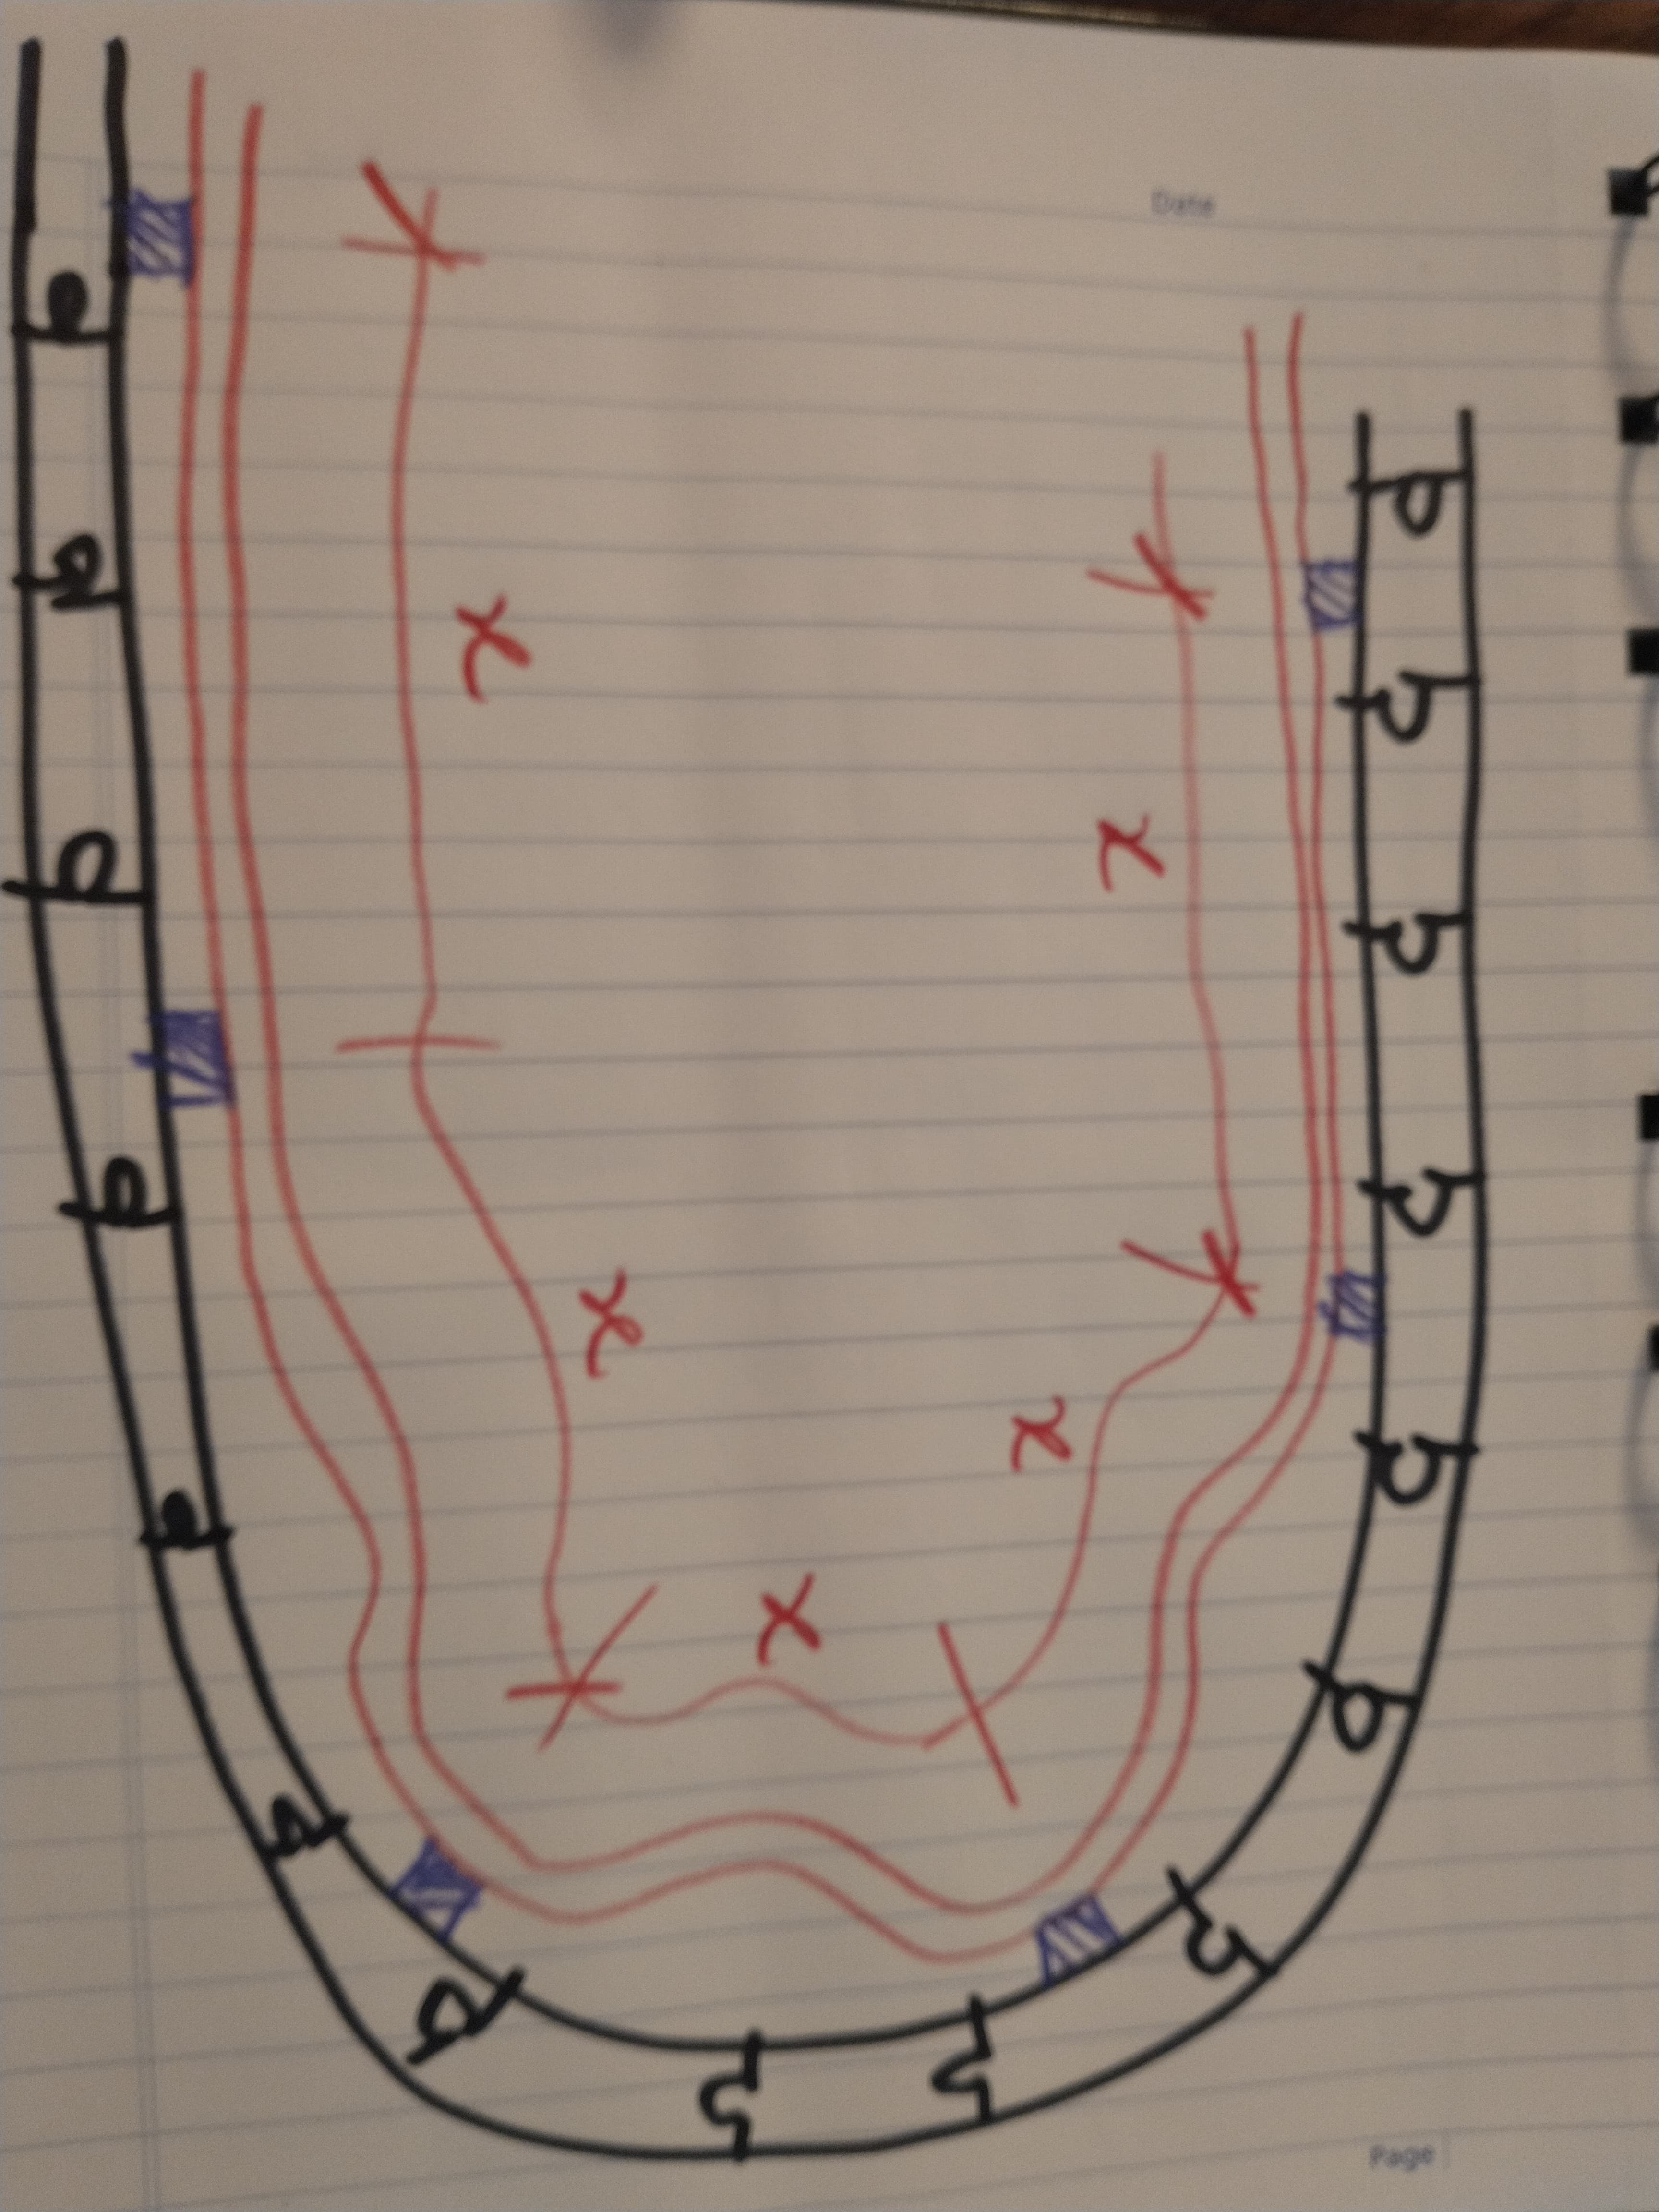
Observation #2: your current brackets should work just fine if you compensate for the reduced radius as you’re mounting the tube in the mount. Mark the entire length of tubing where each bracket will be when straight. So essentially equidistant marks at length ‘x’. And when you mount the tube in the brackets around the loop, make sure the marks line up with the bracket. That will result in a slight bump in the tube when curved, which will flatten out when the drag chain becomes straight. No need for the tube to move freely in the bracket in this case.
1 Like
Ohhh Ohhhh No you didn’t! How could I possibly not think of this solution. thanks for throwing a wrench into the fray! I have a metal dust collection duct right above my Altmill. The plan all long was to install a wye and and turn those pipe down right over the middle of the CNC. And I just check, my chiller can lift 10m which is well more than the 8 or 9 feet I’d need it to lift. That looks like a 4” hose you are using which is the size Id be dropping down from the ceiling to the cnc. By any chance do you still have the files for those brackets? Im not giving up on our current endeavor but this is definitely an option that needs more consideration.
ahhh i see what you are getting at. I was just trying to use my built in Eye-chrometer and got it close but what you are saying totally makes sense to me. Ill give it a shot