I hope I did not come across as (needlessly as it turns out) trying to educate you. Maybe I can get to pick your brains when I machine metal. Thus far I have only managed up to 20mm thick T6 6061 651 aluminium. I was really bothered when I could not get an accuracy tolerance of ±0.0001" ! I have managed 0.0004" but not consistently enough to claim it.
I routinely work with T6 6061 to ±0.001" and for my hobby machine, I can see that I am probably pushing it. It is belt driven so I have less backlash than screw fed and I realised that rigidity was key. I changed the baseboard for a fixture tooling plate and modular vices and could not be happier.
That is very frustrating. I did not realise that even though my initial assembly (not Longmill’s machine) took me three days and I was told that two hours was normal, the machine was not aligned correctly, even though the mark one eyeball said it was. Eventually, I took everything apart completely and built it differently.
I knew now what I needed to pay attention to and although I still had a baseboard in MDF, my assembly after revisiting it… and taking 6 weeks to complete the build… left me without a single tramming mark and everything operated like it had just been serviced. Ultimately, I could not achieve what I wanted with metal and bought the fixture tooling plate and modular vices. It was a night and day difference for rigidity and my machining improved by an order of magnitude.
Did you cure the Y axis nod? Is the Z carriage implicated?
We had the same issue when we first started and realised it was the dust collection bristles. If we had it set too low to the work piece where the bristles were making contact with the stock we would see lines every time the x or y axis would change direction as the bristles actually push the entire router assembly up ever so slightly causing lines in the final work piece.
@Arborister I’m new to the Long Mill, and I’m just making my dust boot. If the pressure of the bristles on the work piece is enough to lift the router and the Z gantry, could it be that the gantry is loose somewhere? I would think that the pressure of the bristles is a lot less than the pressure of a downcut bit pushing into the wood, no??
If that little brush can move the Z gantry, there isn’t much to be said for rigidity!!! I apologize, but at this time, I do not have much good to say about the longmill!!!
You all good I wasn’t offended, just saying simply that I know a little bit about it. But this wood router has me thrown!! I keep having problems every time I try to run my Longmill. The latest is the auto probe. I am not even going to explain all the problems it is giving me. Suffice it to say that it randomly slams the bit into the floor of the probe block, and has basically ruined it. Hopefully after Andy watching the videos I sent, will replace it for me.
I have seen variations of this in a lot of different machines. After performing faultlessly with a tool length measuring device for many months… the tool randomly plunged through the workpiece damaging the tool and the work. I only use the tool length device for multi-tool carves now. My general impression as it is a reported happening fairly widely across many platforms is that there is some inherent issue in 8bit GRBL that contributes to the problem. In any event, manual touch off is your friend at the start of each job and if it is a multi-tool job, I touch off a 1-2-3 block. The auto touch and probe system is great but the failure for it to be reliable several different platforms is not.
I’m certain everything is tight. This was a problem that I was trying to figure out for months and when I finally did it actually made sense. Try it out for yourself. The next cut when I was conscious about the placement of the dust collection the cut was perfect. No movement other than intended. Still sometimes when I change thickness of work pieces I forget to adjust the dust boot and run into the same problem.
don’t get me wrong, this is the only issue I’ve had with the longmill. In my experience almost every piece of equipment, from the longmill to my tractor, has even the slightest bit of flex in certain areas. you only notice it with the router because we’re looking for perfection. And as mentioned, once I lifted the dust boot to clear the work piece everything was perfect.
@Arborister Thank you for this. It does not sound good for the Long Mill’s rigidity, though. If everything is tight and the Z gantry can still be deflected by a visible amount just by the brushes contacting the material, clearly the Mill has issues.
The pressure exerted by a down cut end mill is far more than the pressure exerted by the brushes. So, the gantry must be moving because of the bit, too. I’m starting to think that it’s a good thing that I got a deal on this used Mill.
Alright, so it seems my router is not perpendicular to the waste board.
The two screws that hold the router in place, when I tighten them, the router bottom pushes in, causing it to be out of a alignment.
I tried to push the router up a bit (currently it’s sitting on it’s “enclosure” securely. Should it be seated right on it, I assume so.
So, how do I get it aligned correctly, is enclosure defective? I push the router forward by hand, but once I tighten the two screws in the front that hold it in place, it moves back again.
@Bizbrar There are several threads on here setting out how to tram your router. Search on tramming.
As to router position, the one position where you do not want it is all the way down in the clamp so that the “chamfered” part of the router casing is touching the bracket. I believe that the optimal position is as high up in the clamp as you can get it. This reduces the leverage that the bit can exert on the router and the Z gantry. Clearly, the max height that you can set it to will be influenced by the length of your bit and the ability of the Mill to cut as deeply as you need.
@Bizbrar No, it would not be. A compression bit is nothing more than the combination of an upcut and a downcut bit. They are made to cut completely through material. The bottom of the bit is upcut, so you get a clean cut on the bottom of your material. The top part of the bit is a downcut, so you get a clean cut on the top of the material. For pockets like you are doing, you would be using the upcut part of the compression bit.
@Bizbrar The conventional wisdom is to use down cut bits for pockets. The rationale being that you will get a better surface on the bottom of the pocket. An upcut bit will, at best, leave fuzzies on the bottom since it is pulling the fibres up while cutting.
I guess, in your case, the conventional wisdom is not working out. I just re-read this entire thread. I understand that you tried Garrett’s method and it didn’t help. You’ve trammed your machine and it didn’t help. You’ve ensured that there is no movement in your Z gantry. Am I correct in all of this?
I don’t use Carbide Create, so I can’t try your file. I’m not much help there, obviously.
However, assuming that you have ensured that the machine is solid and true and assuming that you are running the finishing pass as recommended by Garrett, the only thing left is wood moving.
Question: Is this happening with every job, or just this file?
Here is an odd question for you. Are you leaning on the table top when the job is running? I know that sounds strange, but there was another use on here whose problem was that he was leaning on the table top to watch his job up close and personal. He had a problem similar to yours. When he stopped leaning, the problem went away. Strange, but true.
I’ve checked the level again, and used a magnetic digital leveler and i’m at 89.7 degrees, i’m afraid to adjust it as it’s manual and may not be able to get any better than that.
I’ve changed my clamping method a bit, to ensure no movement.
No other changes were made, and I’m not leaning on the table or anything (made sure of it consciously).
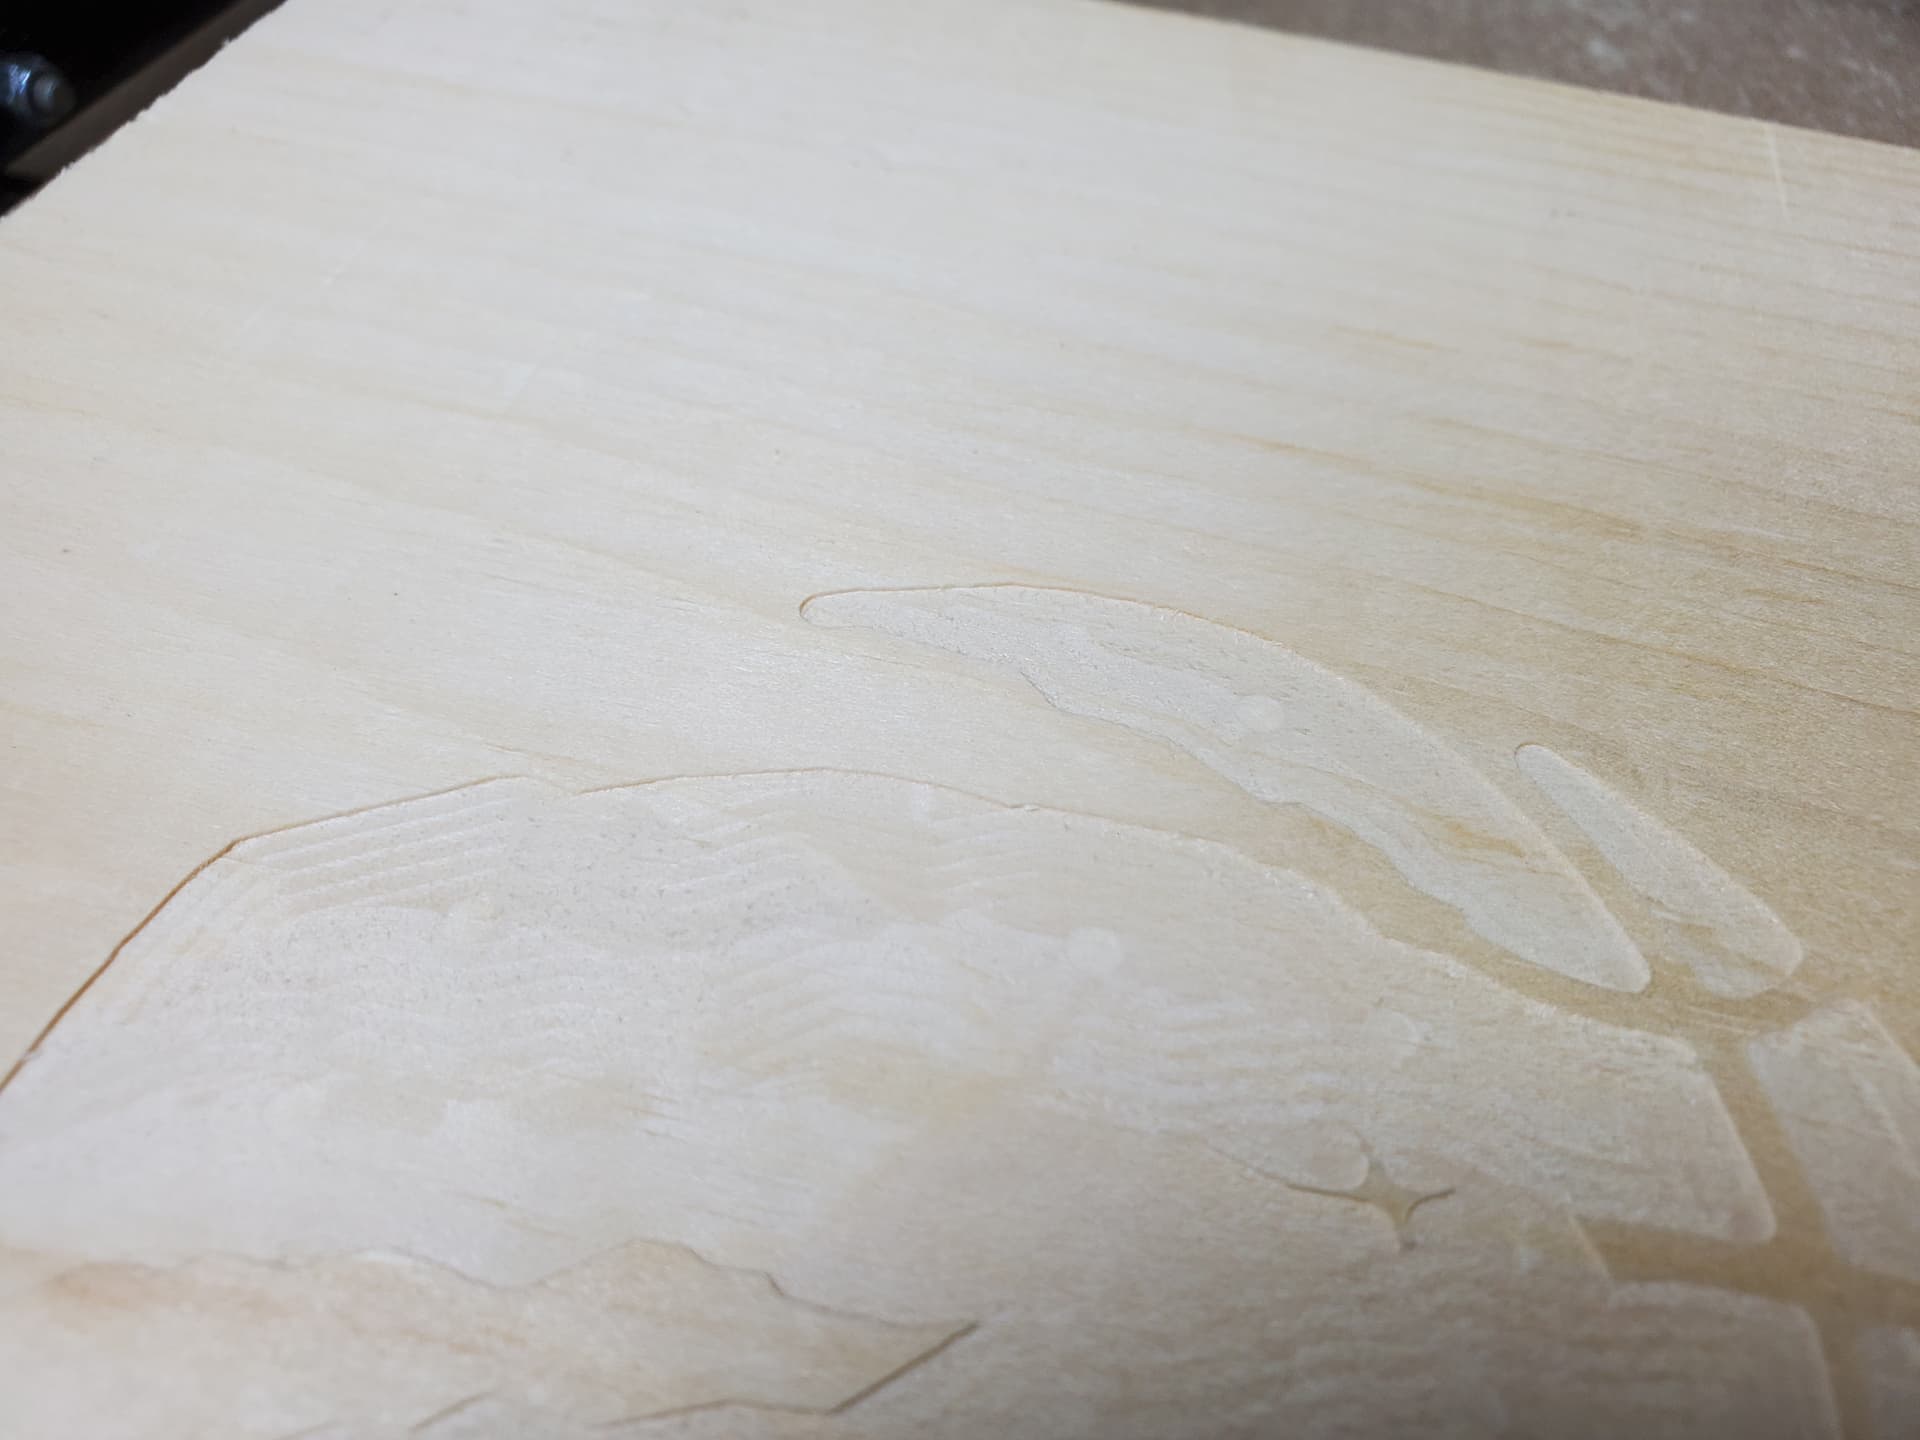
My cut came out very nice now, although I can still see the movement lines of the 1/8 bit. I ran 2 passes at different step over, and there was an improvement.
There is one thing though that’s bothering me, maybe for another thread, but I generally wear my ear protection, and when I take it off and jog the machine, I notice it makes some noises that don’t sound very nice. Some sort of “grinding”, not the right word, but it’s mainly on the Y axis. I did notice on the X that the wheels are leaving a mark as well, I see some black residue, is this normal?