Almost have this thing ready to rock thanks to everyones help here, so first let me say thanks!
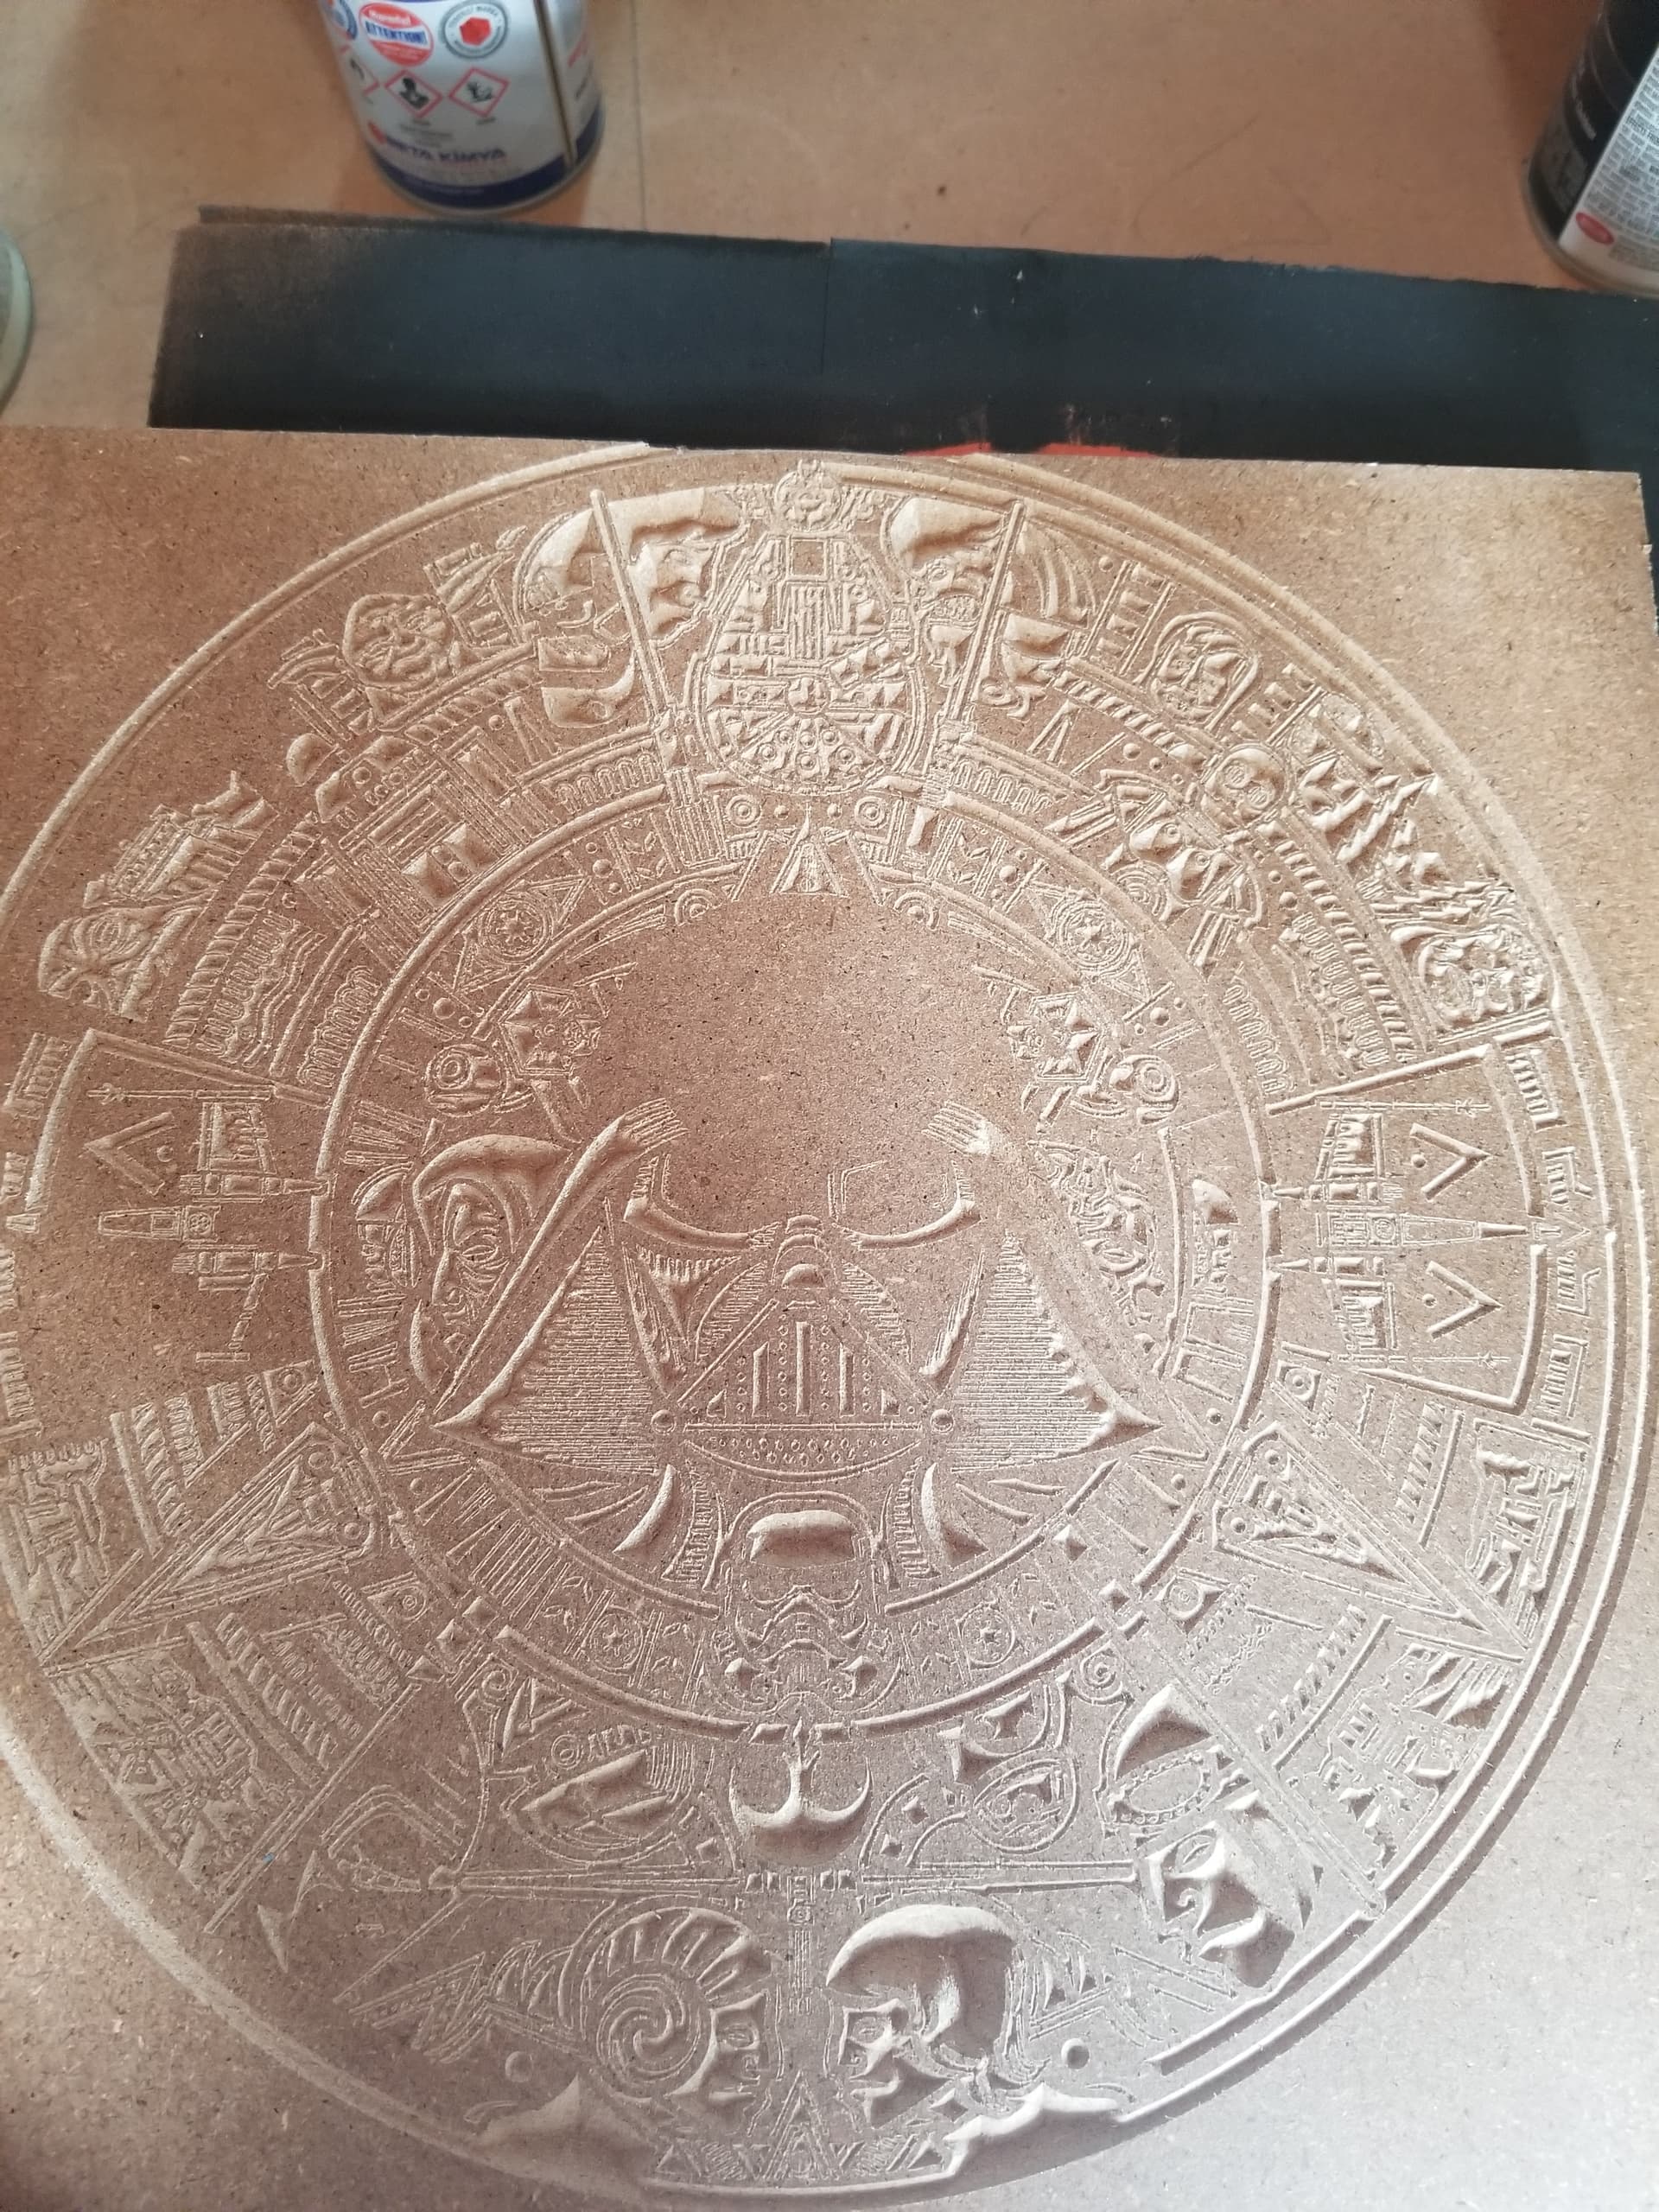
The last issue that seems like an issue is that the cuts are getting less accurate. Thursday and friday i did a few Marvel Aztec Calendars and they seemed to have great detail during the engrave. I went to cut the profile and the cut was a good 1/4 inch off by the time it got to the upper right (furthest from 0,0).
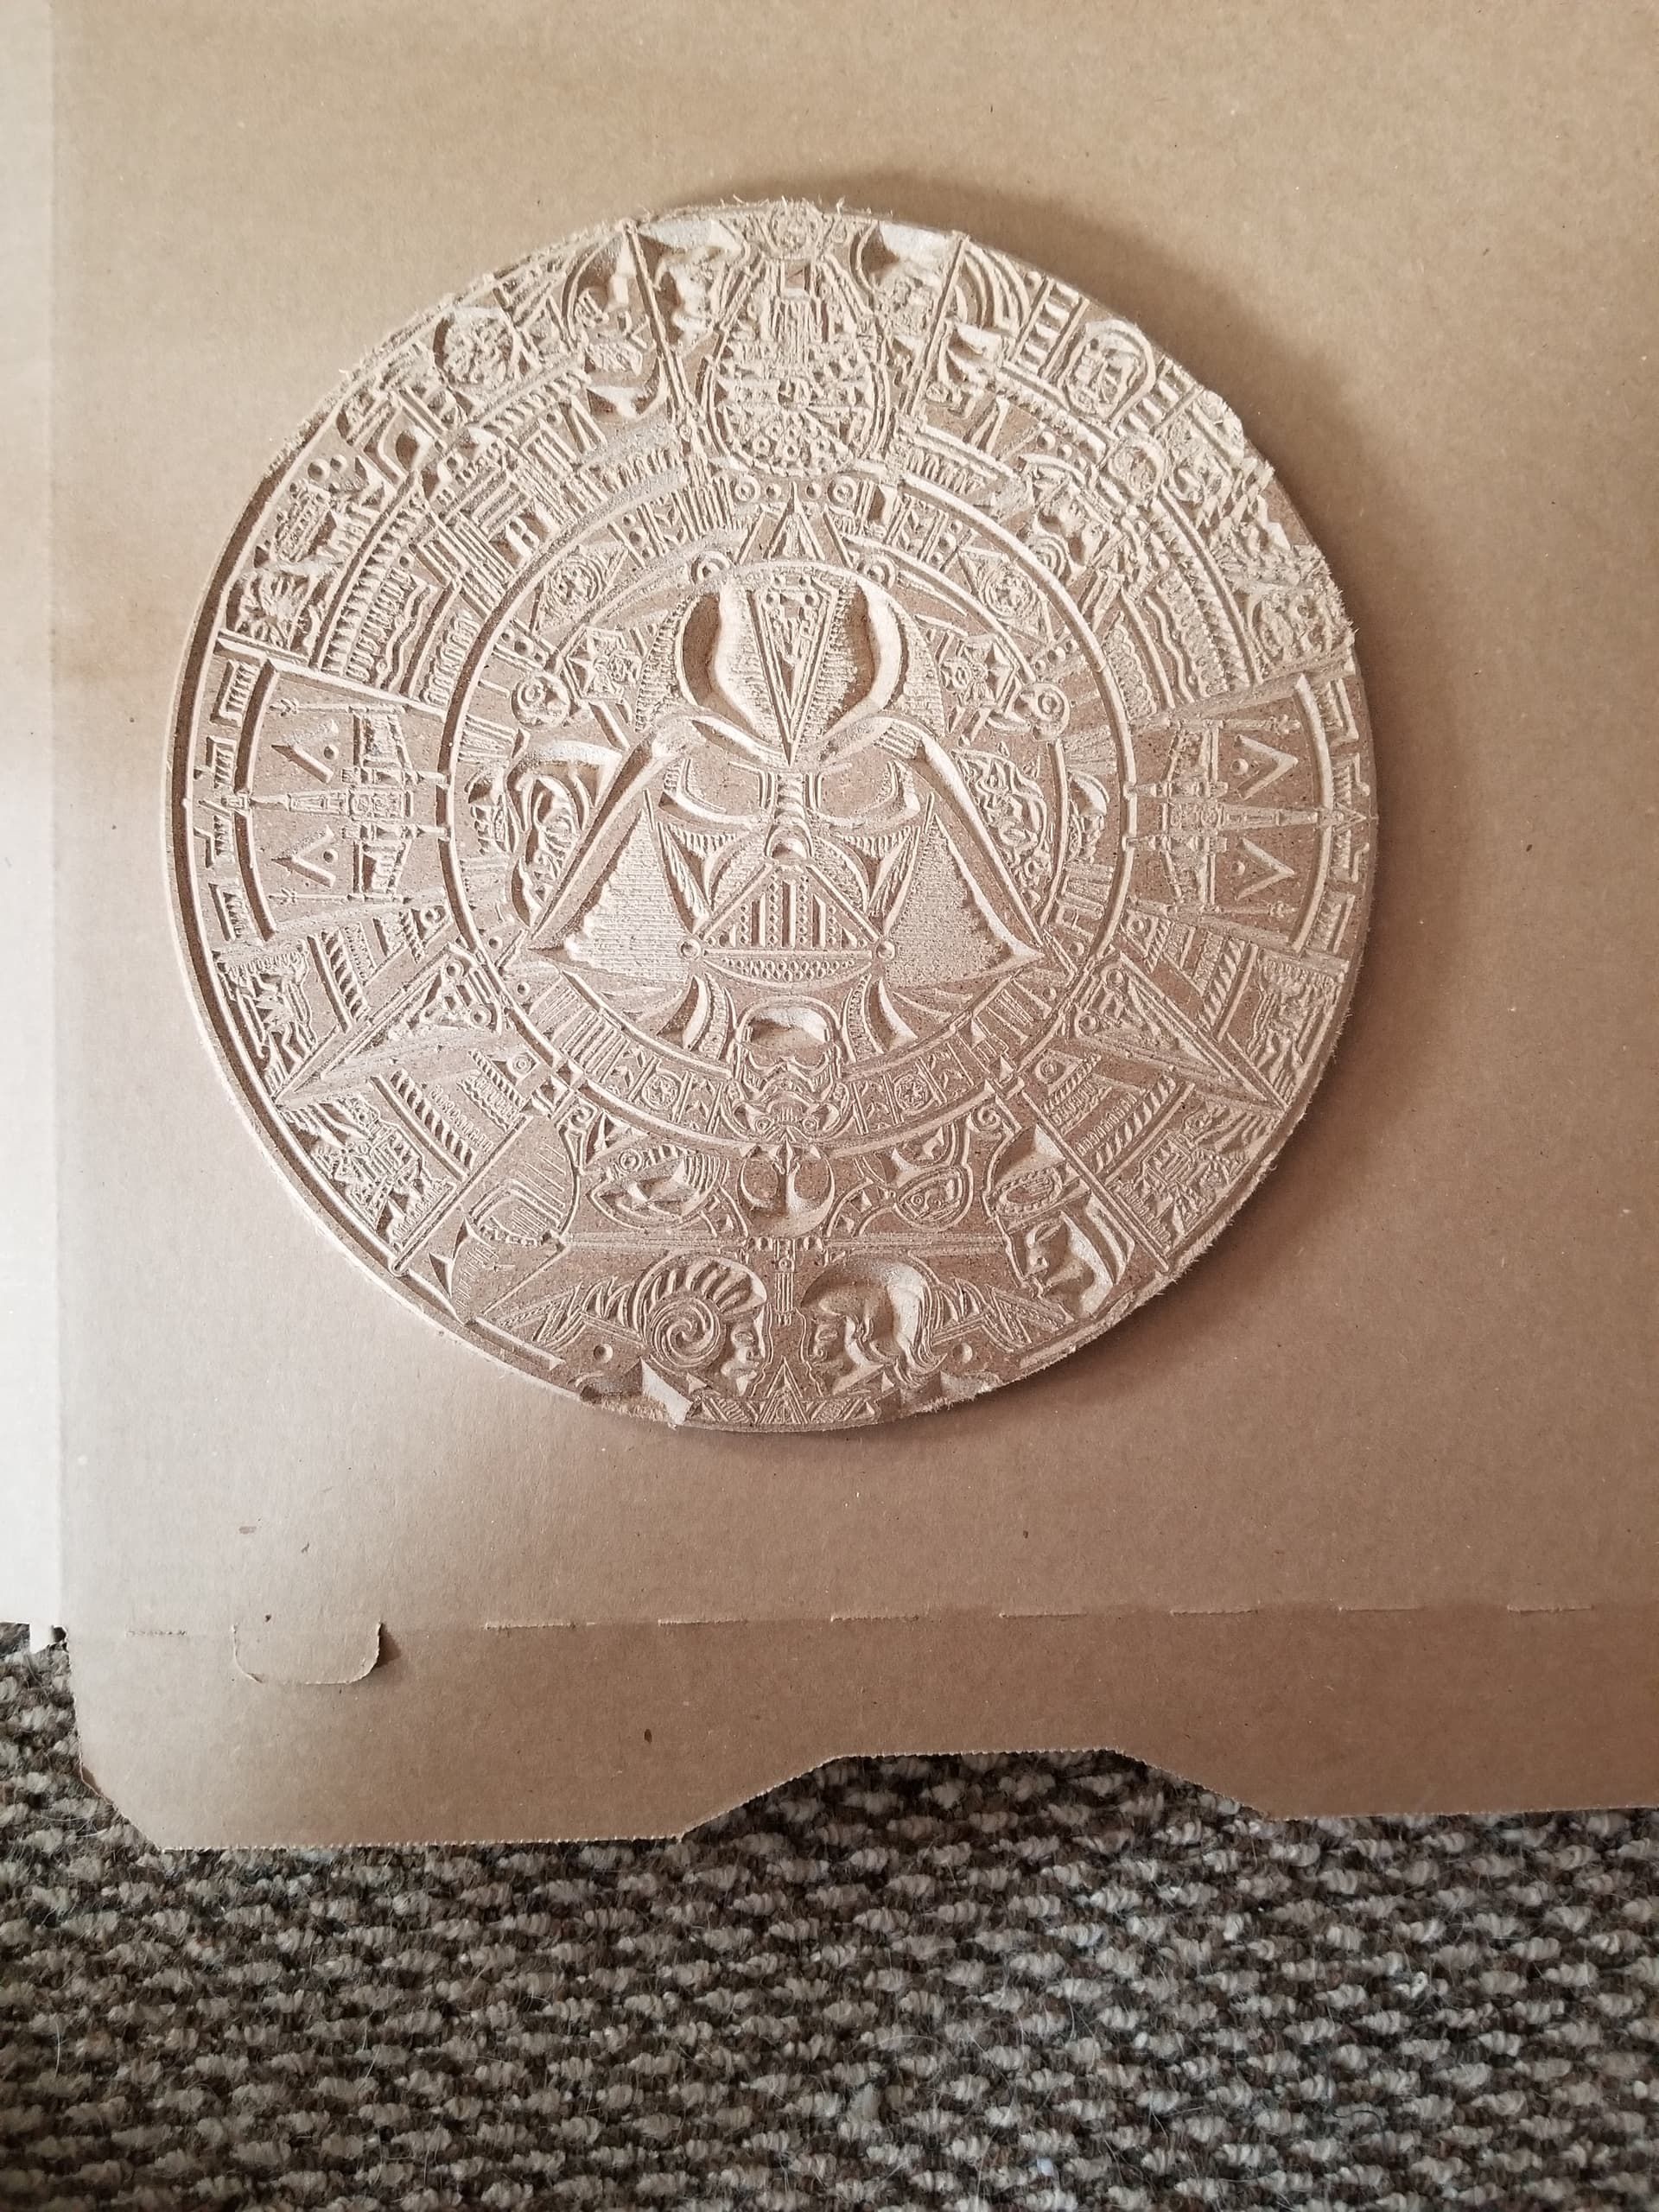
The next one was alottle worse. The third one was a lot worse and that upper right engraves were super messy while the closest to 0,0 looked great, so i am thinking something is off.
I rechecked square, added more support underneath in case it was sag, adjusted the wheels again.
Here are some pics. The half finished vader face one is probably the easiest to see te detail and was the last one i did. Upper right the ewok face is chewed, and the border gets thinner as it goes upper right
The completed cut you can see how far off the profile cut is.
Since it seems to equally affecting x and y is it a controller issue. Im assuming it mostly equal otherwise it would be oblong on the x or y but not both. Rules out the motors, frame, alignment, etc too.
Hi @Pkaser. You seem to have more than one single issue. The shifted cut in the last image could be due to inadequate work-holding. The workpiece may have simply slipped during the cut. In this instance it looks like your workpiece moved up and to the right during that part of the carve. (of course that may not be the case)
The use of MDF can provide you with tearout issues if the feed speed is too high or the cutter is blunt. MDF is just glue and dust and the edges will never be very well defined because the material cannot hold the detail. This type of work requires sharp, well-defined details to work well.
The tension of the wheels may be uneven and causing binding of the router carriage so that the uneven cut is produced by an uneven application of tension in the components, causing the stepper motors to lose steps.
A good place to start is to look at the machine assembly and to ensure that everything is square and tight, according to the assembly instructions. When one is new to the hobby, it can be difficult to account for every piece of the assembly so that no possibility of being out of true is permitted.
I have a different machine, which I had carefully assembled in three days. I was not getting the accuracy I expected. I spent a lot more time researching issues of inaccuracy and stripped my machine back to the beginning again. This time it required 6 weeks to assemble and everything was square and correctly trammed. It was an important lesson because if the set-up is correct, it should not require much work to keep the machine fettled.
It could be my building, idk. I did everything according to the instructions and everything is square the best i can tell. The wheels seem to be different tightness at different points on the rails for some odd reason though. To me this would indicate something is wrong.
OK… I would check the rails with an engineer’s straight edge. If the rails are out of true, nothing you do will being them back into being straight. This would then be an issue for Sienci support to assist you with.
The V wheels are similar to those on my machine. Once they are located on the extrusions, they are adjusted so that they can only be turned with some light finger pressure. (should press your flesh inwards by about 1/8th") If more pressure is needed, they are usually too tight and if they turn freely, they are too loose.
Some of this may not apply to a Longmill and you will need to check with any Longmill owner in case I have said something here which does not apply. I may have missed some vital aspect of a Longmill machine that I do not have to deal with. .
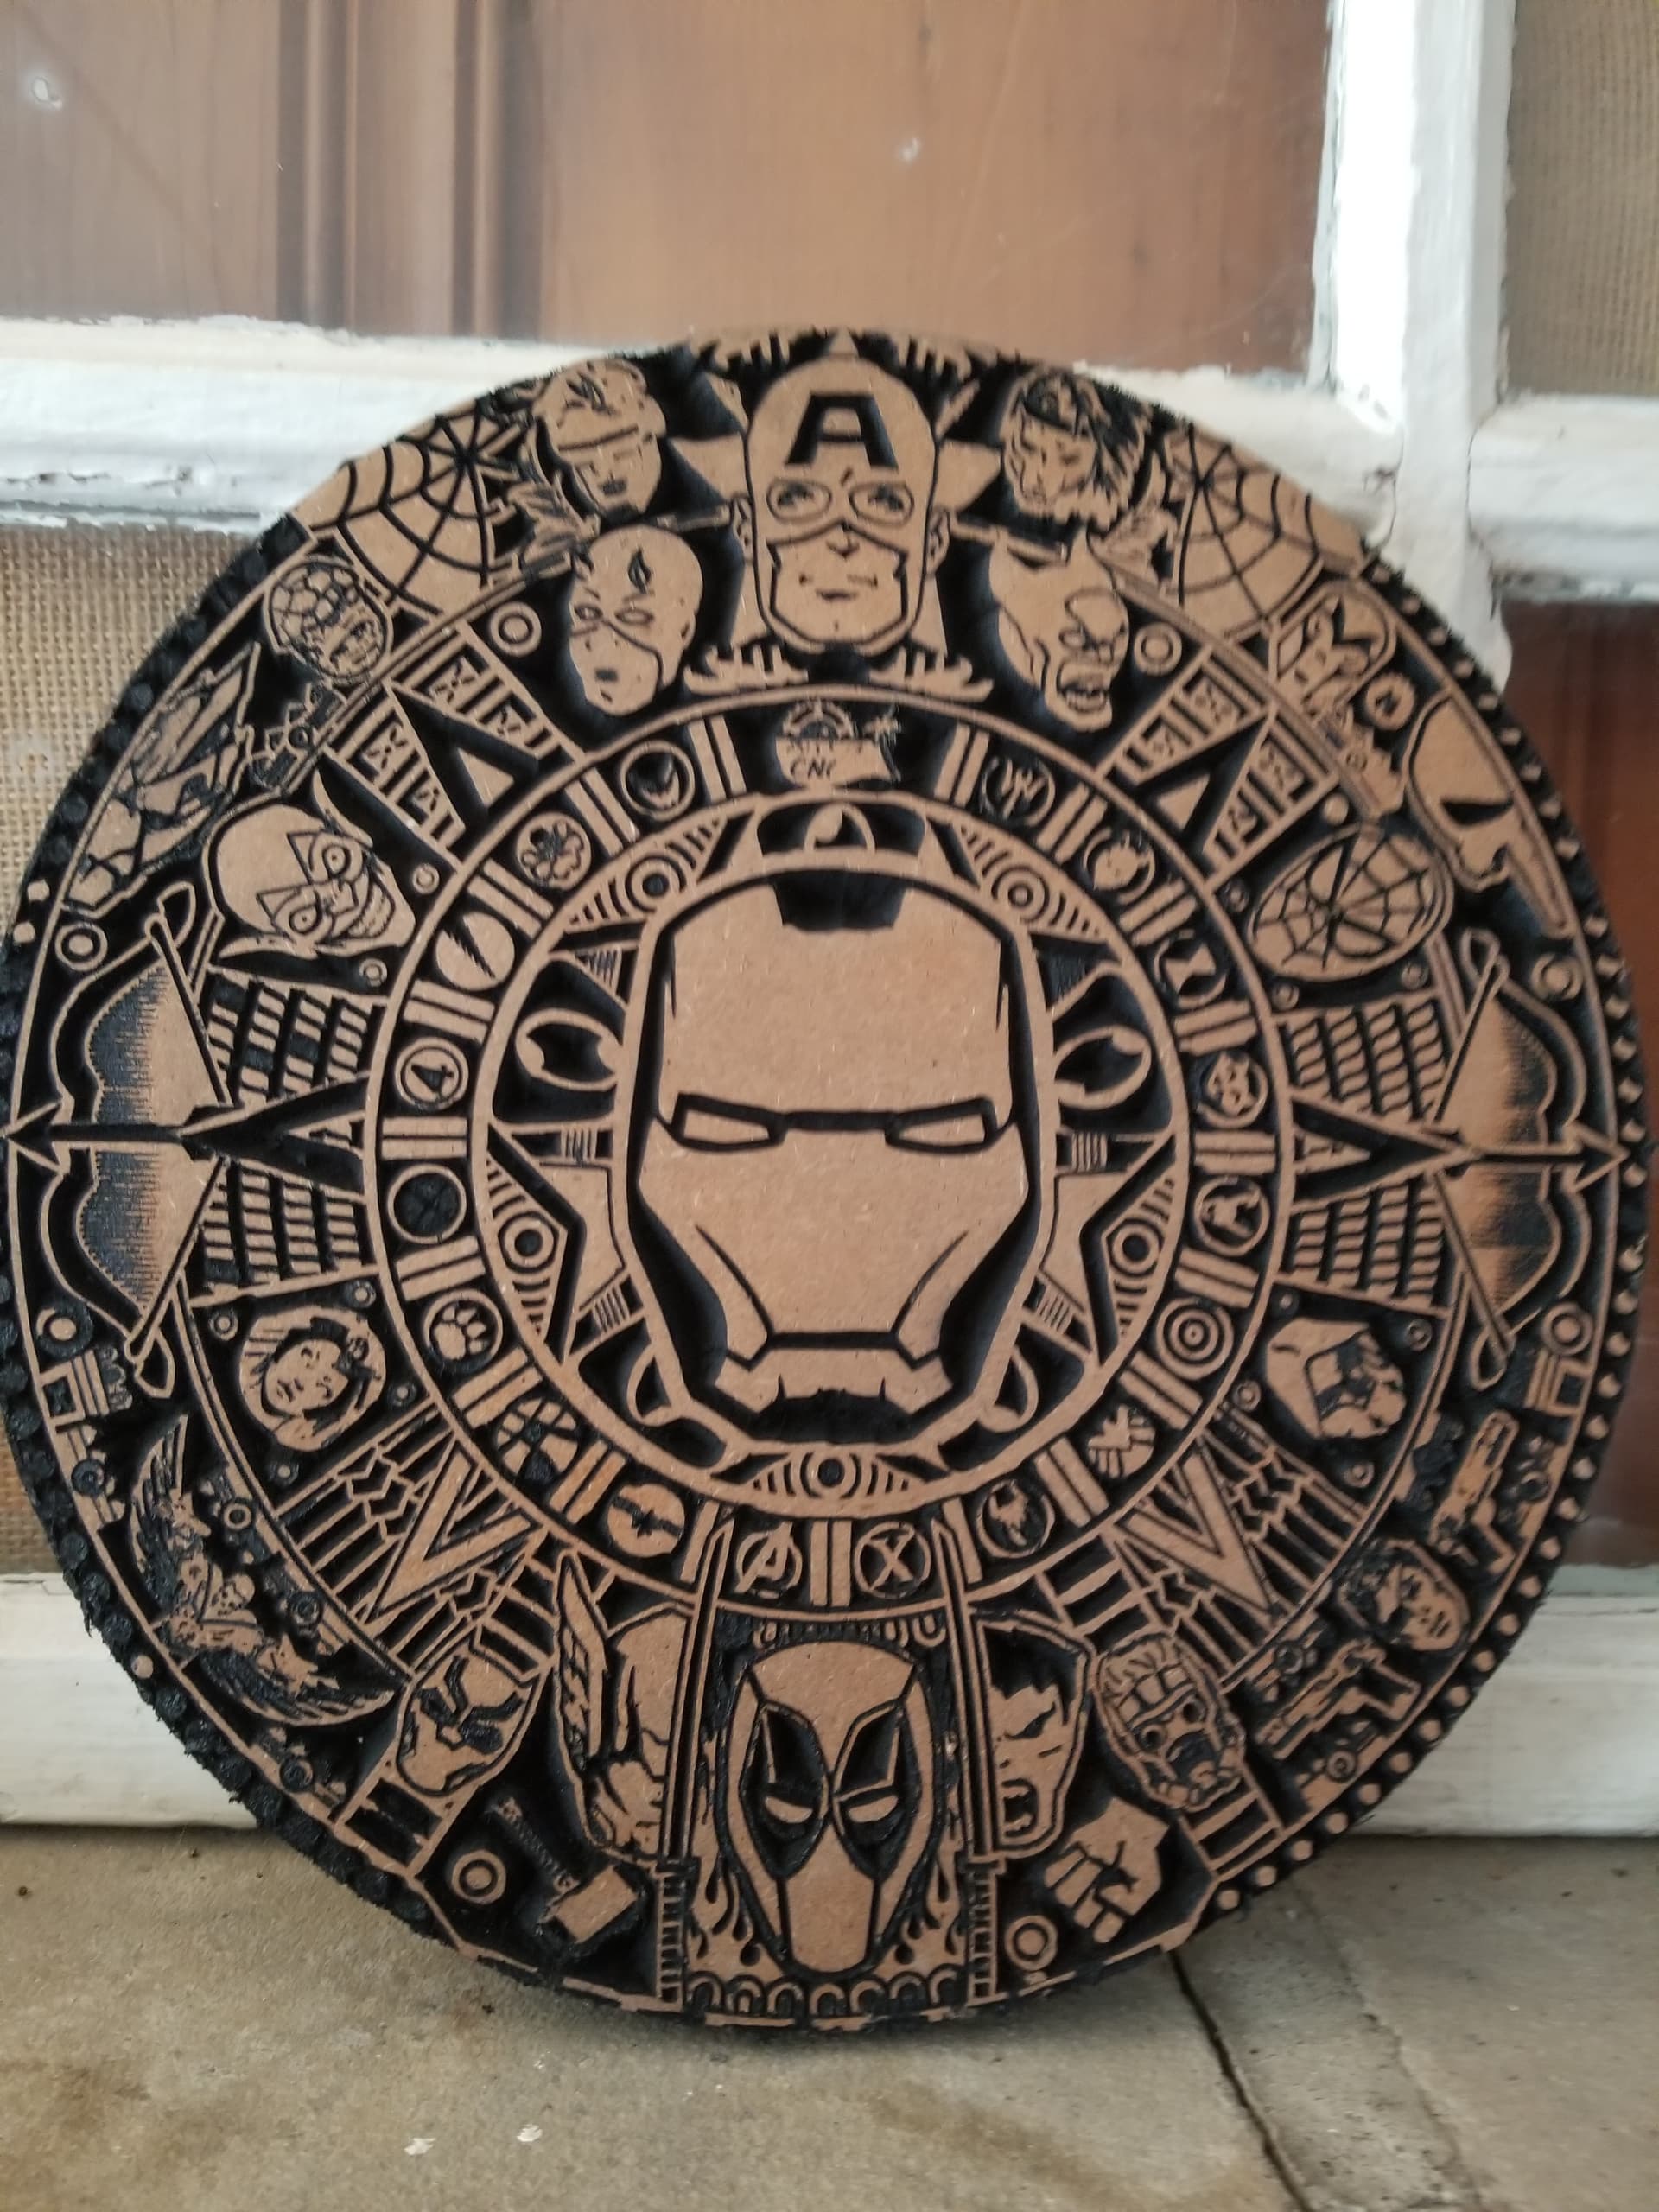
@Pkaser I have a bit of a hard time telling what’s going on with you carve since it’s pretty busy. Also, is this one toolpath or two or ?? Is just one tool path offset from another? In other words, did the Vcarve run properly and then the profile cut go wonky? More info would help.
You might try carving some something simple on scrap wood to see if there is an issue. I would recommend cutting a few concentric circles with your bit of choice with maybe an 1/8" to 1/4" gap. Then look to see if the gaps between the circles are the same on all sides.
When I first set up my machine, long ago, I was trying to cut out a small circular what-not box and found the the box wasn’t quite round and the walls weren’t the same thickness all the way around. It turned out my anti backlash blocks were too loose.
I get that its busy but it shows how more precise the lower left cuts are vs the upper right cuts. And strangely, it started at the upper right and cut lower left towards the end.
2 bits, a 90 vbit for the engeave and a 1/4" endmill for the profile.
First cut was better and only showed the profile was off. Engraving looked pretty good.
I kinda think i have 2 problems. Thinking about this, the detail issue could be a tramming issue or the material being warped. The bit may be going deeper than it should because the surface is higher.
Is there any way to get gsender to probe multiple spots and correct for height variances in material?
The profile may be the wheels being different resistance on different parts of the rail. Whatever is happening, its happening every lap around for the profile cut at the same spot because the cut is consistent
With a correctly trammed router/mill, just a skim across the surface of your workpiece will give you the flatness you are looking for. If the tramming is out, the tilt from the perpendicular for the V bit will be far more noticeable on one side of the cut. There ain’t no substitute for trammed and square, if you want the results that CNC is capable of. Without knowing that these factors are accurate, you cannot hope to pin down uneven stepping.
Simple designs can help you understand what is happening. Draw a 2 inch square and mill outside the profile with any endmill. The 2 inch square should be 2 inches across the flats and across the ends corner to corner at the same end. All sides should be parallel to each other. Set a depth and mill to that depth. It should measure what you set. That is for a plain endmill with a flat end.
V bits work differently. The V bit toolpath lets the machine know how wide the milled pathway is. You may set a depth of 1/8" but if the pathway is wider than the V bit, it will mill the paths deeper until both sides of the pathway can be cut. Milling can be inside a profile, on a profile and outside the profile.
when you have had enough cutting a 2 inch square, try cutting a circle to set depth. Here you are coordinating the movement of the X & Y axes so that they act simultaneously. You want to end up with a perfect circle. Set your radius and use a compass to check that the circle is circular. These tests will only tell you something useful if everything on your machine is square and the router/mill head is trammed to be accurately perpendicular to the baseboard in both X and Y.
I know this stuff is a royal pain but once you have done it, the thing should provide very reasonable accuracy. I can reliably mill metal on my hobby CNC machine to a tolerance ± 0.001" . It required a lot of work to get it right but once it was correct, I have not had to attend to the tramming in 18months.
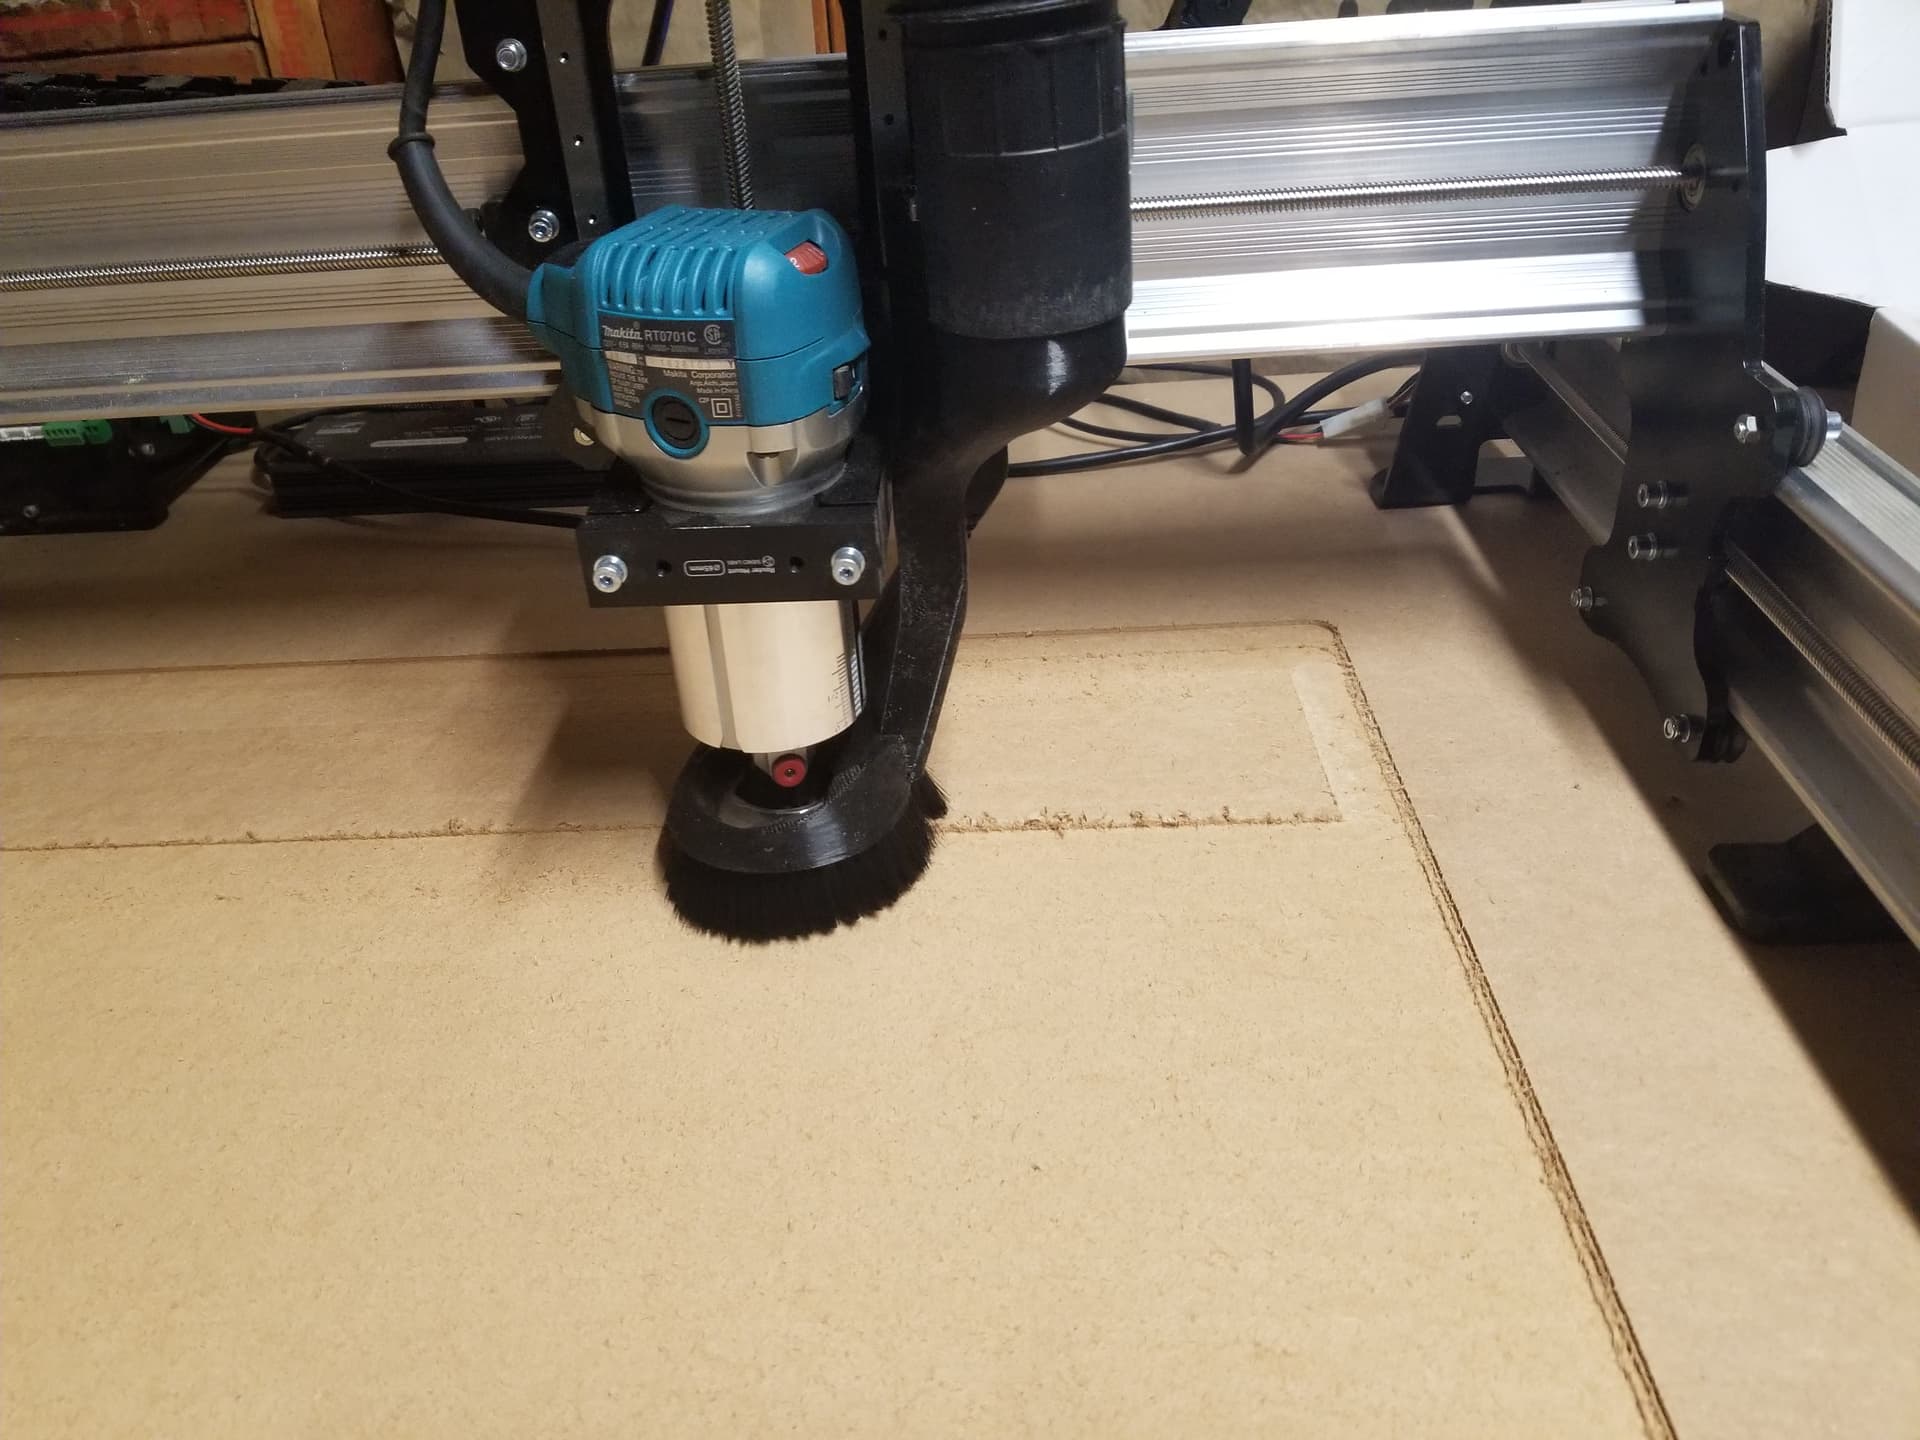
@Pkaser, If the surface of the work piece isn’t flat you can have issues, especially with v carving. It could also be you the flatness of your spoil board. Have you surfaced it?
I think its my spoil board. Its super humid here in Ohio and it appears my board has swelled a bit, and unevenly at that. Or its shifted and has a small bow in it now.
As you can see the 0,0 bottom left is low and it swells as it moves right and back, just like the sloppiness , so that makes sense. Board swelled, raised the piece, bit stayed at its correct height but sunk deeper in since the work was raised, causing wider than desired cuts. (Just spelling it out for logics sake.)
I also bet the profile being off is something simple, like the bit diameter being off by a fraction of an inch in vcarve. By the time its at the upper right corner it’s off by a full 1/8 of an inch.
So as i said i surfaced it just a few days before this issue, but over the last few days it must have changed because here it is mid surfacing and you can see the elevation difference pretty plainly.
@Pkaser There is no question that MDF will swell with humidity. On our 4 x 8 machine at the shop. the difference an be as much as 1/8" between the back left and the front right corner. The corner near the door into the shop is always higher owing to the temp/humidity change every time someone opens the door.
The problem is exacerbated by the fact that we remove the outer skin. You can mitigate that a bit by applying a coat of shellac after surfacing, but that can get pricey and is only good until the next time you surface it.
I read a post on another forum that said that user believed that he could eliminate the problem my surfacing his MDF table top before putting the MDF spoil board strips on top of it. I suggest that this will do nothing. The MDF table top will still swell. It’s the nature of the product. The spoil board slats will rise with the swollen table top and the issue will persist.