Greg, If I understand your plan for incorporating the cutout for vertical milling (which I think has some great potential for all sorts of reasons and not only milling dovetails), you’re planning on your spoilboard set to move backwards to accommodate vertical milling when that feature is needed. How confident are you that the slide system you’ll be using to move the spoilboard, will be accurate enough?
Marty
1 Like
Hi Marty,
You bring up a great question regarding the sliding spoilboard and maintaining accuracy. I believe the type of dovetail wood slides I am planning to use will help maintain accuracy over other kinds of sliding solutions, such as ball bearing slides. However I will definitely be paying extra attention to this issue. I am still working on fine tuning my design, and I know already that one addition I am making is a removable aluminum bar that will span the opening for the vertical table at the front. It will be adjustable to allow you to dial in the correct height and ensure there is no sagging when the spoilboard is slid all the way forward.
I have a question for you Jannik. If I do mount the control box underneath, what length and width would I need to allow for it? Since I have a torsion box design, I need to ensure that one of the “bays” or grid openings on the left side is large enough for the control box and wiring to fit. Thank you, Greg
Greg, I mentioned in an earlier response that I’d seen a YouTube video that showed a vertical table section similar to that you and I are envisioning. So tonight I found it: Frank Howarth was the individual and here’s his video. I’d highly recommend you take a look at it. Let me know what you think, okay?
Incidentally, I went back and revisited the option of having my friend weld my frame rather than making it myself out of sheet goods. He came over to my shop yesterday and together we finalized all the plans for the frame. He’s also going to mount the frame to four, 150 lb capacity locking casters, which will facilitate moving it about my shop whenever necessary. Once he’s welded the frame up, I’ll transfer the torsion box with the CNC mounted to it, over to the frame, and bolt the two together. Between the frame sections, there’s plenty of space for two banks of drawers on the left side, and a set of shelves with doors, on the right side. I’ll keep the front open for access to the hinged vertical table section when I get around to making it.
Hi Marty. Thanks for sharing the video from Frank Howarth. It was definitely worth watching. Really interesting design for the vertical table. Much more complex than I am planning. His animations in the video were amazing as well. Very professional! I am moving forward with my design and have gone ahead and purchased most of the pieces I need for the vertical table. I am able to utilize off-the-shelf aluminum stock for everything but the curved end brackets that allow the table to pivot up and down. For those, I traced the brackets from the Legacy Maverick, drew them in VCarve Pro and am having them water jet cut. Great to hear you are making progress on the frame and have your plans finalized. I am also going to put casters on my table. I will use casters that can lift the table to move it when needed, but then will release to let the table sit on the floor. Will be ordering these casters from Rockler. They have the added benefit of being mounted to brackets, so you can remove the casters by pulling out a single pin and move them to other machines / tables in your shop. Rockler Workbench Caster Kit with Quick-Release Plates | Rockler Woodworking and Hardware
My control box (dont know if it is the same for newer versions, but think so) is ~13.5×27×9 cm, but you need some additional space in length for the DC plug and in width for the stepper cables etc., so I would recommend 15×30cm. Think most limiting value for you is the height of 9cm.
One last thought: The drivers are cooled passively, but I dont know if no possible airflow is too less airflow. Under my table, there is also nearly no airflow, but it is not fully enclousured… and my LM is located in the basement with <20°C.
So… dont know if a tight enclosure is the right decision, but at least I still suggest to locate the control box under the table.
Thank you very much for additional information Jannik. I will plan for 15cm x 30cm then. If heat becomes an issue, I could cut some ventilation holes on the bottom, or possibly add a small fan.
I don’t see any advantage of that system over ply/timber legs which do the same job for less $$$. You could even use your longmill to cut out the legs.
1 Like
Hi, is this mesurment also for the 30x30 mill? I am interested on the PDF page #2 the measurements for the spoilboard on the left the 19" and on the right the 6". of course going of the 58" table like the drawings. Thanks.
Thank you for the feedback. I did definitely consider the plywood / timber legs. Originally that is actually what I was planning to go with. But the torsion box offers some additional benefits for me. It provides extra rigidity, built-in locations for my front drawers as well as the upper structure for where I will mount my vertical workstation.
Hello Franco,
This plan is for the 30 x 30 MK2 which I have on order. Though it would work for the MKI as well. I can tell you that the draft drawing I posted is a work in progress and I have made a number of changes since that time. So, some dimensions have changed, including the overall width of the table, which I have now increased to 60". Once I have finalized the plans and complete the build, I will post the final as-built plan. Thanks, Greg
Quick question, what type of hardware did you use to hold the waste board to the base? Also, did you have your CNC mill the dovetail grooves? Do you lose any area because of that since your need entrance points for cnc bit? I hope this makes sense. Thank You!
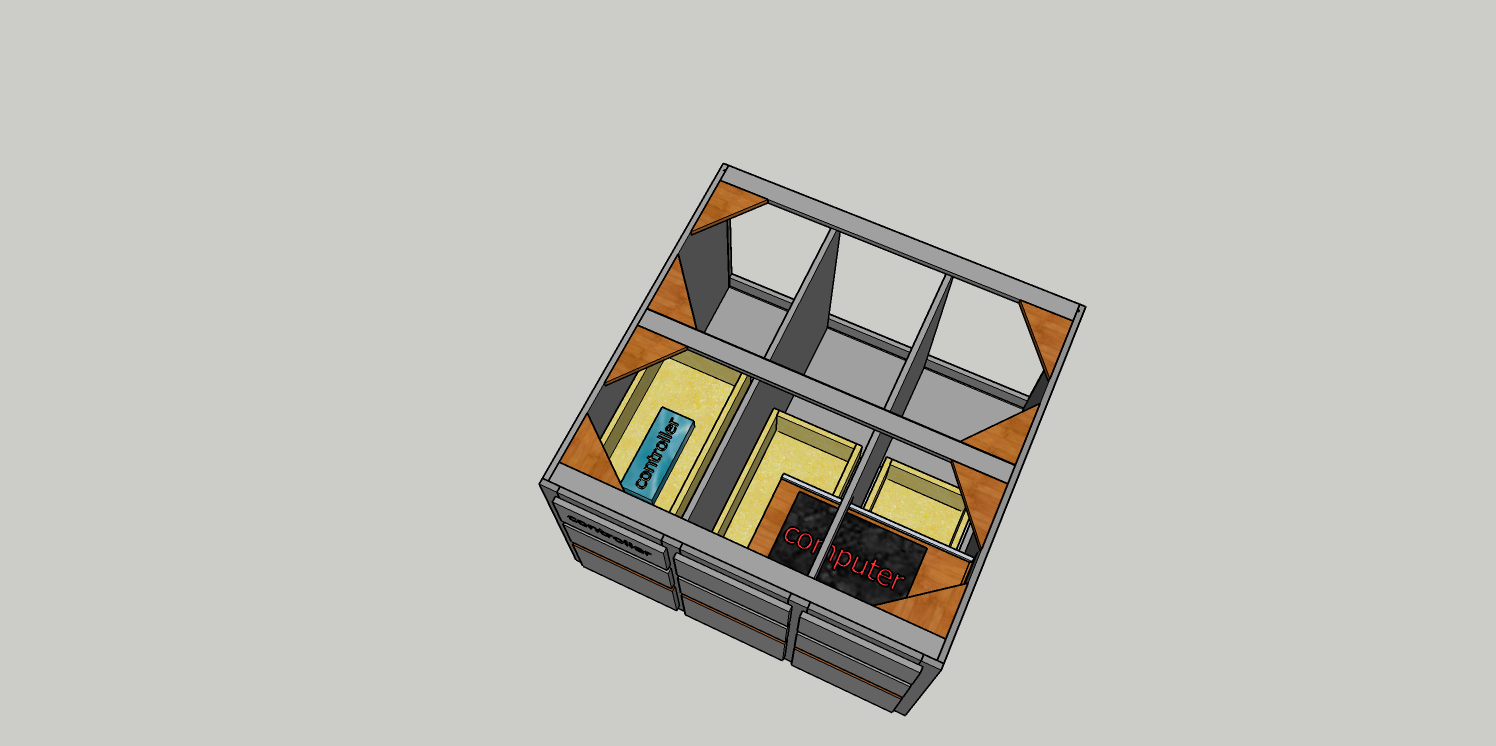
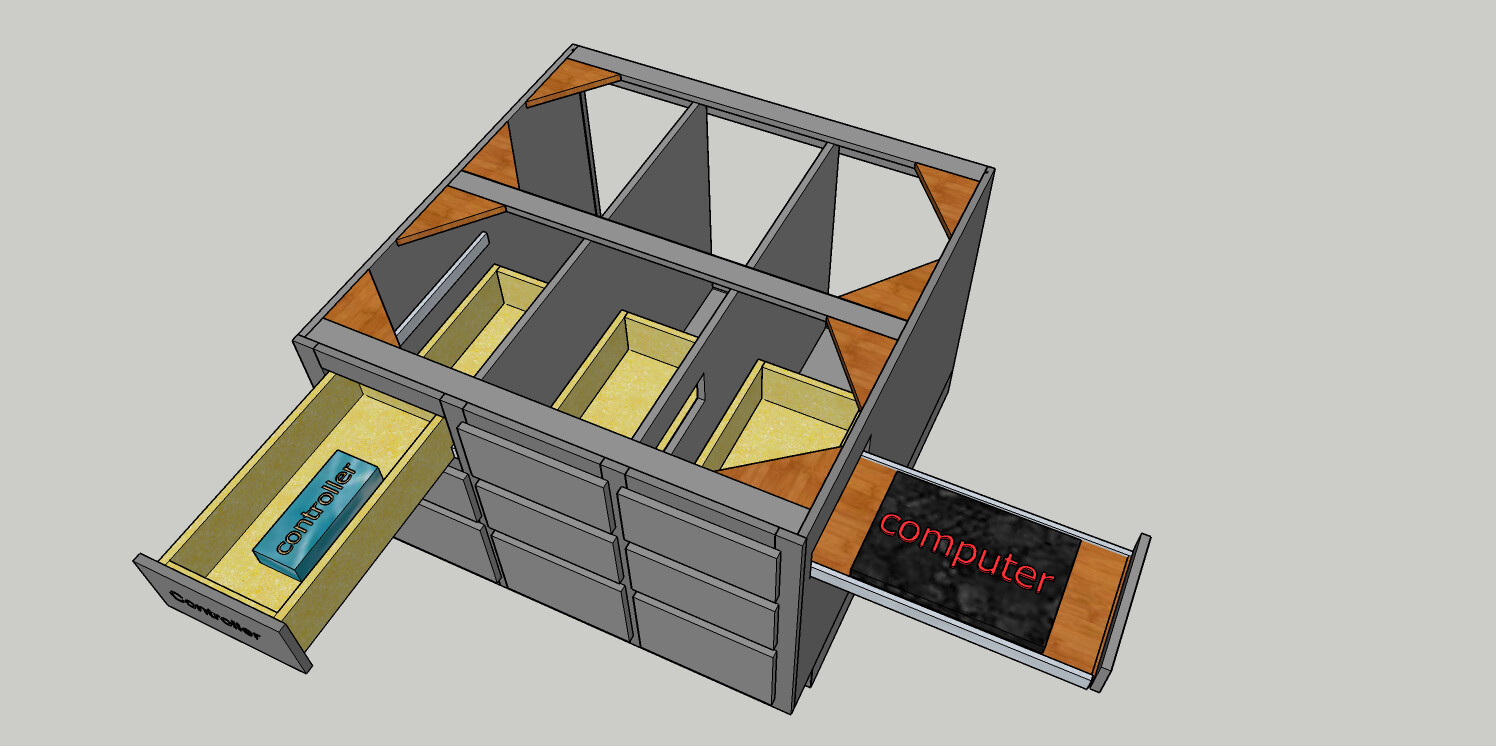
I did this on sketchup17 and I was looking for input. My Longmill should be delivered sometime in the next 6 to 8 weeks with luck and I want to have the table ready to go. on the computer drawer I will make a shelf so I can lift and turn the laptop to 45 degrees to make it easier to work with it.
I want to thank everyone for their posts across the different topics, it has help on my cnc journey.

2 Likes
I can provide “measured drawings” (shop drawings) for the one I made with an iron worker twist if anyone is interested. Spoil board sits on top of the box with C-Clamps.
1 Like
Bill ,
What a fantastic looking design. One of the biggest issue is the mess lol. It does not take long to fill the shop with small wood particles. Especiall in the winter months where windos tend to stay closed. This would be a great resource for anyone building a table.
1 Like
LONGMILL TORSION TABLE.pdf (606.2 KB)
I’ve built a few of these so far.
Model and drawings created with Tekla Structures.
Rick Welcher
Owner
3D Steel Detailing LLC
Yep, you can detail wood with really expensive steel detailing software.
Torsion table drawings are free for personal use.
2 Likes
I really enjoyed this thread. I created my table and will start a new thread for the build. I believe I have enough info and pictures. If the moderator desires to move my thread into this one, I’m good with that. Grant does an amazing job here.
1 Like

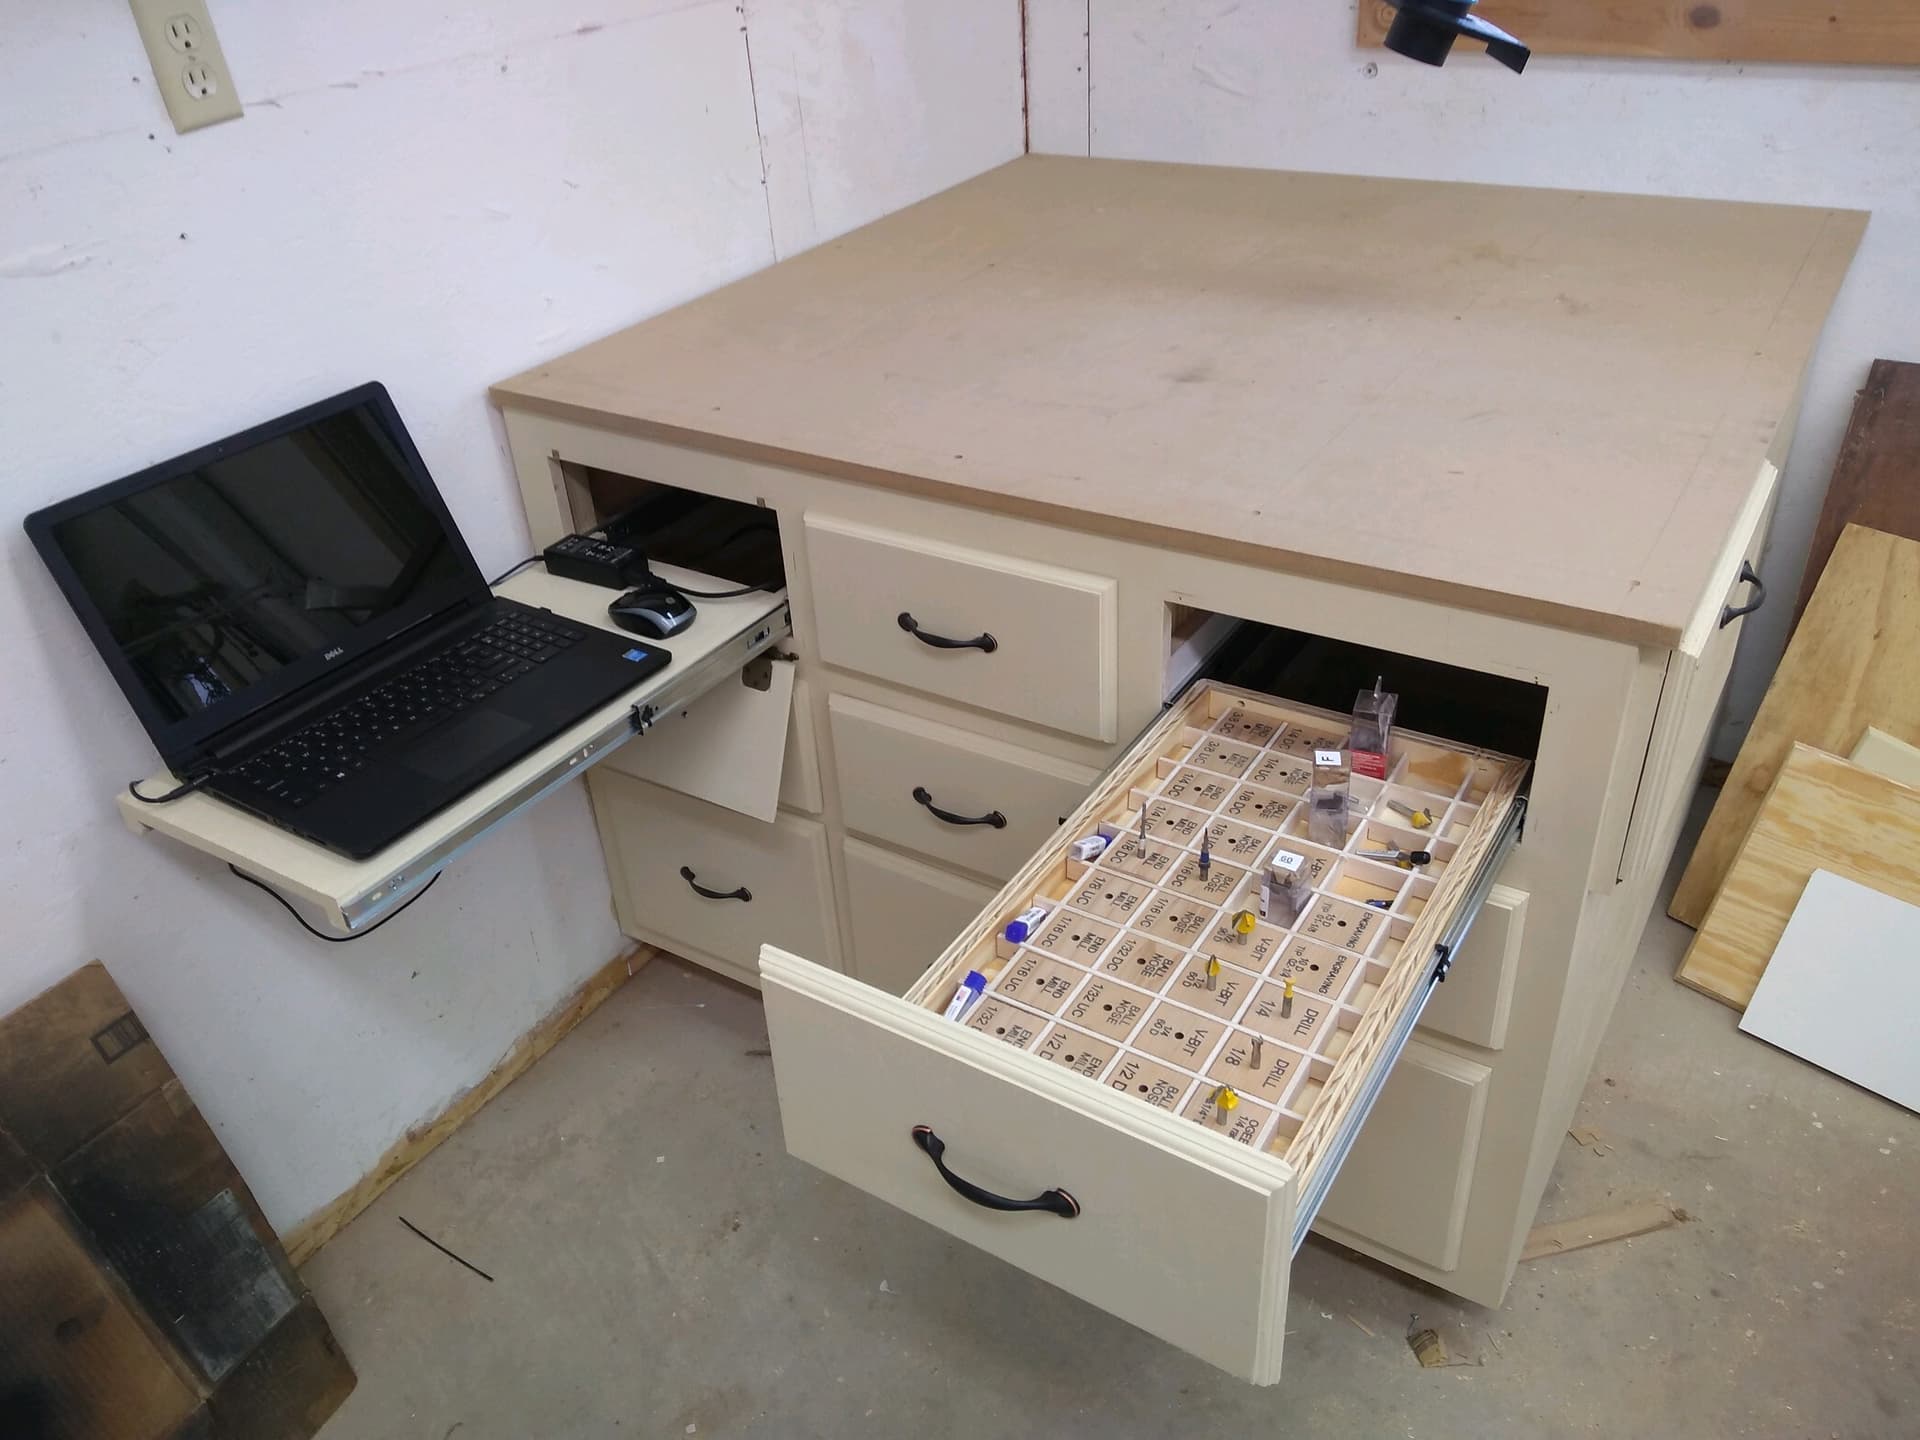
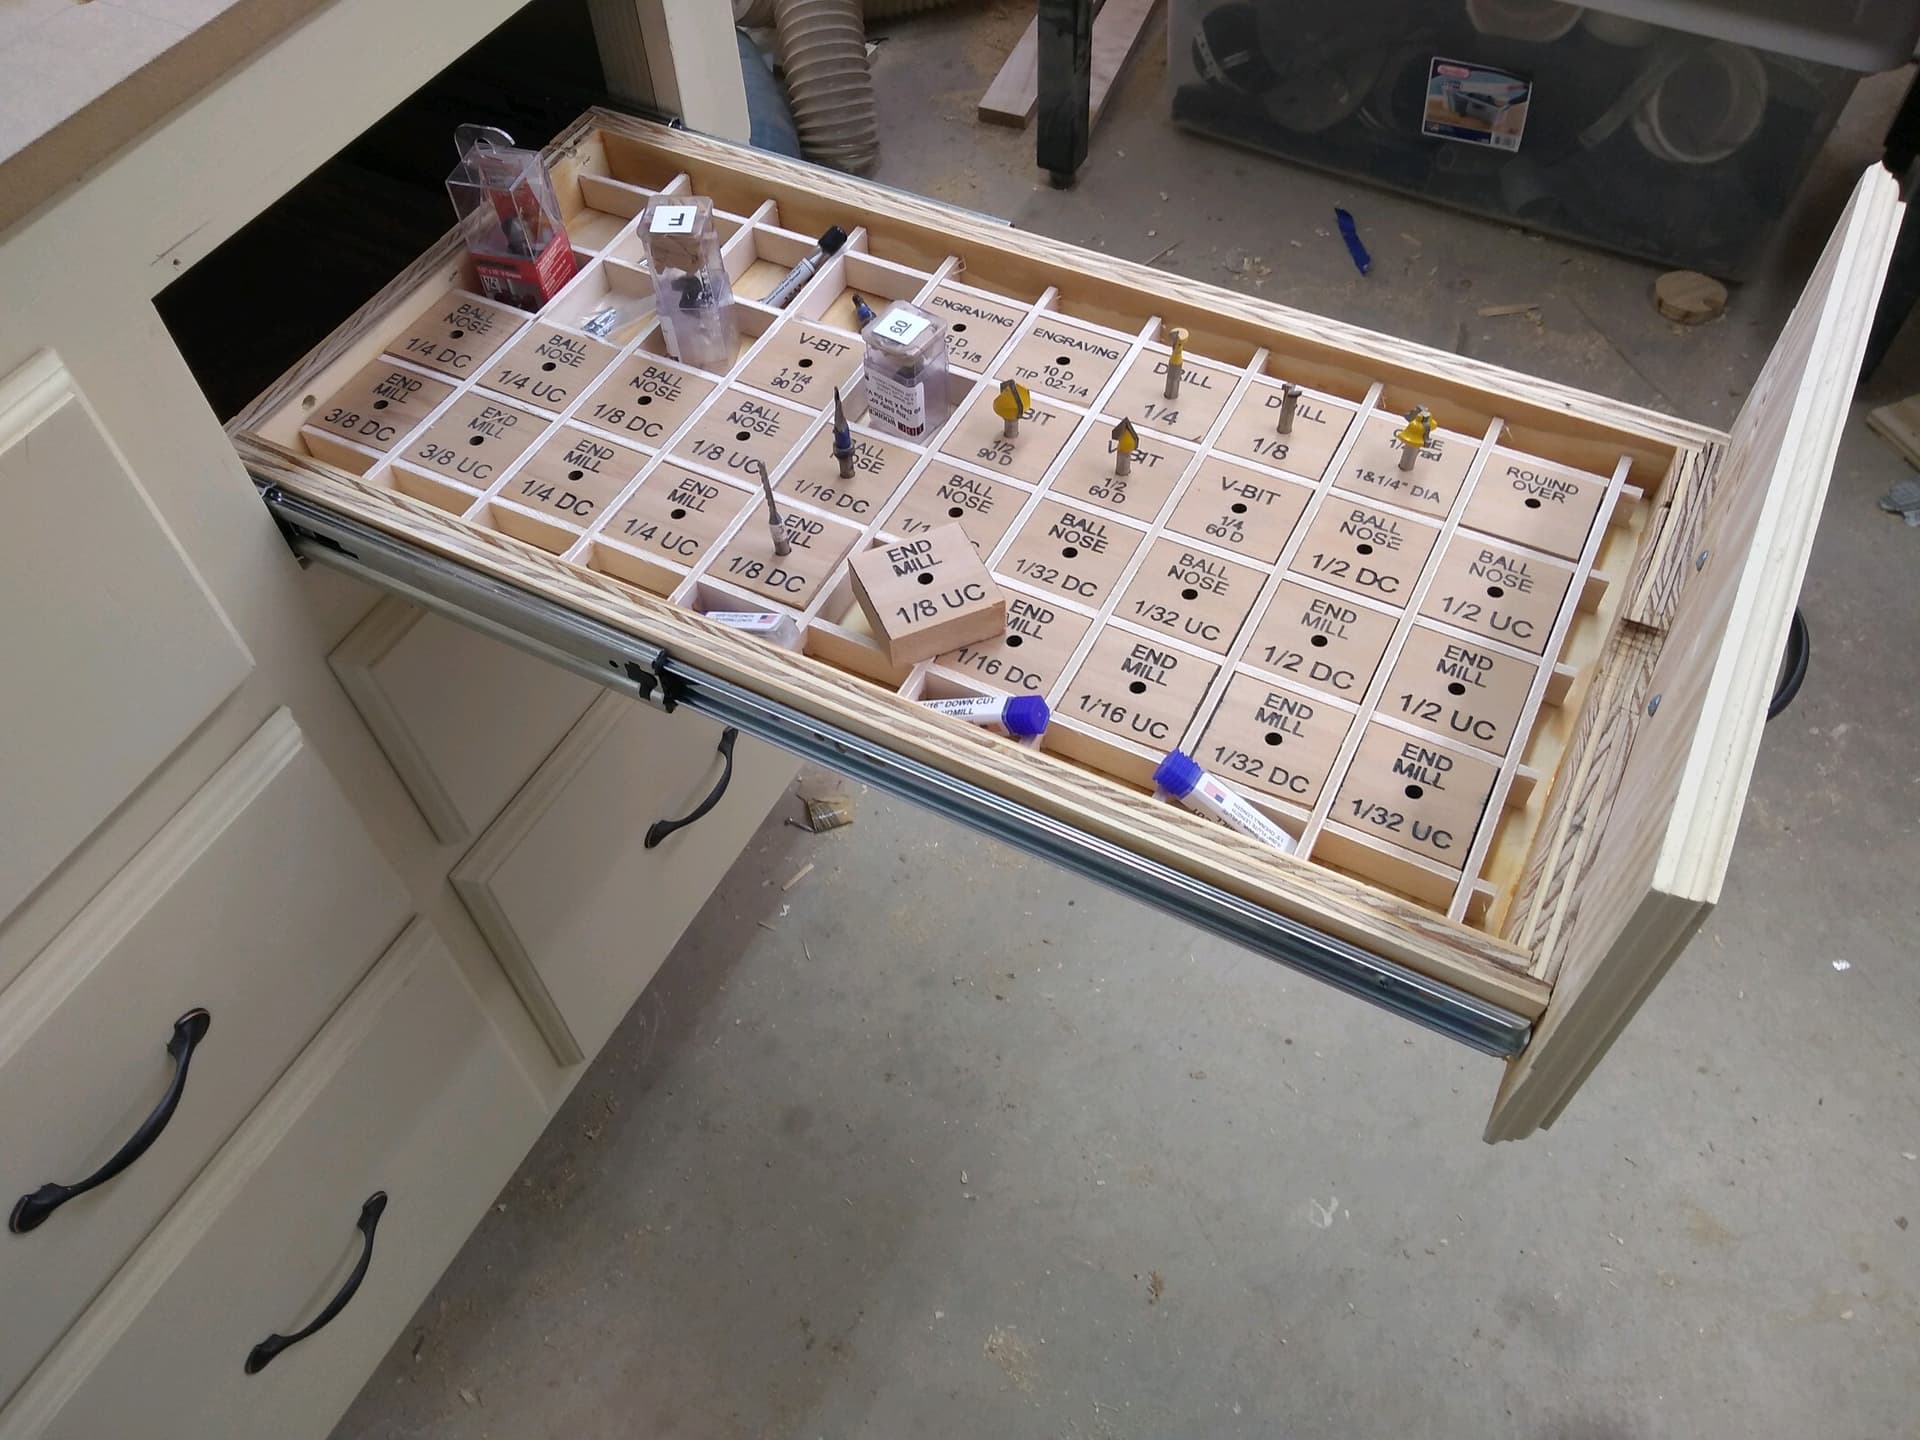
I finally got my table done and I like the way it turned out. I am lucky that I had a spot that I could build a cabinet with drawers, you can never have to much storage. I had posted a sketch-up that I did a while back and the computer pulled up from the side, that was inconvenient so I moved it to the left front and sealed of the opening and I added bit storage on the right front. I have included a picture of the bit storage too. I really like the versatility of the setup, the squares can come out with the bit so I can set out the bits I will need for a given job and then when done just put them back in the drawer. When I’m running a project the drawer is closed and out of the way. The computer is far enough to the left to not be in the way but still near for anything I might have to do with it. I’m hoping at some point to get a wireless joy stick but at this point knowing how to set that up is above my pay grade. All that is left is getting the Long Mill. I ordered it a while back so it should be just a few weeks now. I had lots of time to play with programs, read and watch YouTube videos but I’m still thinking I’m glad there is help here. ![]()
Thanks to all for sharing.
7 Likes
Is there any advantage of mounting the Long Mill at the same level as the spoilboard? I see it done on the same height and not.
@MikeH - It is really up to you whether you need that 3/4" or not (if your spoil board is 3/4"). Otherwise no advantage IMHO.
1 Like