Here is a video of my in progress table build.
@JDW There is no attachment, John.
Yes. It won’t take videos from my phone.
Robert, I wanted to compliment you on your shop that I have seen in pictures you have posted. Very nice! I was very interested in your table that you built to house your LongMill. Do you have any plans or dimensional info that you would share?
1 Like
Hey Gary how you doing I really have to apologize for not getting back to you sooner just been swamped here no sorry I don’t have any plans the table was all done off the top of my head I would be happy to take some measurements for you if you’re interested the table is completely made out of 5/8 MDF as you can see it it all has a grid of crossmembers underneath the table I believe off the top of my head is 48 wide by 52 long since building it I’ve had a steel angle iron frame just for some more rigidity to the table I’m working on a hood for it right now little flip up from the front and open up in the back for longer projects I appreciate your comments if there’s anything you need to know don’t hesitate to ask.
Gary that’s supposed to say it will flip up from the front.
I thought I’d offer an update here after using my Longmill for a number of months with a less traditional “table” setup.
I had two Ikea kitchen islands in the shop that I use for workbenches and they are pretty sturdy. Initially, and in my excitement to get started, I simply clamped my MDF spoilboard down to one of the island workbenches using Irwin medium duty pistol clamps. The island is a bit smaller than my 42" x 54" spoilboard, but in the shorter direction I still have good slamping surface. I made sure they were nice and tight.
Truth be told, once I got the machine dialed in and properly tigthened up, this table approach has worked almost flawlessly. My MDF isn’t even screwed down and I enjoy accuracy to .1mm+. I even shifted it forward (aligning the rear edge where the motors are) with the edge of the workbench and exposing the front 6" or so which I then cut a 192mmx96mm hole in for putting pieces in vertically for edge grain joinery. I haven’t done much of that yet and I may shift it back as the table is in my way a bit pushed forward like that, but even with that cantilever and a hold in the spoilboard, things have worked well.
I’m not sure it’s a long term solution yet, but so far it’s worked well enough that doing anything else hasn’t made sense. It’s more annoying that I am tying up four clamps, although I often steal them when assembling, if the machine isn’t running.
I just wanted to chime in so that folks know that if they have a nice and sturdy (and plumb/flat) surface, they shouldn’t be afraid to try it if sufficient clamping is available.
-Jeff
EDIT: If you’re like me and every available surface quickly fills up with calipers, bits, wrenches, dowels etc - I would recommend making the table wider than it is deep and leaving space on the left size not only for the controller but all the accessories that build up there. Next round I’m going from the low 50" size I have now to 60" wide for this reason.
3 Likes
sysimgrp - I was very impressed with what you came up with for clamping and your tabletop. I’ve ordered my machine and expect it sometime early October. I’m trying to decide what my hold-down system would be. Had I not seen your video I would have gone the t-track path. I may still go that way as I have built many jigs for woodworking with that approach. I’m now contemplating a hybrid of what you presented with a t-track variation. I very much like what you have presented. Kudos to you.
Now some questions: Is you board replaceable without removing the CNC? I could not tell from the video. I was thinking of elevating the machine rails on 3/4" thick MDF strip to accommodate the rail support and then having my spoil board sitting between the rails. That would make replacement easier and if I am not being naïve raise the z-axis cutting height to allow cutting/shaping larger stock. Last question - the video looks like metal reference parts on the lower left corner for x and y calibration. What are they made from? They look like the edges are bent. Where did you get those? I planned on mounting something like that. I just figured I would use wood. Your choice would be more stable. Your system eliminates the need to worry about expansion or contraction with seasonal weather changes in humidity.
Again thanks for the great idea and taking the time to present your approach.
Has anyone stored their LongMill vertically? Hoping I can prop it up or even hang it on the wall for the times I need to reclaim some garage space.
@drrkdrrk Lots doing it. Some for storage and some to actually run it vertically. Plenty of posts on this forum and facebook. Chris Thorogood posted something early on about running vertically.
Chris - the video in my post is not me or of my setup. It was something that I had seen that I thought was interesting and thought others might think so too. There are some stills of my setup in my posts. I use a combination of t-track and dog holes. I find that I mainly use the dog holes with the Kreg clamping jig.
I’m making 2’ X 4’ School desks for a non-profit. There wanting 12 desks. I have built 4 so far. Currently, the second most expensive part other than the 2X4s is the trim. Which is running $7.50 per table, the top is Wood Plank Laminate Flooring which runs about $4.00 per table. With the Long-mill it will cost me $2.00 per table to make the trim. Here is one of the completed tables with the colored PVC store-bought trim!
The second photo is showing a completed corner trim printed on the Long-mill. IMG_0777|666x500
3 Likes
Are the feet spaced equally apart, roughly 14.4" on center? Working on table and don’t want any screw heads etc. in the way of the foot mounting…
Rob I intend to follow your general concept for my table. I plan for my table top to be 47 7/8" square to accommodate saw kerf when cutting 4’ X 8’ sheet in half. It appears your legs are 1" X 6" nominal lumber. This also seems to be the case for the horizontal pieces that support the MDF top. What did you use for the grid crossmembers that support the MDF top? I an interested in how that is arranged while allowing for the space for the drawers. I really hope that you can provide me with this information. Also how tall did you make your legs? I am pretty much limited to my electric scooter for mobility and do little while standing due to poor balance. We adapt! Mine will probably be shorter than yours. How are you coming on your enclosure? I plan to have one also. I am thinking about splitting the top and sides about 2’ from the front face, hinged across the top from left to right. I am thinking I will add 1" foam board on the inside to dampen sound and add LED light strips. Note: As of today ~ # 90 in the QUE > Regards, Gary Cooke from the burbs of Houston, Texas
2 Likes
Gary,
If you are making the top from MDF, I just want to point out that MDF sheets are oversized, normally 49x97. If you want a top that is 48” square, you can do that.
2 Likes
Iguana, thanks for the feedback. I was not aware that MDF sheet goods were oversized vs the anticipated 4’ X 8’. There is something out there to learn every day!
Hi all, figured I’d add another example to the chain.
My garage has a set of stairs going down half a level and left me with almost a perfect 4x4 corner.
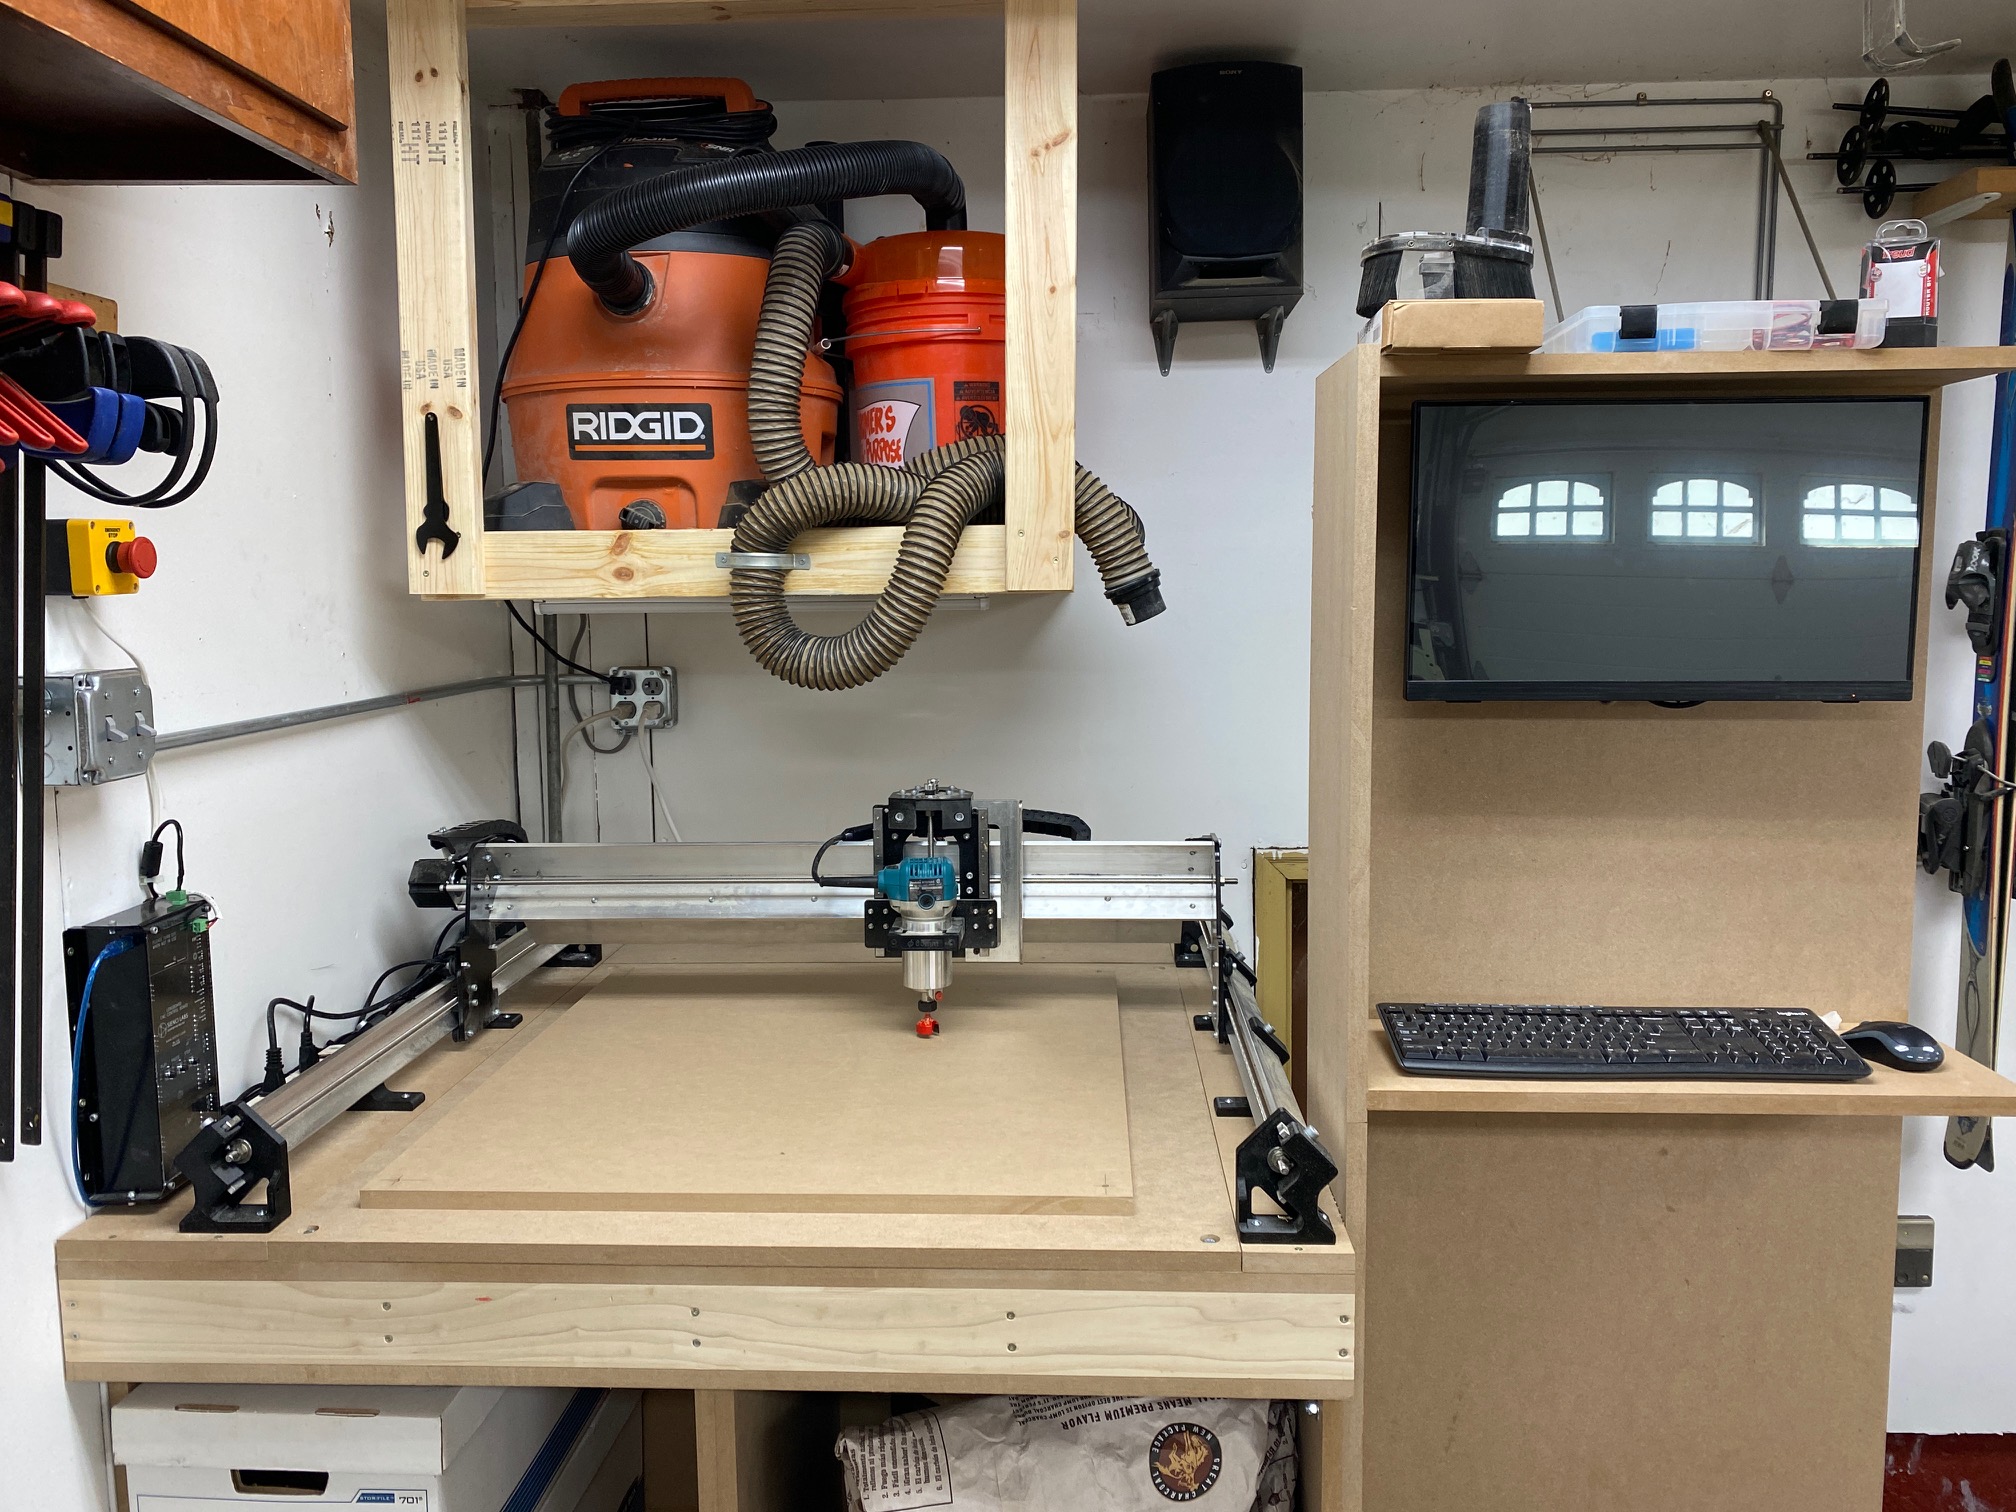
Wired in two switches, one to power on/off the mill and the other for the dust collection. Added a light under the shelf also run on the switch for the mill so I can tell from across the room if its on/off.
Cabinet is MDF, torsion box top with an replaceable section (2 layers MDF) so even when I screw up depths, it can’t cut into the torsion box. Since this picture I’ve added a bunch of threaded inserts for clamping and am taking inspiration from others in this forum to make clamps/holddowns next.
Found a dust separator lid for 5 gallon buckets at HD. Pricy, but seems to work well.
Under cabinet area will be boxed in with doors (with something carved on the mill) later. Only used about 2’ depth. Another opening on the right side allows me to store lumber (4’ or under) which has helped keep things organized.
5 Likes
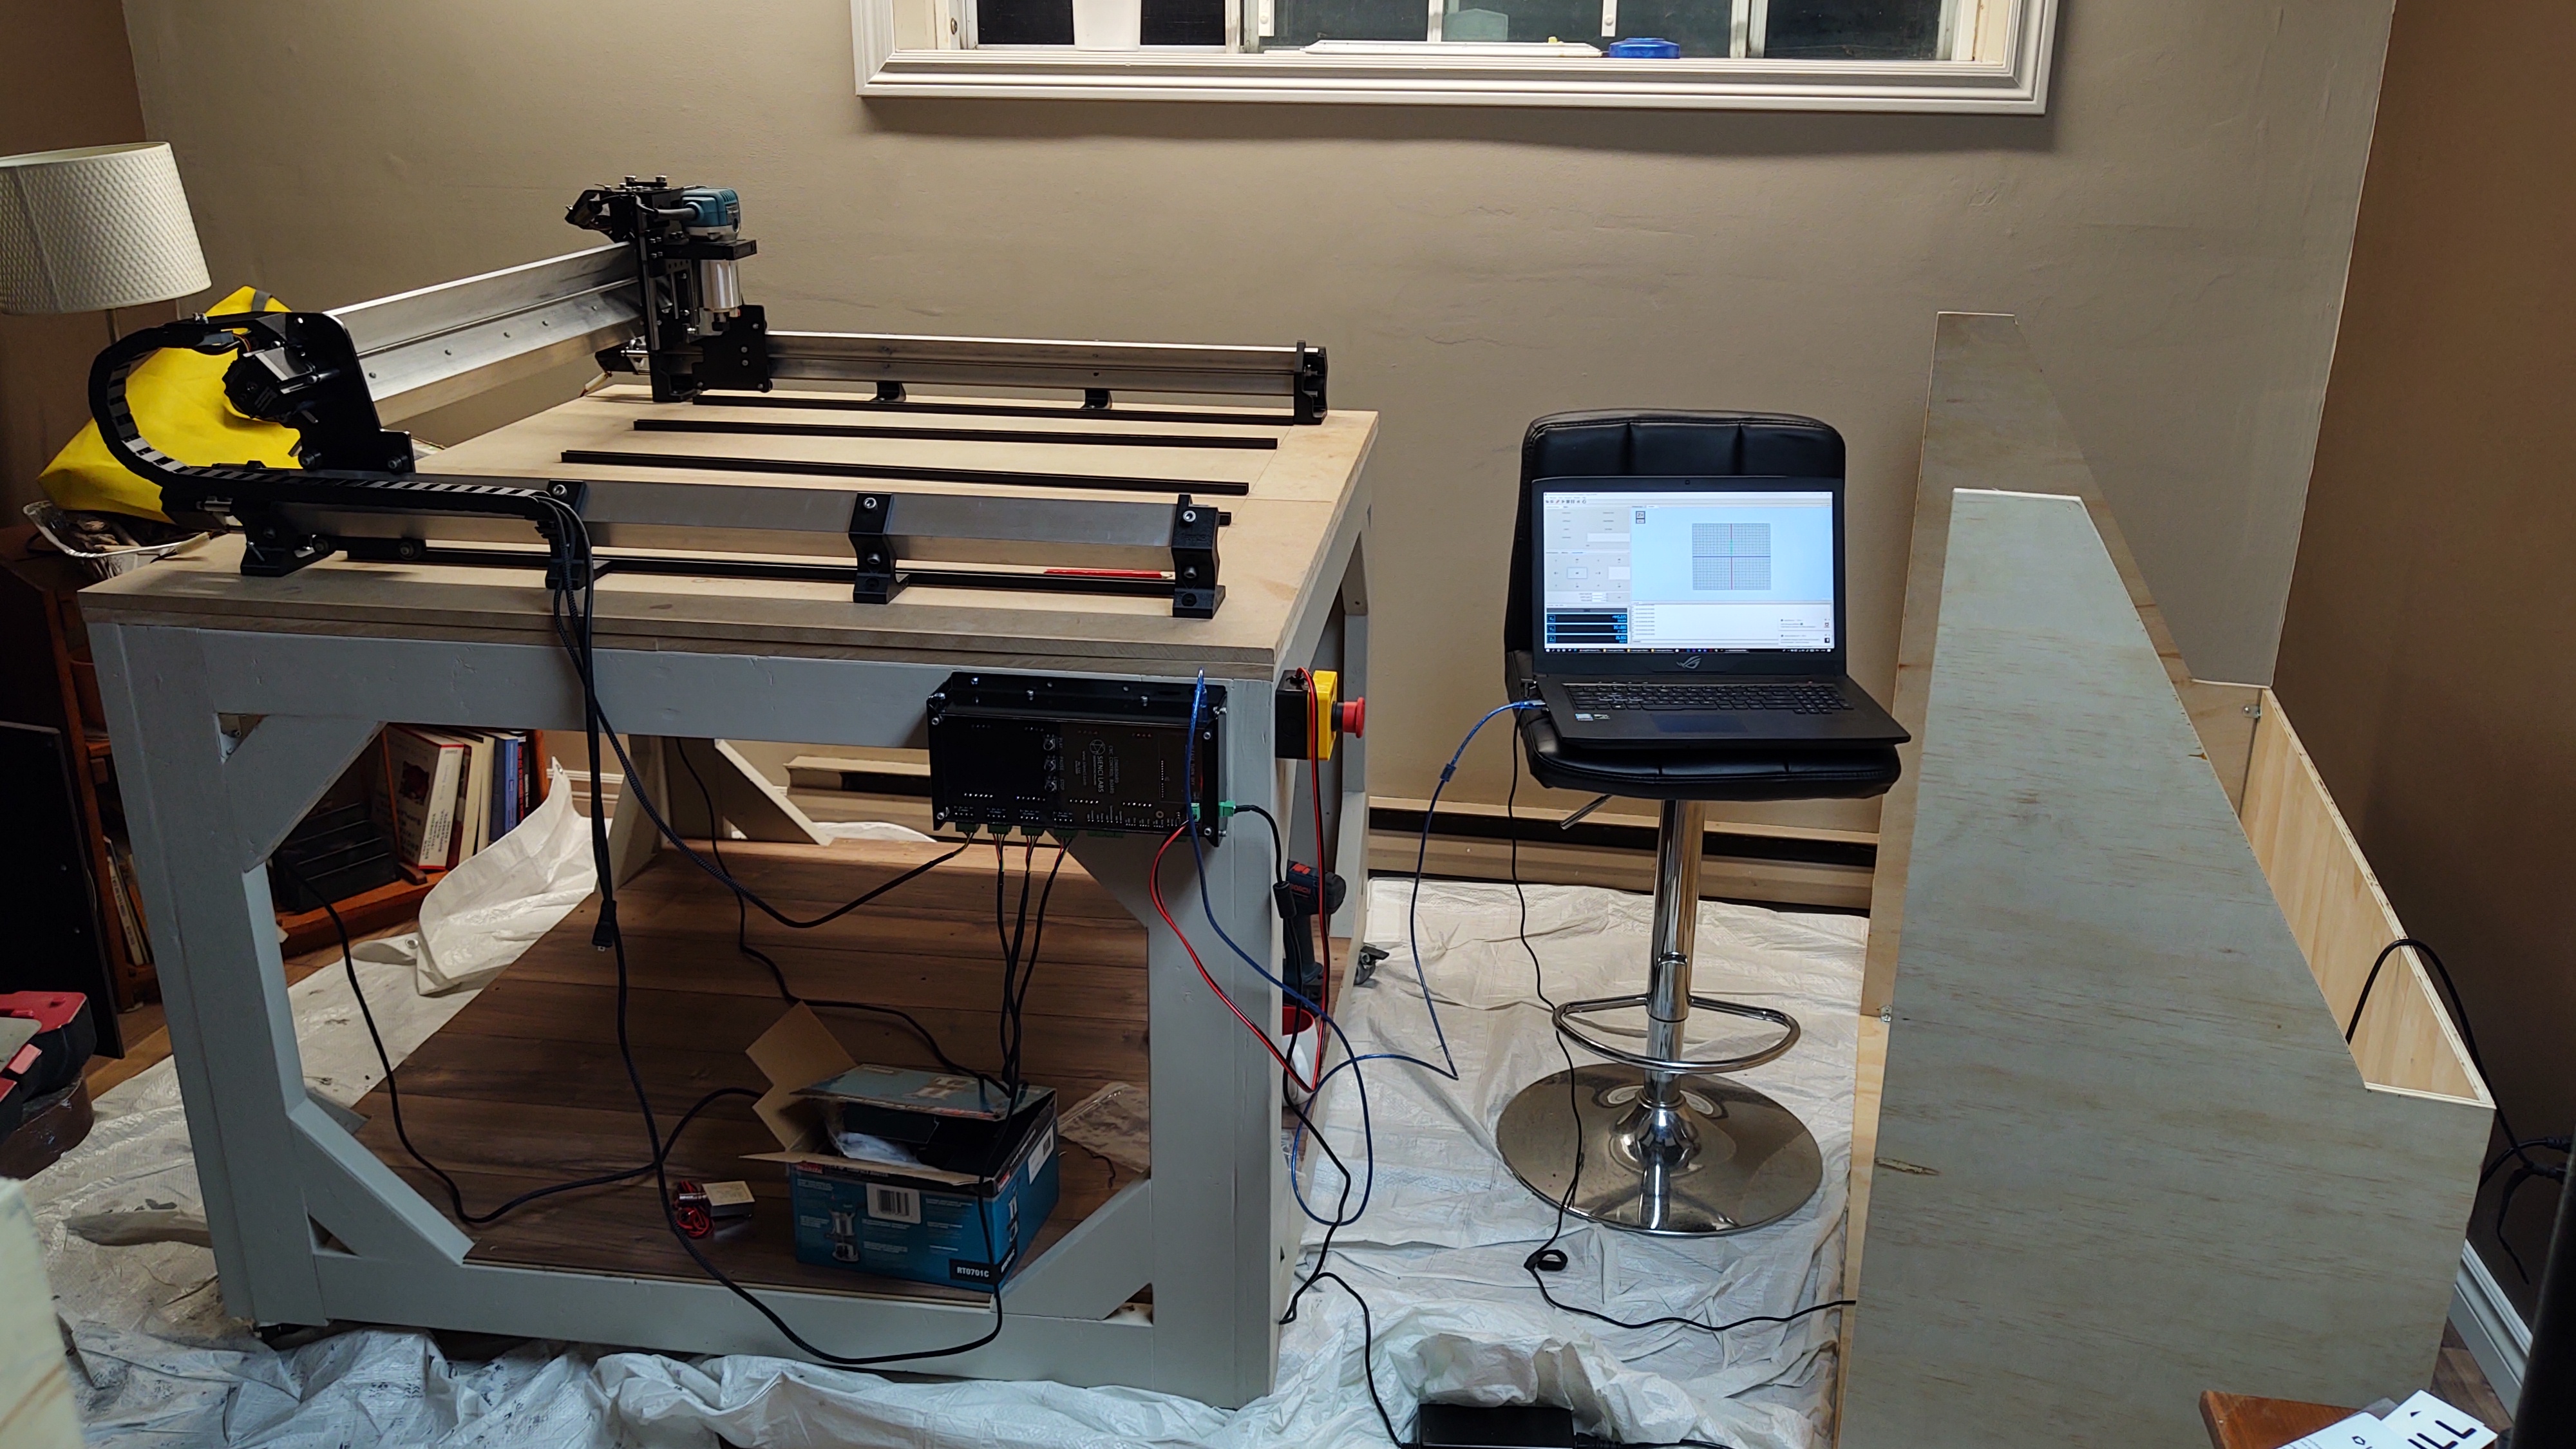
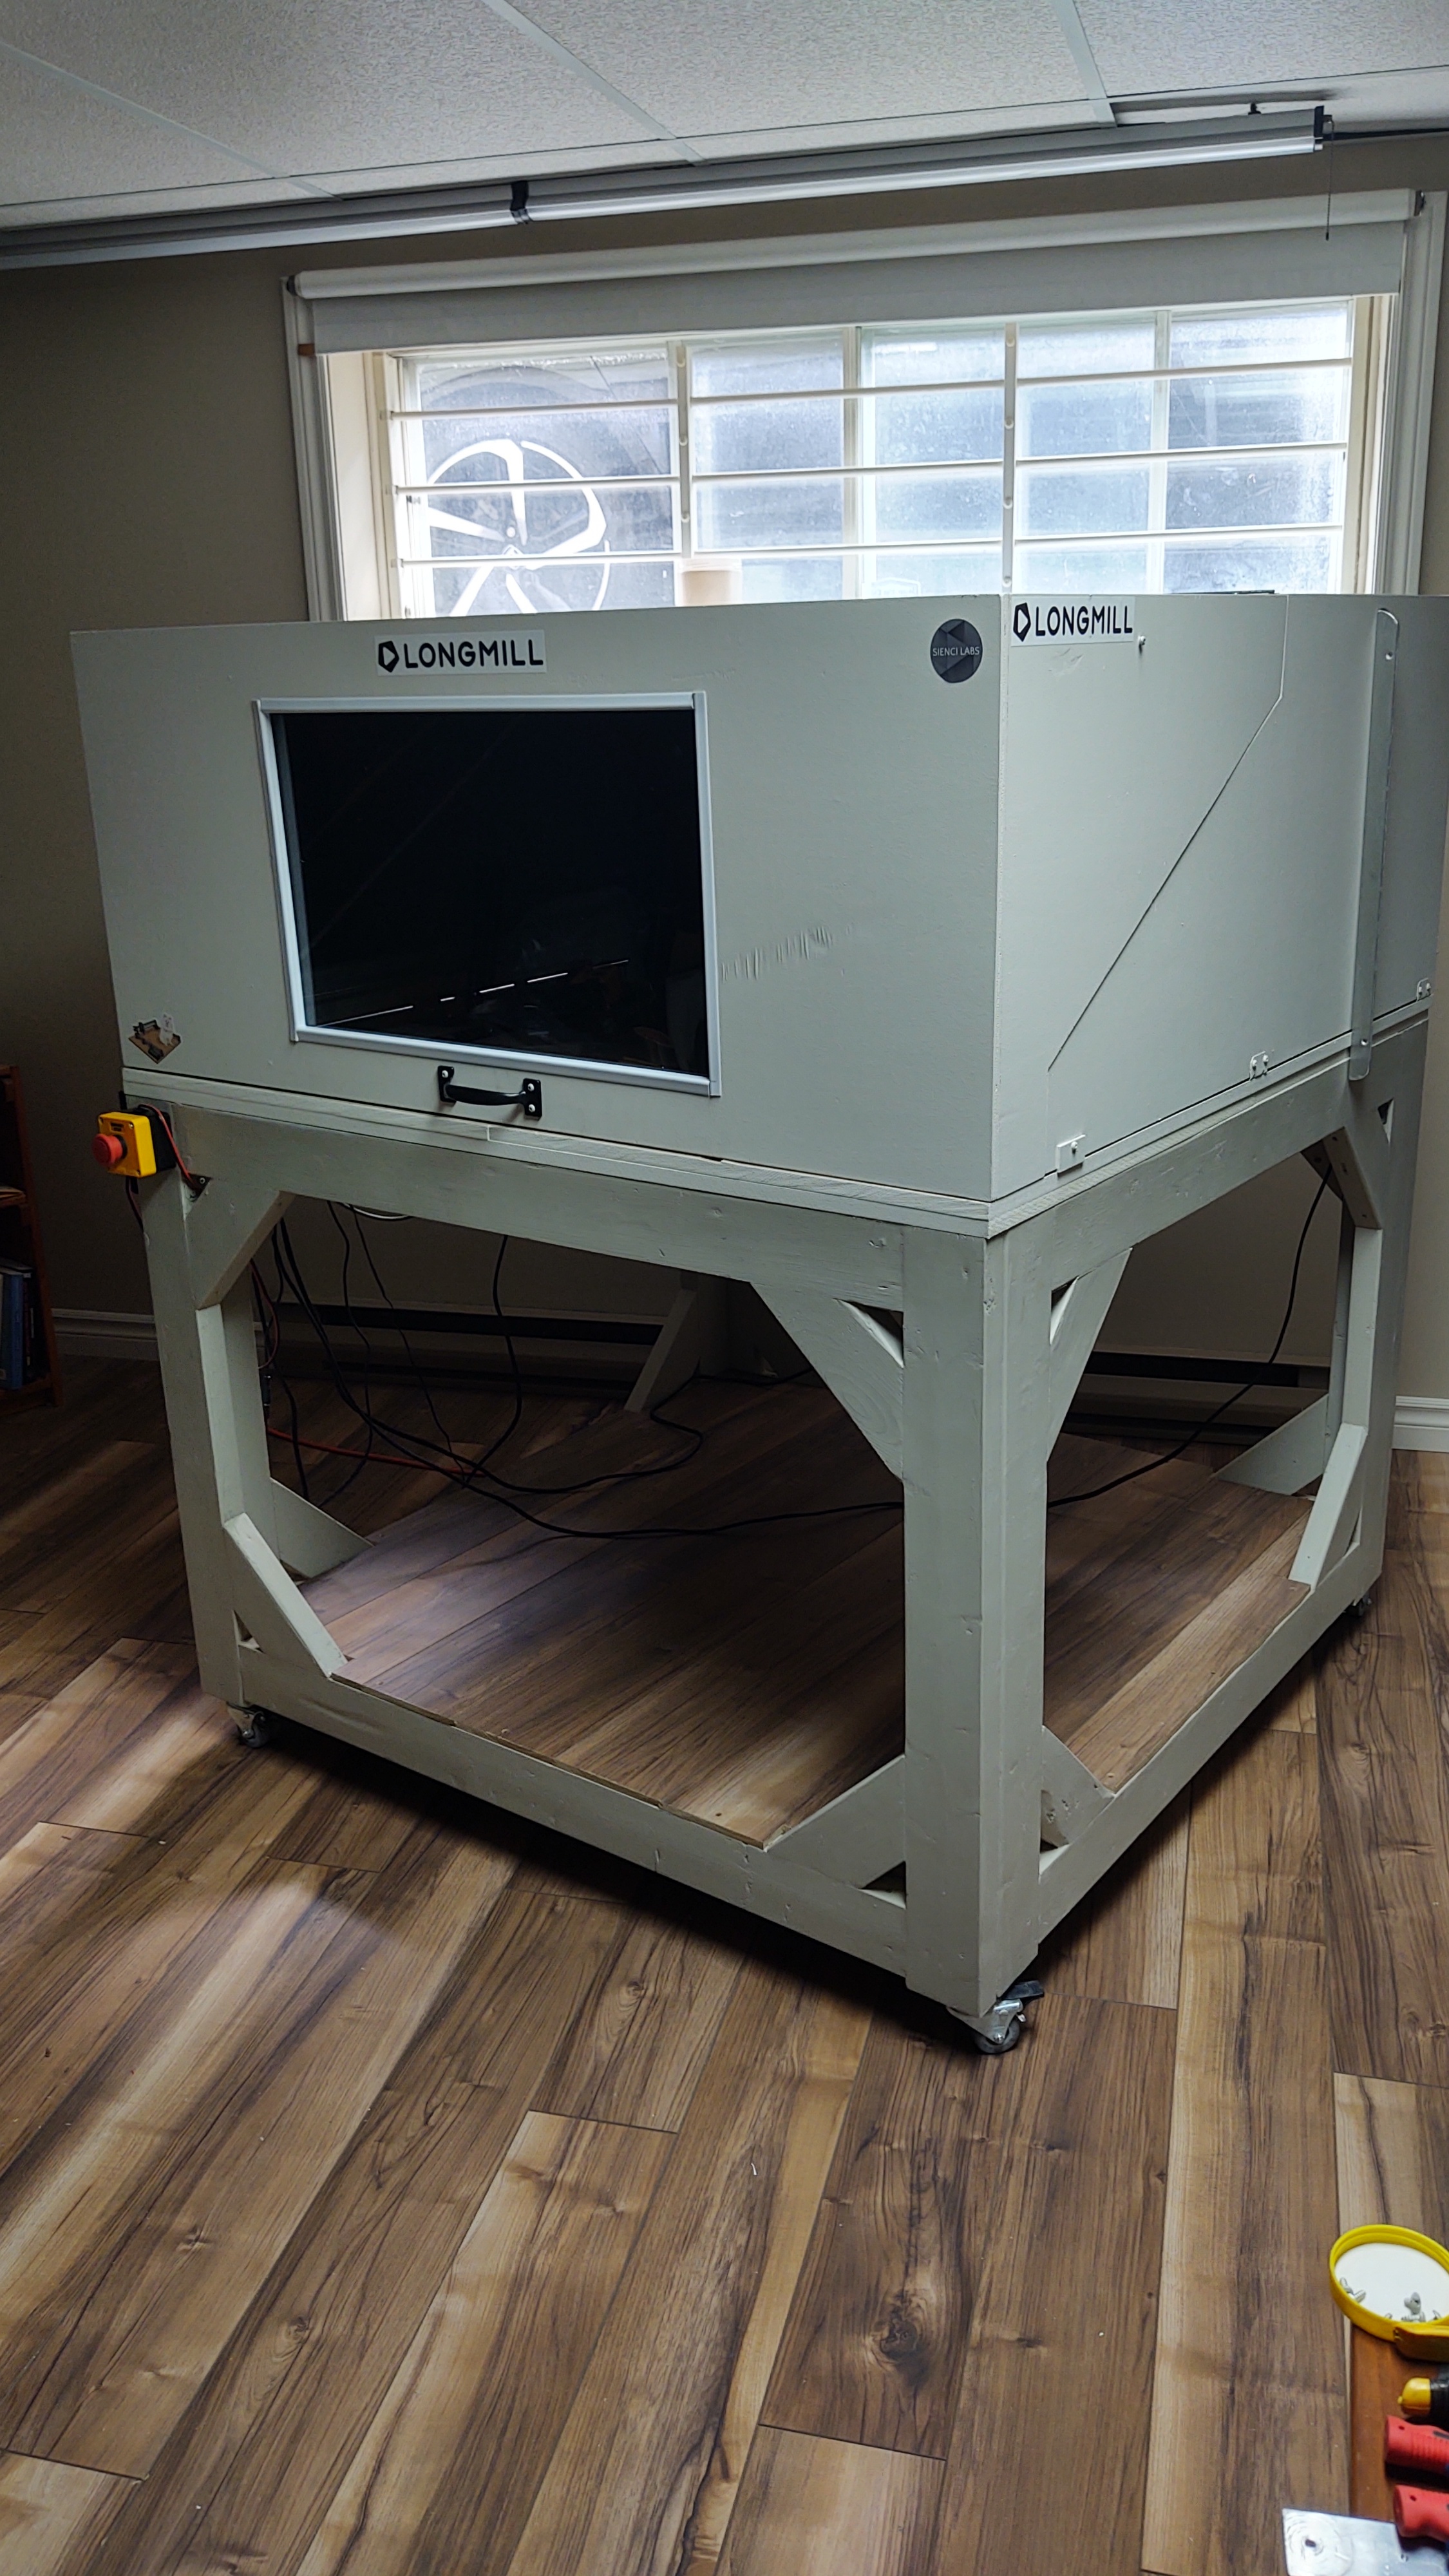
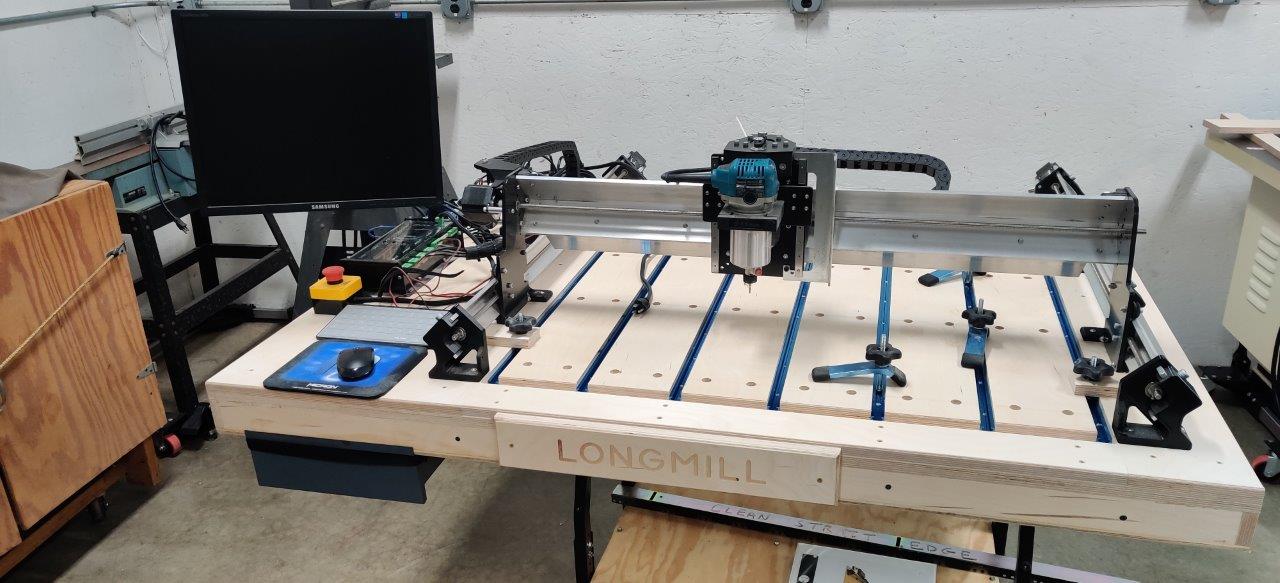
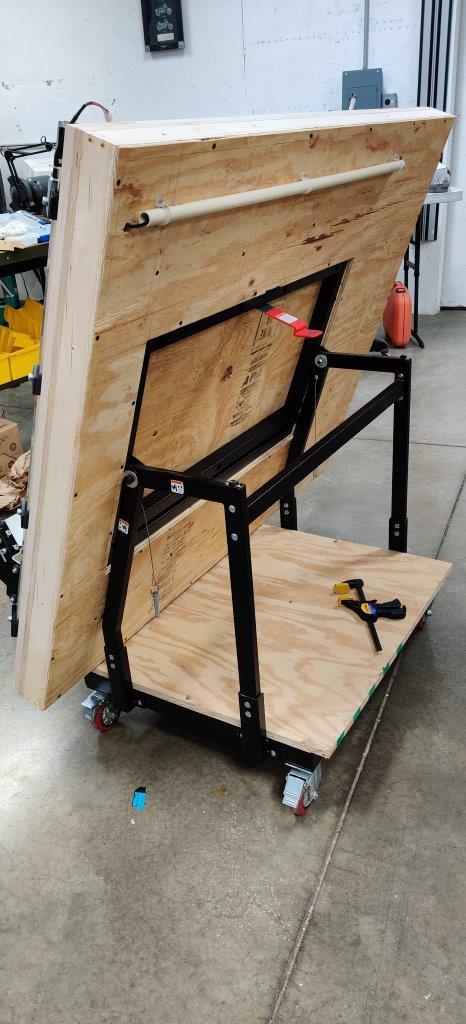
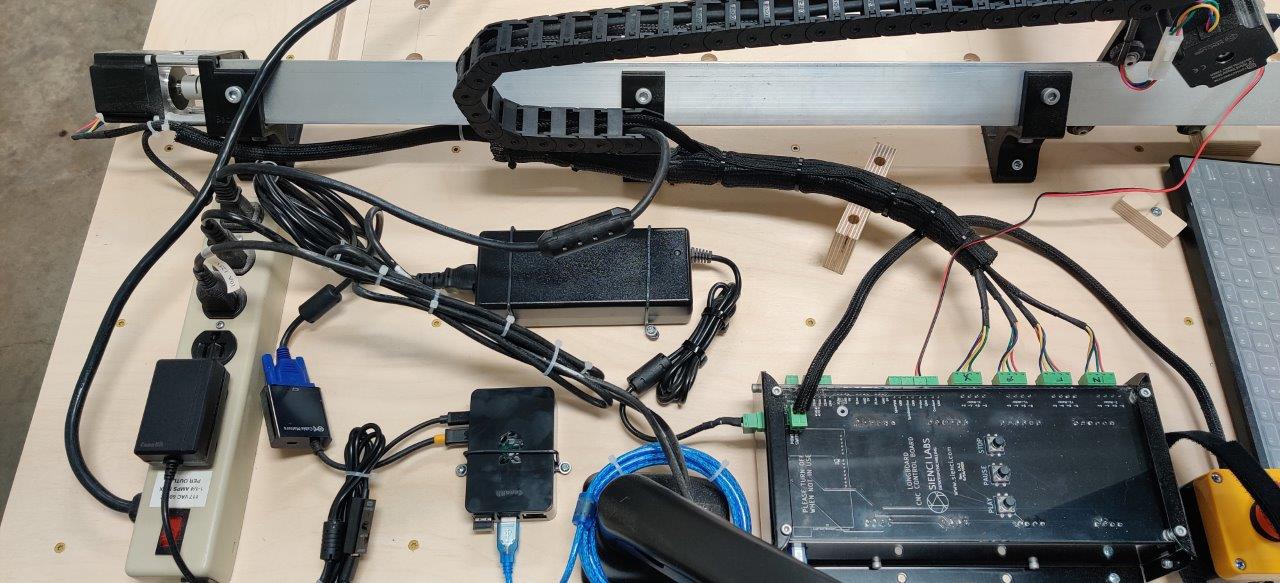
I just finish my table and the enclosure 2 days ago.
The enclosure is based on dave rig design but a bit different, it dampen the sound up to 2/3 rd when the router is at the max speed .
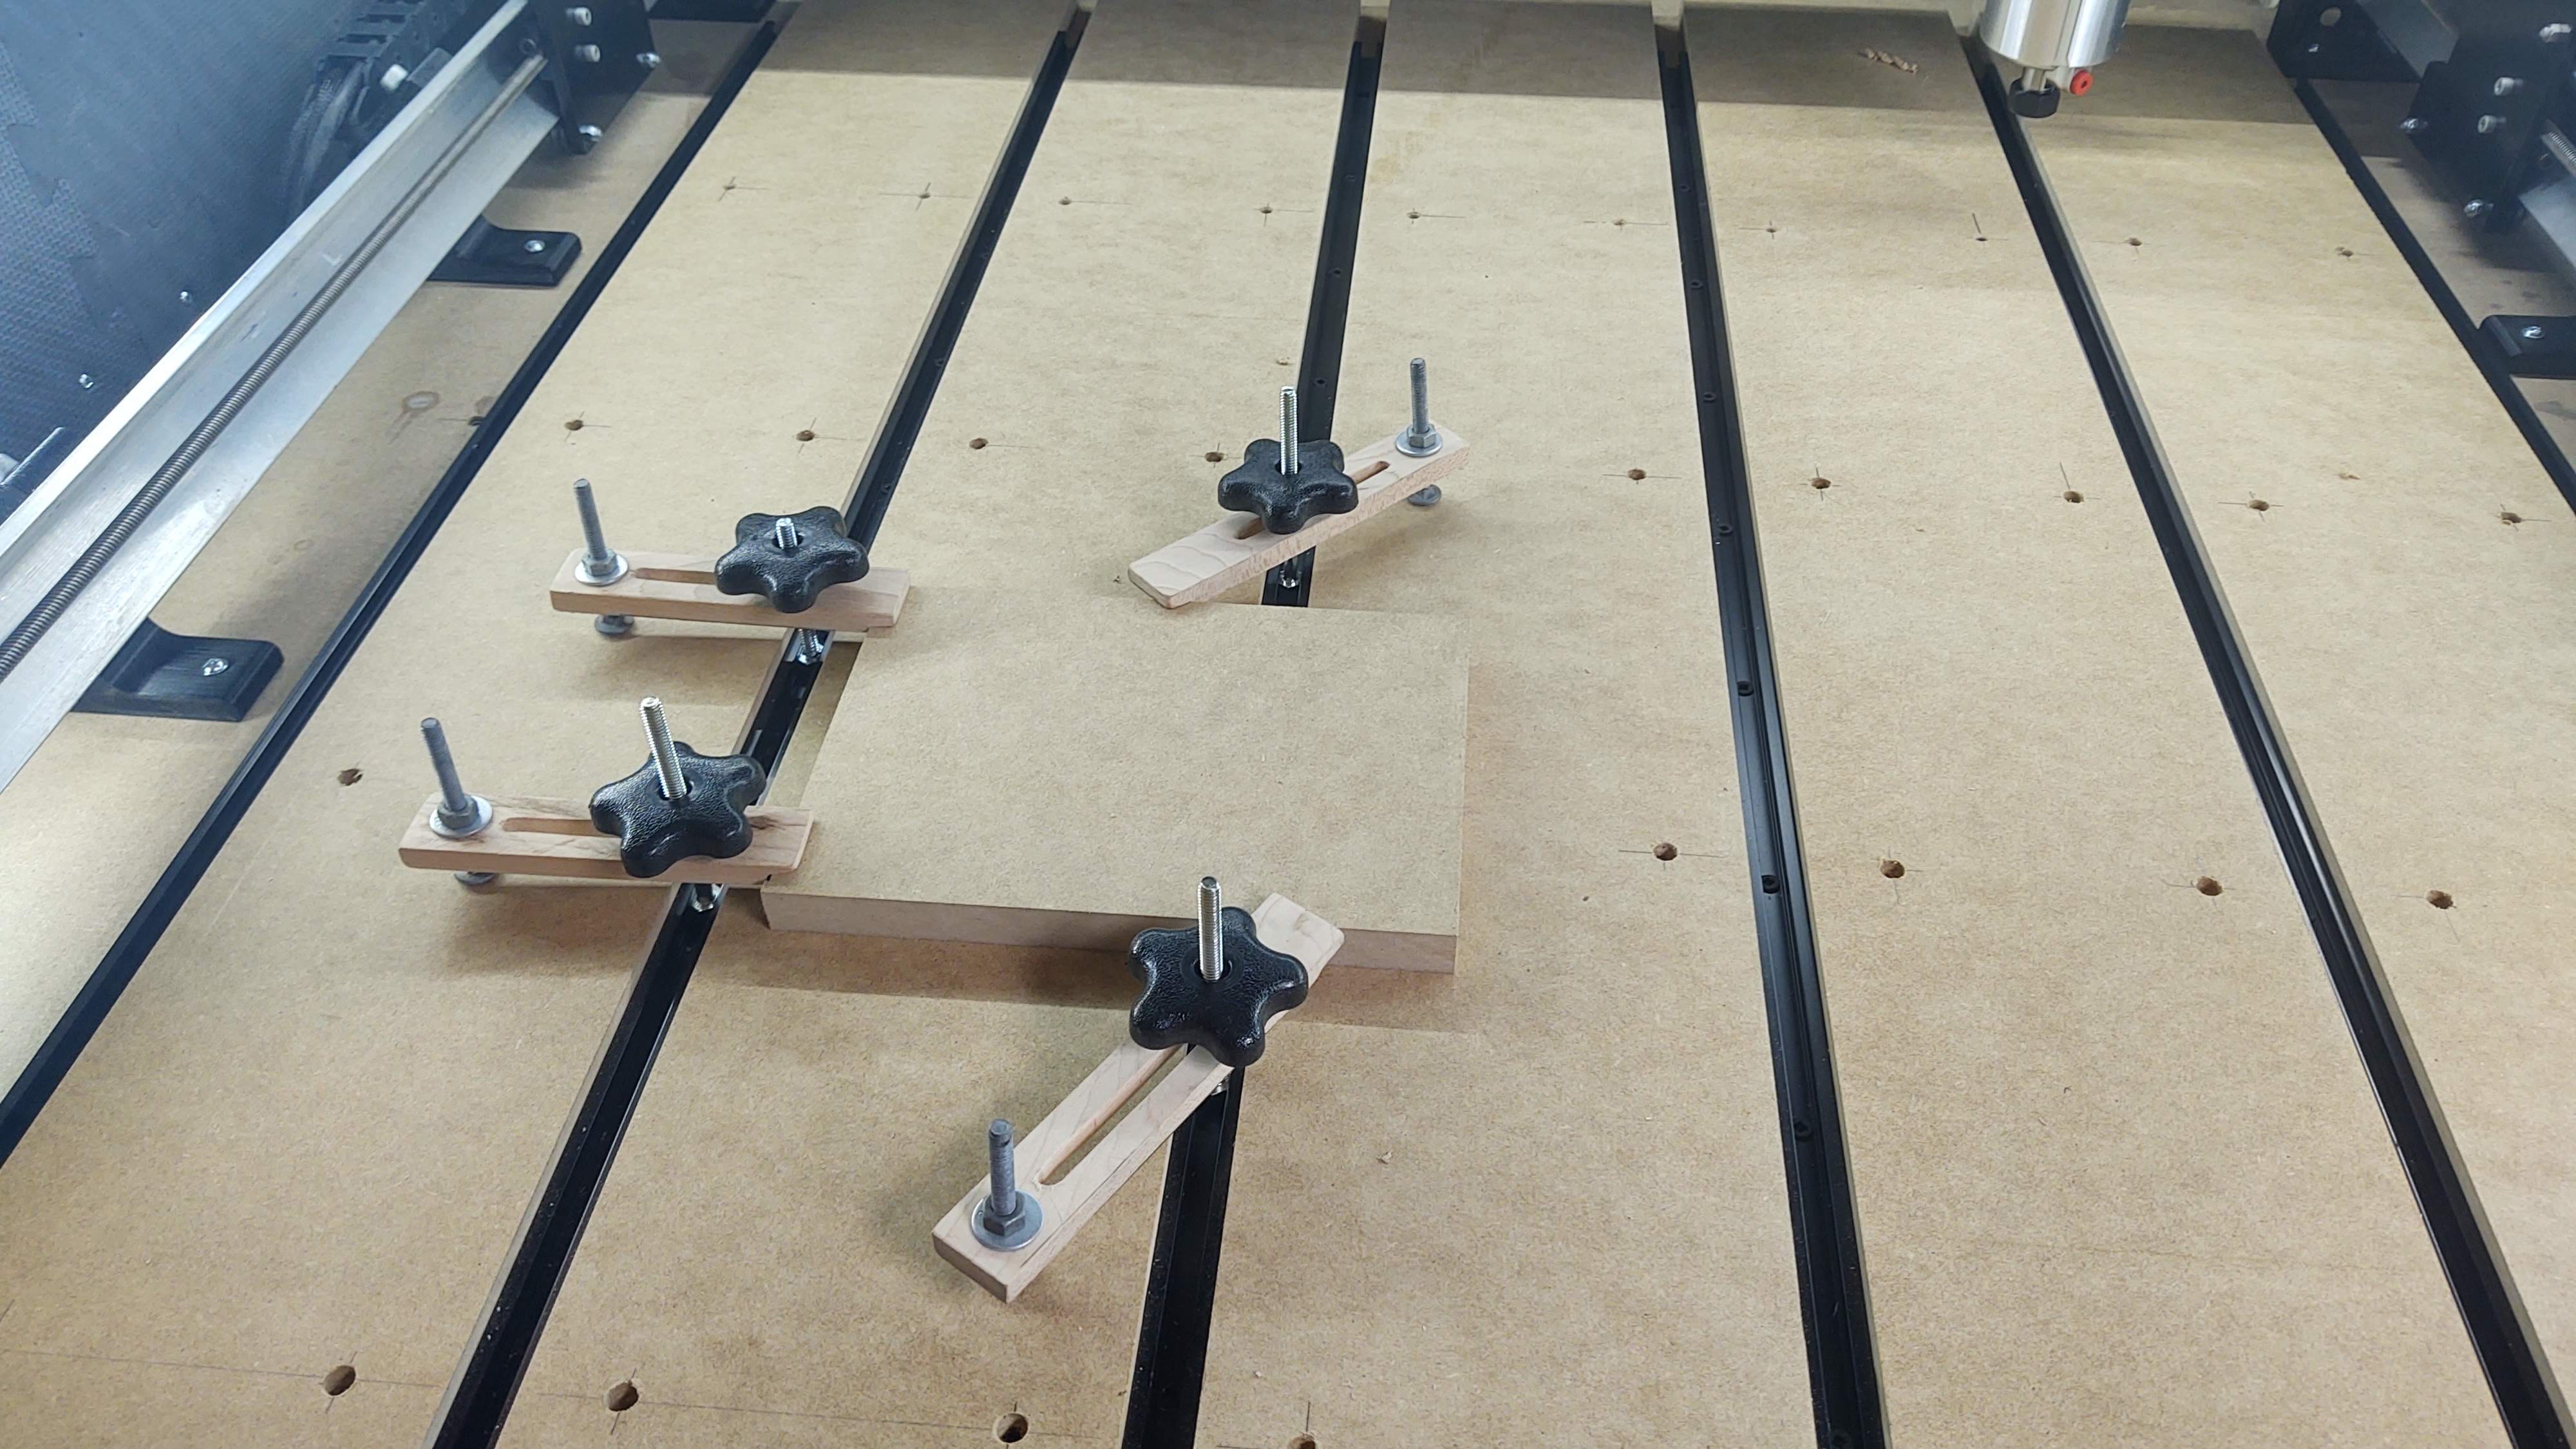
The table is 36 inches high with wheels so i can move around the whole thing very easily. T Track are from sienci labs and work great and are the cheapest i found so i share pictures of the construction up to the final assembly.!


12 Likes
Here’s a mobile unit based on a Rockler “Material Mate” https://www.rockler.com/rockler-material-mate-panel-cart-and-shop-stand


10 Likes
that’s really nice, does the cart stay still enough when carving?